DMP Electronics XR150 Quick Start Manual
Access lab guide
Hide thumbs
Also See for XR150:
- User manual (88 pages) ,
- Installation manual (28 pages) ,
- Lab manual (4 pages)
Advertisement
Quick Links
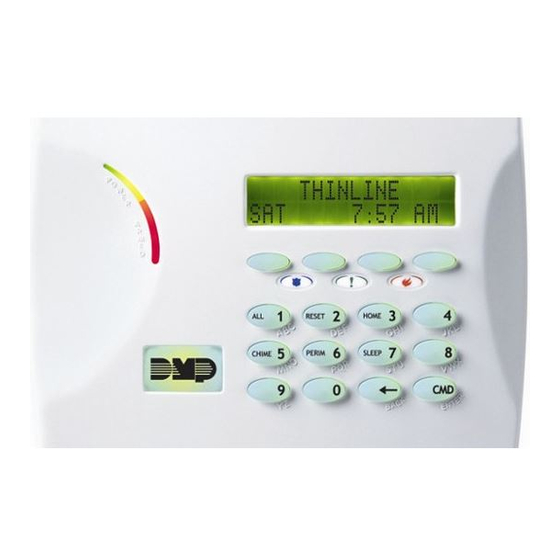
IDENTIFY PANEL COMPONENTS
1. Identify the following panel components using the
panels in front of you, or the on-screen photo of the
XR.
ê Reset header
ê AC Power terminals
ê Programming
ê Cellular pins
header
ê 1100 Series antenna
ê Outputs
connection
POWER UP THE CONTROL PANEL
1. Connect AC power to terminals 1 & 2
ê Transformer type: 16.5VAC 50VA
2. Connect battery backup to terminals 3 & 4
3. Connect alarm bell to terminals 5 & 6
ê Normal 12VDC is supplied to terminal 5, terminal 6 is ground reference
ê 1/2 W 1K Ohm resistor should be added across the bell circuit for supervision
ENTER PANEL PROGRAMMER
1. Reset the panel using the RESET JUMPER
2. Enter 6653 (PROG) and press CMD
3. Press CMD to navigate through the panel programmer
menus:
ê Initialization
ê System Reports
ê Communication
ê System Options
ê Network Options
ê Bell Options
ê Messaging Setup
ê Output Options
ê Device Setup
ê Output Information
ê Remote Options
ê Output Groups
EDIT AREA NAMES
1. Press CMD to navigate to AREA INFORMATION
2. Press a top-row select area to enter AREA
INFORMATION
3. Enter an AREA NUMBER and press CMD
4. Press CMD until EXIT DELAY displays
5. Press a top row select key or area and enter a time
between 45 and 250 seconds
6. Press a top-row select area to clear any text and enter
in a new area name
7. Exit AREA INFORMATION and navigate to STOP to
save changes
8. Arm, disarm and trip an alarm in Area system type
CREATE A SCHEDULE
1. At the keypad, press CMD until the USER MENU?
prompt displays
2. Select YES and enter 99+CMD to enter the USER
MENU
3. Using CMD, navigate to SCHEDULES? and press a
top-row select area
XR150/550 ACCESS LAB GUIDE
Instructor-Led Training
ê On-board zone
terminals
ê Network connection
ê Status List
ê Menu Display
ê PC Log Reports
ê Area Information
ê Zone Information
ê Stop
4. Select TIMES
5. To create a time schedule, select ADD
6. Press 1 to create Schedule 1
7. Press a top row area to enter a name for the schedule
8. Press CMD and select a day of the week.
9. Enter the BEGIN and END times for the chosen day
10. Set times for each day of the week
11. Create schedule 2
CREATE A PROFILE
1. At the keypad, press CMD until the USER MENU?
prompt displays
2. Select YES and enter 99+CMD to enter the USER
MENU
3. Using CMD, navigate to PROFILES? and press a top-
row select area
4. Select ADD and enter 11 to create PROFILE 11
5. Press a top row area to enter a name for the profile
6. Assign ARM/DISARM AREA 2 and press CMD
7. Assign ACCESS AREA 2 and press CMD
8. Press CMD until DISARM? displays and select YES
9. Navigate to DOOR ACCESS and confirm it is set to
YES
10. Navigate to FIRST ACCESS SCHEDULE and press the
third select area to enter the schedule number for the
access schedule
11. LIST will show the schedule names
12. Press CMD until PROFILE 11 ADDED is displayed
13. Create another profile using PROFILE 12
ADD A USER CODE WITH PIN
1. Enter the USER MENU and navigate to the USER
CODES? prompt
2. Press a top-row select area to add a USER CODE
3. Select ADD
4. Select the USER NUMBER and press CMD
ê The fourth top row select area will display the lowest available user number
5. Enter in a 5-digit user code and press CMD
6. Press a top-row select area to add a USER NAME and
press CMD
7. Press a top row select area, enter 12 to assign
PROFILE 12 to this user
ê LIST will display the profile names
8. Press CMD until USER ADDED displays
Advertisement

Related Manuals for DMP Electronics XR150


Summary of Contents for DMP Electronics XR150
- Page 1 XR150/550 ACCESS LAB GUIDE Instructor-Led Training IDENTIFY PANEL COMPONENTS 4. Select TIMES 1. Identify the following panel components using the 5. To create a time schedule, select ADD panels in front of you, or the on-screen photo of the 6. Press 1 to create Schedule 1 7.
- Page 2 ADD A USER CODE WITH CARD PANEL PROGRAMMING 1. Reset the panel and enter 6653 (PROG) to enter the 1. Enter the USER MENU and go to USER CODES? panel programmer 2. Press a top-row select area to add a USER CODE 2.
- Page 3 panel programmer the NEGATIVE terminal on the 1134 2. Using CMD, navigate to DEVICE SETUP 6. Install the Model 333 Suppressor between the C and 3. Press a top-row select key to enter DEVICE SETUP NO terminals on the 1134 4.
- Page 4 ê Days: Friday | Hours: 15 minute window 3. Create two PROFILES with these parameters: ê Staff: Warehouse at Friday schedule | Admin: Full access at all times 4. Add a USER CODE with a proximity token for each of the two profiles: Staff and Admin 5.
Need help?
Do you have a question about the XR150 and is the answer not in the manual?
Questions and answers