
Related Manuals for Thermo Scientific NanoDrop OneC


Summary of Contents for Thermo Scientific NanoDrop OneC
- Page 1 NanoDrop Micro-UV/Vis Spectrophotometer NanoDrop One with NanoDrop QC Software User Guide 269-342200 NanoDrop QC UG Revision A December 2019...
- Page 2 © 2019 Thermo Fisher Scientific Inc. All rights reserved. DYMO and LabelWriter are either trademarks or registered trademarks of Newell Rubbermaid in the United States and/or other countries. Wi-Fi is either a trademark or a registered trademark of Wi-Fi Alliance in the United States and/or other countries. Bluetooth is either a trademark or a registered trademark of Bluetooth Special Interest Group.
-
Page 3: Table Of Contents
Chemometrics Reported Results ........24 Settings for Chemometric Measurements ......28 Thermo Scientific NanoDrop One... - Page 4 Safety Information..........133 NanoDrop One with NanoDropQC Software User Guide Thermo Scientific...
-
Page 5: About The Spectrophotometer
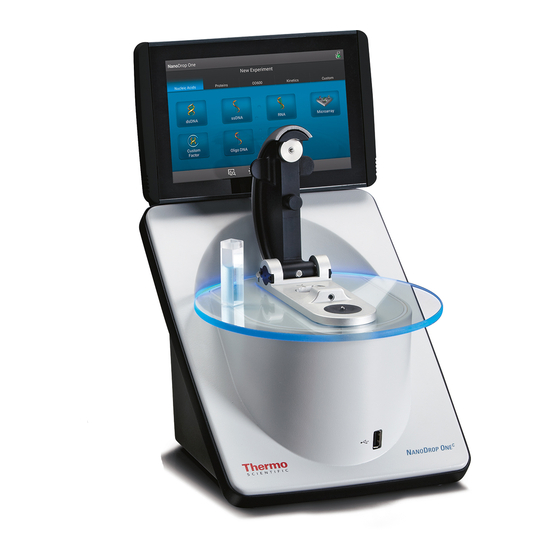
Cuvette holder NOTICE Locate the instrument away from air vents and exhaust fans to minimize evaporation The Thermo Scientific™ NanoDrop™ One is a compact, stand-alone UV-Visible spectrophotometer developed for micro-volume analysis of a wide variety of analytes. The patented sample retention system enables the measurement of highly concentrated samples without the need for dilutions. -
Page 6: Features
7-inch high-resolution touchscreen preloaded with easy-to-use instrument control software. The touchscreen can slide left or right to accommodate personal preference, and tilt forward or back for optimal viewing NanoDrop One with NanoDropQC Software User Guide Thermo Scientific... -
Page 7: Cuvette Holder
• micro-stirring option to ensure sample homogeneity and support kinetic studies For details, see Measure a Sample using a Cuvette. USB-A port Two more USB-A ports are located on instrument back panel Thermo Scientific NanoDrop One with NanoDropQC Software User Guide... -
Page 8: Accessories
The kit includes conditioning compound and applicators. For more information, see Reconditioning the Pedestals. PV-1 Performance Verification Solution Liquid photometric standard used to check instrument performance. For more information, Performance Verification. NanoDrop One with NanoDropQC Software User Guide Thermo Scientific... -
Page 9: Instrument Detection Limits
About the Spectrophotometer Instrument Detection Limits Instrument Detection Limits Upper Detection Limit Measurement Location Pathlength (mm) (10 mm Equivalent Absorbance) Pedestal 12.5 62.5 0.05 0.03 Cuvette Thermo Scientific NanoDrop One with NanoDropQC Software User Guide... - Page 10 About the Spectrophotometer This page is intentionally blank. NanoDrop One with NanoDropQC Software User Guide Thermo Scientific...
-
Page 11: Instrument Set Up
2. Insert the USB device into any USB port on the NanoDrop One instrument. 3. From the instrument Home screen, tap Settings > System > Update Software and choose the latest version of software. Thermo Scientific NanoDrop One with NanoDropQC Software User Guide... -
Page 12: Setting Up User Account Control
Add and remove users and groups to the access list and set access rights using the drop-down for each entity. System policies System Policies is used to set options that define the behavior of the client application. See “Security Administration Policies.” NanoDrop One with NanoDropQC Software User Guide Thermo Scientific... -
Page 13: Security Administration Policies
When you are finished, select Save. Changes will take effect the next time NanoDrop QC is launched. Changes made to the Security Administration policies are applicable to the local PC only and will not affect other computers on the network. Thermo Scientific NanoDrop One with NanoDropQC Software User Guide... -
Page 14: Technical Support
If you are outside the U.S.A. and Canada, please contact your local distributor. If your instrument requires maintenance or repair, contact us or your local distributor. NanoDrop One with NanoDropQC Software User Guide Thermo Scientific... -
Page 15: Chapter 3 Applications
The Custom application provides additional flexibility for the method that you use with the instrument. See the NanoDrop QC PC Control software to learn about custom method features that are supported. • Measure UV-Vis • Measure Chemometrics • Measure Custom Thermo Scientific NanoDrop One with NanoDropQC Software User Guide... -
Page 16: Measure Uv-Vis
1. From the Home screen, select UV-Vis. 2. Specify up to 40 wavelengths to monitor (or you can specify them later if desired) and whether automated pathlength adjustment, analysis wavelength, and baseline correction will be used. NanoDrop One with NanoDropQC Software User Guide Thermo Scientific... -
Page 17: Best Practices For Uv-Vis Measurements
Ensure samples are homogeneous before taking a measurement. Avoid introducing bubbles when mixing and pipetting. – Follow best practices for micro-volume measurements. – Use a 1-2 µL sample volume. See Recommended Sample Volumes for more information. Thermo Scientific NanoDrop One with NanoDropQC Software User Guide... -
Page 18: Uv-Vis Reported Results
Pinch and zoom to Swipe screen left to Tap to end Drag tab adjust axes; view table with more experiment and down/up to see double-tap to reset measurement results export data more/less sample data NanoDrop One with NanoDropQC Software User Guide Thermo Scientific... - Page 19 Absorbance at 450 nm User-defined Baseline correction Absorbance Absorbance at wavelengths wavelength at 635 nm 623 nm Note Scroll up to display absorbance values for any additional user-defined wavelengths. Thermo Scientific NanoDrop One with NanoDropQC Software User Guide...
- Page 20 Click sample row to select sample and update spectrum Shift-click multiple sample rows to overlay up to five spectra Click a sample and hover locations on spectra to view measurement values NanoDrop One with NanoDropQC Software User Guide Thermo Scientific...
-
Page 21: Settings For Uv-Vis Measurements
(750 nm) spectrum. As a result, absorbance of sample spectrum is zero at specified baseline correction wavelength. Thermo Scientific NanoDrop One with NanoDropQC Software User Guide... -
Page 22: Measure Chemometrics
(This is the only way to run a chemometric method if your instrument is not connected to the computer with an Ethernet cable.) NanoDrop One with NanoDropQC Software User Guide Thermo Scientific... - Page 23 A message box shows the NanoDrop One methods available on the selected USB device. 6. Select one or more method names in the Load Method box to select the methods to load. 7. Select Load. Thermo Scientific NanoDrop One with NanoDropQC Software User Guide...
- Page 24 2. Select a method: • select an existing method by selecting the method name in the Select Method box. 3. Select Run Method. 4. Follow the on-screen instructions to measure a sample. NanoDrop One with NanoDropQC Software User Guide Thermo Scientific...
- Page 25 2. Select a method: • select an existing method by selecting the method name in the method selection pane. 3. Select Follow the on-screen instructions to measure a sample. Thermo Scientific NanoDrop One with NanoDropQC Software User Guide...
-
Page 26: Create Chemometrics Method
From the NanoDrop QC software, select the Chemometric Method icon – From the Chemometric Method Management pane, select – Enter both a name and description for your chemometric method – Select the quant method (.qnt fiile) you want to use NanoDrop One with NanoDropQC Software User Guide Thermo Scientific... -
Page 27: Edit Chemometrics Method
– From the drop-down menu select Edit. – Adjust the method settings as desired. You can select the components to be displayed on the LC. – Select Save Thermo Scientific NanoDrop One with NanoDropQC Software User Guide... -
Page 28: Chemometrics Reported Results
Swipe screen left to adjust axes; view table with more double-tap to reset measurement results Note Micro-volume absorbance measurements and measurements taken with nonstandard cuvettes are normalized to a 10.0 mm pathlength equivalent. NanoDrop One with NanoDropQC Software User Guide Thermo Scientific... - Page 29 To view all reported values, press and hold the sample row. Here is an example: Method Sampling Sample name; name method tap to edit Date/time measured Analyte concentration Method details Thermo Scientific NanoDrop One with NanoDropQC Software User Guide...
- Page 30 Measurement Sample name Analyte concentration number Press and hold row to view measurement details Swipe screen right to return Tap to end experiment to Rate measurement screen and export data NanoDrop One with NanoDropQC Software User Guide Thermo Scientific...
- Page 31 Here is an example: Application Sampling Sample name used method Date/time measured Component results Method details (scroll up to view more) Print this Return to Delete this screen previous screen measurement User-defined wavelengths Thermo Scientific NanoDrop One with NanoDropQC Software User Guide...
-
Page 32: Settings For Chemometric Measurements
Settings can be edited only from the NanoDrop QC software. In the PC Control software, you can select which components are displayed on the instrument and set significant figures for each component. NanoDrop One with NanoDropQC Software User Guide Thermo Scientific... -
Page 33: Measure Custom
2. Connect the USB device to one of the USB ports on the instrument. 3. From the Home screen, select Custom Method. 4. Use the list box at the top of the screen to indicate the USB port used. Thermo Scientific NanoDrop One with NanoDropQC Software User Guide... - Page 34 (see To Load a Custom Method for details). 2. From the Home screen, select Custom Method. 3. In the Select Method box, select to select the method to run. NanoDrop One with NanoDropQC Software User Guide Thermo Scientific...
- Page 35 1. Make sure the method resides in same location as the database where you want to store the measurement results (see To Load a Custom Method for details). 2. From the Home screen, select Custom Method. Thermo Scientific NanoDrop One with NanoDropQC Software User Guide...
-
Page 36: Delete Custom Method
5. Follow the on-screen instructions to measure a sample. Delete Custom Method – From Home screen, select Custom Method. – In Select Method box, select a method to delete – Select NanoDrop One with NanoDropQC Software User Guide Thermo Scientific... -
Page 37: Custom Method Reported Results
Swipe screen left to adjust axes; view table with more double-tap to reset measurement results Note Micro-volume absorbance measurements and measurements taken with nonstandard cuvettes are normalized to a 10.0 mm pathlength equivalent. Thermo Scientific NanoDrop One with NanoDropQC Software User Guide... - Page 38 To view all reported values, press and hold the sample row. Here is an example: Method Sampling Sample name; name method tap to edit Date/time measured Analyte concentration Method details NanoDrop One with NanoDropQC Software User Guide Thermo Scientific...
-
Page 39: Manage Custom Methods
(enter “1” to report absorbance measurements only) – if method has standards, enter name and concentration of each standard and select the curve fit type – enter or choose remaining custom settings as needed – choose Save Thermo Scientific NanoDrop One with NanoDropQC Software User Guide... - Page 40 From the Custom Method Management screen, select the method you would like to edit from the list of loaded methods. – From the drop-down menu select Edit – View and adjust the method settings as desired – Select Save NanoDrop One with NanoDropQC Software User Guide Thermo Scientific...
- Page 41 • Sloping baseline. Enter two wavelengths that define sloping baseline for analysis correction. (Absorbance value of sloping baseline at analysis wavelength is subtracted from absorbance value at analysis wavelength. Corrected value is used to calculate sample concentration.) Thermo Scientific NanoDrop One with NanoDropQC Software User Guide...
- Page 42 • If specified unit for factor or extinction coefficient is based on mass (such as mg/mL) and specified unit for calculated result is based on molarity (such as pmol/µL) or vice versa, enter molecular weight and use adjacent drop down list to select appropriate unit. NanoDrop One with NanoDropQC Software User Guide Thermo Scientific...
- Page 43 The measurement results or the concentration will be calculated automatically using the absorbance value at the specified wavelength and applying the selected method type (factor or standard curve). Thermo Scientific NanoDrop One with NanoDropQC Software User Guide...
- Page 44 • When Automated Pathlength is deselected, the software uses a 1 mm pathlength regardless of the sample absorbance. This can cause detector saturation (resulting in jagged peaks) for highly absorbing samples (e.g., ~15 A at 10 mm pathlength equivalent). NanoDrop One with NanoDropQC Software User Guide Thermo Scientific...
- Page 45 • Use period “.” decimal separators for floating point and double-floating point numbers. • Use comma “,” list separators (for example, “POW(2,8)”). • Do not use comma “,” group separators for large numbers (for example, enter 1000 rather than 1,000). Thermo Scientific NanoDrop One with NanoDropQC Software User Guide...
- Page 46 To transfer the method to the NanoDrop One instrument, copy the method file to a USB memory device and then load the method (see Load a Custom Method details) NanoDrop One with NanoDropQC Software User Guide Thermo Scientific...
- Page 47 Delete custom method – from Custom Methods screen, select a custom method from the list of available methods – from the drop-down menu , choose Delete after confirmation message, choose Yes Thermo Scientific NanoDrop One with NanoDropQC Software User Guide...
- Page 48 Applications This page is intentionally blank. NanoDrop One with NanoDropQC Software User Guide Thermo Scientific...
-
Page 49: Learning Center
Set Up the Instrument • Measure a Micro-Volume Sample • Measure a Sample Using a Cuvette • Prepare Samples and Blanks • Basic Instrument Operations • Instrument Settings • PC Control Software Thermo Scientific NanoDrop One with NanoDropQC Software User Guide... -
Page 50: Micro-Volume Sampling-How It Works
A second cable embedded in the lower pedestal leads to a detector. When the instrument arm is down, the sample forms a liquid column, essentially bridging the gap between the two fiber optic cables. NanoDrop One with NanoDropQC Software User Guide Thermo Scientific... - Page 51 “anchoring” the spectrum to zero absorbance units at the reference wavelength. Thermo Scientific NanoDrop One with NanoDropQC Software User Guide...
-
Page 52: Set Up The Instrument
NanoDrop One instruments. Set Up Bluetooth Connections Use Bluetooth™ to connect the instrument to one or more Bluetooth (wireless) input devices such as a Bluetooth keyboard, mouse or barcode scanner. NanoDrop One with NanoDropQC Software User Guide Thermo Scientific... - Page 53 Bluetooth device, follow manufacturer instructions to pair the device (for example, you may need to hold down a button) and tap Search For Devices on instrument) device name should appear in Available Devices list Thermo Scientific NanoDrop One with NanoDropQC Software User Guide...
- Page 54 After a device is paired, it remains paired even after the instrument is restarted. – tap Back (Bluetooth status is displayed at right of Bluetooth button) – repeat steps above to add another Bluetooth device or tap Done to close Settings NanoDrop One with NanoDropQC Software User Guide Thermo Scientific...
- Page 55 • If no Bluetooth device is selected for input, the instrument relies on the integrated touchscreen keyboard for input. • To select the device again, follow the steps above and select the device’s Use for Input checkbox. Thermo Scientific NanoDrop One with NanoDropQC Software User Guide...
- Page 56 – tap Unpair device is no longer listed under “Paired Devices” but remains in Available Devices list – tap Back to return to System settings – tap Done to close Settings NanoDrop One with NanoDropQC Software User Guide Thermo Scientific...
- Page 57 • Connection to a network jack. Select if you plan to connect an Ethernet cable between the NanoDrop One instrument and a network wall jack. – connect one end of Ethernet cable to Ethernet port on instrument back panel Thermo Scientific NanoDrop One with NanoDropQC Software User Guide...
- Page 58 Wi-Fi (if Wi-Fi is disabled, button in upper right is set to “OFF” and no wireless networks are listed) – tap button to enable Wi-Fi and display available Wi-Fi networks NanoDrop One with NanoDropQC Software User Guide Thermo Scientific...
- Page 59 (that is, you may have to search for them by name). For more information, see the system administrator at your work site. – tap Done to exit Settings Thermo Scientific NanoDrop One with NanoDropQC Software User Guide...
- Page 60 Home screen to open System Status box Location of database where instrument is currently storing data (Local (instrument) or Connected PC) Wi-Fi status Bluetooth status – tap OK to exit System Status NanoDrop One with NanoDropQC Software User Guide Thermo Scientific...
- Page 61 Note If operating the instrument at the low end of the recommended humidity range, use adequate sample volume to avoid evaporation. After the instrument is installed, you can leave it turned on. Thermo Scientific NanoDrop One with NanoDropQC Software User Guide...
-
Page 62: Measure A Micro-Volume Sample
• sample material resuspended in appropriate buffer solution (see Preparing Samples) • pure buffer solution for blanking instrument (see Choosing and Measuring a Blank or watch multimedia training What is blank?) NanoDrop One with NanoDropQC Software User Guide Thermo Scientific... - Page 63 • Use new tip for each blank and sample aliquot. • Use new aliquot of sample for each measurement. • If solvents are used, make sure they are compatible with the pedestals. (see “Compatible Solvents” in Hazardous Materials). Thermo Scientific NanoDrop One with NanoDropQC Software User Guide...
- Page 64 1. From the instrument Home screen, select an application: UV-Vis, Chemometric, or Custom Methods. 2. Lift the instrument arm and clean the upper and lower pedestals with new laboratory wipe. NanoDrop One with NanoDropQC Software User Guide Thermo Scientific...
- Page 65 The new spectrum replaces the previous one on the spectral display and the new reported values appear under the previous ones in the table. (Drag tab down to show both Tap to end experiment sets of data.) Thermo Scientific NanoDrop One with NanoDropQC Software User Guide...
- Page 66 Tap to measure Tap to end and acquisition date, experiment name, application used and any assigned labels (see Manage identifiers on the instrument). more samples save experiment NanoDrop One with NanoDropQC Software User Guide Thermo Scientific...
-
Page 67: Measure A Sample Using A Cuvette
• sample material resuspended in appropriate buffer solution (see Preparing Samples) • pure buffer solution for blanking instrument (see Choosing and Measuring a Blank or watch multimedia training What is a blank?) Thermo Scientific NanoDrop One with NanoDropQC Software User Guide... - Page 68 • To prevent damage from spills, keep containers of liquids away from the instrument. • Do not use a squirt or spray bottle on or near the instrument as liquids will flow into the instrument ans may cause permanent damage. NanoDrop One with NanoDropQC Software User Guide Thermo Scientific...
- Page 69 Lift instrument arm and insert blanking cuvette into cuvette holder, making sure to align light path of cuvette with light path of instrument – Tap Blank and wait for the measurement to complete Instrument light path Thermo Scientific NanoDrop One with NanoDropQC Software User Guide...
-
Page 70: Prepare Samples And Blanks
Avoid introducing bubbles when mixing and pipetting. For more information, watch multimedia training Effects of Bubbles in Samples. Note Samples dissolved in extremely volatile solvent such as hexane may work best with cuvette sampling option (NanoDrop One instruments only). NanoDrop One with NanoDropQC Software User Guide Thermo Scientific... - Page 71 If the resulting spectrum is greater than 0.04 A around the analysis wavelength, that buffer solution may interfere with the sample analyses, especially for low concentration samples. See Good blanking buffer (measured abs < 0.04) below for details. Thermo Scientific NanoDrop One with NanoDropQC Software User Guide...
- Page 72 The blanking solution should be a similar pH and ionic strength as the analyte solution. For details, see “To measure samples” in the application used. NanoDrop One with NanoDropQC Software User Guide Thermo Scientific...
- Page 73 • Do not use a squirt or spray bottle on or near the instrument as liquids will flow into the instrument and may cause permanent damage. • Do not use hydrofluoric acid (HF) on the pedestals. Fluoride ions will permanently damage the quartz fiber optic cables. Thermo Scientific NanoDrop One with NanoDropQC Software User Guide...
- Page 74 Example spectrum of buffer unsuitable for Protein A280 protein quantification 5. When you are finished with the blanking cycle, tap End Experiment. 6. Lift the arm and clean both pedestals with a new wipe. NanoDrop One with NanoDropQC Software User Guide Thermo Scientific...
-
Page 75: Basic Instrument Operations
Open Data Viewer • NanoDrop One General Operations NanoDrop One Home Screen These operations are available from the NanoDrop One Home screen. Applications System Status Data Viewer Instrument Instrument Settings Diagnostics Thermo Scientific NanoDrop One with NanoDropQC Software User Guide... - Page 76 * the Ethernet and wireless options listed above also store data on the instrument as a backup. Wi-Fi status Status of WiFi connections for the instrument (“Connected to...”, “Enabled and not connected” or “Disabled”) NanoDrop One with NanoDropQC Software User Guide Thermo Scientific...
- Page 77 Home screen to verify instrument operation. Instrument diagnostics should be run periodically according to the recommended maintenance schedule. See “Instrument Diagnostics” page 122 for information about how to run the available instrument diagnostics. Thermo Scientific NanoDrop One with NanoDropQC Software User Guide...
-
Page 78: Nanodrop One Measurement Screens
Note: The Dye/Chrom. Editor and Protein Editor tabs appear in Settings only when the Settings tab is opened from the NanoDrop One Home screen or the Data Viewer. Print Print selected measurement results NanoDrop One with NanoDropQC Software User Guide Thermo Scientific... - Page 79 Data Viewer – select experiment – swipe left to show data table – press and hold sample name to show Sample Details box – tap Sample Name field to display keyboard Thermo Scientific NanoDrop One with NanoDropQC Software User Guide...
- Page 80 For each measured sample, each application shows the UV or UV-visible absorbance spectrum and a summary of the results. The vertical axis shows absorbance in absorbance units (A). The horizontal axis shows wavelength in nm. Here is an example for a chemometric method. NanoDrop One with NanoDropQC Software User Guide Thermo Scientific...
- Page 81 For more information, see Preparing Samples. and Measure a Micro-Volume Sample Measure a Cuvette Sample Absorbance Detection Limits. Note The Measure button is enabled after a valid blank measurement is completed. Thermo Scientific NanoDrop One with NanoDropQC Software User Guide...
- Page 82 Blank button. End Experiment Button Tap End Experiment when you are ready to name and save your experiment, add a label to help you locate the experiment later or export the data. NanoDrop One with NanoDropQC Software User Guide Thermo Scientific...
- Page 83 Learning Center Basic Instrument Operations Note The End Experiment button is enabled after the first sample measurement is completed. After you tap End Experiment, the End Experiment box is displayed: Thermo Scientific NanoDrop One with NanoDropQC Software User Guide...
- Page 84 Print measurement results for current experiment End Experiment button End the experiment and save the measurement results using the entered experiment name. The experiment is saved in the selected database location. NanoDrop One with NanoDropQC Software User Guide Thermo Scientific...
- Page 85 Information about the measured values displayed in Sample Details is provided in this Help system, under the application used to acquire the data. Note You can also edit the sample name from the Sample Details box. Thermo Scientific NanoDrop One with NanoDropQC Software User Guide...
- Page 86 Use the Data Viewer to open the database on the local instrument in order to view acquired spectra and associated data from any experiment at any time. NanoDrop One with NanoDropQC Software User Guide Thermo Scientific...
- Page 87 Return to NanoDrop One Home screen Settings View or change instrument settings Import Import data from a USB flash drive Disk Status View remaining space available for storing measurement data on the instrument Thermo Scientific NanoDrop One with NanoDropQC Software User Guide...
- Page 88 Tap to change Change a filter and tap OK to time range filter display updated list of experiments Tap to select or deselect Tap to select or deselect user-defined labels application filters NanoDrop One with NanoDropQC Software User Guide Thermo Scientific...
- Page 89 – tap to select one or more experiments to export (tap again to deselect an experiment; to select all experiments in database, select All) – tap Export Thermo Scientific NanoDrop One with NanoDropQC Software User Guide...
- Page 90 Data Viewer to list experiments acquired on that date, or use Search feature to find desired experiment – tap Select – tap to select one or more experiments to delete (tap again to deselect an experiment) – tap Delete and OK NanoDrop One with NanoDropQC Software User Guide Thermo Scientific...
- Page 91 Here is an example: One experiment measured on this date Tap to open this experiment; press and hold to view or edit experiment details such as experiment name Thermo Scientific NanoDrop One with NanoDropQC Software User Guide...
- Page 92 Drag tab Page control; swipe screen left or down/up to Selected Pinch and zoom right to view next or previous screen see more/less application to adjust axes sample data NanoDrop One with NanoDropQC Software User Guide Thermo Scientific...
- Page 93 Settings View or change instrument settings Disk Status View remaining space available for storing measurement data on the instrument Thermo Scientific NanoDrop One with NanoDropQC Software User Guide...
-
Page 94: Nanodrop One General Operations
– tap Done key – tap End Experiment Label experiment in Data Viewer – from Home screen, tap to open Data Viewer – tap to open an experiment NanoDrop One with NanoDropQC Software User Guide Thermo Scientific... - Page 95 Edit Experiment Name You can edit the experiment name when you save the experiment or afterwards from the Data Viewer. Edit experiment name at end of experiment – when finished measuring samples, tap Thermo Scientific NanoDrop One with NanoDropQC Software User Guide...
- Page 96 Data Viewer – tap row to list experiments acquired on that date, or use Search feature to find experiment – press and hold experiment name to open experiment details box NanoDrop One with NanoDropQC Software User Guide Thermo Scientific...
- Page 97 • as tab-separated values (.tsv) files containing x,y coordinates for every spectral data point for each exported experiment • as NanoDrop QC (.sql) files containing spectra and measurement results for each exported experiment Thermo Scientific NanoDrop One with NanoDropQC Software User Guide...
- Page 98 – – from Export box, select one or more formats to export to (see above for details) and tap Export – after “Export Success” message, tap OK – tap End Experiment NanoDrop One with NanoDropQC Software User Guide Thermo Scientific...
- Page 99 – tap to select one or more experiments to export (tap again to deselect an experiment; to select all experiments in database, select All) – tap Export Thermo Scientific NanoDrop One with NanoDropQC Software User Guide...
- Page 100 You can delete selected sample measurements from any experiment, or all the measurements in the database. NOTICE Deleted data cannot be recovered. Delete data from any measurement screen – press and hold sample row to open Sample Details box – NanoDrop One with NanoDropQC Software User Guide Thermo Scientific...
- Page 101 (tap again to deselect a sample row); if no results are selected in data table, all results will be printed – and choose Print Thermo Scientific NanoDrop One with NanoDropQC Software User Guide...
- Page 102 If a label printer is connected to the instrument, the software prints one label for each selected measurement. If a full service printer is connected, the selected measurement screen is printed for each selected measurement. NanoDrop One with NanoDropQC Software User Guide Thermo Scientific...
- Page 103 If a label printer is connected to the instrument, the software prints a label for the selected measurement. If a full service printer is connected, the selected sample details screen is printed. Thermo Scientific NanoDrop One with NanoDropQC Software User Guide...
-
Page 104: Instrument Settings
Select time zone: manually select instrument time zone (this option is disabled when Automatic Time Zone is selected) Use 24-hour format: use 24-hour time format Choose date format: choose an available date format NanoDrop One with NanoDropQC Software User Guide Thermo Scientific... - Page 105 Set up wireless local area network (WLAN) connection on the instrument Ethernet Set up Ethernet (wired) local area network (LAN) connection between the instrument and a personal computer or network wall jack. Thermo Scientific NanoDrop One with NanoDropQC Software User Guide...
- Page 106 (connection can be wired or wireless). Network paths defined here will appear in the Export Data list box when exporting data, from both the Data Viewer and the End Experiment box after you complete a measurement. NanoDrop One with NanoDropQC Software User Guide Thermo Scientific...
- Page 107 Network Locations list on the Export Settings tab. Edit Edit network path, path name or authentication setting for selected network location Delete Delete selected network location Test Test connection for selected network location Thermo Scientific NanoDrop One with NanoDropQC Software User Guide...
- Page 108 Heat cuvette to 37 °C: Select this option if sample cuvettes require heating. Cuvette heater increases from room temperature to 37 °C at rate of 5 °C/minute. NanoDrop One with NanoDropQC Software User Guide Thermo Scientific...
-
Page 109: Data Deletion Settings
You have the option to save a password reset key to a USB drive. Saving a password reset key to a USB drive allows you to reset the password in the event you do not remember or have access to your password. Thermo Scientific NanoDrop One with NanoDropQC Software User Guide... - Page 110 • If you do not have a password key, select No. Continue to step 4 4. With a USB drive inserted into the instrument, select Yes. NanoDrop One with NanoDropQC Software User Guide Thermo Scientific...
-
Page 111: Pc Control Software
PC, as well as change instrument settings, and create or edit custom and chemometrics methods. PC Control Home Screen overview Figure 1. PC Control Home Screen Select your application from the icons just as you would with the NanoDrop One instrument Home Screen. Thermo Scientific NanoDrop One with NanoDropQC Software User Guide... -
Page 112: Control Options
Set security server location and path if desired. “User Account Control” page 8 Help: View help History option functions similarly to the instrument Data Viewer. You can view all experiments performed from the local PC. NanoDrop One with NanoDropQC Software User Guide Thermo Scientific... -
Page 113: Settings
Learning Center PC Control Software You can search history by name, filter by date, and filter by application. Settings Use settings to modify security settings and view the selected database Thermo Scientific NanoDrop One with NanoDropQC Software User Guide... - Page 114 Learning Center This page is intentionally blank. NanoDrop One with NanoDropQC Software User Guide Thermo Scientific...
-
Page 115: Maintenance
Maintenance • Maintenance Schedule • Cleaning the Touchscreen • Maintaining the Pedestals • Decontaminating the Instrument • Maintaining the Cuvette Sampling System • Instrument Diagnostics Thermo Scientific NanoDrop One with NanoDropQC Software User Guide... -
Page 116: Maintenance Schedule
If the issue persists, contact us. If you are outside the U.S.A. and Canada, please contact your local distributor. If your instrument requires maintenance or repair, contact or your local distributor. NanoDrop One with NanoDropQC Software User Guide Thermo Scientific... -
Page 117: Cleaning The Touchscreen
To clean the touchscreen Gently wipe the touchscreen with a soft, lint-free cloth such as microfiber. If necessary, use a cleaner intended for glass LCD displays and follow the manufacturer’s recommendations. Thermo Scientific NanoDrop One with NanoDropQC Software User Guide... -
Page 118: Maintaining The Pedestals
If the diaphragm becomes loose, contact • Note Solutions containing detergent or isopropyl alcohol may uncondition the pedestals. If these are required for sample analyses, follow immediately with 3–5 µL DI H NanoDrop One with NanoDropQC Software User Guide Thermo Scientific... - Page 119 (for example, to remove dried sample left on the pedestals), substitute 0.5M HCl for the DI H2O in the procedure above and follow with 3-5 µL DI H2O. You can also recondition the pedestals using PR-1 compound. Thermo Scientific NanoDrop One with NanoDropQC Software User Guide...
-
Page 120: Reconditioning The Pedestals
(droplet flattens out) (droplet beads up) Supplies needed • lint-free laboratory wipes • PR-1 pedestal reconditioning kit (available from us or a local distributor) • calibrated precision pipettor (0-2 µL) • canned air NanoDrop One with NanoDropQC Software User Guide Thermo Scientific... - Page 121 6. Pipette 1 µL DI H O onto the lower pedestal. The DI H O should “bead up” or form a rounded droplet. Droplet “beads up” on properly conditioned pedestal Thermo Scientific NanoDrop One with NanoDropQC Software User Guide...
- Page 122 7. Fold a clean laboratory wipe into quarters and use it to vigorously buff the surface of each pedestal at least 50 times. 8. Use canned air to remove any paper residue from the pedestals. NanoDrop One with NanoDropQC Software User Guide Thermo Scientific...
-
Page 123: Decontaminating The Instrument
If the diaphragm becomes loose, contact • Supplies needed • lint-free laboratory wipes • deionized water (DI H • 0.5% sodium hypochlorite solution (1:10 dilution of commercial bleach, freshly prepared) • pipettor Thermo Scientific NanoDrop One with NanoDropQC Software User Guide... - Page 124 Supplies needed) and use it to gently wipe the outside surfaces of the instrument. 2. Use a clean cloth or wipe dampened with DI H O to remove the bleach solution. NanoDrop One with NanoDropQC Software User Guide Thermo Scientific...
-
Page 125: Maintaining The Cuvette Sampling System
• Use canned air to remove any dust from the cuvette holder. • Clean up any spills inside the cuvette holder with a new laboratory wipe. To clean and maintain cuvettes, follow the recommendations of the cuvette manufacturer. Thermo Scientific NanoDrop One with NanoDropQC Software User Guide... -
Page 126: Instrument Diagnostics
The test is automatically performed using the pedestal and the cuvette optical paths. Supplies needed • lint-free laboratory wipes NanoDrop One with NanoDropQC Software User Guide Thermo Scientific... - Page 127 6. To rerun the intensity check, tap Measure. 7. When finished, tap End Experiment. After the test is completed, the results are available from the Data Viewer (see example below). See Manage identifiers on the instrument for details. Thermo Scientific NanoDrop One with NanoDropQC Software User Guide...
-
Page 128: Performance Verification
• lint-free laboratory wipes • deionized water (DI H • calibrated precision pipettor (0–2 µL) • PV-1 performance verification solution (liquid photometric standard available only from us or a local distributor) • laboratory gloves NanoDrop One with NanoDropQC Software User Guide Thermo Scientific... - Page 129 1. From the instrument home screen, tap (Diagnostics) and then tap Performance Verification. If you are using the PC Control software, from the Home screen, select Performance. A message asks for target absorbance values. Thermo Scientific NanoDrop One with NanoDropQC Software User Guide...
- Page 130 • If Auto-Measure is off, lower arm and tap Measure or from the PC Control software, select Run. After the measurement, the software displays the results. Here is an example of the performance verification result screen. NanoDrop One with NanoDropQC Software User Guide Thermo Scientific...
- Page 131 After each measurement, a new sample result is added to the display. Swipe the screen left to see a summary of the 10 sample results. Thermo Scientific NanoDrop One with NanoDropQC Software User Guide...
- Page 132 8. If the instrument failed, immediately repeat step 6 using ten 2 µL aliquots of the PV-1 solution. 9. When finished, tap End Experiment and clean the pedestals with 3–5 µL DI H NanoDrop One with NanoDropQC Software User Guide Thermo Scientific...
- Page 133 After the test is completed, the results are available from the Data Viewer (see example below). See Manage identifiers on the instrument for details. To interpret performance verification results If your instrument failed performance verification and you repeated ten measurements using 2 uL aliquots, contact Thermo Scientific NanoDrop One with NanoDropQC Software User Guide...
-
Page 134: Pedestal Image Check
If the Pedestal Image Check displays a yellow triangle instead of the green check mark, follow the on-screen instructions to fix any possible problems. Then rerun the Pedestal Image Check. If the instrument fails again, contact NanoDrop One with NanoDropQC Software User Guide Thermo Scientific... -
Page 135: Safety And Operating Precautions
Safety and Operating Precautions Contents • Operating Precautions • Safety Information NOTICE Be sure that all persons operating this system read the safety manual first. Thermo Scientific NanoDrop One with NanoDropQC Software User Guide... -
Page 136: Operating Precautions
• Do not allow HCl, alcohol, bleach, acetone or any other solvent to remain on the diaphragm for more than one minute or it may loosen the seals. If the diaphragm becomes loose, contact us. NanoDrop One with NanoDropQC Software User Guide Thermo Scientific... -
Page 137: Safety Information
CAUTION Indicates a hazardous situation which, if not avoided, could result in minor or moderate injury. NOTICE Follow instructions with this label to avoid damaging the system hardware or losing data. Note Contains helpful supplementary information. Thermo Scientific NanoDrop One with NanoDropQC Software User Guide... - Page 138 Use approved containers and proper procedures to dispose of waste. Symbol Description Alternating current Earth terminal or ground Direct current Protective conductor terminal Frame or chassis terminal Fuse Power on Power off NanoDrop One with NanoDropQC Software User Guide Thermo Scientific...
- Page 139 • Damage due to removing the sealed plastic bag before the instrument has come to room temperature. • Note It is important to have all system utilities installed before the instrument arrives. Utility installations must comply with all local building and safety codes. Thermo Scientific NanoDrop One with NanoDropQC Software User Guide...
- Page 140 Grounding CAUTION Avoid shock hazard. Each wall outlet used must be equipped with a ground. The ground must be a noncurrent-carrying wire connected to earth ground at the main distribution box. NanoDrop One with NanoDropQC Software User Guide Thermo Scientific...
- Page 141 Maximum power consumption and heat dissipation specifications for the spectrometer and accessories are shown below. The values are approximate. Item Power Consumption Max. Heat Dissipation instrument 60 W 205 Btu/hr Thermo Scientific NanoDrop One with NanoDropQC Software User Guide...
- Page 142 NanoDrop instruments. If you are measuring samples with high vapor pressures, use an instrument with provision for measuring samples in cuvettes. NanoDrop One with NanoDropQC Software User Guide Thermo Scientific...
- Page 143 Individuals should be trained according to applicable regulatory and organization requirements before working with potentially infectious materials. Follow your organization’s Biosafety Program protocols for working with and/or handling potentially infectious materials. Thermo Scientific NanoDrop One with NanoDropQC Software User Guide...
- Page 144 Contact us if you have questions about decontamination requirements. NanoDrop One with NanoDropQC Software User Guide Thermo Scientific...
Need help?
Do you have a question about the NanoDrop OneC and is the answer not in the manual?
Questions and answers