Table of Contents
Advertisement
Quick Links
Advertisement
Table of Contents

Related Manuals for YUNEEC H920 PLUS


Summary of Contents for YUNEEC H920 PLUS
- Page 1 V3.0...
-
Page 2: Table Of Contents
07 DISCLAIMER 08 LIPO BATTERY WARNINGS AND USAGE GUIDELINES 09 CHARGING THE LIPO FLIGHT BATTERY 10 CHARGING THE LI-ION ST16 BATTERY 11 ASSEMBLING THE H920 Plus 12 INSTALLING THE FLIGHT BATTERIES 13 FLIGHT CONTROLS 14 CONTROL RATE KNOB 14 RETRACTING AND LOWERING THE RETRACTABLE LANDING GEAR... -
Page 3: Introduction
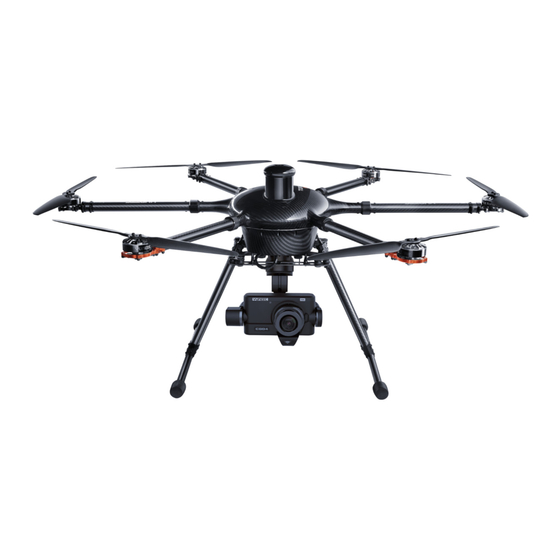
INTRODUCTION H920 Plus The H920 Plus is a professional multirotor aerial photography and videography platform. Its unique and innovative features make it possible to capture amazing photographs and video footage for a variety of uses. The modular aircraft platform is... -
Page 4: Specifications
SPECIFICATIONS H920 Plus Flight Time: 24 Minutes (H920 PLUS/3pcs 6S 4,000mAh LiPo) Dimension: 31.4x36.2x18.1in (797x920x461mm) Diagonal Length Without Rotor Blades: 36.2 in(920mm) Propeller/Main Rotor Diameter: 17.3 in (440mm) Take-off Weight with CGO4 and Batteries: 176.0 oz (4990g) Battery: LiPo 6s 4000mAh 8C Charger: 200W 2 x output AC-DC Balancing Charger Transmitter: 16-channel 2.4GHz with 5.8GHz video downlink (included) -
Page 5: Notices And Warnings
NOTICES AND WARNINGS IMPORTANT NOTE: All safety precautions and warnings, instructions, warranties and other collateral information is subject to change at the sole discretion of Yuneec. For the most up-to-date information please visit the corresponding product page at www.Yuneec.com or contact the nearest Yuneec office or authorized distributor. -
Page 6: General Safety Precautions And Warnings
H920 Plus is not compatible with any other ESCs. Use of any other ESCs in the H920 Plus will cause a crash, which may result in damage to the product, property and/or cause serious injury. - Page 7 THE H920 PLUS RTF CONTENTS The H920 PLUS RTF includes everything necessary to fly. Yuneec offers a variety of imaging products; there may be other enhancements available to suit a specific purpose. 1. H920 Plus RTF Airframe (4 sets of Propeller/Rotor Blade) 2.
-
Page 8: Disclaimer
DISCLAIMER Yuneec Electric Aviation cannot be held liable for any damage, injury or for use of the product in violation with legal regulations, especially in the following circumstances: Damage and/or injury as well violation of legal regulations resulting from a failure to comply with the operating instructions or the instructions at www.yuneec.com, product... -
Page 9: Lipo Battery Warnings And Usage Guidelines
LIPO BATTERY WARNINGS AND USAGE GUIDELINES WARNING: Lithium Polymer (LiPo) batteries are significantly more volatile than alkaline, NiCd or NiMH batteries. All instructions and warnings must be followed exactly to prevent property damage and/or serious injury as the mishandling of LiPo batteries can result in fire. -
Page 10: Charging The Lipo Flight Battery
DEC to change the value and press START/ENTER to confirm your setting. For the H920 Plus battery, it is recommended to set 4A (no more than 8A). For ProAction™ battery, it is recommended to set 2A (no more than 3A). -
Page 11: Charging The Li-Ion St16 Battery
CHARGING THE ST16’S LI-ION BATTERY The ST16 battery is charged by using the supplied USB cable and inserting it into the USB port in the charger. It will take approximately five (5) hours to charge a fully discharged (not over-discharged) battery. NOTICE: To check the charge status of the ST16, simply tap the screen 2 times. -
Page 12: Assembling The H920 Plus
ASSEMBLING THE H920 Plus INSTALLING THE MOTOR ARMS Fold the motor arms upwards and secure them using the straight knurled nut cover located on the motor arms. NOTICE: Do not over tighten the straight knurled nuts; It may cause deformation of the carbon-fiber arms. -
Page 13: Installing The Flight Batteries
STEP 3) Connect the flight battery to the relevant socket above the respective battery on the H920 PLUS using the EC3 blue, polarity-protected connector. NOTICE:The white socket is for battery charging, do not connect it to any port when installing the batteries. -
Page 14: Flight Controls
(mode 2) is moved by the pilot, regardless of the direction in which the nose is pointing. So if you move the stick to the right, the H920 Plus will also move to the right regardless of the position of the nose, even if it is in the middle of turning. The mode can also be useful to pilots who have lost their bearings when flying in Angle Mode. -
Page 15: Retracting And Lowering The Retractable Landing Gear
ANGLE MODE If the Flight Mode selection switch is in the centre position, then the H920 Plus is in Angle Mode. Angle Mode is designed for pilots with a little experience (those who have already mastered Smart Mode), because in this mode the H920 Plus moves in line with the joystick, in the direction in which the nose is pointed. -
Page 16: Landing
When the Flight Mode selection switch is in the bottom position, H920 PLUS will be in Home (also known as Return to Home) Mode. In Home Mode, the GPS connectivity will in a straight line, return the H920 PLUS in the direction of the ST16’s current location, and automatically land within 4-8m/13-26’ of the pilot and ST16 Ground Station. - Page 17 Journey, POI (Point of Interest), ORBIT ME and TAKE OFF. CCC: (Curve Cable Cam) Curve Cable Cam allows creation of a flight route/mission for H920 PLUS to fly. Once the pilot sets the points, H920 PLUS will fly the set coordinates while remembering the heading.
- Page 18 When enabled, the H920 will fly away, up, and return. Tap JOUR to enter the journey function. START: Select JOUR and set the distance, then slide the slider. H920 PLUS will fly up and out to take a photo or video.
- Page 19 fly up and out to take the perfect self-shot, or “selfie”. NOTICE: The journey route is the reverse direction to which the gimbal camera is facing. ORBIT ME: When Orbit Me is enabled, H920 Plus flies a circular path around the pilot. Press ORBIT to enter the ORBIT ME function.
- Page 20 CENTER: Press CENTER to set the current flight position of H920 Plus as the center of a circle. START: Press START, and slide the icon, push the aileron stick to the right or left, H920 Plus will fly around the circle center with distance between the Start point and the center point as the radius.
- Page 21 STEP 1) Press TASK/CAMERA, select TAKE OFF; STEP 2) Slide the sliding block from left to right, the aircraft will climb vertically and begin to hover until it reaches about 6.6 feet high. Model: H920 Plus welcome,Pilot 12:27 AM VOLTS...
- Page 22 STEP 1) Select TASK/CAMERA in Angle mode, select “WAYPOINT.” STEP 2) Choose “OK” to accept any pop up warnings/alerts, and to access the waypoint interface. Model: H920 Plus welcome,Pilot 12:27 AM VOLTS...
- Page 23 Connecting drone... H:N/A V.S:N/A H.S:N/A D:N/A Other Setting Reset Guide Map Select Google Map STEP 1) Power on the ST16, and then lock GPS signal (For a better connection, we recommend you go outdoors). STEP 2) Tap the setting icon [ ] on the right top corner, then select Wi-Fi icon ] and connect to available network.
- Page 24 Tap [ ] again, it will become footage or map again. NOTICE: If there is no gimbal camera, the display screen will only indicate the direction of H920 PLUS nose. Connecting drone... H:N/A V.S:N/A H.S:N/A...
- Page 25 STEP 1) Press and hold the Start/Stop button to start the motors. STEP 2) Press [ ] icon and then slide the pop up sliding block. The H920 PLUS will automatically fly along the mission route as pre-set. Press the [ ] and slide the sliding block;...
- Page 26 1. When a POI/Point of Interest is set, all waypoints will point to the POI in pan direction. The custom value will be the angle that the waypoint point to the POI in pan direction. All single waypoints in pan mode will point to the POI automatically. 2.
- Page 27 POINT OF INTEREST (POI) Multiple points of interest may be set prior to launching the H920 PLUS. The gimbal/camera lens will point to the POI. If a waypoint is set to focus on different POI, the previous setting will be applied to the POI.
- Page 28 NOTICE: The ST16 will not save any setting by default. Choose “YES” to save all settings. NOTICE: The pilot will not be able to use joysticks to adjust the H920 PLUS landing point when the aircraft is operating in a Point-to-Land task. Joysticks are disabled...
- Page 29 After setting/creating the geo-fence, switch to Angle mode. Press start, and then slide the sliding block. The geo-fence function is now activated. NOTICE: If the H920 PLUS launches/takes off outside of the geo-fence after the geo-fence function is activated, once flown inside the geo-fence, it won't fly beyond the pre-set fence line.
- Page 30 PLUS can fly beyond the geo-fence lines. When flying within the geo-fence in Home mode, the H920 PLUS will be allowed to fly back to home point when the home point is out of the geo-fence. The H920 PLUS is still within the geo-fence function. This...
-
Page 31: Attaching Cgo4 Gimbal Camera To Multicopter
NOTICE: The front of the gimbal should be installed in the direction of the nose of H920 Plus. NOTICE: Use the dedicated lock washers when rotating the screws. STEP 3:Connect the gimbal power cord to H920 Plus gimbal connection port. -
Page 32: Led Status Indication
LED STATUS INDICATION LED STATUS INDICATIONS DURING STARTUP - The Aircraft is in "Bind"Mode - Initialization failed Blinks orange very rapidly (10 times per second) Pulses red (3 times per second) - The Aircraft is in a No-Fly Zone * Flashes red and white rapidly (5 times per second) Please see the instruction manual for more information regarding no-fly zones... -
Page 33: Preparing To Fly
Never attempt to operate H920 PLUS nearby tall buildings/obstructions that do not offer a clear view of the sky (a minimum clearance of 33m/100’). Be sure to place the H920 PLUS on a level and stable surface before powering ON the ST16 Ground Station and the H920 PLUS Aircraft. -
Page 34: Compass Calibration
STEP 2) Tap the GPS CALIBRATION icon on the ST16 screen and choose COMPASS. STEP 3) For best results, remove propellers if installed. Lift H920 PLUS airframe straight and level. When one beep is heard, turn the aircraft forward as shown by the red arrow above until two beeps are heard. - Page 35 If the calibration has been successful, an acknowledgement tone will sound (the same tone heard when the H920 PLUS aircraft is powered on), and the H920 PLUS will restart. IMPORTANT NOTE: If calibration has failed, the Main LED Status Indicator will be solid white the calibration process must be repeated.
-
Page 36: Binding (Single Mode)
CGO4 gimbal and the aircraft need to be bound to the ST16, the steps below can be followed: STEP 1) Power on the ST 16 Ground Station and power on the on the H920 PLUS aircraft. Wait for the initialization to completes. - Page 37 Button A = Take Still Photo Button B = Start/Stop Recording Video GIMBAL CAMERA PAN CONTROL The gimbal pan mode switch on ST16 (S2) enables the Follow Mode. When the switch position is UP, the gimbal camera is in Follow Mode. The pan control of the gimbal camera is disabled when the switch position is UP.
-
Page 38: Certification Information
CERTIFICATION INFORMATION FCC STATEMENT: This equipment has been tested and found to comply with the limits for Part 15 of the FCC rules. These limits are designed to provide reasonable protection against harmful interference in a residential installation. This equipment generates, uses and can radiate radio frequency energy and, if not installed and used in accordance with the instructions, may cause harmful interference to radio communications. - Page 39 IC RADIATION EXPOSURE STATEMENT FOR CANADA This device complies with Industry Canada license-exempt RSS standard(s). Operation is subject to the following two conditions: (1) this device may not cause interference, and (2) this device must accept any interference, including interference that may cause undesired operation of the device.
Need help?
Do you have a question about the H920 PLUS and is the answer not in the manual?
Questions and answers