Table of Contents
Advertisement
Quick Links
SCC Quick Start Guide
Step 1. Unpack the Carrier and Modules
This document explains how to install and configure National Instruments
Signal Conditioning Components (SCC) modules with NI-DAQmx. SCC
modules work with NI M Series, E Series, and B Series DAQ devices. This
document assumes you have already installed, configured, and tested the
data acquisition (DAQ) device you will connect to the SC-2345/2350
carrier. If you have not done so, refer to the DAQ Getting Started Guide
included with the DAQ device, available on the NI-DAQ CD, and from
before continuing.
ni.com/manuals
Throughout this document, abbreviations containing XX are used to refer to
families of related device model numbers.
SCC-AIXX—refers to the SCC-AI01, SCC-AI02, SCC-AI03, SCC-AI04,
SCC-AI05, SCC-AI06, SCC-AI07, SCC-AI13, and SCC-AI14.
SCC-LPXX—refers to the SCC-LP01, SCC-LP02, SCC-LP03, and
SCC-LP04.
SCC-TC0X—refers to the SCC-TC01 and SCC-TC02.
SCC-XX—refers to any SCC module.
SCC-SGXX—refers to the SCC-SG01, SCC-SG02, SCC-SG03,
SCC-SG04, and SCC-SG24.
Remove the module from the package and inspect the module for loose
components or any sign of damage. Notify NI if the module appears
damaged in any way. Do not install a damaged module into the carrier.
For safety and compliance information, refer to the device documentation
packaged with your device at
accessible from Start»Programs»National Instruments»NI-DAQ»
Browse Device Documentation, after you install the DAQ documentation
browser.
, on the NI-DAQ CD, or
ni.com/manuals
Advertisement
Table of Contents

Related Manuals for NI SCC Series


Summary of Contents for NI SCC Series
- Page 1 This document explains how to install and configure National Instruments Signal Conditioning Components (SCC) modules with NI-DAQmx. SCC modules work with NI M Series, E Series, and B Series DAQ devices. This document assumes you have already installed, configured, and tested the data acquisition (DAQ) device you will connect to the SC-2345/2350 carrier.
- Page 2 SC-2345/2350 carrier and SC-2345/2350 Carrier User Manual – One or more SCC modules and user guide ❑ Software and documentation – NI-DAQ 7.2 or later software and documentation – One of the following software packages for development: • LabVIEW ™...
- Page 3 – Numbers 1 and 2 Phillips screwdrivers – Wire insulation strippers To install NI-DAQmx, refer to the DAQ Getting Started Guide. To install the SC-2345/2350 carrier, refer to the SC-2345/2350 Carrier User Manual. These documents are available for at ni.com/manuals Step 3.
- Page 4 SC-2345/2350 carrier, refer to the SC-2345/2350 Carrier User Manual. Figure 2 shows the SC-2345 carrier with the signal wires connected. Figures 3 and 4 show the two types of cabling on the SC-2345 with configurable connectors. SCC Quick Start Guide ni.com...
- Page 5 s s ib le S (C o lo r in d ic a n fi g te s u ra st ri ti o n -2 3 fe re n c e ic k P /N L a b 1 8 4 1 1 4 A -0 R ow...
- Page 6 Table 1 lists the panelette specifications. Table 1. Panelette Options Connectors/Units Panelette Description per Panelette Slot Width J- or K-type Mini-thermocouple jack Uncompensated J- or K-type Thermocouple jack Uncompensated BNC connector SMB connector Banana jack Banana jack SCC Quick Start Guide ni.com...
- Page 7 Table 1. Panelette Options (Continued) Connectors/Units Panelette Description per Panelette Slot Width 2-pin female LEMO (B-Series) 4-, 6-pin female MIL-Spec 2-, 4-, 6-pin female Single (male) Single (female) 9-pin D-SUB Dual (male) Dual (female) Momentary switch On – off Toggle switch On –...
-
Page 8: Step 5. Connect The Signals
NI-DAQ C to NI-DAQmx Terminal Names Translation Guide. Complete the following steps: Remove power from the signal lines. Strip 7 mm (0.25 in.) of insulation from the ends of the signal wires. -
Page 9: Sc-2350: Connecting Teds Sensors
Tighten the screws to 0.5 to 0.6 N · m (4.4 to 5.3 lb – in.) of torque. Check if the strain-relief bar is installed as shown in Figures 3, 4, and 5. If necessary, reinstall and tighten the strain-relief screws. Close or replace the top cover. -
Page 10: Connecting Digital Signals (Optional)
A to C. The terminal label numbers correspond to the pin number location of each signal on the 68-pin DAQ device connector. Refer to the DAQ device documentation for more information about this connector. SCC Quick Start Guide ni.com... - Page 11 Not Used Not Used Not Used Not Used D GND AI SENSE PFI 14/FREQ OUT D GND PFI 10/EXTSTROBE* PFI 12/CTR 0 OUT D GND PFI 14/CTR 1 OUT PFI 8/CTR 0 SOURCE D GND PFI 9/CTR 0 GATE PFI 6/AO START TRIG D GND PFI 7/AI SAMP CLK PFI 4/CTR 1 GATE...
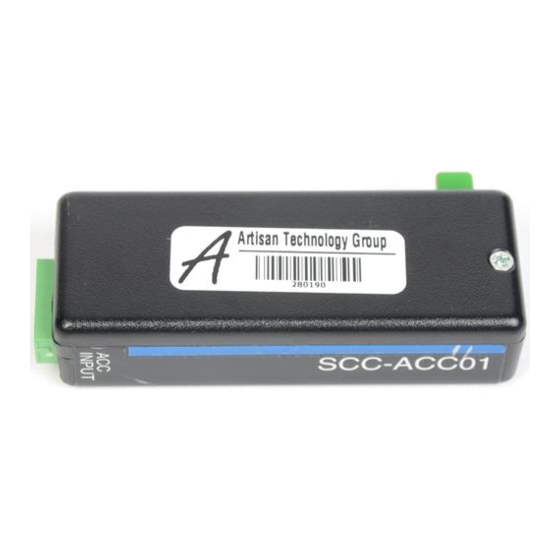
- Page 12 Icon Label Color Measurement Type SCC-ACC01 Blue Analog Input INPUT SCC_AIXX Blue Analog Input SCC-A10 Blue Analog Input SCC-CI20 Blue Analog Input SCC-FV01 Blue Analog Input 0–100Hz SCC-LPXX Blue Analog Input SCC-RTD01 Blue Analog Input SCC Quick Start Guide ni.com...
- Page 13 Table 2. SCC Modules: Icon, Label Color, and Measurement Type (Continued) SCC Module Icon Label Color Measurement Type SCC-SG Refer to the SCC-SG Series Strain Gage Modules User Blue Analog Input Guide. SCC-TC0X Blue Analog Input SCC-FT01 Analog Input, Analog Output, Digital, GPCTR SCC-DI01 Green...
- Page 14 Digital I/O Counter/Timer Analog Input J9-16 J9-16 J19-20 Socket (Optional) Socket (Optional) Socket Yellow *Analog Output is not available on AI E Series boards Figure 11. SCC Module Configurations by Socket, Function Classification, and Color Code SCC Quick Start Guide ni.com...
-
Page 15: Sc-2345 Carrier Diagrams
SC-2345 Carrier Diagrams Figures 12, 13, and 14 show diagrams of the three types of SC-2345 carriers. 1 SCC Socket 5 J24 9 Screw-Terminal Block 2 SCC Socket Reference Designator 6 J25 10 Grounding Terminal Lug 3 SCC Key Slot 7 J21 11 Assembly Number 4 Serial Number... - Page 16 5 Assembly Number 8 Power LEDs 2 SCC Socket 6 Serial Number 9 J25 3 SCC Key Slot 7 J24 10 J21 4 Screw-Terminal Block Figure 14. SC-2345 with Configurable Connectors (Side Cabled) Carrier Diagram SCC Quick Start Guide ni.com...
-
Page 17: Sc-2350 Carrier Considerations
SC-2350 Carrier Considerations The SC-2350 has integrated software support for Transducer Electronic Data Sheet (TEDS) sensors. For more information about using TEDS with SCC modules, refer to the SC-2345/2350 Carrier User Manual. The SC-2350 carrier has 16 channels of analog input sockets, J1 to J8, in one row of eight sockets. -
Page 18: Step 6. Install The Modules
AI 11. Refer to and enter info code ni.com/info rdtntg confirm signal names in the NI-DAQ C to NI-DAQmx Terminal Names Translation Guide. Single-Stage Analog Input Conditioning For single-stage analog input conditioning, plug the SCC module into any socket J1 to J8 and connect the I/O signals to it. - Page 19 lowpass filter SCC module. Figure 16 shows how to install analog input modules on the SC-2345 carrier. Sometimes, you can cascade two analog input SCC modules together on a single analog input channel to form a dual-stage configuration. The first stage of a dual-stage analog input configuration can be in sockets J9 to J16.
-
Page 20: Digital Scc Modules
Plug the SCC-CTR01 general purpose counter timer module into socket J19 or J20 of the SC-2345. Socket J19 connects to the DAQ device general-purpose counter timer channel 0. Socket J20 connects to general purpose counter timer channel 1. SCC Quick Start Guide ni.com... - Page 21 Double-click the Measurement & Automation icon on the desktop to open MAX. Step 8. Configure the SC-2345/2350 You can use the SC-2350 only in NI-DAQmx 7.2 or later; you can use the SC-2345 in either NI-DAQmx 7.0 or later. Open Devices and Interfaces. If your device does not automatically appear, press <F5>...
- Page 22 Select the carrier under NI-DAQmx Device»NI-DAQmx SCC Connector Block. The configuration window opens as shown in Figures 19 and 20. Figure 19. SC-2345 Connector Block Configuration Window SCC Quick Start Guide ni.com...
- Page 23 Figure 20. SC-2350 Configuration Window Note Configuring the SCC system using MAX automatically sets the analog input mode of the DAQ device to NRSE. Step 9. Configure the SCC Modules Complete the following steps to configure the SCC modules: Specify the SCC Carrier Type. The location of the SCC sockets change depending on the SCC carrier type.
- Page 24 If the module name does not appear in the list, either the module is not allowed in that location or you do not have the current version of NI-DAQ. If you do not have the current version of NI-DAQ, download it from ni.com/downloads...
- Page 25 Step 10. Configure Channels and Tasks This step applies only if you are programming your device using NI-DAQ or NI application software. Refer to the Configure Channels and Tasks seciton in the DAQ Getting Started Guide. When using the DAQ Assistant to create a new task, refer to Table 4 for the measurement types in NI-DAQmx and how they correspond to the SCC modules.
- Page 26 Table 4. SCC Module and Corresponding NI-DAQmx Measurement Type (Continued) Recommended NI-DAQmx Recommended SCC Module Measurement Type Parameter Settings SCC-LP01 Analog Input»Voltage Max/Min = ±10 V SCC-LP02 Analog Input»Voltage Max/Min = ±10 V SCC-LP03 Analog Input»Voltage Max/Min = ±10 V SCC-LP04 Analog Input»Voltage...
-
Page 27: Where To Go For Support
Table 4. SCC Module and Corresponding NI-DAQmx Measurement Type (Continued) Recommended NI-DAQmx Recommended SCC Module Measurement Type Parameter Settings SCC-TC01 Analog Input»Temperature»Thermocouple CJC Source = Built In Thermocouple Type = # SCC-TC02 Analog Input»Temperature»Thermocouple CJC Source = Built In Thermocouple Type = # Use default value for parameters not specified in the table. - Page 28 National Instruments, NI, ni.com, and LabVIEW are trademarks of National Instruments Corporation. Refer to the Terms of Use section on ni.com/legal for more information about National Instruments trademarks. Other product and company names mentioned herein are trademarks or trade names of their respective companies. For patents covering National Instruments products, refer to the appropriate location: Help»Patents in your software, the patents.txt file on your CD, or...
Need help?
Do you have a question about the SCC Series and is the answer not in the manual?
Questions and answers