Table of Contents
Advertisement
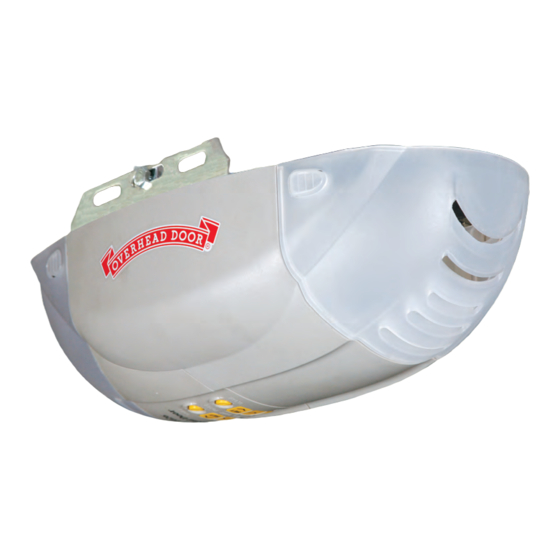
2026
Legacy
800
®
Chain and Belt Openers
•
CodeDodger
remote control
®
for the ultimate in safety!
• Safe-T-Beam
system must
®
be installed to close door
•
Homelink
and Car2U
®
compatible
•
2-bulb light system
•
Wall console
• For use only with sectional
doors
•
Easy programming
For answers and assistance
1.800.929.3667
or visit
www.OverheadDoor.com
Save this manual for future reference.
© 2009 Overhead Door Corporation. Overhead Door, Legacy, and the Ribbon logo are registered trademarks of Overhead
Door Corporation. All other trademarks are the property of their rightful owners. Consistent with our policy of continuing
product improvements, we reserve the right to change product specifications without notice or obligations. R900-785
Homelink
is a registered trademark of Johnson Controls Technology Company.
®
Car2U
is a registered trademark of Lear Corporation.
®
®
Legacy
Installer: Leave this manual with homeowner.
800
®
Model 2026
GARAGE DOOR OPENERS
PN# 37027500123
2/26/2010 REV.1
Advertisement
Table of Contents
Troubleshooting

Related Manuals for Overhead door Legacy 800 2026


Summary of Contents for Overhead door Legacy 800 2026
- Page 1 Save this manual for future reference. © 2009 Overhead Door Corporation. Overhead Door, Legacy, and the Ribbon logo are registered trademarks of Overhead Door Corporation. All other trademarks are the property of their rightful owners. Consistent with our policy of continuing product improvements, we reserve the right to change product specifications without notice or obligations.
-
Page 2: Safety Information
Could result in Death or Serious Injury Installations, repairs and adjustments must be done by a trained door system technician using proper tools and instructions. ©2009 Overhead Door Corporation Part Number 37027500123 02/26/2010 REV. 1... -
Page 3: Table Of Contents
(Refer to Section 6) *OPENER MUST BE INSTALLED WITH THE INCLUDED WALL CONTROL. **SAFE-T-BEAM® SAFETY REVERSE SYSTEM MUST BE INSTALLED TO CLOSE DOOR. ©2009 Overhead Door Corporation Part Number 37027500123 02/26/2010 REV. 1... -
Page 4: Pre-Installation Check List
They are as follows: The Overhead Door Corporation recommends that you read and fully understand all information and instructions contained herein before choosing a "Do-it-yourself" installation. Any questions should be directed to Overhead Door Corporation or an authorized Overhead Door Dealer. - Page 5 SENSORS MAX. 6" MIN. 5" Pg. 25 SECTIONAL DOOR WARNING To reduce the risk of injury to persons or damage to property - Use this opener only with sectional doors. ©2009 Overhead Door Corporation Part Number 37027500123 02/26/2010 REV. 1...
-
Page 6: Recommended Tools
Insulated Staple with wire Bracket Safe-T-Beam® (Red LED) Sensor with wire (Green LED) Safe-T-Beam® Source/Sensor Bracket Three-button Wall Control, Remote Control Pro Rail (Chain) Section Door Arm Pro Rail (Belt) Section ©2009 Overhead Door Corporation Part Number 37027500123 02/26/2010 REV. 1... - Page 7 DO NOT RETURN TO POINT OF PURCHASE. IMPORTANT! - Information needed when calling • Model number - (located on packaging) Clevis pin Cotter pin • Store, city, state, and date of purchase 5/16" x 3/4" ©2009 Overhead Door Corporation Part Number 37027500123 02/26/2010 REV. 1...
-
Page 8: Key Illustrations
1-PIECE RAIL ASSEMBLED VIEW ......FOR HELP-1.800.929.3667 OR WWW.OVERHEADDOOR.COM ©2009 Overhead Door Corporation Part Number 37027500123 02/26/2010 REV. 1... -
Page 9: Safety Installation Information
6. Locate the Wall Control: call the Overhead Door Corporation or an • Within sight of door, authorized Overhead Door Dealer.) • At minimum height of 5 feet so small 2. - Page 10 NOW before continuing with installation (Fig. 1-5). Remove Set assembled power head and rail aside. Begin FIG. 1-5 Disable garage door lock. with Section 2 INSTALLATION. ©2009 Overhead Door Corporation Part Number 37027500123 02/26/2010 REV. 1...
-
Page 11: Installation
• Drill 3/16" pilot holes at each screw hole mark. FIG. 2-3 Header bracket mounting (on header & above header) – Fasten header bracket with 2 lag screws (provided) (Fig. 2-3). ©2009 Overhead Door Corporation Part Number 37027500123 02/26/2010 REV. 1... - Page 12 • Check that rail clamp bolts and nuts are tight. • DO NOT PLUG OPENER IN YET! bolts & nuts Extra framing NEEDED bolts & nuts FIG. 2-6 Mounting the power head ©2009 Overhead Door Corporation Part Number 37027500123 02/26/2010 REV. 1...
- Page 13 Contact door manufacturer or distributor for Centerline even with or a bracing kit. above top roller The Overhead Door Corporation is not responsible for damage caused due to improperly braced door. FIG. 2-7 Mounting door Bracket NOTE: For door bracket and bolts locate Bag 4 from Box 2.
-
Page 14: Wall Control Installation
• Fasten wire to control board screws on back of FIG. 3-2 Splitting and stripping wall control button. – Striped wire to the + (plus) terminal. – White wire to the - (minus) terminal. ©2009 Overhead Door Corporation Part Number 37027500123 02/26/2010 REV. 1... - Page 15 . f l o © 1 FIG. 3-5 Mounting Entrapment warning label FIG. 3-6 Wall control ©2009 Overhead Door Corporation Part Number 37027500123 02/26/2010 REV. 1...
-
Page 16: Safe-T-Beam® System Installation
– If not: bracket FIG. 4-2 a) Mounting bracket extensions are available tongue Mounting brackets through an authorized Overhead Door dealer. b) Blocks of wood, etc. may be substituted for FIG. 4-3 Attach sensors to brackets extensions. - Page 17 + – performed following connection to electrical power (see page 18). DO NOT PLUG IN YET! Infared Sensor (Power Head With Rear Cover Removed) FIG. 4-8 Insert wires ©2009 Overhead Door Corporation Part Number 37027500123 02/26/2010 REV. 1...
-
Page 18: Connecting To Power
Red LED will remain ON continuously. during the closing movement the door will • After the alignment is finished tighten the reverse automatically to its fully opened position. adjustment screws on both sensors. ©2009 Overhead Door Corporation Part Number 37027500123 02/26/2010 REV. 1... -
Page 19: Limit Switches & Force Adjustment
"Open SET Limit" button for 5 result in damage to rail components including seconds. The LED indicator light will blink green the rail pulley. twice. This stores the opened position in memory. ©2009 Overhead Door Corporation Part Number 37027500123 02/26/2010 REV. 1... -
Page 20: Adjustments
"CLOSE FORCE" control setting CLOSE slightly (turn it counter-clockwise). • Test again. Repeat as necessary until door FIG. 6-6 2 x 4 under center of door opening reverses upon contacting board. ©2009 Overhead Door Corporation Part Number 37027500123 02/26/2010 REV. 1... -
Page 21: Programming Remote Controls
Homelink® and Car2U® remote control, or any other which has not been device follow the Homelink® reprogrammed. or Car2U® instructions in your car owner’s manual. ©2009 Overhead Door Corporation Part Number 37027500123 02/26/2010 REV. 1... -
Page 22: Battery/Visor Clip Installation
(Fig. 9-2). • Repeat for rear lens on power head. • Plug power cord back into electrical outlet. • Test lamp operation. FIG. 9-2 Fasten lens ©2009 Overhead Door Corporation Part Number 37027500123 02/26/2010 REV. 1... -
Page 23: Safety Instructions
– Opener still fails is improperly balanced or springs are broken. CONTACT AN AUTHORIZED OVERHEAD – CONTACT A TRAINED DOOR SYSTEM DOOR DEALER OR OVERHEAD DOOR TECHNICIAN. CORPORATION 3. Safe-T-Beam® System. ROUTINE MONTHLY MAINTENANCE •... -
Page 24: Wiring Diagram
STRIPED WHITE STRIPED WHITE ADVERTENCIA BLANC RAYÉ BLANC RAYÉ BLANCO RAYADO BLANCO RAYADO WALL CONTROL PHOTO SENSOR ELECTRICAL SHOCK. COMMANDE MURAL PHOTODÉTECTEUR CHOC ÉLECTRIQUE CONTROL DE LA PARED FOTOSENSOR CHOQUE ELÉCTRICO ©2009 Overhead Door Corporation Part Number 37027500123 02/26/2010 REV. 1... -
Page 25: Troubleshooting Guide - Opener
WARNING: If you suspect a problem with the garage door hardware or springs, contact an completely open. authorized Overhead Door Dealer or a trained door system technician, or contact Overhead Door Corporation at 1.800.929.3667. • Check door balance, condition, and door spring. -
Page 26: Troubleshooting Guide - Power Head Led
• Check for obstruction, remove 1 BLINK, Pause obstruction going down – Check door spring. (Repeat) • Door obstruction going – Contact Overhead Door down Corporation at 1.800.929.3667 • Door obstruction going up • Programming incomplete • Set UP LIMIT programming •... -
Page 27: Transmitter Compliance Statement
Ländern eingesetzt werden, so muss der Importeur vor dem Gebrauch sicherstellen, dass die Sendegeräte auch solchen lokalen Bestimmungen entsprechen, welche von den Bestimmungen der USA und Kanadas abweichen. ©2009 Overhead Door Corporation Part Number 37027500123 02/26/2010 REV. 1... -
Page 28: Warranty
Legacy ® Limited Warranty The Distributor of Overhead Door Corporation products whose name appears below ("Seller") warrants to the original purchaser of the Legacy ® 800 Operator, Model 2026 (“Product”), subject to all of the terms and conditions hereof, that the Product and all components thereof will be free from defects in materials and workmanship for the following period(s) of time, measured from the date of installation: MOTOR- Seller warrants the motor for a period of TEN (10) YEARS.
Need help?
Do you have a question about the Legacy 800 2026 and is the answer not in the manual?
Questions and answers
My garage door does not close completely, stops leaving a 1/2" to 1" gap, I have a model 2026. Not sure how to adjust the travel distance, unit is about 5 years old, just started acting up
To adjust the travel distance on an Overhead Door Legacy 800 Model 2026 garage door that does not close completely:
1. Locate the "Close Travel Limit" button on the opener.
2. Press and hold the button to move the door downward until it is fully closed.
3. If small adjustments are needed, quickly press and release the "Close Travel Limit" button to move the door in small increments.
4. Ensure the door presses firmly onto the ground.
5. Once the desired closed position is reached, press and hold the "Set Limit" button for 5 seconds until the LED indicator blinks green.
This stores the closed position in memory.
This answer is automatically generated
I **** in need of a replacement Belt for my overhead door Legacy 800 2026 unit. is this item something i can order?
hi, my power head has a code showing and its not in the manual. the green light is blinking 6 times, then repeats. any ideas ?
Can’t get my 2025 Tundra to program the garage door opener. Have tried the learn button and a garage door remote.
The Overhead Door Legacy 800 garage door opener is compatible with Homelink® and Car2U® systems. To program it with a 2025 Toyota Tundra, follow these general steps:
1. Clear Existing Codes (If Needed):
- Press and hold the two outer Homelink buttons in your vehicle until the indicator light starts flashing (about 20 seconds), then release.
2. Enter Programming Mode on the Opener:
- Press and hold both "SET" buttons on the garage door opener until the green indicator light blinks (about 5 seconds).
3. Train the Homelink Button:
- Hold your existing remote control close to the Homelink buttons in the vehicle.
- Press and hold both the remote control button and the desired Homelink button until the indicator light changes from slow to rapid blinking.
4. Sync with the Opener (If Required):
- Press the "Learn" or "Program" button on the opener.
- Within 30 seconds, press the programmed Homelink button in the vehicle multiple times until the door operates.
5. Test the System:
- Press the Homelink button to ensure the door opens and closes properly.
If the vehicle uses Car2U®, follow similar steps using the Car2U instructions. The Safe-T-Beam® system must be installed for proper operation.
This answer is automatically generated
how do I reprogram my keypad