
Related Manuals for Steca Solarix MPPT 3020


Summary of Contents for Steca Solarix MPPT 3020
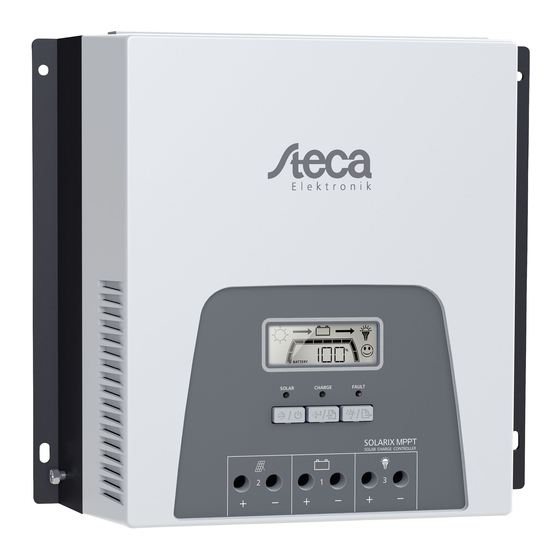
- Page 1 Solarix MPPT 3020 / MPPT 5020 Installation and operating instructions 764393 | Z01 | 18.43...
- Page 2 Preface Thank you for choosing a solar charge controller from our company. Through the use of solar energy, you significantly help to protect the environment by reducing the pollution of the atmosphere by the emissions of carbon dioxide (CO ) and other harmful gases. All rights reserved, including those for the translation.
-
Page 3: Table Of Contents
Table of contents General information ..............4 Safety instructions ..............5 Labels and symbols ....................6 2.1.1 Safety marks ......................6 2.1.2 Keywords ......................6 Designated use ................7 Overview ..................8 Installation ................... 9 Operation ................... 13 Switching on / switching off ................. 15 Changing the display: .................. -
Page 4: General Information
General information The solar charge controller is available in two power levels (30 A and 50 A). The device fulfils the following tasks: • Optimizing the power yield of the connected solar modules • Controlling the charging process of the battery •... -
Page 5: Safety Instructions
Safety instructions This document is part of the product. • Read these operating instructions thoroughly and completely prior to installation and use. • Keep these operating instructions close the device over the entire lifetime of the device. • Pass these operating instructions on to every subsequent owner or user of the product. The installation may only be carried out by a qualified trained electrician. -
Page 6: Labels And Symbols
Do not allow the following persons to operate the device: • Children • Persons with reduced physical, sensory or mental capabilities • Persons that do not possess sufficient experience and knowledge (unless given instruc- tion on proper use of the device and initial supervision by a person responsible for their safety) Follow the safety instructions of the connected battery. -
Page 7: Designated Use
Designated use The solar charge controller is suitable for photovoltaic (PV) systems, for charging batteries of a rated voltage of 12 VDC or 24 VDC (50 A version also 48 VDC). The areas of use include the fields of hobbies and leisure, businesses, commerce, and small companies. -
Page 8: Overview
Disclaimer Both the compliance with these instructions and the conditions and methods during instal- lation, operation, use, and maintenance of the solar charge controller cannot be supervised by the manufacturer. Improper performance of the installation may cause property damages and, subsequently, endanger persons. Therefore, we assume no responsibility and liability for losses, damages or costs that result due to incorrect installation, improper operation, usage, and maintenance or in any manner associated therewith. -
Page 9: Installation
The solar charge controller optimizes the charging of the battery and its lifetime by means of a three-stage charging algorithm and a configurable equalizing charge: Charging stages Description Bulk charge stage The battery is charged with the maximum power possible depending on the input by the solar modules Absorption stage Battery charging at a constant voltage. - Page 10 Mounting location: • Mount only indoors. • Mount in vertical position on the wall, on concrete or another non-flammable surface. Mounting materials such as screws and dowels depend on the mounting surface and are, therefore, not included in the scope of delivery. •...
- Page 11 Electrical connection The connections to the solar modules must be realised with circuit breakers or disconnect- ors. The connections to the batteries must be realised with a fuse or a circuit breaker. It is not allowed to connect inverters to the load output. Recommended core cross-sections, tightening torques, and battery circuit breakers: Device System...
- Page 12 The tightening torques apply to the terminal screws of all electrical connections on the de- vice. The values specified for the battery circuit breaker are calculated maximum values. This means that the battery circuit breaker used must trigger no later than when reaching this amperage.
-
Page 13: Operation
Successively introduce the conductors into the screw-type terminals of the solar charge controller and tighten the terminal screws. Connect positive cable (+) of the battery to the battery positive input of the solar charge controller. Connect negative cable (-) of the battery to the battery negative input of the solar charge controller. - Page 14 Meaning of the LEDs: Colour Status Meaning Permanently lit Input Solar module normal SOLAR Green Input Solar module without voltage or defective Permanently lit Battery is fully charged CHARGE Green Flashing Battery is being charged Flashing Error FAULT Solar charge controller is working normally Function of the buttons: Button...
-
Page 15: Switching On / Switching Off
Symbol Meaning Battery Consumer Normal operation / fault Level of battery charge When all segments are black, the battery is fully charged Text display / values / unit Display during program entry and fault Shows the program numbers ERROR XX Flashing with the code for warning Permanently lit with code for fault Switching on / switching off... -
Page 16: Changing The Display
Examples for operating states: Display Meaning Solar modules are working, battery is being charged Consumer is switched on Solar modules are working, battery is being charged No consumer is switched on No input from the solar module The consumer is operated with battery current Changing the display: Press "Up/down &... - Page 17 Display Meaning Input current from the solar module (here: 50 A) Charging current or discharging current (negative), battery (here: 30 A) Load current, consumer (here: 20 A) Total input power (here: 100 Ah) Total output power (here: 80 Ah) Device temperature (internal) (here: 40 °C) Operating hours (here: 3.5 h)
-
Page 18: Settings Menu
Display Meaning Minimum occurred battery voltage (here: 10.1 V) Maximum occurred charging current (here: 51.0 A) Minimum occurred discharging current (= load current) (here: 20.8 A) Firmware version (here: 1.00) Then, the main page is displayed again. Settings menu Press "Enter & Call settings menu" button and hold for 3 seconds. The solar charge controller switches to the display mode Settings menu. - Page 19 Program selection Name Option Meaning Setting battery The battery voltage is detected voltage automatically 12.0 Setting battery voltage 12 V 24.0 Setting battery voltage 24 V Setting battery voltage 48 V 48.0 (only for 50 A version) Selection of Lead battery GEL/AGM battery type (standard) The voltage values are...
- Page 20 Program selection Name Option Meaning Voltage of the If "USE" has been selected in program 01, absorption this program can be used charge 12 V rated voltage: 14.4 V Can be set from 12.0 V to 16.0 V (default setting: 14.4 V) 24 V rated voltage: 28.8 V Can be set from 24.0 V to 32.0 V...
- Page 21 Program selection Name Option Meaning Equalizing charge Activating equalizing charge function function Deactivating equalizing charge function Voltage for If "USE" has been selected in program 01, equalizing charge this program can be used 15.0 V 12 V rated voltage: Can be set from 12.0 V to 16.0 V (default setting: 14.1 V) 30.0 V 24 V rated voltage:...
- Page 22 Program selection Name Option Meaning Maximum Can be set from 5 min to 900 min duration of the in increments of 5 min equalizing charge (default setting: 300 min) in case the voltage of the equalizing charge is not reached permanently Interval of the Can be set from 1 day to 90 days...
- Page 23 Program selection Name Option Meaning Control of load On (default setting) output Load output is always switched on, except in the event of under- voltage cutoff Switching off by pressing the "Load on/off & ESC" button for one second Load output is always switched Switching on by pressing the "Load on/ switching &...
- Page 24 Program selection Name Option Meaning Power-on Can be set from 0 min to 480 min duration for load in increments of 5 min output (default setting: 480 min) Can only be set if "LIG" is set in program 16 PV voltage to 12 V rated voltage: 15.0 define sunrise...
- Page 25 Program selection Name Option Meaning Display backlight Backlight is always switched on Backlight is always switched off Backlight is switched on when pressing a button The backlight will go out after 30 second of inactivity Reset to factory setting Reset of total input power Reset of total output power...
-
Page 26: Maintenance And Care
Maintenance and care The device is maintenance-free. DANGER Voltage. There is a risk of death by electrocution. Only clean device with a slightly moist cloth. The care of the device is limited to the following measures: • Removing dust • Cleaning Remove dust from the cooling fins of the device by using compressed air of a maximum of 2 bar. -
Page 27: Fault Correction
Fault correction DANGER Voltage. In the case of improper repairs, risks for the user and the system may arise. Any claim to warranty will also be cancelled. Do not open the device fro troubleshooting and do not try to replace com- ►... -
Page 28: Measures In The Event Of Faults
Measures in the event of faults Displayed Cause Remedy error code PV overvoltage Check voltage of the solar modules The voltage must be lower than 100 V for the 30 A version, and smaller than 150 V for the 50 A version If the voltage of the solar modules is within the permitted range, contact the service Internal memory... - Page 29 Displayed Cause Remedy error code Load output Check if the load output is overloaded overloaded Inverters must be connected directly to the battery, they must not be operated via the load output If the load output is overloaded, disconnect consumers from the load output If the problem persists, contact the service Short circuit at the Check if a short circuit is present at the load...
-
Page 30: Technical Data
Technical data Version 30 A 50 A Mechanics and surrounding Dimensions (W x H x D) 230 x 130 x 80 mm 250 x 230 x 85 mm Weight 1.4 kg 3.2 kg Ambient temperature 0 °C to 55 °C range Storage temperature -40 °C to 75 °C... - Page 31 Version 30 A 50 A Battery charging Max. charging current 30 A 50 A Required battery capacity Min. 60 Ah Min. 100 Ah Charging stages 3-stage, plus periodical equalizing charge: Bulk-Absorption-Float Charging voltage, 14.4 V / 28.8 V 14.4 V / 28.8 V / 57.6 V absorption charge (rated value) Charging voltage, float...
-
Page 32: Commercial And Legal Guarantee Conditions
Commercial and legal guarantee conditions Find the warranty terms on internet at: www.steca.com/pv-off-grid/warranties Steca Elektronik GmbH Mammostraße 1 87700 Memmingen Germany T +49-(0)8331-8558-0 F +49-(0)8331-8558-131 www.steca.de...
Need help?
Do you have a question about the Solarix MPPT 3020 and is the answer not in the manual?
Questions and answers