Schwinn 170 Assembly Manual / Owner's Manual
Hide thumbs
Also See for 170:
- Service manual (63 pages) ,
- Assembly manual (36 pages) ,
- Service manual (60 pages)
Table of Contents
Advertisement
170 /
1.5
Manual en Español Latino Americano:
Assembly MANUAL / OWNER'S MANUAL
http://www.schwinnfitness.com
Advertisement
Table of Contents

Related Manuals for Schwinn 170


Summary of Contents for Schwinn 170
- Page 1 170 / Manual en Español Latino Americano: ASSEMBLY MANUAL / OWNER’S MANUAL http://www.schwinnfitness.com...
- Page 2 TABLE OF CONTENTS Important Safety Instructions - Assembly Important Safety Instructions - Owner’s Safety Warning Labels / Serial Number 4 Features Specifications Console Features Before Assembly Remote Heart Rate Monitor Parts Operations Hardware Adjustments Tools Initial Setup Assembly Quick Start / Manual Program Leveling the Bike User Profiles Moving the Bike...
- Page 3 IMPORTANT SAFETY INSTRUCTIONS — ASSEMBLY This icon means a potentially hazardous situation which, if not avoided, could result in death or serious injury. Obey the following warnings: Read and understand all warnings on this machine. Carefully read and understand the Assembly instructions. •...
- Page 4 SAFETY WARNING LABELS AND SERIAL NUMBER • Read, understand and obey all warnings on this machine. • Keep children away. • Not intended for use by anyone under 14 years of age. • Prior to use, read and understand the Owner’s Manual. •...
-
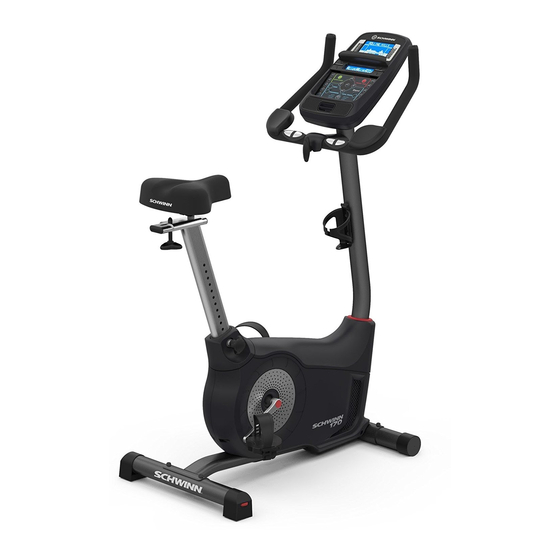
Page 5: Specifications
SPECIFICATIONS Maximum User Weight: 300 lbs. (136 kg) Power Requirements: Operational Voltage: 9VDC Operating Current: 1.5A Regulatory Approvals: ISO 20957 AC Power Adapter: UL listed, Rated 120V 60Hz Input, 9VDC, 1500mA Output. Class 2. 55.6” (141cm) This product, its packaging, and components contain chemicals known to the State of California to cause cancer, birth defects, or reproductive harm. - Page 6 PARTS 13 (R) 12 (L) Item Description Item Description Main Frame Seat Post Front Stabilizer Adjustment Knob Rear Stabilizer Seat Top Shroud Left Pedal (L) Mast Gasket Right Pedal (R) Console Mast (with Handlebar Mount) Water Bottle Holder Handlebars AC Adapter Console Handlebar Mount Cover Note: Media Cable is in a bag.
- Page 7 HARDWARE / TOOLS Item Description Button Head Hex Screw M8 x 25 Lock Washer M8 Curved Washer M8 Flat Washer M8 T-handle Tools Included Not Included 6 mm (recommended)
- Page 8 1. Attach Stabilizers to Main Frame Note: Hardware(*) is pre-installed on the stabilizers and not on Hardware Card. Make sure transport wheels on the front stabilizer point forward, and the Schwinn decal on the rear stabilizer faces outward from the machine.
- Page 9 3. Install Handlebars on Console Mast NOTICE: Do not crimp the cables. Put the Handlebar (7) in the bracket (6a), adjust the Handlebar to the desired angle, and install the T-handle (E) through the holes. Use the pull cable in the Handlebar Mount to route the HR cable (7a) through the slot (6c) under the Handlebar Mount to the top of the mast.
- Page 10 4. Install Console on Console Mast Note: Remove the pre-installed screws(*) from the back of the Console before you connect the cables. NOTICE: Do not crimp the cables.
Need help?
Do you have a question about the 170 and is the answer not in the manual?
Questions and answers