Table of Contents
Advertisement
Advertisement
Table of Contents

Related Manuals for Carestream CS 7200


Summary of Contents for Carestream CS 7200
- Page 1 CS 7200 User and Installation Guide...
- Page 2 Notice The CS 7200 User Guide describes and illustrates the workflow for digital dental radiography using an imaging plate (storage phosphor screen) for radiographic diagnostic intraoral images. We recommend that you thoroughly familiarize yourself with this Guide in order to make the most effective use of your system.
-
Page 3: Table Of Contents
Setting Up CS 7200 ........ - Page 4 Acquiring Multiple Images.......50 Preparing the Acquisition of FMS Images ....50 Acquiring FMS Images .
-
Page 5: Conventions In This Guide
CAUTION: Alerts you to a condition that might cause serious damage. Important: Alerts you to a condition that might cause problems. Note: Emphasizes important information. Tip: Provides extra information and hints. CS 7200 User and Installation Guide (6M0940)_Ed04... - Page 6 Chapter 1 Conventions in this Guide...
-
Page 7: Indications For Use
CS 7200. The CS 7200 system is used to scan and review intraoral dental X-ray images. When scanning the X-ray exposed imaging plate a digital image is displayed on the workstation screen. After scanning, the scanner erases the imaging plate and ejects it. -
Page 8: Cs 7200 Components Overview
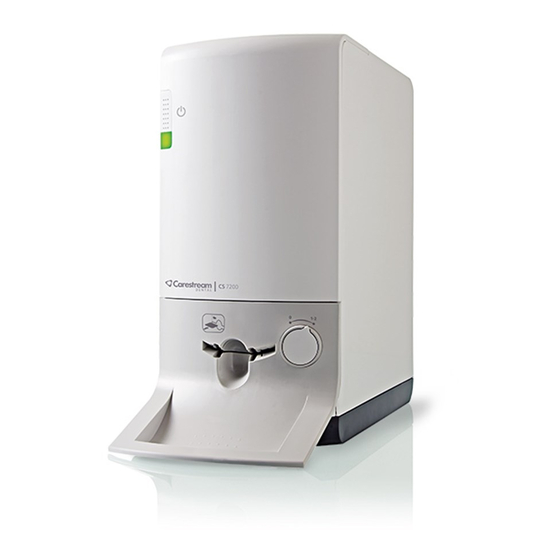
CS 7200 Components Overview Scanner Overview The CS 7200 scanner includes the functions necessary for scanning and acquiring images from the imaging plates. Figure 1 CS 7200 Front View On/Off switch Turn scanner On: press for 1 second Shut down the scanner: press for 2 seconds to reset the scanner, run BIT. - Page 9 Figure 2 CS 7200 Back View Base Cables compartment Cover Figure 3 Cables Compartment in detail Power supply inlet USB port Cable Compartment cove CS 7200 User and Installation Guide (6M0940)_Ed04...
-
Page 10: Indication Leds Statuses
If plate is not fully loaded for a number of times (three Green Recovery consecutive attempts), the scanner performs a reset and returns to loading position. Green Ready for scan Green Blinking Green Scanning Fast Blinking Green Erasing/Eject Blinking Red Error Chapter 2 CS 7200 Overview... -
Page 11: Imaging Plates Overview
Imaging Plates Overview The CS 7200 works with three imaging plate sizes: 0, 1 and 2. The scanned image file size depends on the imaging plate size and the scanning resolution set by the user. Table 2-1 Intraoral imaging plates sizes... -
Page 12: Hygienic Sheaths
Figure 4 Hygienic Sheath (front view) Adhesive strip (for sealing the hygienic sheath) Sheath transparent side to see the plate refernce Tear line to be opened when inserting the plate into the scanner Chapter 2 CS 7200 Overview... -
Page 13: Environmental Requirements
It is recommended not to install the scanner close to the opened window to prevent the exposure to the direct sunlight. Unit dimensions and Space Requirements The scanner should be placed on a flat stable surface. CS 7200 User & Installation Guide (6M0940)_Ed04... -
Page 14: Electrical Requirements
Minimum System Requirements For installation of the CS 7200 intraoral imaging software, the computer must meet the minimum computer system requirements, specified in the CS 7200 Safety, Regulatory & Technical Specification Guide. . Important:... -
Page 15: Setting Up Cs 7200
Setting Up CS 7200 Connecting Cables This chapter describes how to connect the Power Supply and USB cables to CS 7200: Note: CS 7200 must be powered by the dedicates AC/DC adapter model TR30RAM240, manufactured by Cincon Electronics Co., Ltd. - Page 16 Close the cable compartment cover. Connect the free end of the USB cable to the main USB port in the back of the computer. Connect the Power Supply cable plug to the Mains wall socket. Chapter 3 Setting Up CS 7200...
-
Page 17: Cs Imaging Software Installation
To install the CSI software, follow these steps: Insert the Carestream Imaging software DVD-ROM in the DVD-ROM drive of the PC. The installation wizard is automatically loaded. Note: If the installation wizard is not loaded, run the CSISuiteSetup 1.17 file located on the installation DVD-ROM. - Page 18 The Welcome screen is displayed. Click Next to continue. The License Agreement screen is displayed. Click I Agree to continue the installation. Chapter 3 Setting Up CS 7200...
- Page 19 Select the components to install and then click Install. Patient file: is selected by default. You can deselect it, if you do not want the patient database. The Practice Management Software Configuration screen is displayed. Click No. CS 7200 User & Installation Guide (6M0940)_Ed04...
- Page 20 Click Yes only if you use Practice Management Software. The Installing wizard screen is displayed. Let the installation process run automatically. Chapter 3 Setting Up CS 7200...
- Page 21 The Installation Complete screen is displayed when the installation is finished. Select Reboot now to complete the installation and then click Finish. After the computer is restarted, proceed to “CS 7200 Drivers Installation” on page CS 7200 User & Installation Guide (6M0940)_Ed04...
-
Page 22: Cs 7200 Drivers Installation
Wait for the installation program to start. Note: If the installation wizard is not loaded, run the wizard file located on the installation DVD-ROM. Select language from the list on the upper right side of the Installation Wizard window. Chapter 3 Setting Up CS 7200... - Page 23 Click Run Installation Wizard to continue the installation. Minimum system requirements are verified and the status of each checked item is displayed. Click Next to continue the installation. CS 7200 User & Installation Guide (6M0940)_Ed04...
- Page 24 Note: If a red X mark appears next to one of the items, click Help? to view the description of the problem. Then, make sure your computer meets minimum system requirements. In the IP2 Image Acquisition window, click Install to install the required plug-ins on your computer. Chapter 3 Setting Up CS 7200...
- Page 25 The Welcome window is displayed. Click Next to continue the installation process. The Destination Folder window is displayed. Click Next, if you accept the default destination folder or browse to choose another destination folder, and then click Next. CS 7200 User & Installation Guide (6M0940)_Ed04...
- Page 26 Wait until the system installs the software. 10. The New Scanner Files window is displayed. Click Next to continue without updating the scanner files. Chapter 3 Setting Up CS 7200...
- Page 27 11. The Installation Wizard Completed window is displayed. Click Finish to finish the installation. 12. On the Finish tab, click Finish to complete the installation. 13. Perform “License Activation” on page CS 7200 User & Installation Guide (6M0940)_Ed04...
-
Page 28: License Activation
After the installation is complete, the license activation message appears:. Click Next to continue. If the scanner is not connected and powered on, the following message appears: Connect the scanner and turn it on. Chapter 3 Setting Up CS 7200... - Page 29 The Login window appears. Enter your Carestream user name and password if you are a registered user. If not, click Create a new user account and follow the link to the Carestream License Registration site. On the Product Activation and Registration page, fill in the sign in details.
- Page 30 In the Online License Activation window, enter the license key received with the scanner, select the license check box and click Activate. 10. After the license activation process is complete, click Exit. You are returned to the CS 7200 Installation Wizard. Chapter 3 Setting Up CS 7200...
- Page 31 11. Click Finish to finish the installation process. CS 7200 User & Installation Guide (6M0940)_Ed04...
-
Page 32: Cs 7200 Post Installation Test
Load the exposed plate into the scanner and wait until the scan is complete and the image is displayed on the CS Imaging Software main screen. . Close the CS Imaging Software main screen. Chapter 3 Setting Up CS 7200... -
Page 33: Adapt Filtering Options
The gallery of the available looks is displayed at the bottom of the screen. Click Apply at acquisition to apply this view during the image acquisition process. Hover the mouse pointer over the selected frame in the gallery. The following options are available: CS 7200 User & Installation Guide (6M0940)_Ed04... -
Page 34: Create Customized Look
Hover with the mouse pointer over the selected frame. Click Create. Adjust brightness and contrast of the new look by using Brightness and Contrast sliders. Use the zoom slider to zoom in or out certain areas of the image. Chapter 3 Setting Up CS 7200... -
Page 35: Modify The Exisiting Customized Look
Click Create to create a new modified look and add it to the frames gallery. Modify the Exisiting Customized Look Select the frame to be customized. Hover with the mouse pointer over the selelcted frame. Click Modify. Perform the required changes and click Save Changes. CS 7200 User & Installation Guide (6M0940)_Ed04... - Page 36 If you close the CS Adapt Library screen without saving the performed actions,. the following dialog box appears: Click OK if you really want to exit without saving chnages or click Cancel to return to the CS Adapt Library screen. Chapter 3 Setting Up CS 7200...
-
Page 37: Delete Existing Filter
Delete Existing Filter Select the frame to be customized. Hover with the mouse pointer over the selelcted frame. Click Delete. In the Delete Filter dialog box that appears, click Yes to confirm the action. CS 7200 User & Installation Guide (6M0940)_Ed04... - Page 38 Chapter 3 Setting Up CS 7200...
-
Page 39: General Software Overview
CS Imaging Software Overview General Software Overview CS 7200 operates with the CS Imaging Software. You can acquire: Single images. Full Mouth Series (FMS). Single Image Acquisition Overview You can acquire individual images using the CS Imaging Software. - Page 40 Select a Format enables you to select FMS template options to select for acquisition. You can modify existing templates and create new templates (see the Carestream Imaging Software Online Help) Note: Only FMS templates for CR images can be used. Using other FMS will cause images not to be displayed.
- Page 41 CS Adapt Library: Opens the CS Adapt Library software that allows to manage your filters. Adapt - Unfiltered Perio: Enhances the display of periodontal tissue. Adapt - Unfiltered Endo1: Enhances contrast at the canals and roots (produces brighter images). CS 7200 User and Installation Guide (6M0940)_Ed04...
- Page 42 Intraoral Toolbar INTRA toolbar: enables you to adjust the image display. For more information on Intraoral toolbar functions, see the Carestream Dental Imaging Software Online Help. Sharpness filter: click to apply sharpnes filter on the image. Highlight: click to optimize contrast within a region of interest.
- Page 43 Isodensity dots: click to apply color to pixels of the same bone density. Densitometric analysis: click to analyze bone density. Caries Detector: click to open the Logicon Caries module for detecting interproximal caries. CS 7200 User and Installation Guide (6M0940)_Ed04...
-
Page 44: Patient Browser Window Overview
Patient Browser Window Overview Title bar: name of the selected patient. System icons: About, Prefernces and Online Help. Imaging Software Button: click to open the Imaging Window. Patient Card:information on the selected patient.. Image Management Tools: import/export and print functions. Patient History: displays the list of available patients. -
Page 45: Image Acquisition Workflow
Positioning, exposing and removing the imaging plate from the patient’s mouth . See “Performing the X-rays” on page 44. Disinfecting the Hygienic Sheath. Refer to the CS 7200 Safety and Regulatory Guide (6K9678). Scanning the imaging plate and reviewing the image. See “Scanning Imaging Plate” on page 47. -
Page 46: Acquiring Single Image
For more details, see “Create a New Patient Card” on page 75 The CS 7200 indication LED turns from yellow to green, indicating that the scanner is ready for use and the Imaging Window appears. -
Page 47: Preparing The Imaging Plates
To prepare the intraoral imaging plate, follow these steps: Choose an imaging plate of the appropriate size for your examination. Important: Use only CS 7200 intraoral imaging plates from Carestream and hygienic sheaths from Carestream. The use of plates or hygienic... -
Page 48: Performing The X-Rays
Peel the adhesive strip’s protective paper to seal the hygienic sheath (B) and (C). Handle the imaging plate by holding the hygienic sheath’s empty edge where the silicone strip is. Select an appropriate positioner for the region of interest and the size of the plate. Performing the X-rays Perform the required X-rays according to your clinical procedure. - Page 49 60kV 70kV incisors 0.08 0.16 pre-molars 0.125 0.25 molars 0.16 0.125 0.32 0.25 Lower jaw 60kV 70kV 60kV 70kV incisors 0.08 0.16 pre-molars 0.125 0.25 molars 0.125 0.25 Bitewing 0.16 0.125 0.32 0.25 CS 7200 User and Installation Guide (6M0940)_Ed04...
- Page 50 Position the CS 7200 imaging plate in the mouth of the patient depending on the region of interest. Move the X-ray generator tube head close to the patient and align it with the tooth of the patient and the CS 7200 imaging plate.
-
Page 51: Scanning Imaging Plate
Clean and disinfect the hygienic sheath after each patient (see the CS 7200 Safety, Regulatory, and Technical Specifications User Guide (6K9678)). Scanning Imaging Plate Move to the CS 7200 scanner and make sure the plate size selector knob is set for the same size as indicated on the plate. Open the hygienic sheath. - Page 52 Remove the hygienic sheath to start the scanning process. CS 7200 starts scanning. The indication LED is blinking green during the process and the Preview window appears showing the scan progress. When the scan is complete, the imaging plate is erased and then ejected. The indication LED stops blinking and remains steady green.
- Page 53 The ideal image quality is when the indicator of the quality of exposure is a full green bar in the Control Panel. Avoid under-exposed or over-exposed images indicated by a partial or full red bar. Under-exposed Image Overexposed Image Ideal Image Quality Ideal Image Quality CS 7200 User and Installation Guide (6M0940)_Ed04...
-
Page 54: Acquiring Multiple Images
Acquiring Multiple Images Preparing the Acquisition of FMS Images To prepare the acquisition of FMS images, follow these steps: Access the Dental Imaging Software. See “Starting the Imaging Software” on page 42. Click the Use a format button in the Imaging Window toolbar to access the Select a format window. From the list of available formats (templates), select the required template and click Open. - Page 55 Prepare all imaging plates required for completing FMS template. See “Preparing the Imaging Plates” on page 43. Position the imaging plate in the mouth of the patient depending on the region of interest. CS 7200 User and Installation Guide (6M0940)_Ed04...
- Page 56 Move the X-ray generator tube head to the patient and align it with the tooth of the patient and the imaging plate. Important: Make sure that the tube head is not shaking. Select the X-ray exposure time according to the region of interest and the patient type. Follow the user instructions of your X-ray generator.
-
Page 57: Acquiring Fms Images
The ideal image quality is when the indicator of the quality of exposure is a full green bar in the Control Panel. Avoid under-exposed or over-exposed images indicated by a partial or full red bar. Under-exposed Image Overexposed Image Ideal Image Quality Ideal Image Quality CS 7200 User and Installation Guide (6M0940)_Ed04... -
Page 58: Retaking Images
Retaking Images If you need to retake images, after the FMS template acquisition is complete, follow these steps: Click the frame for which you want to retake images. The selected frame is highlighted in green. Using the mouse cursor, drag the selected image outside the template window. 54 Chapter 5 Acquiring Images... - Page 59 Close the CS 7200 window with the image to be relaced. The image is deleted from the template. Perform a scan again. After the scan is complete, the new image appears in the FMS template. Close the template window to save the performed changes.
-
Page 60: Manually Erasing The Plate
Manually Erasing the Plate To manually erase a plate, perform the following steps: On the Dental Imaging Software main tool bar, click the CS 7200 Configuration icon. The CS 7200 window appears: Click Erase Plate. The following dialog box appears: Load the late into the scanner. -
Page 61: Changing Scanner User Preferences
Changing Scanner User Preferences To change the Scanner User Preferences, perform the following steps: On the Dental Imaging Software main tool bar, click the CS 7200 Configuration icon. The CS 7200 window appears: Click Preferences to open the CS 7200 Preferences window. -
Page 62: Tools Tab
Start the Dental Imaging Software. Open the file of the patient whose images you want to retrieve. On the Dental Imaging Software main tool bar, click the CS 7200 Configuration icon. The CS 7200 window appears. Click Preferences to open the CS 7200 Preferences window and select the Tools tab. - Page 63 The retrieved images are displayed. The image highlighted in orange is displayed in the preview area next to the list. Seelect the required images from the list by selecting the check box next to each image. The Restore and Delete buttons become available. CS 7200 User and Installation Guide (6M0940)_Ed04...
-
Page 64: About Tab
Click Restore to restore the selected image to the currently opened patient. About Tab Open the about tab to view scanner information that includes firmware, hardware and software versions, serial number and other details. 60 Chapter 5 Acquiring Images... -
Page 65: Changing Scan Resolution
Changing Scan Resolution To chnage scan resolution, perform the following steps: On the Dental Imaging Software main tool bar, click the CS 7200 Configuration icon. The CS 7200 window appears: Select the desired scan resolution and click OK to save the selection. - Page 66 62 Chapter 5 Acquiring Images...
- Page 67 Maintenance or all maintenance information, refer to CS 7200 Technical Specifications, Safety and Regulatory Guide. CS 7200 User and Installation Guide (6M0940)_Ed04...
- Page 68 64 Chapter 6 Maintenance...
-
Page 69: Quick Troubleshooting
Occasionally, malfunctions can occur during use in the event of an incorrect action. An error message is displayed. During the CS 7200 power up, system performs a self test: ejects a plate (if left in the scanner) and reports whether the system is ready for operation or a malfunction is detected. - Page 70 Reduce the ambient light to the level specified in position unexpectedly. strong ambient light or to a camera CS 7200 Technical Specifications, Safety and Regulatory Guide. flash directed to the insertion panel. Make sure the scanner is located away from...
- Page 71 Click OK to eject the plate. LED indicator blinks red Rescan the plate. Error code #9043 If the problem persists, restart the Scanner. Scanner hardware malfunction. If the problem persists, call Service. CS 7200 User and Installation Guide (6M0940)_Ed04...
- Page 72 Symptom Cause Corrective Action Plate was not ejected and erased Click OK to eject the plate. LED indicator blinks red properly. Erase the plate manually. Error code #9044, 9047 If the problem persists, restart the Scanner. If the problem persists, call Service.
-
Page 73: Offline License Activation
The following sequence takes place, when the license activation is performed offline: After the installation is complete, the license activatuion message appears:. Click Next to continue. The following message appears: Turn on the scanner. CS 7200 User & Installation Guide (6M0940)_Ed04... - Page 74 The Offline License Activation window appears: Go to https://cs-licensing-staging.carestreamdental.com/Licensing and sign in or create an account, if you do not have one. Chapter 8 Appendix...
- Page 75 After filling in all details, an account is created and an email is sent to the provided email address. Open the received email and click the provided link to activate your Carestream account. 10. After email verification is complete, click Continue.
- Page 76 11. Select Activate a license for a Carestream Dental Product. 12. Fill in the required product details as follows: Product Name: select CS 7200 from the available products list. Serial Number: type in the serial number that appears on the Data Plate label located on the ...
- Page 77 14. On the Activation Complete page, copy the displayed activation code.. 15. Paste the copied activation code into the Offline License Activation window and click Activate. CS 7200 User & Installation Guide (6M0940)_Ed04...
- Page 78 16. After the license activation is complete, click Exit to close the Offline License Activation window. You are returned to the CS 7200 Installation Wizard. 17. Click Finish to finish the installation process. Chapter 8 Appendix...
-
Page 79: Create A New Patient Card
Note: First Name, Last Name and Gender are mandatory fields. All other fields are optional. Grayed out fields are not editable. Click Create patient to save the patient card. The Patient Card window closes and the new patient appears in the patient list. CS 7200 User & Installation Guide (6M0940)_Ed04... - Page 80 Chapter 8 Appendix...
- Page 81 CS 7200 User & Installation Guide (6M0940)_Ed04...
- Page 82 Chapter 8 Appendix...
-
Page 83: Manufacturer's Address
Carestream Health Netherlands B.V Bramenberg 12 3755 BZ Eemnes The Netherlands Representante no Brasil Carestream do Brasil Comércio e Serviços de Produtos Médicos Ltda. Rua Pequetita, 215 cjs. 31 E 32 Edifício Atrium VII - Vila Olímpia São Paulo - Brazil... - Page 84 80 Chapter 9 Contact Information...
-
Page 85: List Of Consumables
Hygienic Sheaths #1 200 Pcs 1067511 Hygienic Sheaths #2 200 Pcs 1067545 Imaging Plate #0 4 Pcs 1067552 Imaging Plate #1 4 Pcs 1067560 Imaging Plate #2 4 Pcs 1030428 Carestream Screen Cleaner CS 7200 User and Installation Guide (6M0940)_Ed04... - Page 86 82 Chapter 10 List of Consumables...
- Page 87 Added table to the CS 7200 User and 2015-06 6M0940 Revision 2 Consumables List Installation Guide Updated manual to CS 7200 User and 2017-05 6M0940 match the new SW Revision 4 Installation Guide version CS 7200 User and Installation Guide (6M0940)_Ed04...
- Page 88 Carestream Dental A Division of Carestream Health, Inc. 150 Verona St. Rochester, NY 14608 For more information, visit: www.carestreamdental.com To give documentation feedback, visit: www.carestreamdental.com/documentationfeedback ©Carestream Health, Inc., 2017. 6M0940 Ed04 2017-04...
Need help?
Do you have a question about the CS 7200 and is the answer not in the manual?
Questions and answers