Table of Contents
Advertisement
Advertisement
Table of Contents

Related Manuals for Carestream CS 1200


Summary of Contents for Carestream CS 1200
- Page 1 User and Installation Guide...
- Page 2 The information in this document is subject to change. Neither Carestream Health, Inc. nor any of its subsidiaries shall be liable for errors contained herein or for incidental damages in conjunction with the furnishing, performance, or use of this material.
-
Page 3: Table Of Contents
Overview CS 1200 Acquisition Interface Overview ... 6 Toolbar Overview..... . 6 Video Toolbar . - Page 4 Chapter 5 Accessing the Acquisition Interface ... . . 19 Getting Started Setting up Preferences ....19 Using the Imaging Software with TWAIN.
-
Page 5: Conventions In This Guide
CAUTION: Alerts you to a condition that might cause serious damage. Important: Alerts you to a condition that might cause problems. Note: Emphasizes important information. Tip: Provides extra information and hints. CS 1200 Intraoral Camera User and Installation Guide (9H1809)_Ed04... - Page 6 Chapter 1 Conventions in This Guide...
-
Page 7: Camera Overview
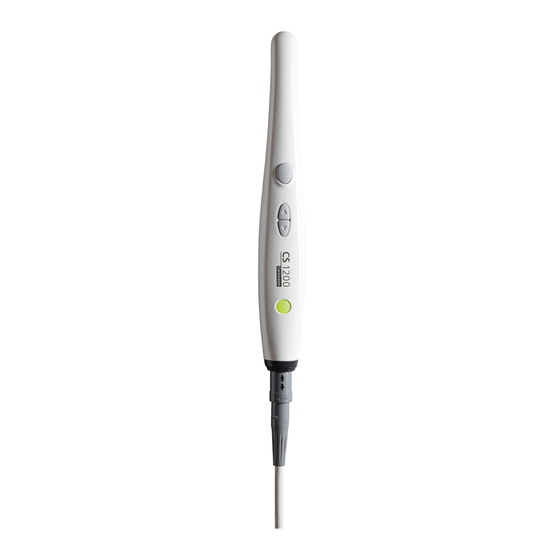
CS 1200 Intraoral Camera Overview The CS 1200 intraoral camera is an easy-to-use, simple-to-share, and high quality imaging system. It has three connection configurations based on which model you purchased: S-Video When connected to a computer, it has the following functions: ... - Page 8 5 Cable connection S-Video 6 Camera Lens 7 Push-pull connector 8 USB Connector 9 Camera holder 10 Protective Sheaths (not pictured) Chapter 2 CS 1200 Intraoral Camera Overview...
-
Page 9: Minimum Computer System Requirements
Note: The quality of images is affected by the quality of the monitor and monitor settings. See your monitor user's guide for information. General Software Overview The CS 1200 intraoral imaging system operates with the following software: Imaging Software ... -
Page 10: Cs 1200 Acquisition Interface Overview
CS 1200 Acquisition Interface Overview The CS 1200 Acquisition interface can acquire, review, and store videos and images of the oral cavity. Figure 2 Acquisition Interface Overview Title Bar: Displays the patient’s name. Toolbar: “Toolbar Overview” on page View Screen: Displays live video, selected captured image, or recorded video. -
Page 11: Image Toolbar
The image gallery toolbar enables you to manage videos and images displayed in the image gallery. Scroll button: Scrolls images and recorded videos in the image gallery. Delete button: Deletes selected images and recorded videos. CS 1200 Intraoral Camera User and Installation Guide (9H1809)_Ed04... -
Page 12: Dialog Boxes Monitor Connection Overview
Transfer to Hard Disk button: Transfers images from the camera to the computer. Select Patient Dialog Box The Select Patient dialog box enables you to transfer images of the selected patient number to the Acquisition interface. Figure 3 Select Patient Dialog Box Chapter 3 CS 1200 Software Overview... -
Page 13: Dialog Boxes Overview
The tooth chart dialog box enables you to select tooth numbers associated with the image or video. Figure 5 Tooth Chart Date field: Displays the current date. Comments field: Enables comments to be associated with an image or video. CS 1200 Intraoral Camera User and Installation Guide (9H1809)_Ed04... -
Page 14: Select A Format Dialog Box
Selection field: Enables you to select the display format you want. Preview field: Enables you to preview the selected display format. Cancel button: Cancels the format selection. Open button: Opens the format selection. 10 Chapter 3 CS 1200 Software Overview... -
Page 15: Preferences Dialog Boxes Overview
Record sound: Enable/disable the audio sound when a video is recorded. Important: Ensure that the proper frequency setting is selected for your region. The wrong setting can negatively impact image quality. CS 1200 Intraoral Camera User and Installation Guide (9H1809)_Ed04 11... -
Page 16: Video Adjustment Preferences
Brightness Setting: Select the video brightness setting. Contrast Setting: Select the video contrast setting. Tools Preferences Figure 9 Tool Preferences Tool Preferences enable you to Create log file: Save log files for service information. 12 Chapter 3 CS 1200 Software Overview... -
Page 17: The Software
Insert the Drivers DVD to install the Intraoral Camera driver. The Choose Setup Language dialog box is displayed. Select the installation language and click OK. When you are prompted with the Choose Components screen, select CS 1200/ CS1500/ CS 1600. - Page 18 Follow the on-screen instructions to install the Acquisition interface and set up the camera. If you are prompted with the following pop-ups: Click Continue Anyway. Check Always trust software from “Carestream Health” and click Install. 14 Chapter 4 Setting Up the CS 1200 Intraoral Camera...
-
Page 19: Connecting The Camera To A Monitor
Connecting the Camera to a Monitor To connect the camera to a monitor, follow the instructions in the Figures below. S-Video Connection AC/DC AV Connection AC/DC CS 1200 Intraoral Camera User and Installation Guide (9H1809)_Ed04 15... -
Page 20: Installing The Camera Holder
Remove the adhesive tape protection from the support (A). Place the taped side of the camera holder on the clean surface (B) and press firmly several times for correct adherence. The maximum adherence is obtained after two hours. 16 Chapter 4 Setting Up the CS 1200 Intraoral Camera... - Page 21 Preferences” on page For places on which you cannot use the adhesive tape, insert a screw through the appropriate hole in the camera holder to fix it to a solid surface. CS 1200 Intraoral Camera User and Installation Guide (9H1809)_Ed04 17...
- Page 22 18 Chapter 4 Setting Up the CS 1200 Intraoral Camera...
-
Page 23: Accessing The Acquisition Interface
To access the Acquisition interface, follow these steps: In the Imaging window, If you installed only the CS 1200, or you have installed the CS 1500 and/or CS 1600 camera before the CS 1200, click If you have installed a K 1000 camera before the CS 1200, click the arrow button on , and select the CS 1200 camera option from the drop-down list. -
Page 24: Using The Imaging Software With Twain
Using the Imaging Software with TWAIN Starting the Imaging Software To acquire an image using imaging software via TWAIN, follow these steps: From your imaging software, such as Photoshop, open the TWAIN interface. For example, in Photoshop, go to Import > Select Source. The Select Source window is displayed. -
Page 25: Preparing For Acquisition
Adjust the protective sheath if necessary. The end should be tight to prevent fogging or blurring of the image. Note: Installing the sheath incorrectly has a negative effect on image quality. CS 1200 Intraoral Camera User and Installation Guide (9H1809)_Ed04 21... -
Page 26: Acquiring Live Video Or Images
Acquiring Live Video or Images Accessing the Acquisition Interface To access the Acquisition interface, If you use the Imaging Software, click in the Imaging Window and select your camera. If you use imaging software via TWAIN interface, see the user guide of your imaging software to open Acquisition interface. -
Page 27: Capturing And Viewing Images
“Tooth Chart Dialog Box” on page The selected images are displayed and saved temporarily in the image gallery. Use the toolbar to view the image (see “Image Toolbar” on page CS 1200 Intraoral Camera User and Installation Guide (9H1809)_Ed04 23... - Page 28 Press the review button on the camera to review the images. Use the image gallery toolbar to navigate, save, or delete the images (see“Image Gallery Toolbar” on page Click to close the Acquisition interface. The images are saved and displayed in the Patient history. Remove and dispose of the protective sheath.
-
Page 29: Monitor Interface Overview
At the same time, you can have a total of 9 patients. Figure 12 Patient Number Dialog Box CS 1200 Intraoral Camera User and Installation Guide (9H1809)_Ed04 25... -
Page 30: Preparing For Acquisition
Preparing for Acquisition Preparing the Camera The protective sheath covers the camera and provides a sanitary shield for the patient. Use a new protective sheath with each patient. Always discard the protective sheath after each use. For additional protective sheaths, contact your dealer or the protective sheaths manufacturer. Important: Only use the protective sheaths designed specifically for this camera. -
Page 31: Capturing, Viewing And Deleting Images
For how to delete images, see“Deleting Images” on page 29. For how to transfer images to the computer, see “Transferring Images” on page Note: The camera can store up to 300 images. CS 1200 Intraoral Camera User and Installation Guide (9H1809)_Ed04 27... -
Page 32: Viewing Images
Remove and dispose of the protective sheath when you have finished with the current patient. Note: The camera automatically goes into sleep mode when inserted into the camera holder or left idle for 1.5 minutes. To use it again, pick it up or press the Capture button. -
Page 33: Deleting Images
Software” on page 13. Press the ON/OFF button 3 seconds to turn on the camera. In the Imaging window, click and select your camera. The Acquisition interface is displayed. CS 1200 Intraoral Camera User and Installation Guide (9H1809)_Ed04 29... -
Page 34: Transferring Images To The Computer Hard Disk
On the Acquisition interface, click Transfer to Software button. The Select Patient dialog box displays. Select the patient number and click Transfer. After the transferring is completed, the images are deleted automatically from the camera. Transferring Images to the Computer Hard Disk To transfer images from the camera to the computer hard disk, follow these steps: Press the ON/OFF button 3 seconds to turn off the camera. -
Page 35: Cleaning And Disinfecting The Camera
Never put the camera in a sterilizing device or immerse it completely. Excessive fluids can damage the camera. Not protected against water spray. CS 1200 Intraoral Camera User and Installation Guide (9H1809)_Ed04 31... -
Page 36: Cleaning The Camera
Cleaning the Camera If the camera is visibly contaminated with blood and/or body fluids, you must clean the camera before disinfecting it. To clean the camera, follow these steps: Dampen (not soaked) a lint-free cloth with lukewarm water. Remove the blood and/or body fluids with the dampened lint-free cloth. Disinfecting the Camera Before each patient, the camera must be thoroughly disinfected. -
Page 37: Manufacturer
Transportation and storage temperature Operating relative humidity 10 ~ 85% RH Transportation and storage relative humidity 10 ~ 95% RH Operating atmospheric pressure 700-1060 hPa Transportation and storage atmospheric pressure 600-1060 hPa CS 1200 Intraoral Camera User and Installation Guide (9H1809)_Ed04 33... - Page 38 34 Chapter 9 Technical Specifications...
- Page 39 Carestream Dental A Division of Carestream Health, Inc. 150 Verona St. Rochester, NY 14608 For more information, visit: www.carestreamdental.com To give documentation feedback, visit: www.carestreamdental.com/documentationfeedback ©Carestream Health, Inc., 2013. 9H1809 Ed04 2013-03...
Need help?
Do you have a question about the CS 1200 and is the answer not in the manual?
Questions and answers