Table of Contents
Advertisement
Advertisement
Table of Contents

Related Manuals for GE Amersham Typhoon

Summary of Contents for GE Amersham Typhoon
- Page 1 Amersham ™ Typhoon Operating Instructions Original instructions...
-
Page 2: Table Of Contents
Main window ............................Scanning modes ........................... General settings ............................ Scan area functions ..........................Image file settings ..........................View Image mode ..........................Installation ......................Site requirements ..........................Delivery and transport ........................Setup ................................Connections ............................Amersham Typhoon Operating Instructions 29193226 AC... - Page 3 Table of Contents Operation ......................Preparing the Amersham Typhoon scanner ................6.1.1 Starting the system ........................6.1.2 Changing the filters ........................6.1.3 Custom filters ........................... Preparing the sample ......................... 6.2.1 Preparing a sample for fluorescence imaging ..............6.2.2 Preparing a sample for phosphor imaging ................
-
Page 4: Introduction
1 Introduction Introduction About this chapter This chapter contains important user information, descriptions of safety notices, regula- tory information, and intended use of the Amersham Typhoon system. In this chapter This chapter contains the following sections: Section See page 1.1 About this manual 1.2 Important user information... -
Page 5: About This Manual
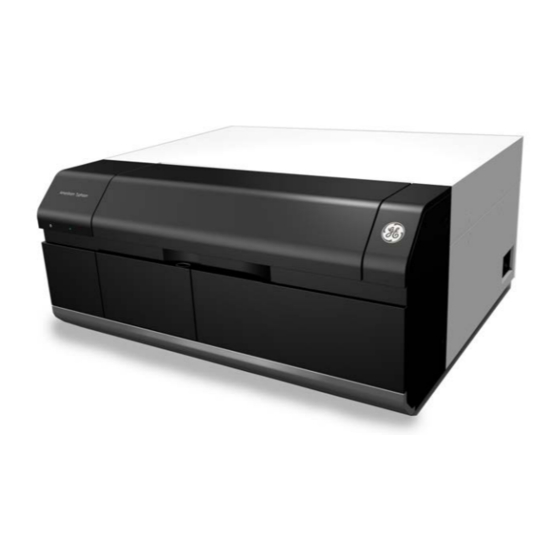
The Operating Instructions provide you with the information needed to install, operate and maintain the product in a safe way. Scope of this manual The Operating Instructions cover all configurations of Amersham Typhoon scanner and the Amersham Typhoon Control Software. The illustration below shows the Amersham Typhoon scanner. -
Page 6: Important User Information
If you do, you may be exposed to hazards that can lead to personal injury and you may cause damage to the equipment. Intended use of the Amersham Typhoon scanner The Amersham Typhoon scanner is a versatile laser scanner that can be used for many different imaging applications, including: • imaging of storage phosphor screens •... - Page 7 1 Introduction 1.2 Important user information • Amersham Typhoon scanner must be installed in accordance with the site require- ments and instructions in Chapter 5 Installation, on page Safety notices This user documentation contains safety notices (WARNING, CAUTION, and NOTICE) concerning the safe use of the product.
-
Page 8: Regulatory Information
1 Introduction 1.3 Regulatory information Regulatory information Introduction This section lists the regulations and standards that apply to Amersham Typhoon scanner. Manufacturing information The table below summarizes the required manufacturing information. Requirement Information Name and address of manufacturer GE Healthcare Bio-Sciences AB, Björkgatan 30, SE 751 84 Uppsala, Sweden... -
Page 9: Eu Directives
• used according to the Operating Instructions or user manuals, and • used in the same state as it was delivered from GE, except for alterations described in the Operating Instructions or user manuals. Amersham Typhoon Operating Instructions 29193226 AC... -
Page 10: Eurasian Customs Union
GE Healthcare Life Sciences Presnenskaya nab., 10C, 12th floor RU-123 317 Moscow, Russian Federation Telephone 1: + 7 495 411 9714 Fax nr: + 7 495 739 6932 Email: LSrus@ge.com Amersham Typhoon Operating Instructions 29193226 AC... -
Page 11: Regulations For Usa And Canada
1.3.3 Regulations for USA and Canada NRTL certification This symbol indicates that Amersham Typhoon has been certified by a Nationally Rec- ognized Testing Laboratory (NRTL). NRTL means an organization, which is recognized by the US Occupational Safety and Health Administration (OSHA) as meeting the legal requirements of Title 29 of the Code of Federal Regulations (29 CFR), Part 1910.7. -
Page 12: Korean Regulatory Information
When used in a residential environment, there is a concern of radio interference. 주의사항 A급 기기 (업무용 방송통신 기자재) 이 기기는 업무용환경에서 사용할 목적으로 적합성평가를 받은 기기 로서 가정용 환경에서 사용하는 경우 전파간섭의 우려가 있습니 다. Amersham Typhoon Operating Instructions 29193226 AC... -
Page 13: Other Regulations And Standards
EN ISO 12100 Safety of machinery. General principles for design. Risk assessment and risk reduction. EN60529, IEC60529 Degrees of protection provided by enclosures. Amersham Typhoon Operating Instructions 29193226 AC... - Page 14 (21 CFR, Chapter 1, Subchapter J). CLASS 1 CLASS 1 LASER PRODUCT LASER PRODUCT IEC60825-1:2014 EN60825-1 : 2014 The following lasers can be installed in the Amersham Typhoon scanner: Laser and class Wavelength Operating power Maximum power LD laser, class 3B 488 nm...
-
Page 15: Abbreviations
The abbreviations used in this Operating Instructions are defined as follows: Abbreviation Description 2D DIGE Two-dimensional Difference Gel Electrophoresis Optical density Photo-multiplier tube Red Green Blue Relative humidity Radioisotope Second harmonic generation nonlinear optical process Titer plate Ultraviolet radiation Near-infrared radiation Amersham Typhoon Operating Instructions 29193226 AC... -
Page 16: Safety Instructions
In this chapter Section See page 2.1 Radiation 2.2 Safety precautions 2.3 Labels 2.4 Emergency procedures 2.5 Recycling information 2.6 Declaration of Hazardous Substances (DoHS) Amersham Typhoon Operating Instructions 29193226 AC... -
Page 17: Radiation
Article 8 and Table 3 of this Notice define the limits as shown below: 1 Superficial density of radioisotope that radiates alpha rays: 4 Bq/cm 2 Superficial density of radioisotope that does not radiate alpha rays: 40 Bq/cm Amersham Typhoon Operating Instructions 29193226 AC... - Page 18 Limit of superficial pollu- tion, on page 17 above. Amersham Typhoon Operating Instructions 29193226 AC...
-
Page 19: Safety Precautions
2.2 Safety precautions Safety precautions Introduction Amersham Typhoon scanner is powered by mains voltage and handles materials that may be hazardous. Before installing, operating or maintaining the system, you must be aware of the hazards described in this manual. Follow the instructions provided to avoid personal injuries, damage to the product, or to other personnel and equipment in the area. - Page 20 WARNING Do not allow liquids, flammable materials or metallic objects to get into the Amersham Typhoon. This may result in fire or electric shock. In case of malfunction, turn off the power switch, unplug the equipment from the power outlet, then contact you local GE repre- sentative.
- Page 21 Do not use the equipment with a power supply other than that recommended. Fire and electric shock could result. WARNING The Amersham Typhoon scanner must always be connected to a grounded power outlet. WARNING Do not block access to the power switch and power cord. The power switch must always be easy to access.
- Page 22 Only authorized service personnel are allowed to install or move Amersham Typhoon scanner. Contact your local GE representative for help and advice. CAUTION Install the Amersham Typhoon scanner in a location where it will not come into contact with water or chemicals. Amersham Typhoon Operating Instructions 29193226 AC...
- Page 23 2.2 Safety precautions CAUTION • Do not connect any USB devices other than the Amersham Typhoon scanner to the computer in which the Amersham Typhoon Control Software is installed. Malfunction could result. • Use only the Amersham Typhoon Control Software during scanning.
- Page 24 Handle the sample stages and the digitization plate with care to avoid dropping them. CAUTION Be careful not to break the glass surface of the fluor stage. CAUTION Reagents used to prepare the sample should be used in accordance with the manufacturer instructions. Amersham Typhoon Operating Instructions 29193226 AC...
- Page 25 Do not leave samples in the instrument after scanning. If left, these may degrade and cause damage to the instrument. CAUTION Do not insert a storage phosphor screen in Amersham Typhoon before turning on the machine. If a storage phosphor screen is detected during the self-diagnosis of the Amersham Typhoon, the sensitivity of the storage phosphor screen may deteriorate and reduce the quality of the scanned data.
- Page 26 2 Safety instructions 2.2 Safety precautions WARNING Do not use excessive amounts of liquids for cleaning the Amersham Typhoon, this may result in product malfunction or electric shock. CAUTION Wear gloves to prevent direct contact with chemical substances. CAUTION Take care when connecting the power supply cable. Do not tug on the cable, and do not handle the connection plugs with wet hands.
-
Page 27: Labels
Amersham Typhoon scanner. System label The illustration below shows an example of a system label that is attached to Amersham Typhoon scanner. The system label identifies the product and shows electrical data and regulatory compliance. Label text Description... - Page 28 Chinese standard SJ/T11364-2014 Requirements for Concentration Limits for Certain Hazardous Substances in Electronics. This symbol indicates that Amersham Typhoon scanner has been certified by a Nationally Recognized Testing Laboratory (NRTL). Amersham Typhoon Operating Instructions 29193226 AC...
- Page 29 Operation is subject to the following two conditions: FCC rules. (1) This device may not cause harmful interference, and (2) this device must accept any interference received, including interference that may cause undersired operation. CAN ICES-3 (A)/NMB-3 (A) CAN ICES-3 (A)/NMB-3(A) Amersham Typhoon Operating Instructions 29193226 AC...
- Page 30 2 Safety instructions 2.3 Labels Symbols on the Amersham Typhoon scanner Label Meaning On/Off switch Power switch l: Power ON O: Power OFF USB port Amersham Typhoon Operating Instructions 29193226 AC...
- Page 31 2 Safety instructions 2.3 Labels Location of labels and symbols on the Amersham Typhoon scanner Amersham Typhoon Operating Instructions 29193226 AC...
- Page 32 2 Safety instructions 2.3 Labels Interlock parts inside the Amersham Typhoon scanner Never insert any foreign objects into the interlock parts to avoid potential laser exposure and injury. Amersham Typhoon Operating Instructions 29193226 AC...
-
Page 33: Emergency Procedures
2 Safety instructions 2.4 Emergency procedures Emergency procedures About this section This section describes how to do an emergency shutdown of Amersham Typhoon scanner. The section also describes the results of a power failure. Precautions WARNING Access to power switch and power cord with plug. Do not block access to the power switch and power cord. - Page 34 Action Click the Stop button in the Amersham Typhoon Control Software. Turn off the Amersham Typhoon scanner by switching the power switch on the right side of the instrument to the O position. Disconnect the power cord from the wall socket.
- Page 35 If power to the instrument has been lost, re-start the instrument as described Start the Amersham Typhoon scanner, on page Re-start the computer and Amersham Typhoon Control Software as de- scribed in Start the Amersham Typhoon Control Software, on page...
-
Page 36: Recycling Information
General instructions for disposal When taking Amersham Typhoon scanner out of service, the different materials must be separated and recycled according to national and local environmental regulations. Specific instructions for disposal... -
Page 37: Declaration Of Hazardous Substances (Dohs)
Periodic replacement of those consumables or parts to maintain the declared EFUP shall be done in accordance with the Product Maintenance Procedures. This product must not be disposed of as unsorted municipal waste, and must be collected separately and handled properly after decommissioning. Amersham Typhoon Operating Instructions 29193226 AC... - Page 38 Indicates that this hazardous substance contained in at least one of the homogeneous materials used for this part is above the limit requirement in GB/T 26572. Data listed in the table represents best information available at the time of publication. • Amersham Typhoon Operating Instructions 29193226 AC...
-
Page 39: System Description
3 System description System description About this chapter This chapter gives an overview of Amersham Typhoon scanner and a brief description of its function. In this chapter Section See page 3.1 System overview 3.2 Illustrations 3.3 Stages 3.4 Filters Amersham Typhoon Operating Instructions 29193226 AC... -
Page 40: System Overview
System overview Introduction The Amersham Typhoon scanner is a laser scanner that can be used for many different imaging applications. The scanner is part of the complete Amersham Typhoon system, that consists of the scanner, an eraser and a cabinet. - Page 41 Main components in Amersham Typhoon scanner, on page 132 Laser specifications, on page 132. Scanning modes The Amersham Typhoon scanner can be used for scanning with three different scanning modes. Mode Used for Fluorescence Scanning fluorescent samples using different combina- •...
- Page 42 The multi-alkali PMT has a wide spectral response from the ultraviolet to the near infrared region. It is the detector of choice for fluorescence applications. Cooling fans The Amersham Typhoon scanner has cooling fans that prevent the internal temperature from rising. Instrument control The Amersham Typhoon scanner is operated using Amersham Typhoon Control Software.
-
Page 43: Illustrations
3 System description 3.2 Illustrations Illustrations Front and right view of the Amersham Typhoon scanner Part Function Instrument panel Main scanner door Scanner door handle Instrument cover Power cord connector Power switch Filter module Filter door Amersham Typhoon Operating Instructions 29193226 AC... - Page 44 3 System description 3.2 Illustrations Rear and left view of the Amersham Typhoon scanner Part Function Air intake filter and fan Exhaust outlet Exhaust outlet USB connector Amersham Typhoon Operating Instructions 29193226 AC...
- Page 45 If flashing: Instrument is starting up or • shutting down Blue LED light The instrument is scanning, or • The filters are being moved inside the • scanner (after filter installation). Red LED light Error Amersham Typhoon Operating Instructions 29193226 AC...
- Page 46 3 System description 3.2 Illustrations Filter module and stage Part Function Filter module Stage Amersham Typhoon Operating Instructions 29193226 AC...
-
Page 47: Stages
This section describes the different stages and accessories that are supplied with the Amersham Typhoon scanner. In this section Section See page 3.3.1 Overview of stages 3.3.2 Fluor stage with accessories 3.3.3 Phosphor stage with accessories 3.3.4 Multi stage with accessories Amersham Typhoon Operating Instructions 29193226 AC... -
Page 48: Overview Of Stages
3 System description 3.3 Stages 3.3.1 Overview of stages 3.3.1 Overview of stages Stages Three types of stages can be used with the Amersham Typhoon scanner depending on the type of scanning: • Fluor stage • Phosphor stage • Multi stage... -
Page 49: Fluor Stage With Accessories
The digitization plate is a fluorescent plate that emits light when exposed to a laser beam. The digitization plate is used together with spacers for densitometry (measurement of relative optical density) and digitization of samples. Amersham Typhoon Operating Instructions 29193226 AC... - Page 50 The digitization/OD spacers can be used both for digitization and for OD measurements, depending on the orientation and placement of the spacers. The illustation below shows the orientation in which the spacers are used for digitization. Amersham Typhoon Operating Instructions 29193226 AC...
- Page 51 Spacer positioning The spacers are placed and secured on the fluor stage by hooking the spacers onto grooves on the fluor stage. The following illustration shows the positions of the grooves on the fluor stage. Amersham Typhoon Operating Instructions 29193226 AC...
- Page 52 The membrane weight is used to press fluorescent membranes flat against the fluor stage. The use of a membrane weight improves image quality, since the membrane weight removes air bubbles and reduces vibration of the membrane during scanning. Amersham Typhoon Operating Instructions 29193226 AC...
-
Page 53: Phosphor Stage With Accessories
(PMT). In this way, the Amersham Typhoon scanner creates a digital image of the radiated areas of the storage phosphor screen. - Page 54 Exposure cassettes are used for exposing storage phosphor screens to radioactively labeled samples. The time of exposure varies depending on the samples. Suction rod The suction rod is used to lift up or place the storage phosphor screen on the phosphor stage. Amersham Typhoon Operating Instructions 29193226 AC...
-
Page 55: Multi Stage With Accessories
Height adjustment ridges for positioning the titer plate holder and glass cassettes (3 mm and 5 mm) Movable guide plate Lock screw, holds the movable guide plate on the multi stage Movable guide plate Amersham Typhoon Operating Instructions 29193226 AC... - Page 56 The glass plate guides are used in- stead of the default movable guide plates. The thickness of each glass in the glass cas- sette should be 5 mm. Amersham Typhoon Operating Instructions 29193226 AC...
-
Page 57: Filters
Custom filters It is also possible to use custom (third party) filters. Amersham Typhoon scanner is sup- plied with two accessory custom filter holders in which these custom filters can be mounted. These filters are recognized by the scanner as Custom1 and Custom2 filters. -
Page 58: Amersham Typhoon Control Software
4 Amersham Typhoon Control Software Amersham Typhoon Control Software About this chapter This chapter describes the user interface of the Amersham Typhoon Control Software. In this chapter Section See page 4.1 Main window 4.2 Scanning modes 4.3 General settings 4.4 Scan area functions 4.5 Image file settings... -
Page 59: Main Window
This section gives an overview of the main window and describes the settings that can be made. Example of the main window When the Amersham Typhoon Control Software is started, the main window appears. The main window contains the following panes and fields. Part... - Page 60 If a method is edited by changing any parameter setting, the user can save the new method with a new method name. For more information about scan settings in the different scanning modes, refer to Sec- tion 4.2 Scanning modes, on page Amersham Typhoon Operating Instructions 29193226 AC...
- Page 61 A slow scan speed reduces noise by data averaging. Adds additional scans. Changes between scan areas (DIGE method). Adds an annotation (DIGE method). An annotation can be deleted with the small cross. Fluorescence mode Phosphor Imaging mode Densitometry mode Amersham Typhoon Operating Instructions 29193226 AC...
- Page 62 Blue frame (white area) indicates a scan • area that has been disabled. A disabled scan area will be omitted during scan- ning. For more information about the Stage/Area settings, refer to Section 4.4 Scan area functions, on page Amersham Typhoon Operating Instructions 29193226 AC...
- Page 63 Method and scanning Button Function Save Method Opens the Input method name dialog box to save the method Delete Method Deletes the method Pre Scan Starts a pre-scan Scan Starts a scan Amersham Typhoon Operating Instructions 29193226 AC...
- Page 64 List of installed lasers Filter List of installed filters List of photo-multiplier tubes Status Displays the current status of the Amersham Typhoon scanner. The status of the scanner can be one of the following: Scanner not connected • Initializing •...
- Page 65 View Image Displays the image in the View Image mode after a pre-scan or a scan. Refer to Section 4.6 View Image mode, on page 78 for more information about the View Image mode. Amersham Typhoon Operating Instructions 29193226 AC...
-
Page 66: Scanning Modes
The scan settings and Stage/Area area settings can be edited in a default method. An edited method can be saved under a new name for re-use at a later time. The following illustration shows and example of a DIGE method set up screen. Amersham Typhoon Operating Instructions 29193226 AC... - Page 67 4 Amersham Typhoon Control Software 4.2 Scanning modes Phosphor imaging tab The following illustration shows an example of a Phosphor Imaging set up screen. Amersham Typhoon Operating Instructions 29193226 AC...
- Page 68 1 OD method for measurements of relative optical density 2 Digitization method blue (blue laser) 3 Digitization method green (green laser) The following illustration shows an example of the OD method set up screen. Amersham Typhoon Operating Instructions 29193226 AC...
-
Page 69: General Settings
Laser and filter combinations Amersham Typhoon scanner comes with a number of default laser and filter combina- tions. New laser, filter, and detector combinations can be created on the Laser & Filter tab in the General settings dialog. - Page 70 For fluorescence scanning, only the multi-alkali PMT can be used. Auto correction Amersham Typhoon scanner is installed with correction files. It is recommended to always use the correction files (auto correction on). The auto correction can be turned off in the General settings dialog on the Auto correction tab.
- Page 71 Phosphor Imaging. This selection only affects how images are displayed, it does not affect the saved image. Service log In the General settings dialog on the Service tab, a log file can be generated which is used for instrument service or troubleshooting. Amersham Typhoon Operating Instructions 29193226 AC...
-
Page 72: Scan Area Functions
Change the position of a scan area Click and drag the blue box. Change the size of a scan area Click and drag the edges of the blue box. Amersham Typhoon Operating Instructions 29193226 AC... - Page 73 When the name of one scan area is changed, all other scan areas will be renamed as well. Remove... Deletes the scan area. Setting... Opens the dialog box Scan Area Settings, where the size and position of the scan area can be adjusted. Amersham Typhoon Operating Instructions 29193226 AC...
- Page 74 • the scan area. Area Assigns a name (A, B, C, ...) to the scan area. When the name of one scan area is changed, all other scan areas will be renamed as well. Amersham Typhoon Operating Instructions 29193226 AC...
- Page 75 Enables or disables an individual scan area. A tick mark indicates that the scan area is enabled and will be included in the scan. Note: A disabled scan area will be omitted during scanning. Amersham Typhoon Operating Instructions 29193226 AC...
-
Page 76: Image File Settings
In addition to the .img and .gel formats, the .tif format can be used for presentation of fluorescence and phosphor imaging data. In the densitometry mode, the .tif format is used for saving digitization images and relative OD scans. Amersham Typhoon Operating Instructions 29193226 AC... - Page 77 For quantitative analysis use the .img format or the .gel file format. • For DIGE applications, and when image properties need to be read in IQTL, use the .gel format. In the Densitometry mode, the data is automatically converted and saved as a .tif file. Amersham Typhoon Operating Instructions 29193226 AC...
-
Page 78: View Image Mode
PMT that gives a non-saturated image. Use the Estimated tab of the Adjust PMT field to Pre-scan simulate images using different PMT settings. Scanned image. Pre-scan and scan Amersham Typhoon Operating Instructions 29193226 AC... - Page 79 Linear The light intensities are displayed using a linear tone curve. Sigmoid The light intensities are displayed using a sigmoid (S-shaped) tone curve. Tip: It is recommended to use the linear curve setting Amersham Typhoon Operating Instructions 29193226 AC...
- Page 80 To display a larger or smaller interval of intensities, drag the red lines to adjust the Low and High values, or type the limits directly in the Low and High boxes. Amersham Typhoon Operating Instructions 29193226 AC...
-
Page 81: Installation
This chapter provides required information to enable users and service personnel to unpack, install, and transport Amersham Typhoon scanner. CAUTION Only authorized service personnel are allowed to install or move Amersham Typhoon scanner. Contact your local GE representative for help and advice. In this chapter This chapter contains the following sections:... -
Page 82: Site Requirements
5 Installation 5.1 Site requirements Site requirements Precautions CAUTION Install the Amersham Typhoon scanner in a location where it will not come into contact with water or chemicals. NOTICE The Amersham Typhoon is intended for indoor use only. Space requirements... - Page 83 5 Installation 5.1 Site requirements Dimensions The following illustration shows the dimensions of Amersham Typhoon scanner. 40 cm 80 cm 90 cm Amersham Typhoon scanner weighs 90 kg. Environmental requirements Parameter Requirement Ambient temperature, operation 18°C to 28°C Max. relative humidity, operation 20% to 70%, non-condensing Max.
- Page 84 Otherwise loss of data might occur. Note: At installation, the GE service engineer will turn off the automatic sleep mode of the computer. Amersham Typhoon Operating Instructions 29193226 AC...
-
Page 85: Delivery And Transport
Turn off the power switch and remove connecting cables before moving the equipment. If you need to transport the Amersham Typhoon scanner, contact your local GE repre- sentative for help and advice. See also Removal from the controlled area, on page... -
Page 86: Setup
Amersham Typhoon scanner. • The air intake fan on the rear side of the Amersham Typhoon scanner is unobstructed. • The air exhaust outlets on the right and rear of the Amersham Typhoon scanner are unobstructed. - Page 87 NOTICE Do not place the Amersham Eraser and Amersham Cabinet to the right of the scanner, because then they block the access to the power switch and power outlet. Amersham Typhoon Operating Instructions 29193226 AC...
-
Page 88: Connections
Plug in the power cord in the power cord connector on Amersham Typhoon scanner, and connect the power cord to a grounded wall outlet. Amersham Typhoon scanner uses a special AC power cord. Only use power cords that are specified in GE service manuals or by GE service personnel. - Page 89 5.4 Connections Communication CAUTION • Do not connect any USB devices other than the Amersham Typhoon scanner to the computer in which the Amersham Typhoon Control Software is installed. Malfunction could result. • Use only the Amersham Typhoon Control Software during scanning.
- Page 90 5 Installation 5.4 Connections Installing Amersham Typhoon Control Software All tasks related to software installation require a computer account with administrator privileges. Amersham Typhoon Operating Instructions 29193226 AC...
-
Page 91: Operation
6 Operation Operation About this chapter This chapter contains the information required to operate the Amersham Typhoon scanner. In this chapter Section See page 6.1 Preparing the Amersham Typhoon scanner 6.2 Preparing the sample 6.3 Performing a scan 6.4 Procedures after a scan... - Page 92 NOTICE The automatic sleep mode of the computer should be turned off to prevent the computer from entering sleep mode during a scan. Otherwise loss of data might occur. Amersham Typhoon Operating Instructions 29193226 AC...
-
Page 93: Preparing The Amersham Typhoon Scanner
6 Operation 6.1 Preparing the Amersham Typhoon scanner Preparing the Amersham Typhoon scanner About this section This section describes how to prepare the Amersham Typhoon scanner for a scan. In this section Section See page 6.1.1 Starting the system 6.1.2 Changing the filters 6.1.3 Custom filters... -
Page 94: Starting The System
Start the Amersham Typhoon scanner CAUTION Do not insert a storage phosphor screen in Amersham Typhoon before turning on the machine. If a storage phosphor screen is detected during the self-diagnosis of the Amersham Typhoon, the sensitivity of the storage phosphor screen may deteriorate and reduce the quality of the scanned data. - Page 95 Start the Amersham Typhoon Control Software Step Action Start Amersham Typhoon Control Software from the Start menu, or use the desktop shortcut. The following window is displayed while the Amersham Typhoon Control Software is launched. Amersham Typhoon Operating Instructions 29193226 AC...
- Page 96 6.1 Preparing the Amersham Typhoon scanner 6.1.1 Starting the system Step Action When the Amersham Typhoon Control Software is ready, the main window is displayed. See Example of the main window, on page The instrument status is displayed in the Status field, see also...
-
Page 97: Changing The Filters
6.1.2 Changing the filters 6.1.2 Changing the filters Introduction The filters that are installed in the Amersham Typhoon scanner are listed in the Instru- ment status pane in the main window of the Amersham Typhoon Control Software, see also Instrument status, on page It is possible to exchange filters if necessary. - Page 98 6 Operation 6.1 Preparing the Amersham Typhoon scanner 6.1.2 Changing the filters Step Action Pinch the metal tab on the filter module, and pull out the filter module. Replace filters in the filter module Step Action Slide the holder on the filter module to the left to open the filter module.
- Page 99 6 Operation 6.1 Preparing the Amersham Typhoon scanner 6.1.2 Changing the filters Step Action Pull out the filter from under the metal ridge, and remove the filter. Insert a new filter in the filter module as follows: 1 Hook a new filter under the metal ridge on the rear of the filter module.
- Page 100 Close the filter door. In the Amersham Typhoon Control Software, check the list of filters in the Instrument status pane. Make sure that the newly installed filters are cor- rectly registered.
-
Page 101: Custom Filters
6.1.3 Custom filters Introduction It is possible to use custom (third party) filters with the Amersham Typhoon scanner. The custom filters have to be installed in the filter holder boxes supplied by GE. Insert a custom filter in the filter holder Follow the steps below to insert a custom filter in the filter holder. - Page 102 6 Operation 6.1 Preparing the Amersham Typhoon scanner 6.1.3 Custom filters Step Action Insert the stopper cylinder in the filter holder and tighten it with the tool. Amersham Typhoon Operating Instructions 29193226 AC...
-
Page 103: Preparing The Sample
6.2.3 Preparing a sample for densitometry Precautions CAUTION Always wear gloves, protective glasses and a lab coat or similar when handling samples. CAUTION Handle the sample stages and the digitization plate with care to avoid dropping them. Amersham Typhoon Operating Instructions 29193226 AC... -
Page 104: Preparing A Sample For Fluorescence Imaging
Follow the steps below to prepare a gel or membrane sample for fluorescence imaging. Step Action Place a gel or membrane on the fluor stage. Remove any air bubbles between the gel or membrane and the stage. Amersham Typhoon Operating Instructions 29193226 AC... - Page 105 If the sample is a membrane, place a membrane weight on top of the membrane to reduce vibrations during the scan. Open the main scanner door of the Amersham Typhoon scanner. Place the stage on the stage holder, with the printed side of the stage facing up, and the handle of the stage facing to the front.
- Page 106 Close the spring locks that hold the titer plate holder in place. Place the titer plate on the desired position in the titer plate holder. Open the main scanner door of the Amersham Typhoon scanner. Place the stage on the stage holder, with the printed side of the stage facing up, and the handle of the stage facing to the front.
- Page 107 Place the glass slide holder on the titer plate holder, with the glass slides facing down. Open the main scanner door of the Amersham Typhoon scanner. Place the stage on the stage holder, with the printed side of the stage facing up, and the handle of the stage facing to the front.
- Page 108 When scanning large glass cassettes (max. 33 × 42 cm) on the multi stage, the default movable guide plates have to be replaced by the glass plate guide for large glass cas- settes. These glass plate guides are available as option to the Amersham Typhoon scanner, see also...
-
Page 109: Preparing A Sample For Phosphor Imaging
NOTICE Remove the storage phosphor screen from the Amersham Typhoon scanner when not in use. Store the storage phosphor screens in a horizontal position, protected from moisture. - Page 110 NOTICE Protect exposed storage phosphor screens from light until the scanning is finished. Required tools and materials • Storage phosphor screen cassette • Radioisotope-labeled samples • Gloves • Plastic film • Soft, lint-free tissues Amersham Typhoon Operating Instructions 29193226 AC...
- Page 111 Tip: For increased image quality, minimize the time between exposing the storage phosphor screen and scanning it with the Amersham Typhoon scanner. Step Action If necessary, clean the surface of the storage phosphor screen with a soft, lint-free tissue.
- Page 112 Make sure that the notch of the storage phosphor screen is placed at the corner of the gauge with the A1 coordinates. Close the cassette. Press on the cover of the cassette until the cover clicks into place. Amersham Typhoon Operating Instructions 29193226 AC...
- Page 113 1 Press one end of the suction rod against the storage phosphor screen. 2 Cover the other end of the suction rod with a finger. 3 Lift up the storage phosphor screen with the suction rod. Amersham Typhoon Operating Instructions 29193226 AC...
- Page 114 The phosphor stage is magnetic, so that it holds the storage phosphor screen in place. Placing the phosphor stage in the scanner Step Action Open the main scanner door of the Amersham Typhoon scanner. Amersham Typhoon Operating Instructions 29193226 AC...
- Page 115 The storage phosphor screen can be erased using the Amersham Eraser in 10-20 min, if it is not overly exposed. For more information, refer to Amersham Eraser Operating Instructions, 29187307AA. After the storage phosphor screen is erased, it can be re-used. Amersham Typhoon Operating Instructions 29193226 AC...
-
Page 116: Preparing A Sample For Densitometry
Prepare the sample The illustrations under the Densitometry tab in the main window of the Amersham Typhoon Control Software provide instructions for placing gels, spacers and the digitization plate. The instructions provided in the software are adapted to the den- sitometry method that is chosen. -
Page 117: Performing A Scan
The pre-scan feature is not available in the phosphor imaging mode. Step Action In the main window of the Amersham Typhoon Control Software, click on one of the scanning mode tabs to choose the scanning mode. See also Scanning mode tabs, on page... - Page 118 Section 4.6 View Image mode, on page Click Back to return to the main screen, • Click Scan to start a scan, • Adjust the PMT voltage, and click Scan to start a scan. • Amersham Typhoon Operating Instructions 29193226 AC...
- Page 119 Avoid any shock or vibration to the instrument during scanning, or some streaks appear in the image. Step Action In the main window of the Amersham Typhoon Control Software, click on one of the scanning mode tabs to choose the scanning mode, see Scanning mode tabs, on page...
- Page 120 For the DIGE method it is not possible to choose a new file name and the sample annotations are not included in the Save as option. If necessary, choose a new save location to keep the original DIGE data. Amersham Typhoon Operating Instructions 29193226 AC...
- Page 121 Select a file format in the Save as type: buttons. For the DIGE method the files are saved in a folder with an additional DS- file. Click Save. Result: The image or images are saved. Amersham Typhoon Operating Instructions 29193226 AC...
-
Page 122: Procedures After A Scan
Press the On/Off button on the front panel. Result: The white Ready LED blinks and then goes out. Push the power switch on the right side of the instrument to the O position. Result: The instrument is turned off. Amersham Typhoon Operating Instructions 29193226 AC... - Page 123 6 Operation 6.4 Procedures after a scan CAUTION Unplug the equipment if it will not be used for an extended period. Amersham Typhoon Operating Instructions 29193226 AC...
-
Page 124: Maintenance
WARNING Do not use excessive amounts of liquids for cleaning the Amersham Typhoon, this may result in product malfunction or electric shock. CAUTION Turn the power switch off before cleaning the inside of the equip- ment. - Page 125 Place the stage in the stage cabinet. Recommended cleaning agents The accessories may be cleaned with water and one of the following: • 70% ethanol • Mild and neutral detergent • Isopropanol • 6% H Amersham Typhoon Operating Instructions 29193226 AC...
- Page 126 7 Maintenance Storing the stages Store the stages in the cabinet when they are not in use. DO NOT store stages inside the Amersham Typhoon scanner. Amersham Typhoon Operating Instructions 29193226 AC...
-
Page 127: Troubleshooting
8 Troubleshooting Troubleshooting About this chapter This chapter describes various problems that may occur with the Amersham Typhoon scanner. Suggestions for possible corrective actions are given. In this chapter This chapter contains the following sections: Section See page 8.1 General errors and warnings 8.2 Error messages... -
Page 128: General Errors And Warnings
Take note of the error code and error message on the monitor. Turn off the Amersham Typhoon scanner and the computer, wait 10 seconds and turn them on again. Try to perform the action again. If the error persists, contact your GE repre- sentative. General error messages... -
Page 129: Error Messages
The scan was stopped because The scanned image was overex- Decrease the PMT voltage in the of overexposure. Set a lower posed due to a high PMT voltage Scan settings pane. PMT voltage and restart the setting. scan. Amersham Typhoon Operating Instructions 29193226 AC... - Page 130 Contact your GE representative Please restart the Amersham if the problem persists. Typhoon scanner and control software, and try to scan again. Contact your GE representative if the problem persists. Amersham Typhoon Operating Instructions 29193226 AC...
-
Page 131: Reference Information
9 Reference information Reference information About this chapter This chapter lists the technical specifications of the Amersham Typhoon scanner. In this chapter Section See page 9.1 Specifications 9.2 Software 9.3 Ordering information 9.4 Health and Safety Declaration Forms Amersham Typhoon Operating Instructions 29193226 AC... -
Page 132: Specifications
9 Reference information 9.1 Specifications Specifications Main components in Amersham Typhoon scanner Amersham Typhoon scanners are available in four configurations. Depending on the configuration, the Amersham Typhoon scanner is equipped with the following lasers. Functions Wave- Amersham Amersham Amersham Amersham... - Page 133 50/60 Hz Max. current 2.5 to 1.0 A Noise levels Parameter Data Noise < 60 dB (A) A-weighted sound pressure level LAeq, t ≤ 60 dB, fast (t=0.25 s, 1 m from the instrument) Amersham Typhoon Operating Instructions 29193226 AC...
- Page 134 Amersham Typhoon scanner Left 10 cm Rear 10 cm 10 cm Placement A stable laboratory bench with a load capacity of 2940 N (300 kg), or higher. The bench must be level within two degrees. Amersham Typhoon Operating Instructions 29193226 AC...
-
Page 135: Software
Maximum image file size after scan If pixel size is set as Image file size 10 µm 3510 MB 25 µm 562 MB 50 µm 140 MB 100 µm 35 MB 200 µm 9 MB Amersham Typhoon Operating Instructions 29193226 AC... -
Page 136: Ordering Information
Amersham Typhoon accessories Product Product code Phosphor stage 29187195 Fluor stage 29187197 Multi stage 29187198 Membrane weight 29191518 Digitization plate 29191517 Sample guide 29191519 Suction rod 29191516 Titer plate holder 29191520 Glass slide holder 29191521 Amersham Typhoon Operating Instructions 29193226 AC... - Page 137 9 Reference information 9.3 Ordering information Product Product code Custom filter boxes 29191540 Glass plate guide (33 × 42 cm) 29215514 Amersham Typhoon Operating Instructions 29193226 AC...
-
Page 138: Health And Safety Declaration Forms
Service Ticket #: To make the mutual protection and safety of GE service personnel and our customers, all equipment and work areas must be clean and free of any hazardous contaminants before a Service Engineer starts a repair. To avoid delays in the servicing of your equipment, please complete this checklist and present it to the Service Engineer upon arrival. - Page 139 To make sure the mutual protection and safety of GE personnel, our customers, transportation personnel and our environment, all equipment must be clean and free of any hazardous contaminants before shipping to GE. To avoid delays in the processing of your equipment, please complete this checklist and include it with your return.
-
Page 140: Index
9 Cleaning air intake, 44 instrument, 125 exhaust, 44 recommended agents, 125 FCC compliance, 11 stage, 125 File format, 76 Computer requirements, 84, choice, 77 description, 76 Configurations, 40, 132 File size, 135 Amersham Typhoon Operating Instructions 29193226 AC... - Page 141 Phosphor stage, 53 Instrument panel, 43, 45 place in scanner, 114 Instrument status, 60, 64 Photomultiplier tube, 41 Intended use, 6 Place Amersham Cabinet, 87 Interlocks, 32 Place Amersham Eraser, 87 International standards, 13 Amersham Typhoon Operating Instructions 29193226 AC...
- Page 142 22 Stage/Area settings, 59, 62, 72 Sample spacer, 50 Standards positioning, 52 lasers, 14 Scan machinery, 13 save image, 120 Start, 94 start, 119 Status, 64 stop, 120 Storage, 85 Scan Area Settings, 74 Amersham Typhoon Operating Instructions 29193226 AC...
- Page 143 Suction rod, 54, 111 UL conformity, 28 Symbols, 30 USB connector, 44, 89 System start, 94 System label, 27 View image mode, 60, 78 Titer plate, 56 Waste, 28 Transport, 85 Weight, 83, 133 Troubleshooting Amersham Typhoon Operating Instructions 29193226 AC...
- Page 144 All goods and services are sold subject to the terms and conditions of sale of Sweden the company within GE Healthcare which supplies them. A copy of these terms and conditions is available on request. Contact your local GE Healthcare repre- www.gelifesciences.com...
Need help?
Do you have a question about the Amersham Typhoon and is the answer not in the manual?
Questions and answers