Table of Contents
Advertisement
Quick Links
Creative Playthings
®
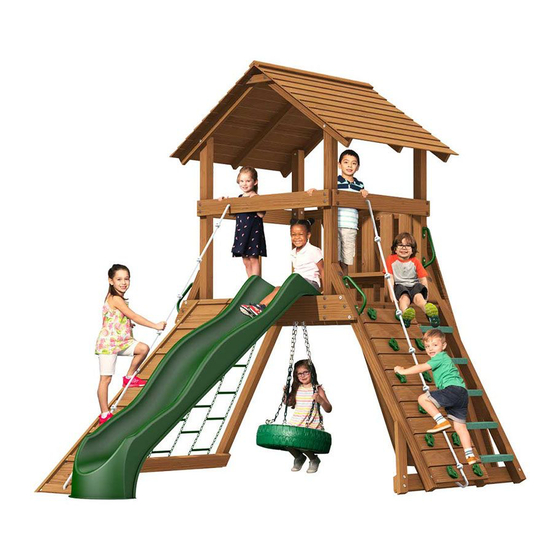
NORFOLK II
ASSEMBLY MANUAL
All hardware on this set
is coated for corrosion re-
sistance. If non-Creative
Playthings hardware is
used, it must be galvanized
or stainless steel.
Please read the owner's manual before assembling your play set.
It provides additional information on the care and use of your play set. You must
carefully read the entire instruction manual before proceeding with the assembly
or use of your new play set.
Creative Playthings takes great care to design its products with your child's safety
in mind. However, only with careful supervision and proper safety instructions,
can you be assured of safe play time on any product designed for children.
This product is intended for single family home/residential use only and
not intended for use in any public setting. Placement in any public setting
constitutes a misuse of this product.
Advertisement
Table of Contents

Related Manuals for Creative Playthings NORFOLK II


Summary of Contents for Creative Playthings NORFOLK II
- Page 1 Creative Playthings takes great care to design its products with your child’s safety in mind. However, only with careful supervision and proper safety instructions, can you be assured of safe play time on any product designed for children.
-
Page 2: Assembly Safety
• Until assembly is complete, DO NOT let your children use the Play Set. • Never fasten anything not approved by Creative Playthings to your Play Set. Accessories or items not ap- proved by Creative Playthings include; Dog runs, clothes lines, electrical devices, or bird feeders etc. -
Page 3: Safe Play Area
• The Norfolk II gym has ground dimensions of 11'-8" x 6'-6". • The Norfolk II play set requires a level ground surface of 13'-8" x 18'-6' for a Safe Play Area • Additional accessories such as slide or swing beam may increase the size of the Safe Play Area. - Page 4 #8 x 1-5/8" Screw Hex Bolt 3/8 x 5-1/2" #8 x 1-1/4" Screw 3/8 x 5" Lag Screw 1/4 x 1-1/2" Hex Bolt 3/8 x 7" Lag Screw NORFOLK II Page 4 © Copyright 2016, Creative Playthings 19944-200 Rev E (01-19)
-
Page 5: Hardware Bags
26 17001-104 Weld Nut 1/4" 17 12017-207 Lock Washer 3/8" CREATIVE PLAYTHINGS PLAY SETS USE A FEW STANDARD CONNECTIONS. BECOME FAMILIAR WITH THESE CONNECTIONS TO EASE ASSEMBLY AND ENSURE A SAFER PLAY PRODUCT FOR YOUR CHILDREN. Hex Bolt & Weld Nut Assembly Procedure: Assembly Layout: Align the holes in the parts to be fastened. - Page 6 PLAYSET VIEW NORFOLK II Page 6 © Copyright 2016, Creative Playthings 19944-200 Rev E (01-19)
-
Page 7: Component View
COMPONENT VIEW Take inventory of all parts, making sure nothing is missing or defective. If you find that parts are missing or defective call the Creative Playthings Customer Service Department at 1-800-598-4997. * Not visible in illustration on Page 6... -
Page 8: Maintenance Instructions
• Check structure twice monthly during usage for any evidence of deterioration. If upon inspection, hardware has sharp edges, rusted or structural pieces have signs of premature failure; replace them through Creative Playthings Customer Service. • Oil all metallic moving parts monthly during the usage season. -
Page 9: Step 1 - Platform Frame
Washer in each end. Secure the middle of the Climber Block with three #8 x 1-5/8" Screws. 7/8" f t s i d e t h e 5/16 x 5-1/2" Lag Screw NORFOLK II Page 9 © Copyright 2016, Creative Playthings 19944-200 Rev E (01-19) - Page 10 End Rope Support. The hole should be closest to the front of the gym. t h e i d e NORFOLK II Page 10 © Copyright 2016, Creative Playthings 19944-200 Rev E (01-19)
- Page 11 3/8" Weld Nut STEP 8 – Tip onto Back: With the help of another person, gently tip the assembly onto its back, with the Weld Nuts facing the ground. NORFOLK II Page 11 © Copyright 2016, Creative Playthings 19944-200 Rev E (01-19)
- Page 12 3/8 x 4" Hex Bolt as shown, using two 5/16 x 4" Hex Bolt Assemblies. Tighten and hammer so the Weld Nuts are flush with surface of this Leg. NORFOLK II Page 12 © Copyright 2016, Creative Playthings 19944-200 Rev E (01-19)
- Page 13 3/8 x 4" Hex Bolt Assemblies. Fasten the Leg to the Cargo Base Rail as shown, using two 5/16 x 4" Hex Bolt Assemblies. 3/8 x 4" Hex Bolt NORFOLK II Page 13 © Copyright 2016, Creative Playthings 19944-200 Rev E (01-19)
- Page 14 Posts where the holes in the legs meet the posts. Fasten the Legs to the Posts using 3/8 x 5" Lag Screws and 3/8" Flat Washers. 3/8 x 5" Lag Screw NORFOLK II Page 14 © Copyright 2016, Creative Playthings 19944-200 Rev E (01-19)
-
Page 15: Step 18 - Side Supports
Base Rail fastener, tighten and hammer so the Weld Nut is flush with surface of the Step Support. Tighten and hammer so Weld Nut is flush with surface Stair Support NORFOLK II Page 15 © Copyright 2016, Creative Playthings 19944-200 Rev E (01-19) - Page 16 Rock, and not protrude more than a 1/8" past the end of the weld nut. Protruding bolts can be a hazard to users, replace any protruding bolts. NORFOLK II Page 16 © Copyright 2016, Creative Playthings 19944-200 Rev E (01-19)
- Page 17 The ends of the Ridge Cap should be flush with the ends of the roof. From inside the Gym, fasten the Ridge Cap using #8 x 1-1/4" screws, through the pilot holes and into the Ridge Cap. NORFOLK II Page 17 © Copyright 2016, Creative Playthings 19944-200 Rev E (01-19)
- Page 18 Mark the positions of the holes in the Grip. Drill and fasten the Hand Grip as above. Note: Use a C-Wrench or ratcheting box wrench to tight- en the Lag Screws; a power tool can scar the Hand Grip. NORFOLK II Page 18 © Copyright 2016, Creative Playthings 19944-200 Rev E (01-19)
- Page 19 Loop the quick links to the third link from the end of the Chain. Tighten the quick-links using a C-wrench. NORFOLK II Page 19 © Copyright 2016, Creative Playthings 19944-200 Rev E (01-19)
- Page 20 Check the area is clear of tools before allowing children to play on the swing set. Save all instructions and receipts in case it becomes necessary to contact Creative Playthings for warranty service and/or part replacement. The warranty can be found in your Owner’s Manual.
Need help?
Do you have a question about the NORFOLK II and is the answer not in the manual?
Questions and answers