Siemens Sinamics S110 Function Manual
Hide thumbs
Also See for Sinamics S110:
- List manual (1288 pages) ,
- Function manual (512 pages) ,
- Manual (268 pages)
Table of Contents
Advertisement
Quick Links
Advertisement
Table of Contents

Related Manuals for Siemens Sinamics S110


Summary of Contents for Siemens Sinamics S110
- Page 1 SINAMICS S110 Function Manual · 01/2011 SINAMICS...
- Page 3 ___________________ Function Manual Preface General information for ___________________ commissioning Commissioning preparations ___________________ for PROFIBUS SINAMICS Commissioning with ___________________ PROFIBUS S110 Commissioning with ___________________ Function Manual CANopen ___________________ Diagnostics Function Manual Parameterization using the ___________________ Basic Operator Panel 20 ___________________ Drive functions ___________________ Safety Integrated Functions ___________________...
- Page 4 Note the following: WARNING Siemens products may only be used for the applications described in the catalog and in the relevant technical documentation. If products and components from other manufacturers are used, these must be recommended or approved by Siemens. Proper transport, storage, installation, assembly, commissioning, operation and maintenance are required to ensure that the products operate safely and without any problems.
-
Page 5: Preface
Siemens' content, and adapt it for your own machine documentation: http://www.siemens.com/mdm Training Using the following link, you can find information on SITRAIN - training from Siemens for products, systems and automation engineering solutions: http://www.siemens.com/sitrain FAQs You can find Frequently Asked Questions in the Service&Support pages under Product Support: http://support.automation.siemens.com... - Page 6 SINAMICS S110 Equipment Manual Commissioning STARTER commissioning tool SINAMICS S110 Getting Started SINAMICS S110 Function Manual Drive Functions SINAMICS S110 List Manual Usage / operation SINAMICS S110 Function Manual Drive Functions SINAMICS S110 List Manual ...
- Page 7 The EC Declaration of Conformity for the EMC Directive can be found on the Internet at: http://support.automation.siemens.com There – as a search term – enter the number 15257461 or contact your local Siemens office. The EC Declaration of Conformity for the Low Voltage Directive can be found on the Internet http://support.automation.siemens.com...
- Page 8 The Safety Integrated functions of SINAMICS components are generally certified by independent institutes. An up-to-date list of certified components is available on request from your local Siemens office. If you have any questions relating to certifications that have not been completed, please ask your Siemens contact.
- Page 9 Preface ESD information CAUTION Electrostatic sensitive devices (ESD) are single components, integrated circuits or devices that can be damaged by electrostatic fields or electrostatic discharges. Regulations for handling ESD components: When handling components, make sure that personnel, workplaces, and packaging are well grounded.
- Page 10 Preface General safety guidelines DANGER Commissioning is absolutely prohibited until it has been completely ensured that the machine in which the components described here are to be installed is in full compliance with the provisions of the EC Machinery Directive. Only appropriately qualified personnel may install, commission, and maintain SINAMICS S devices.
- Page 11 Preface DANGER As part of routine tests, SINAMICS S components will undergo a voltage test in accordance with EN 61800-5-1. Before the voltage test is performed on the electrical equipment of machines acc. to EN 60204-1, Section 18.4, all connectors of SINAMICS S equipment must be disconnected/unplugged to prevent the equipment from being damaged.
- Page 12 Preface Function Manual Function Manual, 01/2011, 6SL3097-4AB10-0BP3...
-
Page 13: Table Of Contents
Table of contents Preface ..............................3 General information for commissioning....................21 Explanations regarding the STARTER user interface ..............21 BICO interconnection procedure in STARTER................23 DRIVE-CLiQ interface for CU305 ....................32 Notes on the commissioning of a 2-pole resolver as absolute encoder ........32 Temperature sensors for SINAMICS components ..............33 Commissioning preparations for PROFIBUS ................... - Page 14 Table of contents 4.1.4 CAN bus interface X126......................68 4.1.5 CANopen functionality CU305 CAN.................... 69 4.1.6 Diagnostics LED "COM"......................70 Commissioning..........................70 4.2.1 Procedure when commissioning the drive for the first time ............70 4.2.2 CANopen object directory ......................71 4.2.3 Commissioning options .......................
- Page 15 Table of contents 7.1.4 Torque-controlled operation.......................127 7.1.5 Torque setpoint limitation......................129 7.1.6 Current controller ........................134 7.1.7 Current setpoint filter........................137 7.1.7.1 Integration ..........................143 7.1.8 Note about the electronic motor model..................143 7.1.9 V/f control for diagnostics......................144 7.1.10 Optimizing the current and speed controller ................147 7.1.11 Operation without an encoder....................150 7.1.12...
- Page 16 Table of contents 7.3.5.5 Measuring probe evaluation and reference mark search ............231 7.3.5.6 Integration ..........................232 7.3.6 Basic Positioner ........................233 7.3.6.1 Mechanical system........................235 7.3.6.2 Limits ............................237 7.3.6.3 Referencing..........................241 7.3.6.4 Referencing with more than one zero mark per revolution ............249 7.3.6.5 Traversing blocks ........................
- Page 17 Table of contents 8.1.1.1 Aims ............................317 8.1.1.2 Functional safety ........................318 8.1.2 Safety of machinery in Europe....................318 8.1.2.1 Machinery Directive ........................319 8.1.2.2 Harmonized European Standards .....................319 8.1.2.3 Standards for implementing safety-related controllers ..............321 8.1.2.4 EN ISO 13849-1 (previously EN 954-1)..................322 8.1.2.5 EN 62061 ...........................323 8.1.2.6 Series of standards EN 61508 (VDE 0803) ................325...
- Page 18 Table of contents 8.5.6 Safely Limited Speed (SLS) ...................... 375 8.5.6.1 Safely Limited Speed (SLS) ...................... 375 8.5.6.2 Safely Limited Speed without encoder..................377 8.5.6.3 Safely Limited Speed - Parameter .................... 380 8.5.6.4 EPOS and Safely-Limited Speed....................381 8.5.7 Safe Speed Monitor (SSM) ....................... 382 8.5.7.1 Safe Speed Monitor with encoder.....................
- Page 19 Table of contents Acceptance test and acceptance report ..................458 8.9.1 General information ........................458 8.9.2 Acceptance test structure ......................459 8.9.2.1 Content of the complete acceptance test ..................460 8.9.2.2 Content of the partial acceptance test ..................463 8.9.2.3 Test scope for specific measures ....................466 8.9.3 Safety logbook ...........................467 8.9.4...
- Page 20 Table of contents 9.4.1 General information about PROFINET IO ................617 9.4.1.1 Real-time (RT) and isochronous real-time (IRT) communication ..........617 9.4.1.2 Data transfer ..........................618 9.4.1.3 General information about PROFINET IO for SINAMICS............618 9.4.1.4 Addresses ..........................620 9.4.1.5 PROFINET: Address parameters .....................
- Page 21 Table of contents 10.5.1 Overview of inputs/outputs......................680 10.5.2 Digital inputs/outputs........................681 10.5.3 Analog Input ..........................683 10.6 Replacing SMI and DQI components ..................683 10.7 System sampling times ......................684 10.8 Licensing ............................685 Appendix..............................689 11.1 Availability of SW functions......................689 11.2 Availability of hardware components ..................691 11.3 List of abbreviations ........................692 Index..............................
- Page 22 Table of contents Function Manual Function Manual, 01/2011, 6SL3097-4AB10-0BP3...
-
Page 23: General Information For Commissioning
General information for commissioning Explanations regarding the STARTER user interface Use STARTER to create your sample project. The different areas of the user interface are used for different configuration tasks (refer to diagram below): ① ● Project navigator (area ): this area displays the elements and objects that can be added to your project. - Page 24 General information for commissioning 1.1 Explanations regarding the STARTER user interface Figure 1-1 The different areas of the STARTER user interface Function Manual Function Manual, 01/2011, 6SL3097-4AB10-0BP3...
-
Page 25: Bico Interconnection Procedure In Starter
General information for commissioning 1.2 BICO interconnection procedure in STARTER BICO interconnection procedure in STARTER Introduction Parameterization can be carried out via the following means: ● Expert list ● Graphical screen interface The steps described below explain the general BICO interconnection procedure in STARTER. - Page 26 General information for commissioning 1.2 BICO interconnection procedure in STARTER 2. Search for parameter p0840. Figure 1-2 Interconnect 1 ① 3. Click the button to interconnect with an r parameter (see 4. A selection list from which you can select the available r parameters is now displayed. Function Manual Function Manual, 01/2011, 6SL3097-4AB10-0BP3...
- Page 27 General information for commissioning 1.2 BICO interconnection procedure in STARTER 5. Search for parameter r2090. Figure 1-3 Interconnect 2 Function Manual Function Manual, 01/2011, 6SL3097-4AB10-0BP3...
- Page 28 General information for commissioning 1.2 BICO interconnection procedure in STARTER 6. Click the "+" sign to open the 16 bits of r parameter r2090. Figure 1-4 Interconnect 3 Function Manual Function Manual, 01/2011, 6SL3097-4AB10-0BP3...
- Page 29 General information for commissioning 1.2 BICO interconnection procedure in STARTER 7. Double-click r2090: Bit0. 8. In the expert list, you can now see that p0840 has been interconnected with r parameter r2090[0]. Figure 1-5 Interconnect 4 Function Manual Function Manual, 01/2011, 6SL3097-4AB10-0BP3...
- Page 30 General information for commissioning 1.2 BICO interconnection procedure in STARTER Graphical screen interface When carrying out BICO interconnection via the graphical screen interface, proceed as follows: If for the setpoint speed, for example, you want to interconnect p parameter p1155[0] for "speed setpoint 1"...
- Page 31 General information for commissioning 1.2 BICO interconnection procedure in STARTER Figure 1-7 Interconnection via graphical screen interface 2 2. Click the blue field to the left of the field for Speed setpoint 1 and then click the selection Further interconnections, which is now displayed. 3.
- Page 32 General information for commissioning 1.2 BICO interconnection procedure in STARTER 4. Search for parameter r2060. Figure 1-8 Interconnection via graphical screen interface 3 5. Click the "+" sign to open the 15 indices of r parameter r2060. Function Manual Function Manual, 01/2011, 6SL3097-4AB10-0BP3...
- Page 33 General information for commissioning 1.2 BICO interconnection procedure in STARTER 6. Double-click r2060[1]. Figure 1-9 Interconnection via graphical screen interface 5 7. In the graphical screen interface, you can now see that p1155 has been interconnected with r parameter r2060[1]. Function Manual Function Manual, 01/2011, 6SL3097-4AB10-0BP3...
-
Page 34: Drive-Cliq Interface For Cu305
General information for commissioning 1.3 DRIVE-CLiQ interface for CU305 DRIVE-CLiQ interface for CU305 The CU305 has a DRIVE-CLiQ interface. You may connect exactly one of the following components to this interface: ● SMI motor ● 1 encoder of type SMC10, SMC20, SMC30, SME20 or SME25 Further components or connections to the DRIVE-CLiQ interface are not permitted and lead to errors in the drive system. -
Page 35: Temperature Sensors For Sinamics Components
1.5 Temperature sensors for SINAMICS components Temperature sensors for SINAMICS components The following table provides an overview of the components which are available in SINAMICS S110 with temperature sensor connections. DANGER Safe electrical isolation of temperature sensors Only temperature sensors that meet the safety isolation specifications contained in EN 61800-5-1 may be connected to terminals "+Temp"... - Page 36 General information for commissioning 1.5 Temperature sensors for SINAMICS components SMC30 In addition to temperature evaluation via terminal X531 (temperature channel 1), this module also has temperature evaluation at SUB-D socket X520 (temperature channel 2). With the default setting (p0600 = 1 "Temperature via encoder 1" and p0601 = 2 "KTY") the temperature is evaluated via the first temperature channel.
- Page 37 1.5 Temperature sensors for SINAMICS components Function diagrams (see SINAMICS S110 List Manual) ● 8016 Signals and monitoring - Thermal monitoring of motor Overview of important parameters (see SINAMICS S110 List Manual) ● r0035 Motor temperature ● p0600[0..n] Motor temperature sensor for monitoring ●...
- Page 38 General information for commissioning 1.5 Temperature sensors for SINAMICS components Function Manual Function Manual, 01/2011, 6SL3097-4AB10-0BP3...
-
Page 39: Commissioning Preparations For Profibus
● Requirements for commissioning ● PROFIBUS components Requirements for commissioning The basic requirements for commissioning a SINAMICS S110 drive system are as follows: ● STARTER commissioning tool ● PROFIBUS interface ● Wired drive line-up (see Equipment Manual) The following diagram shows an overview of an example configuration with blocksize components. -
Page 40: Profibus Components
Commissioning preparations for PROFIBUS 2.2 PROFIBUS components Check list for commissioning blocksize power units The following checklist must be carefully observed. The safety information in the Manuals must be read and understood before starting work. Table 2- 1 Check list for commissioning blocksize Check O. - Page 41 Commissioning preparations for PROFIBUS 2.2 PROFIBUS components – CP5511 (PROFIBUS connection via PCMCIA card in the notebook as programming device) PROFIBUS card CP5511 permits a maximum of 10 slave connections to be established. For large projects (many CUs) with several drive units - and therefore more than 10 PROFIBUS slaves - problems can be encountered when STARTER goes online with the notebook.
-
Page 42: Connection Via Serial Interface
Commissioning preparations for PROFIBUS 2.3 Connection via serial interface Connection via serial interface Prerequisite There must be a serial interface (COM) on the PC from which the connection is to be made. Settings 1. In STARTER, go to Project > Set PG/PC interface and select the Serial cable (PPI) interface. - Page 43 Commissioning preparations for PROFIBUS 2.3 Connection via serial interface 3. The Control Unit's PPI address is pre-set to "3" in the factory. 4. You should also set the bus address to "3" during setup, or under "Properties" in the drive unit's shortcut menu.
-
Page 44: Powering-Up/Powering-Down The Drive System
Commissioning preparations for PROFIBUS 2.4 Powering-up/powering-down the drive system Powering-up/powering-down the drive system Powering-up the drive Figure 2-4 Powering-up the drive Function Manual Function Manual, 01/2011, 6SL3097-4AB10-0BP3... - Page 45 (p1226) has expired. – Switching on inhibited is activated. Control and status messages Table 2- 3 Power-on/power-off control Signal name Internal control word Binector input PROFdrive/Siemens telegram 1 ... 111 0 = OFF1 STWA.00 p0840 ON/OFF1 STW1.0 STWAE.00 0 = OFF2 STWA.01...
- Page 46 ZSW1.6 ZSWAE.06 Pulses enabled ZSWA.11 r0899.11 ZSW1.11 Only Siemens telegrams 102 and 103 Function diagrams (see SINAMICS S110 List Manual) ● 2610 Sequence control - sequencer ● 2634 Missing enable signals, line contactor control Function Manual Function Manual, 01/2011, 6SL3097-4AB10-0BP3...
-
Page 47: Commissioning With Profibus
Commissioning with PROFIBUS Sequence of operations during commissioning Once the basic requirements have been met, you may proceed as follows to commission the drive: Table 3- 1 Commissioning Step Activity Create project with STARTER. Configure the drive unit in STARTER. Save the project in STARTER. -
Page 48: Safety Guidelines
CAUTION A project with Safety Integrated must only be created online. Note Please observe the installation guidelines and safety instructions in the SINAMICS S110 Equipment Manual. CAUTION In STARTER, after the changeover of the axis type via p9302/p9502 and subsequent POWER ON, the units that depend on the axis type are only updated after a project upload. -
Page 49: Important Starter Functions
Commissioning with PROFIBUS 3.2 STARTER commissioning tool 3.2.1 Important STARTER functions STARTER supports the following tools for managing the project: ● Copy RAM to ROM ● Download to target device ● Load to PG/PC ● Restoring the factory settings ● Commissioning wizard ●... - Page 50 Commissioning with PROFIBUS 3.2 STARTER commissioning tool Load to PG/PC You can use this function to load the current Control Unit project to STARTER. This function can be activated as follows: ● Right-click Drive unit → Target device → Load to PG/PC ●...
- Page 51 3. Install the latest firmware version for the project. – In the project navigator, right-click Drive unit → Target device → Device version. – For example, select version "SINAMICS S110 V4.3x" -> Change version. Update the firmware and load the new project to the target device.
-
Page 52: Activating Online Operation: Starter Via Profibus
Commissioning with PROFIBUS 3.2 STARTER commissioning tool 3.2.2 Activating online operation: STARTER via PROFIBUS Description The following options are available for online operation via PROFIBUS: ● Online operation via PROFIBUS STARTER via PROFIBUS (example with 2 CU305 and a CU310 DP) Figure 3-1 STARTER via PROFIBUS (example with 2 CU305 and a CU310 DP) Settings in STARTER for direct online connection via PROFIBUS... -
Page 53: Basic Operator Panel 20 (Bop20)
Commissioning with PROFIBUS 3.3 Basic Operator Panel 20 (BOP20) ● Tools → Set PG/PC interface... → Properties Activate/deactivate "PG/PC is the only master on the bus". Note Baud rate Switching STARTER to a working PROFIBUS: STARTER automatically detects the baud rate used by SINAMICS for the PROFIBUS. Switching the STARTER for commissioning: The Control Unit automatically detects the baud rate set in STARTER. -
Page 54: Important Functions Via Bop20
Commissioning with PROFIBUS 3.3 Basic Operator Panel 20 (BOP20) 3.3.1 Important functions via BOP20 Description Using the BOP20, the following functions can be executed via parameters that support you when handling projects: ● Restoring the factory settings ● Copy RAM to ROM ●... -
Page 55: Creating A Project In Starter
3.4.1 Creating a project offline To create a project offline, you need the PROFIBUS address, the device type (e.g. SINAMICS S110), and the device version (e.g. FW 4.1). Table 3- 2 Sequence for creating a project in STARTER (example) What to do? - Page 56 Information about the bus address: → Double-click "Add individual drive unit". When commissioning the system Device type: SINAMICS S110 CU305 DP (can be for the first time the PROFIBUS selected) address of the Control Unit must Device version: 4.1x (can be selected) be set here.
-
Page 57: Searching For A Drive Unit Online
Commissioning with PROFIBUS 3.4 Creating a project in STARTER 3.4.2 Searching for a drive unit online To search for a drive unit online, the drive unit and the PG/PC must be connected via PROFIBUS. Table 3- 3 Sequence for searching for a drive unit in STARTER (example) What to do? How to do it? Create a new... - Page 58 Commissioning with PROFIBUS 3.4 Creating a project in STARTER What to do? How to do it? interface Insert drives Here, you can search for nodes that have been accessed. Function Manual Function Manual, 01/2011, 6SL3097-4AB10-0BP3...
-
Page 59: Searching For Nodes That Can Be Accessed
Commissioning with PROFIBUS 3.4 Creating a project in STARTER What to do? How to do it? Summary You have now created the project. → Click "Complete". Configure the drive Once you have created the project, you have to configure the drive unit. The "Example of first unit. -
Page 60: Example Of First Commissioning With Starter
● Telegram for drive 1 ● Standard telegram 4: Speed control, 1 position encoder Note For more information about telegram types, see the section titled "Communication via PROFIBUS" or see the SINAMICS S110 List Manual. Function Manual Function Manual, 01/2011, 6SL3097-4AB10-0BP3... -
Page 61: Commissioning With Starter (Example)
Save the parameters Point the mouse at the drive Connect with target system (go online) on the device unit (SINAMICS S110) and Target system → Download to target device right-click. Target system → Copy RAM to ROM ... -
Page 62: Initial Commissioning Using Servo Ac Drive With Bop20 As An Example
Commissioning with PROFIBUS 3.6 Initial commissioning using servo AC DRIVE with BOP20 as an example STARTER diagnosis options Under "Component" → Diagnosis → Control/status words ● Control/status words ● Status parameters ● Alarm history Initial commissioning using servo AC DRIVE with BOP20 as an example The example provided in this section explains all the configuration and parameter settings that are required for first commissioning. -
Page 63: Component Wiring (Example)
Commissioning with PROFIBUS 3.6 Initial commissioning using servo AC DRIVE with BOP20 as an example 3.6.2 Component wiring (example) The following diagram shows a possible component configuration and wiring option. Figure 3-2 Component wiring with integrated Sensor Module (example) For more information on wiring and connecting the encoder system, see the Equipment Manual. -
Page 64: Quick Commissioning Using The Bop (Example)
Commissioning with PROFIBUS 3.6 Initial commissioning using servo AC DRIVE with BOP20 as an example 3.6.3 Quick commissioning using the BOP (example) Table 3- 7 Quick commissioning for a motor with a DRIVE-CLiQ interface Procedure Description Factory setting Note: The drive must be set to the factory settings before first commissioning is carried out. p0009 = 1 Device commissioning parameter filter * 0 Ready... - Page 65 Binector output r0019.0 is set using this pushbutton. * These parameters offer more setting options than the ones described here. For more possible settings, see the SINAMICS S110 List Manual. [CDS] Parameter depends on command data sets (CDS). Data set 0 is preset.
- Page 66 Commissioning with PROFIBUS 3.6 Initial commissioning using servo AC DRIVE with BOP20 as an example Function Manual Function Manual, 01/2011, 6SL3097-4AB10-0BP3...
-
Page 67: Commissioning With Canopen
● STARTER commissioning tool on PG/PC You can find a detailed description of the CANopen interface on the CU305 CAN in the SINAMICS S110 Equipment Manual. The "STARTER commissioning tool" chapter of this manual contains an introduction to the STARTER commissioning tool. -
Page 68: Prerequisites For Commissioning Cu305 With Canopen
● STARTER commissioning tool on the PG/PC. Note Please see the SINAMICS S110 Manual for a description of the components in a SINAMICS drive line-up and for information about wiring the interface to a PC/PG. The STARTER documentation contains information on how to install the STARTER commissioning tool. -
Page 69: Can Bus On The Cu305
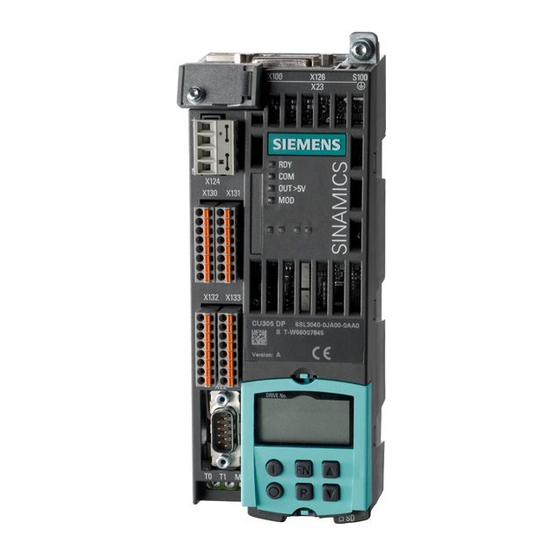
4.1 Requirements for commissioning 4.1.3 CAN bus on the CU305 The integrated CAN interface is used to connect drives in the SINAMICS S110 drive system to higher-level automation systems with a CAN bus. Figure 4-1 View of the CU305 CAN... -
Page 70: Can Bus Interface X126
Commissioning with CANopen 4.1 Requirements for commissioning The CU305 CAN uses 9-pin Sub D X126 connectors for the connection to the CAN bus system. WARNING Do NOT connect a PROFIBUS cable Connecting a PROFIBUS cable to CAN connector X126 is highly likely to damage the CANopen interface of the CU305 beyond repair. -
Page 71: Canopen Functionality Cu305 Can
Commissioning with CANopen 4.1 Requirements for commissioning 4.1.5 CANopen functionality CU305 CAN Introduction The CU305 CAN supports the CANopen transfer types with SDOs (service data objects) and PDOs (process data objects). The CU305 CAN also supports free PDO mapping. The CU305 CAN supports CANopen communication profile DS 301 version 4.0, device profile DSP 402 (drives and motion control) version 2.0, and indicator profile DR303-3 version 1.0. -
Page 72: Diagnostics Led "Com
Commissioning with CANopen 4.2 Commissioning 4.1.6 Diagnostics LED "COM" COM diagnostics LED → red Table 4- 2 COM diagnostics LED → red (CANopen error LED) ERROR LED Status Meaning flashing frequency No error Ready Single flash Warning limit At least one of the CAN controller error counters has reached reached the "Error Passive"... -
Page 73: Canopen Object Directory
Commissioning with CANopen 4.2 Commissioning 4.2.2 CANopen object directory CANopen object directory When the drive objects are initialized, the CANopen objects are initialized in the object directory for the SINAMICS drive line-up (CANopen slave software). Objects The following SINAMICS objects are involved in communication: 1. -
Page 74: Commissioning Options
All CANopen parameters, errors and warnings are described in the List Manual. SINAMICS S110 on a CANopen interface There are two ways of putting SINAMICS S110 into operation with the STARTER tool on a CANopen interface. ● Via predefined message frames ("predefined connection set"). - Page 75 Commissioning with CANopen 4.2 Commissioning Carrying out the commissioning step Configure the drive unit in STARTER by carrying out the following steps: ● Search for the drive unit ONLINE. ● Enter the drive configuration data. ● Configure the motor. ● Configure the CANopen interface on the CU305 Control Unit –...
-
Page 76: Searching For The Drive Unit Online
Commissioning with CANopen 4.2 Commissioning 4.2.5 Searching for the drive unit ONLINE Introduction The SINAMICS firmware is able to detect the connected drives automatically, as well as set and save the corresponding parameters. Steps To ensure that the drive unit configuration is identified automatically, open a new project in STARTER: Proceed as follows: 1. -
Page 77: Configuring A Drive Unit
Commissioning with CANopen 4.2 Commissioning 4. The Project Wizard searches for the drive unit ONLINE and inserts it in the project. Click Continue >. The Wizard displays a summary of the project. 5. Choose Complete. The new project and drive unit are displayed in STARTER. Note STARTER searches for drive units (in this case, Control Units). - Page 78 Commissioning with CANopen 4.2 Commissioning 2. During first commissioning, double-click Configure drive unit in the project navigator (see the example screen below). Once first commissioning is complete, you will find the CANopen interface configuration under Control Unit → Configuration → Wizard button. Figure 4-3 Configuring a drive Function Manual...
- Page 79 Commissioning with CANopen 4.2 Commissioning 3. Enter the transmission rate and the CAN bus address (node ID) in the Configuration - <Project name> - CAN interface dialog box. Figure 4-4 CAN interface 4. You can select a transmission rate of 1 MBit/s for commissioning, for example. The factory setting is 20 kBit/s.
- Page 80 Commissioning with CANopen 4.2 Commissioning 5. There are two possible ways of setting the bus address/node ID: – In this dialog box, you can set a value between 1 and 126 if the address switch on the Control Unit (labeled "DP address") is set to 0 or 127. Note If the address switch is set to between 1 and 126, values that were entered here in OFFLINE mode will not be downloaded.
- Page 81 Commissioning with CANopen 4.2 Commissioning 7. On the dialog screen which appears when you select this command path ("SINAMICS_S110_CU305_CAN configuration - Control structure"), you can define whether the drive object (function module) is to operate with/without an extended setpoint channel. The commissioning procedure described here is carried out without an extended setpoint channel (ramp-function generator).
- Page 82 Commissioning with CANopen 4.2 Commissioning 8. You only configure the motor and the encoder! Work through the Wizard by choosing Continue > until you reach the point at which you configure the motor (see the following diagram). Figure 4-6 Configure the motor 9.
-
Page 83: Monitoring
Commissioning with CANopen 4.2 Commissioning This completes the OFFLINE configuration of the drive unit. 4.2.7 Monitoring Introduction SINAMICS supports the following two optional monitoring services to ensure the functionality of CANopen network nodes: ● Heartbeat: SINAMICS (producer) cyclically transmits (heartbeat time) its communication status on the CAN bus to the master application. - Page 84 Commissioning with CANopen 4.2 Commissioning Parameter p8609 Sets the behavior of the CAN node referred to the communications error or equipment fault. ● Values: – 0: Pre-operational – 1: No change – 2: Stopped ● Index (corresponds to the CANopen object 1029 hex): –...
-
Page 85: Loading The Project To The Drive Unit
Commissioning with CANopen 4.2 Commissioning 4.2.8 Loading the project to the drive unit Introduction To load the project to the drive unit, proceed as follows: Steps 1. Click Connect to target system. An ONLINE connection is established and an ONLINE/OFFLINE comparison takes place. If any discrepancies are identified, they are displayed (see screenshot below). -
Page 86: Configuring Cob-Ids And Process Data Objects
Commissioning with CANopen 4.3 Configuring COB-IDs and process data objects 3. Discrepancies were identified again during the ONLINE/OFFLINE comparison. Now click Load to programming device ==>. 4. Load the new data from the drive unit to the PG. Carry out the following: –... -
Page 87: Loading And Managing Projects Online
Commissioning with CANopen 4.5 Loading and managing projects ONLINE Loading and managing projects ONLINE 4.5.1 In ONLINE mode, load the projects from the drive unit to the PC/PG and save. Prerequisite You are in ONLINE mode in STARTER and have completed the initial commissioning procedure. - Page 88 Commissioning with CANopen 4.5 Loading and managing projects ONLINE Function Manual Function Manual, 01/2011, 6SL3097-4AB10-0BP3...
-
Page 89: Diagnostics
Diagnostics This chapter describes the following diagnostic features of the SINAMICS S drive system: ● Diagnostics via LEDs ● Diagnostics via STARTER ● Diagnostic buffer ● Fault and alarm messages Diagnostics via LEDs 5.1.1 LEDs when the Control Unit is booted The individual statuses during the booting procedure are indicated by means of the LEDs on the Control Unit. - Page 90 Diagnostics 5.1 Diagnostics via LEDs Control Unit 305 - behavior of the LEDs during booting Table 5- 1 LEDs during power up Status Remark OUT>5 Orange Orange Reset – BIOS loaded – Red 2 Hz BIOS error – Firmware – loaded Red 2 Hz Red 2 Hz...
-
Page 91: Leds After The Control Unit Cu305 Has Booted
Diagnostics 5.1 Diagnostics via LEDs 5.1.2 LEDs after the Control Unit CU305 has booted Table 5- 2 Control Unit CU305 – description of the LEDs after booting Color Status Description, cause Remedy Electronics power supply is missing or outside (READY) permissible tolerance range. - Page 92 Diagnostics 5.1 Diagnostics via LEDs Color Status Description, cause Remedy Flashing Cyclic communication is not yet running fully. 0.5 Hz Possible reasons: The controller is not transferring any setpoints. During isochronous operation, no global control (GC) or a faulty global control (GC) is transferred by the controller.
-
Page 93: Sensor Module Cabinet Smc10 / Smc20
Diagnostics 5.1 Diagnostics via LEDs 5.1.3 Sensor Module Cabinet SMC10 / SMC20 Table 5- 3 Sensor Module Cabinet 10 / 20 (SMC10 / SMC20) – description of the LEDs Color Status Description, cause Remedy Electronics power supply is missing or outside permissible –... -
Page 94: Meaning Of Leds On The Sensor Module Cabinet-Mounted Smc30
Diagnostics 5.1 Diagnostics via LEDs 5.1.4 Meaning of LEDs on the Sensor Module Cabinet-Mounted SMC30 Table 5- 4 Meaning of LEDs on the Sensor Module Cabinet SMC30 Color Status Description, cause Remedy Electronics power supply is missing or outside permissible –... -
Page 95: Diagnostics Via Starter
Diagnostics 5.2 Diagnostics via STARTER Diagnostics via STARTER The diagnostic functions support commissioning and service personnel during commissioning, troubleshooting, diagnostics and service activities. Prerequisite ● Online operation of STARTER. Diagnostic functions The following diagnostic functions are available in STARTER: ● Specifying signals with the ramp-function generator ●... - Page 96 Diagnostics 5.2 Diagnostics via STARTER Parameterizing and operating the ramp-function generator Use the STARTER commissioning tool to parameterize and operate the function generator. Figure 5-1 "Ramp-function generator" initial screen Note Please see the online help for more information on parameterization and operation. Properties ●...
- Page 97 Diagnostics 5.2 Diagnostics via STARTER ● Restriction of the output signal to the minimum and maximum value settable. ● Operating modes of the function generator – Connector output – Current setpoint downstream of filter (current setpoint filter) – Disturbing torque (downstream of current setpoint filter) –...
- Page 98 Diagnostics 5.2 Diagnostics via STARTER To start the ramp-function generator: 1. Set the requirements for starting the function generator: – Activate the control panel: Drive_1 → Commissioning → Control panel – Switch on the drive: Control board → Issue enable signals → Switch on 2.
-
Page 99: Trace Function
Diagnostics 5.2 Diagnostics via STARTER 5.2.2 Trace function Description You can use the trace function to record measured values over a defined period, depending on trigger conditions. Call to the trace function The "Trace" parameter screen is selected via the following icon in the toolbar of the STARTER commissioning tool. -
Page 100: Measuring Function
Diagnostics 5.2 Diagnostics via STARTER The unit cycle time display flashes 3 times at around 1 Hz when the time slice is changed from < 4 ms to ≥ 4 ms (see description under "Properties"). Note Please see the online help for more information about parameterizing and operation. Properties ●... - Page 101 Diagnostics 5.2 Diagnostics via STARTER Parameterizing and using the measuring function The measuring function is parameterized and operated via the STARTER commissioning tool. Figure 5-7 "Measuring function" initial screen Note Please see the online help for more information about parameterizing and operation. Properties ●...
- Page 102 Diagnostics 5.2 Diagnostics via STARTER Starting/stopping the measuring function CAUTION With the corresponding measuring function parameter settings (e.g. offset), the motor can "drift" and travel to its end stop. The movement of the drive is not monitored while the measuring function is active. To start the measuring function: 1.
-
Page 103: Measuring Sockets
Diagnostics 5.2 Diagnostics via STARTER 5.2.4 Measuring sockets Description The measuring sockets are used to output analog signals. Any interconnectable signal can be output to any measuring socket on the Control Unit. CAUTION The measuring sockets should be used for commissioning and servicing purposes only. The measurements may only be carried out by properly trained specialist personnel. - Page 104 Diagnostics 5.2 Diagnostics via STARTER In the STARTER commissioning tool, select the parameter screen "Measuring sockets" in the project tree under the CU in the entry inputs/outputs in the tab Measuring sockets. Note Please see the online help for more information about parameterizing and operation. Properties 8-bit ...
- Page 105 Diagnostics 5.2 Diagnostics via STARTER Which signal can be output via measuring sockets? The signal to be output via a measuring socket is specified by parameterizing the connector input p0771[0...1]. Important measuring signals (examples): r0060 CO: Speed setpoint before speed setpoint filter r0063 CO: Actual speed value r0069[0...2]...
- Page 106 3. Parameterize the signal characteristic (scaling, offset, limitation). Function diagrams (see SINAMICS S110 List Manual) ● 8134 measuring sockets Overview of important parameters (see SINAMICS S110 List Manual) Adjustable parameters ● p0771[0...1] CI: Measuring sockets signal source ● p0777[0...1] Measuring sockets characteristic value x1 ●...
-
Page 107: Fault And Alarm Messages
The messages are categorized into faults and alarms. Note The individual faults and alarms are described in the SINAMICS S110 List Manual in the section titled "Faults and Alarms". Here you can also find a chapter titled "Function diagrams" → "Faults and alarms", which contains function diagrams for the fault buffer, alarm buffer, fault trigger, and fault configuration. - Page 108 Diagnostics 5.3 Fault and alarm messages ● General properties of faults and alarms – Can be configured (e.g. change fault to alarm, fault reaction). – Triggering on selected messages possible. – Initiation of messages possible via an external signal. – Contain the component number for identifying the affected SINAMICS component –...
-
Page 109: Buffer For Faults And Alarms
Diagnostics 5.3 Fault and alarm messages 5.3.2 Buffer for faults and alarms Note The contents of the fault buffer are saved to non-volatile memory when the Control Unit is powered down, i.e. the fault buffer history is still available when the unit is powered up again. NOTICE The entry in the fault/alarm buffer is made after a delay. - Page 110 Diagnostics 5.3 Fault and alarm messages Properties of the fault buffer: ● A new fault incident encompasses one or more faults and is entered in "Current fault incident". ● The entries appear in the buffer according to the time at which they occurred. ●...
- Page 111 Diagnostics 5.3 Fault and alarm messages Alarm buffer, alarm history The alarm buffer comprises the alarm code, the alarm value and the alarm time (received, resolved). The alarm history occupies the last indices ([8...63]) of the parameter. Figure 5-13 Structure of alarm buffer Alarms that occur are entered in the alarm buffer as follows: A maximum of 64 alarms are displayed in the alarm buffer: ●...
-
Page 112: Configuring Messages
Diagnostics 5.3 Fault and alarm messages ● r2121 is incremented each time the alarm buffer changes. ● An alarm value (r2124) can be output for an alarm. The alarm value is used to diagnose the alarm more accurately; please refer to the alarm description for details of the meaning. - Page 113 Diagnostics 5.3 Fault and alarm messages Note Only those messages which are listed in the indexed parameters can be changed as desired. All other message settings retain their factory settings or are reset to the factory settings. Examples: In the case of messages listed via p2128[0...19], the message type can be changed. The factory setting is set for all other messages.
-
Page 114: Parameters And Function Diagrams For Faults And Alarms
● 8065 Diagnostics - Alarm buffer ● 8070 Diagnostics - Fault/alarm trigger word r2129 ● 8075 Diagnostics - Fault/alarm configuration Overview of important parameters (see SINAMICS S110 List Manual) ● r0944 Counter for fault buffer changes ● p0952 Fault counter ●... -
Page 115: Forwarding Of Faults And Alarms
Diagnostics 5.3 Fault and alarm messages 5.3.5 Forwarding of faults and alarms Forwarding of faults and alarms of the CU When faults or alarms are triggered on the drive object of the CU, it is always assumed that central functions of the drive unit are affected. For this reason, these faults and alarms are not only signaled on the drive object of the CU, but are also forwarded to all other drive objects. - Page 116 Diagnostics 5.3 Fault and alarm messages ZSW2: Valid for SIMODRIVE 611 Interface Mode p2038=1 (function diagram 2453) Bit 11 - 12 Alarm classes alarms = 0: Alarm (former alarm level) = 1: Alarm class W_NCA alarms = 2: Alarm class W_NCB alarms = 3: Alarm class W_NCC alarms These attributes for differentiating the alarms are assigned implicitly to the appropriate alarm numbers.
-
Page 117: Parameterization Using The Basic Operator Panel 20
Parameterization using the Basic Operator Panel 20 General information about the BOP20 With the Basic Operator Panel 20 (BOP20), drives can be powered up and powered down during the commissioning phase and parameters can be displayed and modified. Faults can be diagnosed as well as acknowledged. - Page 118 Parameterization using the Basic Operator Panel 20 6.1 General information about the BOP20 Information on the displays Table 6- 1 Display Meaning top left The active drive object of the BOP is displayed here. 2 positions The displays and key operations always refer to this drive object. Is lit (bright) if the drive is in the RUN state (operation).
-
Page 119: Displays And Using The Bop20
Parameterization using the Basic Operator Panel 20 6.2 Displays and using the BOP20 BOP20 functions Table 6- 3 Functions Name Description Units The units are not displayed on the BOP. Access level The access level for the BOP is defined using p0003. The higher the access level, the more parameters can be selected using the BOP. - Page 120 Parameterization using the Basic Operator Panel 20 6.2 Displays and using the BOP20 Parameter display The parameters are selected in the BOP20 using the number. The parameter display is reached from the operating display by pressing the "P" key. Parameters can be searched for using the arrow keys.
- Page 121 Parameterization using the Basic Operator Panel 20 6.2 Displays and using the BOP20 Value display To switch from the parameter display to the value display, press the "P" key. In the value display, the values of the adjustable parameters can be increased and decreased using the arrow.
- Page 122 Parameterization using the Basic Operator Panel 20 6.2 Displays and using the BOP20 Example: Changing binector and connector input parameters For the binector input p0840[0] (OFF1) of drive object 2 binector output r0019.0 of the Control Unit (drive object 1) is interconnected. Figure 6-4 Example: Changing indexed binector parameters Function Manual...
-
Page 123: Fault And Alarm Displays
Parameterization using the Basic Operator Panel 20 6.3 Fault and alarm displays Fault and alarm displays Displaying faults Figure 6-5 Faults Displaying alarms Figure 6-6 Alarms Function Manual Function Manual, 01/2011, 6SL3097-4AB10-0BP3... -
Page 124: Controlling The Drive Using The Bop20
Parameterization using the Basic Operator Panel 20 6.4 Controlling the drive using the BOP20 Controlling the drive using the BOP20 Description When commissioning the drive, it can be controlled via the BOP20. A control word is available on the Control Unit drive object (r0019) for this purpose, which can be interconnected with the appropriate binector inputs of e.g. -
Page 125: Drive Functions
Drive functions Servo control This type of closed-loop control enables operation with a high dynamic response and precision for a motor with a motor encoder. 7.1.1 Speed controller The speed controller controls the motor speed using the actual values from the encoder (operation with encoder) or the calculated actual speed value from the electric motor model (operation without encoder). -
Page 126: Speed Setpoint Filter
Filter overview for speed setpoint filters Function diagrams (see SINAMICS S110 List Manual) ● 5020 Speed setpoint filter and speed pre-control Overview of important parameters (see SINAMICS S110 List Manual) Adjustable parameters ● p1414[D] Speed setpoint filter activation ● p1415[D] Speed setpoint filter 1 type ●... -
Page 127: Speed Controller Adaptation
"operation with encoder" mode as an additional factor for speed-dependent Kp_n adaptation. Speed-dependent Kp_n/Tn_n adaptation is only active in "operation with encoder" mode and also affects the Tn_n value. Function diagram 5050 (see SINAMICS S110 List Manual) illustrates how speed controller adaptation operates. Example of speed-dependent adaptation Note This type of adaptation is only active in "operation with encoder"... - Page 128 STARTER icon for "speed controller" Function diagrams (see SINAMICS S110 List Manual) ● 5050 Kp_n and Tn_n adaptation Overview of important parameters (see SINAMICS S110 List Manual) Free Kp_n adaptation ● p1455[0...n] CI: Speed controller P gain adaptation signal ● p1456[0...n] Speed controller P gain adaptation lower starting point ●...
-
Page 129: Torque-Controlled Operation
Drive functions 7.1 Servo control 7.1.4 Torque-controlled operation Description An operating mode switchover (p1300) or binector input (p1501) can be used to switch from speed control to torque control mode. All torque setpoints from the speed control system are rendered inactive. The setpoints for torque control mode are selected by parameterization. Properties ●... - Page 130 (p1226) or once the monitoring time (p1227) started when speed setpoint ≤ speed threshold (p1226) has expired. – Switching on inhibited is activated. Function diagrams (see SINAMICS S110 List Manual) ● 5060 Torque setpoint, control type changeover ● 5610 Torque limiting/reduction/interpolator Signal overview (see SINAMICS S110 List Manual) ●...
-
Page 131: Torque Setpoint Limitation
The "torque setpoints" parameter screen is selected via the following icon in the toolbar of the STARTER commissioning tool: Figure 7-7 STARTER icon for "torque setpoints" Overview of important parameters (see SINAMICS S110 List Manual) Adjustable parameters ● p1300 Open-loop/closed-loop control operating mode ● p1501[C] BI: Change over between closed-loop speed/torque control ●... - Page 132 Drive functions 7.1 Servo control Figure 7-8 Current/torque setpoint limiting Note This function is effective immediately without any settings. The user can also define further settings for limiting the torque. Properties The connector inputs of the function are initialized with fixed torque limits. If required, the torque limits can also be defined dynamically (during operation).
- Page 133 Negative values at r1534 or positive values at r1535 represent a minimum torque for the other torque directions and can cause the drive to rotate if no load torque is generated to counteract this (see function diagram 5630 in the SINAMICS S110 List Manual). Function Manual...
- Page 134 – Set the torque offset. Examples ● Travel to fixed stop ● Tension control for continuous goods conveyors and winders Function diagrams (see SINAMICS S110 List Manual) ● 5610 Torque limiting/reduction/interpolator ● 5620 Motor/generator torque limit ● 5630 Upper/lower torque limit ●...
- Page 135 Drive functions 7.1 Servo control Overview of important parameters (see SINAMICS S110 List Manual) ● p0640[0...n] Current limit ● p1400[0...n] Speed control configuration ● r1508 CO: Torque setpoint before supplementary torque ● r1509 CO: Torque setpoint before torque limiting ● r1515 Supplementary torque total ●...
-
Page 136: Current Controller
Drive functions 7.1 Servo control 7.1.6 Current controller Properties ● PI controller for current control ● Two identical current setpoint filters ● Current and torque limitation ● Current controller adaptation ● Flux control Closed-loop current control No settings are required for operating the current controller. Optimization measures can be taken in certain circumstances. - Page 137 ● 5710 Current setpoint filters ● 5714 Iq and Id controller ● 5722 Specified field current, flux reduction, flux controller Overview of important parameters (see SINAMICS S110 List Manual) Closed-loop current control ● p1701[0...n] Current controller reference model dead time ●...
- Page 138 Drive functions 7.1 Servo control Display parameters ● r1526 Torque limit, upper/motoring without offset ● r1527 Torque limit, lower/regenerative without offset ● r1533 Maximum torque-generating current of all current limits ● r1534 CO: Torque limit, upper total ● r1535 CO: Torque limit, lower total ●...
-
Page 139: Current Setpoint Filter
The phase frequency curve is shown alongside the amplitude log frequency curve. A phase shift results in a control system delay and should be kept to a minimum. Function diagram 5710 (see SINAMICS S110 List Manual) illustrates how the current setpoint filter operates. - Page 140 Drive functions 7.1 Servo control Band-stop with infinite notch depth Table 7- 3 Example of band-stop with infinite notch depth STARTER filter parameters Amplitude log frequency curve Phase frequency curve Blocking frequency f = 500 Hz Bandwidth (-3 dB) f = 500 Hz Notch depth K = -∞...
- Page 141 Drive functions 7.1 Servo control Band-stop with defined notch depth Table 7- 4 Example of band-stop with defined notch depth STARTER filter parameters Amplitude log frequency curve Phase frequency curve Blocking frequency f = 500 Hz Bandwidth f = 500 Hz Notch depth K = -20 dB Reduction Abs = 0 dB Simplified conversion to parameters for general order filters:...
- Page 142 Drive functions 7.1 Servo control Band-stop with defined reduction Table 7- 5 Example of band-stop STARTER filter parameters Amplitude log frequency curve Phase frequency curve Blocking frequency f = 500 Hz Bandwidth f = 500 Hz Notch depth K = -∞ dB Reduction ABS = -10 dB General conversion to parameters for general order filters: ●...
- Page 143 Drive functions 7.1 Servo control General low-pass with reduction Table 7- 6 Example of general low-pass with reduction STARTER filter parameters Amplitude log frequency curve Phase frequency curve Characteristic frequency f = 500 Hz Damping D = 0.7 Reduction Abs = -10 dB Conversion to parameters for general order filters: ●...
- Page 144 Drive functions 7.1 Servo control Transfer function general 2nd order filter Numerator natural frequency f Numerator damping D Denominator natural frequency f Denominator damping D Table 7- 7 Example of general 2nd order filter STARTER filter parameters Amplitude log frequency curve Phase frequency curve Numerator frequency f = 500 Hz...
-
Page 145: Integration
STARTER icon for "current setpoint filter" Function diagrams (see SINAMICS S110 List Manual) ● 5710 Current setpoint filters Overview of important parameters (see SINAMICS S110 List Manual) ● p1656 Activates current setpoint filter ● p1657 Current setpoint filter 1 type ●... -
Page 146: V/F Control For Diagnostics
Drive functions 7.1 Servo control 7.1.9 V/f control for diagnostics Description With V/f control, the motor is operated with an open control loop and does require speed control or actual current sensing, for example. Operation is possible with a small amount of motor data. - Page 147 Drive functions 7.1 Servo control 2. First commissioning has not been carried out: The following relevant motor data must be checked and, where necessary, corrected: – r0313 Motor pole pair number, actual (or calculated) – p0314 Motor pole pair number –...
- Page 148 Function diagrams (see SINAMICS S110 List Manual) ● 5300 V/f control ● 5650 Vdc_max controller and Vdc_min controller Overview of important parameters (see SINAMICS S110 List Manual) ● p0304 Motor rated voltage ● p0310 Motor rated frequency ● p0311 Motor rated speed ●...
-
Page 149: Optimizing The Current And Speed Controller
Drive functions 7.1 Servo control ● p0640 Current limit ● p1082 Maximum speed ● p1317 V/f control activation ● p1318 V/f control ramp-up/ramp-down time ● p1319 V/f control voltage at zero frequency ● p1326 V/f control programmable characteristic frequency 4 ●... - Page 150 Drive functions 7.1 Servo control Optimizing the speed controller The speed controller is set in accordance with the motor moment of inertia when the motor is configured for the first time. The calculated proportional gain is set to approximately 30% of the maximum possible gain in order to minimize vibrations when the controller is mounted on the mechanical system of the machine for the first time.
- Page 151 Drive functions 7.1 Servo control Example of speed setpoint step change A rectangular step change can be applied to the speed setpoint via the speed setpoint step change measuring function. The measuring function has preselected the measurement for the speed setpoint and the torque-generating current. Figure 7-17 Setting the proportional gain Kp Parameter overview...
-
Page 152: Operation Without An Encoder
Drive functions 7.1 Servo control 7.1.11 Operation without an encoder NOTICE The operation of synchronous motors without an encoder must be verified in a test application. Stable operation in this mode cannot be guaranteed for every application. Therefore, the user will be solely responsible for the use of this operating mode. Description This allows operation without an encoder and mixed operation (with/without encoder). - Page 153 Drive functions 7.1 Servo control To accept a high load torque even in the open-loop controlled range, the motor current can be increased via p1612. To do so, the drive torque (e.g. friction torque) must be known or estimated. An additional reserve of approx. 20% should also be added. In synchronous motors, the torque is converted to the current via the motor torque constant (p0316).
- Page 154 Drive functions 7.1 Servo control Operation without an encoder is displayed in parameter r1407.1. Figure 7-18 Area switchover Note In closed-loop control operating mode "Speed controller without encoder", a rotor position encoder is not required. Since a temperature monitor is not usually connected in this case either, this must be parameterized via p0600 = 0 (no sensor).
- Page 155 ● 5060 Torque setpoint, control type switchover ● 5210 Speed controller Overview of important parameters (see SINAMICS S110 List Manual) ● p0341 Motor moment of inertia ● p0342 Ratio between the total moment of inertia and that of the motor ●...
-
Page 156: Motor Data Identification
Drive functions 7.1 Servo control 7.1.12 Motor data identification Description Motor data identification (MotID) provides a means of determining motor data (of third-party motors, for example). The drive system must have been commissioned for the first time as basis for using MotID. To do this, either the electrical motor data (motor data sheet) or the rating plate data must be entered and the calculation of the motor/control parameters (p0340) must have been completed. - Page 157 Drive functions 7.1 Servo control DANGER The stationary MotID can result in slight movement of up to 210 degrees electrical. For the rotating motor data identification routine, motor motion is initiated capable of reaching the maximum speed (p1082) and the motor torque corresponding to the maximum current (p0640).
- Page 158 Drive functions 7.1 Servo control Rating plate data Input of the rating plate data requires the following parameters: Table 7- 9 Rating plate data Induction motor Permanent-magnet synchronous motor p0304 Motor rated voltage p0304 Motor rated voltage p0305 Motor rated current p0305 Motor rated current ...
-
Page 159: Motor Data Identification - Induction Motor
Drive functions 7.1 Servo control 7.1.12.1 Motor data identification - induction motor Induction motor The data are identified in the gamma equivalent circuit diagram and displayed in r19xx. The motor parameters p0350, p0354, p0356, p0358 and p0360 taken from the MotID refer to the T equivalent circuit diagram of the induction machine and cannot be directly compared. - Page 160 Drive functions 7.1 Servo control Table 7- 12 Data determined using p1960 for induction motors (rotating measurement) Determined data (gamma) Data that are accepted (p1960 = 1) r1934 q Inductance identified r1935 q Inductance identification current Note: The q inductance characteristic can be used as basis to manually determine the data for the current controller adaptation (p0391, p0392 and p0393).
-
Page 161: Motor Data Identification - Synchronous Motor
Drive functions 7.1 Servo control 7.1.12.2 Motor data identification - synchronous motor Synchronous motor Table 7- 13 Data determined using p1910 for synchronous motors (stationary measurement) Determined data Data that are accepted (p1910 = 1) r1912 stator resistance identified p0350 motor stator resistance, cold + p0352 cable resistance r1925 threshold voltage identified r1932 d inductance... - Page 162 Drive functions 7.1 Servo control Table 7- 14 Data determined using p1960 for synchronous motors (rotating measurement) Determined data Data that are accepted (p1960 = 1) r1934 q inductance identified r1935 q inductance identification current Note: The q inductance characteristic can be used as basis to manually determine the data for the current controller adaptation (p0391, p0392 and p0393).
- Page 163 Drive functions 7.1 Servo control Figure 7-20 Equivalent circuit diagram for synchronous motor and cable Overview of important parameters (see SINAMICS S110 List Manual) ● r0047 Status identification Standstill measurement ● p1909 Motor data identification control word ● p1910 Motor data identification, stationary Rotating measurement ●...
-
Page 164: Pole Position Identification
Drive functions 7.1 Servo control 7.1.13 Pole position identification Description For synchronous motors, the pole position identification determines its electrical pole position, that is required for the field-oriented control. Generally, the electrical pole position is provided from a mechanically adjusted encoder with absolute information. In this case, pole position identification is not required. - Page 165 Drive functions 7.1 Servo control ● For motors without iron, the pole position cannot be identified using the saturation-based technique. ● With 1FK7 motors, two-stage procedures must not be used (p1980 = 4). The value in p0329, which is set automatically, must not be reduced. For the motion-based technique, the following supplementary conditions apply: ●...
- Page 166 Drive functions 7.1 Servo control Determining a suitable technique for the pole position identification routine Figure 7-21 Selecting the appropriate technique Angular commutation offset commissioning support (p1990) The function for determining the commutation angle offset is activated via p1990=1. The commutation angle offset is entered in p0431.
- Page 167 When fault F07414 occurs, p1990 is automatically started; if p1980 is not equal to 99 and p0301 does not refer to a catalog motor with an encoder that is adjusted in the factory. Overview of important parameters (see SINAMICS S110 List Manual) ● p0325[0...n] Motor pole position identification current 1st phase ●...
-
Page 168: Vdc Control
Drive functions 7.1 Servo control 7.1.14 Vdc control Description Vdc control can be activated if overvoltage or undervoltage is present in the supply voltage. This prevents a fault from occurring due to the supply voltage and ensures that the drive is always ready to use. - Page 169 Drive functions 7.1 Servo control In the event of a power failure, the Power Module will no longer be able to maintain the supply voltage, particularly if the motor is drawing active power. To maintain the supply voltage in the event of a power failure (e.g. for a controlled emergency retraction), the Vdc_min controller can be activated for the drive.
- Page 170 (F07404) with a parameterizable voltage threshold (p1244). This is carried out by activating the Vdc_max monitoring function (p1240 = 4, 6). Function diagrams (see SINAMICS S110 List Manual) ● 5650 Vdc_max controller and Vdc_min controller ●...
- Page 171 Drive functions 7.1 Servo control Overview of important parameters (see SINAMICS S110 List Manual) Adjustable parameters ● p1240 Vdc controller or Vdc monitoring configuration ● p1244 DC link voltage threshold, upper ● p1248 DC link voltage threshold, lower ● p1250 Vdc controller proportional gain Display parameters ●...
-
Page 172: Travel To Fixed Stop
Drive functions 7.1 Servo control 7.1.15 Travel to fixed stop Description This function can be used to move a motor to a fixed stop at a specified torque without a fault being signaled. When the stop is reached, the specified torque is built up and remains applied. - Page 173 Drive functions 7.1 Servo control Figure 7-24 Signals for "Travel to fixed stop" When PROFIdrive telegrams 2 to 4 are used, no torque reduction is transmitted. When the "Travel to fixed stop" function is activated, the motor ramps up to the torque limits specified in p1520 and p1521.
- Page 174 Drive functions 7.1 Servo control Signal chart Figure 7-25 Signal chart for "Travel to fixed stop" Commissioning for PROFIdrive telegrams 2 to 4 1. Activate travel to fixed stop. Set p1545 = "1". Function Manual Function Manual, 01/2011, 6SL3097-4AB10-0BP3...
- Page 175 Torque utilization < torque ZSW monitoring functions r2199.11 MESSAGEW.1 threshold value 2 3.11 Function diagrams (see SINAMICS S110 List Manual) ● 5610 Torque limiting/reduction/interpolator ● 5620 Motor/generator torque limit ● 5630 Upper/lower torque limit ● 8012 Torque messages, motor blocked/stalled Function Manual...
- Page 176 Drive functions 7.1 Servo control Overview of important parameters (see SINAMICS S110 List Manual) ● p1400[0...n] Speed control configuration ● r1407.7 BO: Torque limit reached ● p1520[0...n] CO: Torque limit, upper/motoring ● p1521[0...n] CO: Torque limit, lower/regenerative ● p1522[0...n] CI: Torque limit, upper/motoring ●...
-
Page 177: Vertical Axes
● 5060 Torque setpoint, control type switchover ● 5620 Motor/generator torque limit ● 5630 Upper/lower torque limit Overview of important parameters (see SINAMICS S110 List Manual) ● r0031 Actual torque smoothed ● p1513 CI: Supplementary torque 2 ● p1520 CO: Torque limit, upper/motoring ●... -
Page 178: Variable Signaling Function
Drive functions 7.1 Servo control 7.1.17 Variable signaling function Description The variable signaling function can be used to monitor BICO sources and parameters (with the attribute "traceable") for violation of an upper or lower threshold value (p3295). A hysteresis (p3296) can be specified for the threshold value and a pull-in or drop-out delay (p3297/8) can be specified for the output signal (p3294). - Page 179 7.1 Servo control Function diagram (see SINAMICS S110 List Manual) ● 5301 Servo control - variable signaling function Overview of important parameters (see SINAMICS S110 List Manual) ● p3290 Variable signaling function start ● p3291 Variable signaling function signal source ●...
-
Page 180: Central Probe Evaluation
Drive functions 7.1 Servo control 7.1.18 Central probe evaluation Description Frequently, motion control systems have to detect and save the positions of drive axes at an instant in time defined by an external event. For example, this external event may be the signal edge of a probe. - Page 181 Drive functions 7.1 Servo control Central measuring with handshake ● Evaluation technique with handshake, as long as p0684 = 0. ● Transfer, control word probe (BICO p0682 to PZD3) at the instant To in the MAP cycle. ● A measurement is activated with a 0/1 transition of the control bit for falling or rising edge in the probe control word.
- Page 182 Function diagrams (see SINAMICS S110 List Manual) ● 4740 Encoder evaluation - measurement probe evaluation Overview of important parameters (see SINAMICS S110 List Manual) ● p0680[0...5] Central measurement probe input terminal ● p0681 BI: Central measurement probe synchronization signal signal source ●...
-
Page 183: Pulse/Direction Interface
Thanks to the pulse/direction interface, SINAMICS S110 can be used for simple positioning tasks on a controller. The controller is connected to SINAMICS S110 via the encoder interface (connector X23) of the CU305. The controller uses the following methods to give setpoints to the drive via interface X23: ●... -
Page 184: Commissioning The Pulse/Direction Interface
Drive functions 7.1 Servo control 7.1.19.1 Commissioning the pulse/direction interface Wiring input signals The input signals for the pulse/direction interface are wired via connector X23: Table 7- 18 Setpoint value specification with HTL level Signal name Technical specifications 1 ... 6 Not relevant –... - Page 185 Drive functions 7.1 Servo control Wiring control signals Control signals are created at terminals X132 and X133: Table 7- 20 Wiring control signals Signal name Inputs X133.1 (DI 0) Off 1 X133.2 (DI 1) Fault acknowledgment X133.3 (DI 3) Position reset (only applies to position control) X133.5 Ground Outputs...
- Page 186 Drive functions 7.1 Servo control Settings in the configuration wizard Make the settings for the pulse/direction interface via the Process data exchange dialog in the STARTER configuration wizard: Figure 7-28 Configuring the pulse/direction interface in STARTER Make the following settings: Function Manual Function Manual, 01/2011, 6SL3097-4AB10-0BP3...
- Page 187 Drive functions 7.1 Servo control ● Control type: Speed control or Position control ● Encoder channel The pulse/direction interface is assigned an encoder channel. If you are using a motor encoder, it is always assigned encoder channel 1. This means you need to select encoder channel 2 for the pulse/direction interface.
- Page 188 Drive functions 7.1 Servo control Overview of important parameters (see SINAMICS S110 List Manual) ● p0010 Drive commissioning parameter filter ● p0141 Encoder interface (Sensor Module) component number ● p0184 Encoder interface with WSG ● p0400[0...n] Encoder type selection ● p0404[0...n] Encoder configuration active ●...
-
Page 189: Basic Functions
This assignment and the unit groups for each parameter are listed in the parameter list in the SINAMICS S110 List Manual. The units groups can be individually switched via the following parameters: p0100, p0505... - Page 190 To call up the function for converting units in STARTER, choose Drive object → Configuration → Units. The reference parameters can be found under Drive object → Configuration → Reference parameters. Overview of important parameters (see SINAMICS S110 List Manual) ● p0010 Commissioning parameter filter ● p0100 Motor Standard IEC/NEMA ●...
-
Page 191: Reference Parameters/Normalizations
Drive functions 7.2 Basic functions 7.2.2 Reference parameters/normalizations Description Reference values equivalent to 100% are required in order to express units in percentage terms. These reference values are entered in parameters p2000 to p2007. They are computed during the calculation via p0340 = 1 or in STARTER during drive configuration. After calculation in the drive, these parameters are automatically protected via p0573 = 1 against overwriting through a new calculation (p0340). - Page 192 100% = 100 ℃ Reference electrical angle 100 % = 90° Overview of important parameters (see SINAMICS S110 List Manual) ● p0340 Automatic calculation of motor/control parameters ● p0573 Disable automatic calculation of reference values ● p2000 Reference speed reference frequency ●...
-
Page 193: Automatic Restart
Drive functions 7.2 Basic functions 7.2.3 Automatic restart Description The "automatic restart" function is used to restart the drive automatically once the power has been restored following a power failure. In this case, all of the faults present are automatically acknowledged and the drive is powered-up again. This function is not only restricted to line supply faults;... - Page 194 2. Set starting attempts (p1211). 3. Set delay times (p1212, p1213). 4. Check function. Overview of important parameters (see SINAMICS S110 List Manual) ● r0863 CO/BO: Drive coupling status word/control word ● p1210 Automatic restart, mode ● p1211 Automatic restart, attempts to start ●...
-
Page 195: Armature Short-Circuit Brake, Dc Brake
Drive functions 7.2 Basic functions 7.2.4 Armature short-circuit brake, DC brake Features ● For permanent-magnet synchronous motors: – Controlling an external armature short-circuit configuration ● For induction motors: – Activation of DC brake ● Assignment as fault response Description Armature short-circuit braking is only supported for permanent-magnet synchronous motors. It is mainly required when braking in a hazardous situation if controlled braking using the frequency converter is no longer possible (e.g. - Page 196 The internal armature short-circuit (p1231 = 4 for synchronous motor) and internal voltage protection (p1231 = 3) functions are not supported for the SINAMICS S110 system. The "IASC/DC brake" fault response has the second-highest priority (second only to OFF2).
- Page 197 ● 7014 External armature short circuit (p0300 = 2xx or 4xx, synchronous motors) ● 7017 DC brake (p0300 = 1xx, induction motors) Overview of important parameters (see SINAMICS S110 List Manual) ● p1226 Standstill detection, velocity threshold ● p1230[0...n] BI: Armature short-circuit/DC brake activation ●...
-
Page 198: Off3 Torque Limits
Torque limits OFF3 Function diagrams (see SINAMICS S110 List Manual) ● 5620 Motor/generator torque limits ● 5630 Upper/lower torque limit Overview of important parameters (see SINAMICS S110 List Manual) ● p1520 Torque limit, upper/motoring ● p1521 Torque limit, lower/regenerative Function Manual... -
Page 199: Simple Brake Control
The Power Module then performs the action and activates the output for the holding brake. The exact sequence control is illustrated in the SINAMICS S110 List Manual (FP 2701). The operating principle of the holding brake can be configured via parameter p1215. - Page 200 CAUTION Brake control monitoring may only be activated for Blocksize power units with Safe Brake Relay (p1278 = 0). Function diagrams (see SINAMICS S110 List Manual) ● 2701 Simple brake control (r0108.14 = 0) Function Manual Function Manual, 01/2011, 6SL3097-4AB10-0BP3...
- Page 201 Drive functions 7.2 Basic functions Overview of important parameters (see SINAMICS S110 List Manual) ● r0056.4 Magnetizing complete ● r0060 CO: Speed setpoint before the setpoint filter ● r0063 CO: Actual speed smoothed (servo) ● r0108.14 Extended brake control ● p0855[C] BI: Unconditionally release holding brake ●...
-
Page 202: Parking Axis And Parking Encoder
Drive functions 7.2 Basic functions 7.2.7 Parking axis and parking encoder The parking function is used in two ways: ● "Parking axis" – Monitoring of all encoders assigned to the "motor control" application of a drive is suppressed. – All encoders assigned to the "Motor control" application of a drive are prepared for the "removed"... - Page 203 Drive functions 7.2 Basic functions Example: parking axis In the following example, an axis is parked. To ensure that the axis parking is effective, the drive must be brought to a standstill (e.g. via STW1.0 (OFF1). All components assigned to the motor control (e.g.
-
Page 204: Runtime (Operating Hours Counter)
Drive functions 7.2 Basic functions Overview of important parameters (see SINAMICS S110 List Manual) ● p0145 Activate/deactivate encoder interface ● r0146 Encoder interface active/inactive ● p0895 BI: Activate/deactivate power unit component ● r0896.0 BO: Parking axis status word ● p0897 BI: Parking axis selection 7.2.8... -
Page 205: Changing The Direction Of Rotation Without Changing The Setpoint
The rotational direction change can be identified as a result of the phase voltage. Similarly, when the rotational direction changes, the absolute position reference is also lost. Overview of important parameters (see SINAMICS S110 List Manual) ● r0069 Phase current, actual value ●... -
Page 206: Function Modules
Unit (CU). The READY LED on the main component of the drive object can be made to flash by means of parameter p0124 (CU). Overview of important parameters (see SINAMICS S110 List Manual) ● p0108 Drive objects, function module ● p0124 Identifying the main components using LEDs... -
Page 207: Technology Controller
Drive functions 7.3 Function modules 7.3.2 Technology controller 7.3.2.1 Features Simple control functions can be implemented with the technology controller, e.g.: ● Level control ● Dancer position/tension control ● Pressure control ● Flow control ● Simple closed-loop control without higher-level controller The technology controller features: ●... - Page 208 Drive functions 7.3 Function modules Technology controller Two scalable setpoints (p2255/ p2256) can be specified via two connector inputs (p2253/ p2254). A ramp-function generator in the setpoint channel can be used to define a ramp by means of the ramp-up and ramp-down times (p2257/p2258). Both the setpoint and actual value channels have access to a filter element with configurable time constants (p2261 and p2265).
- Page 209 Drive functions 7.3 Function modules Please note that the controller structure of the technology controller differs from the standard technology controller structure described below, which is standard in some sources. To enable comparison, the corresponding conversions have been specified: Figure 7-36 Technology controller structure with parallel components where Other controller variants are also possible:...
-
Page 210: Integration
● 7950 Fixed values (r0108.16 = 1) ● 7954 Motorized potentiometer (r0108.16 = 1) ● 7958 Closed-loop control (r0108.16 = 1) Overview of important parameters (see SINAMICS S110 List Manual) Fixed setpoints ● p2201[0...n] CO: Technology controller, fixed value 1 ●... -
Page 211: Commissioning With Starter
Drive functions 7.3 Function modules Closed-loop control ● p2200 BI: Technology controller enable ● p2253[0...n] CI: Technology controller setpoint 1 ● p2254 [0...n] CI: Technology controller setpoint 2 ● p2255 Technology controller setpoint 1 scaling ● p2256 Technology controller setpoint 2 scaling ●... -
Page 212: Extended Monitoring Functions
Drive functions 7.3 Function modules 7.3.3 Extended monitoring functions 7.3.3.1 Description When the extension is activated, the monitoring functions are extended as follows: ● Speed setpoint monitoring: |n_setp| ≤ p2161 ● Speed setpoint monitoring: n_set > 0 ● Load monitoring Description of load monitoring This function monitors power transmission between the motor and the working machine. -
Page 213: Commissioning
Function diagrams (see SINAMICS S110 List Manual) ● 8010 Speed messages 1 ● 8011 Speed messages 2 ● 8013 Load monitoring Overview of important parameters (see SINAMICS S110 List Manual) Load monitoring ● p2181[D] Load monitoring response ● p2182[D] Load monitoring speed threshold 1 ●... -
Page 214: Extended Brake Control
● 2704 Zero speed detection (r0108.14 = 1) ● 2707 Release and apply brake (r0108.14 = 1) ● 2711 Signal outputs (r0108.14 = 1) Overview of important parameters (see SINAMICS S110 List Manual) ● r0108.14 Extended brake control ● r0899 CO/BO: Status word sequence control Standstill (zero-speed) monitoring ●... - Page 215 Drive functions 7.3 Function modules Release and apply the brake ● p0855 BI: Unconditionally release holding brake ● p0858 BI: Unconditionally close holding brake ● p1216 Holding brake release time ● p1217 Holding brake application time ● p1218[0...1] BI: Open motor holding brake ●...
-
Page 216: Description
Drive functions 7.3 Function modules Table 7- 25 Status message: Extended brake control Signal name Parameter Brake status word Command, open brake (continuous r1229.1 B_ZSW.1 signal) Pulse enable, extended brake control r1229.3 B_ZSW.3 Brake does not open r1229.4 B_ZSW.4 Brake does not close r1229.5 B_ZSW.5 Brake threshold exceeded... - Page 217 Drive functions 7.3 Function modules Emergency brake If emergency braking is required, electrical and mechanical braking is to take place simultaneously. This can be achieved if OFF3 is used as a tripping signal for emergency braking: p1219[0] = r0898.2 (OFF3 to "apply brake immediately"). The OFF3 ramp (p1135) should be set to 0 seconds so that the converter does not work against the brakes.
-
Page 218: Commissioning
Drive functions 7.3 Function modules p1275.02 (1) p1224[0] <1> [2501 ] p1279[0] r1229.3 p0856 r1229.10 p1279[1] <1> p1142[C] & r0898.6 <1> p1152 (r0899.15) Figure 7-38 Example, operating brake for a crane drive 7.3.4.5 Commissioning The extended brake control function can be activated while the commissioning Wizard is running. -
Page 219: Closed-Loop Position Control
Drive functions 7.3 Function modules 7.3.5 Closed-loop position control 7.3.5.1 General features The position controller essentially comprises the following parts: ● Position actual value conditioning (including the lower-level measuring probe evaluation and reference mark search) There is still no position actual value conditioning for distance-coded measuring systems. ●... - Page 220 Drive functions 7.3 Function modules Figure 7-39 Position actual value sensing with rotary encoders The link between the physical variables and the neutral length unit LU is established via parameter p2506 (LU per load revolution) for rotary encoders. Parameter p2506 mirrors, together with p2504, p2505, the interrelationship between encoder increments and the neutral position unit LU.
- Page 221 Drive functions 7.3 Function modules For linear encoders, the interrelationship between the physical quantity and the neutral length unit LU is configured using parameter p2503 (LU/10 mm). Example: Linear encoder, 10 mm should have a resolution of 1 µm (i.e. 1 LU = 1 µm). →...
- Page 222 Drive functions 7.3 Function modules Load gear position tracking Terminology ● Encoder range The encoder range is the position area that can itself represent the absolute encoder. ● Singleturn encoder A singleturn encoder is a rotating absolute encoder, which provides an absolute image of the position inside an encoder rotation.
- Page 223 Drive functions 7.3 Function modules Features ● Configuration via p2720 ● Virtual multiturn via p2721 ● Tolerance window for monitoring the position at switching on p2722 ● Input of the load gear via p2504 and p2505 ● Display via r2723 Prerequisite ●...
- Page 224 Drive functions 7.3 Function modules Example of position area extension With absolute encoders without position tracking, it must be ensured that the traversing range is 0 smaller than half the encoder range, because beyond this range, no unique reference remains after switching on and off (see description on parameter p2507). This traversing range can be extended using the virtual multiturn (p2721).
- Page 225 Drive functions 7.3 Function modules Configuration of the load gear (p2720). The following points can be set by configuring this parameter: ● p2720.0: Activation of position tracking ● p2720.1: Setting the axis type (linear or rotary axis) Here, a rotary axis refers to a modulo axis (modulo offset can be activated through higher-level control or EPOS).
- Page 226 Drive functions 7.3 Function modules Virtual multiturn encoder (p2721) The virtual multiturn resolution is used to set the number of resolvable motor rotations for a rotary absolute encoder with activated position tracking. It can be edited only for rotary axes. With a rotary absolute encoder (p0404.1 = 1) with activated position tracking (p2720.0 = 1), p2721 can be used to enter a virtual multiturn resolution.
- Page 227 Drive functions 7.3 Function modules Multiple drive data sets Position tracking of the load gear can be activated in multiple drive data sets. ● The load gear is DDS-dependent. ● Load gear position tracking is computed only for the active drive data set and is EDS- dependent.
- Page 228 ● 4704 Position and temperature sensing, encoders 1...2 ● 4710 Actual speed value and rotor pos. meas., motor enc. (encoder 1) Overview of important parameters (see SINAMICS S110 List Manual) ● p2502[0...n] LR encoder assignment ● p2503[0...n] LR length unit LU per 10 mm ●...
-
Page 229: Position Controller
(factor, speed pre-control) can be disabled via the value 0. Function diagrams (see SINAMICS S110 List Manual) ● 4015 Position controller Overview of important parameters (see SINAMICS S110 List Manual) ● p2533 LR position setpoint filter, time constant ● p2534 LR speed pre-control factor ●... -
Page 230: Monitoring Functions
Drive functions 7.3 Function modules 7.3.5.4 Monitoring functions Features ● Standstill monitoring (p2542, p2543) ● Positioning monitoring (p2544, p2545) ● Dynamic following error monitoring (p2546, r2563) ● Cam controllers (p2547, p2548, p2683.8, p2683.9) Description Figure 7-44 Zero-speed monitoring, positioning window The position controller monitors the standstill, positioning and following error. - Page 231 The position controller has two cam controllers. If cam position p2547 or p2548 is passed in the positive direction (p2521 > p2547 or 2548), then cam signals r2683.8 and r2683.9 are reset. Function diagrams (see SINAMICS S110 List Manual) ● 4020 Zero-speed / positioning monitoring ● 4025 Dynamic following error monitoring, cam controllers...
- Page 232 Drive functions 7.3 Function modules Overview of important parameters (see SINAMICS S110 List Manual) ● p2530 CI: LR setpoint position ● p2532 CI: LR actual position value ● p2542 LR standstill window ● p2543 LR standstill monitoring time ● p2544 LR positioning window ●...
-
Page 233: Measuring Probe Evaluation And Reference Mark Search
Drive functions 7.3 Function modules 7.3.5.5 Measuring probe evaluation and reference mark search Description The "Reference mark search" and "Measuring probe evaluation" functions can be initiated and carried-out via binector input p2508 (activate reference mark search) and p2509 (activate measuring probe evaluation). Binector inputs p2510 (measurement probe selection) and p2511 (measurement probe edge evaluation) define the mode for measurement probe evaluation. -
Page 234: Integration
● 4720 Encoder interface, receive signals, encoder 1 ... 2 ● 4730 Encoder interface, send signals, encoder 1 ... 2 Overview of important parameters (see SINAMICS S110 List Manual) ● p2508 BI: LR activate reference mark search ● p2509 BI: LR activate measuring probe evaluation ●... -
Page 235: Basic Positioner
Drive functions 7.3 Function modules 7.3.6 Basic Positioner General description The basic positioner is used to position linear and rotary axes (modulo) in absolute/relative terms with motor encoder (indirect measuring system) or machine encoder (direct measuring system). User-friendly configuration, commissioning, and diagnostic functions are also available in STARTER for the basic positioner functionality (graphic navigation). - Page 236 Drive functions 7.3 Function modules ● Referencing or adjusting – Set reference point (for an axis at standstill that has reached its target position) – Reference point approach (autonomous mode including reversing cam functionality, automatic direction of rotation reversal, referencing to "cams and encoder zero mark" or only "encoder zero mark"...
-
Page 237: Mechanical System
Drive functions 7.3 Function modules 7.3.6.1 Mechanical system Features ● Backlash compensation (p2583) ● Modulo offset (p2577) Description Figure 7-47 Backlash compensation When mechanical force is transferred between a machine part and its drive, generally backlash occurs. If the mechanical system was to be adjusted/designed so that there was absolutely no play, this would result in high wear. - Page 238 ● 4. Direct encoder without position tracking: v = p0421 * p2506 * p0433 / (p0432 * p2576) With position tracking it is recommended to change p2721. Function diagrams (see SINAMICS S110 List Manual) ● 3635 Interpolator ● 4010 Position actual value conditioning...
-
Page 239: Limits
Drive functions 7.3 Function modules Overview of important parameters (see SINAMICS S110 List Manual) ● p2576 EPOS modulo offset, modulo range ● p2577 BI: EPOS modulo offset activation ● p2583 EPOS backlash compensation ● r2684 CO/BO: EPOS status word 2 ●... - Page 240 Drive functions 7.3 Function modules ● Jog mode ● Processing traversing blocks ● Direct setpoint input/MDI for positioning/setting-up ● Reference point approach Maximum acceleration/deceleration Parameter p2572 (maximum acceleration) and p2573 (maximum deceleration) define the maximum acceleration and the maximum deceleration. In both cases, the units are 1000 LU/s Both values are relevant for: ●...
- Page 241 Drive functions 7.3 Function modules STOP cam A traversing range can, on one hand, be limited per software using the software limit switches and on the other hand, the traversing range can be limited per hardware. In this case, the functionality of the STOP cam (hardware limit switch) is used. The function of the STOP cams is activated by the 1 signal on the binector input p2568 (activation of STOP cams).
- Page 242 Jerk limitation is not active when messages are generated with stop responses OFF1 / OFF2 / OFF3. Function diagrams (see SINAMICS S110 List Manual) ● 3630 Traversing range limits Overview of important parameters (see SINAMICS S110 List Manual) ● p2571 EPOS maximum velocity ● p2572 EPOS maximum acceleration ● p2573 EPOS maximum deceleration ●...
-
Page 243: Referencing
Drive functions 7.3 Function modules Software limit switches ● p2578 CI: EPOS software limit switch, minus signal source ● p2579 CI: EPOS software limit switch, plus signal source ● p2580 CO: EPOS software limit switch, minus ● p2581 CO: EPOS software limit switch, plus ●... - Page 244 Drive functions 7.3 Function modules Description After a machine has been powered-up, for positioning, the absolute dimension reference must be established to the machine zero. This operation is known as referencing. The following referencing types are possible: ● Setting the reference point (all encoder types) ●...
- Page 245 Drive functions 7.3 Function modules Absolute encoder adjustment Absolute encoders must be adjusted while commissioning. After the machine has been powered-down the position information of the encoder is kept. When p2507 = 2 is entered, using the reference point coordinate in p2599, an offset value (p2525) is determined.
- Page 246 Drive functions 7.3 Function modules Reference point approach for incremental measurement systems When the reference point approach (in the case of an incremental measuring system), the drive is moved to its reference point. In so doing, the drive itself controls and monitors the complete referencing cycle.
- Page 247 Drive functions 7.3 Function modules Search for reference, step 1: travel to reference cam If there is no reference cam present (p2607 = 0), go to step 2. When the referencing process is started, the drive accelerates at maximum acceleration (p2572) to the reference cam approach velocity (p2605).
- Page 248 Drive functions 7.3 Function modules Search for reference, step 2: Synchronizing to the reference zero mark (encoder zero mark or external zero mark) Reference cam available (p2607 = 1): In step 2, the drive accelerates to the velocity, specified in p2608 (zero mark approach velocity) in the direction opposite to that specified using binector input p2604 (reference point approach start direction).
- Page 249 Drive functions 7.3 Function modules Search for reference, step 3: Travel to reference point Travel to the reference point is started when the drive has successfully synchronized to the reference zero mark (see step 2). Once the reference zero mark has been detected, the drive accelerates on-the-fly to the reference point approach velocity set in parameter p2611.
- Page 250 (p2503 ... p2506). In operating mode, a fault message (F07494) is also generated. Function diagrams (see SINAMICS S110 List Manual) ● 3612 Referencing ● 3614 Flying referencing...
-
Page 251: Referencing With More Than One Zero Mark Per Revolution
Drive functions 7.3 Function modules Overview of important parameters (see SINAMICS S110 List Manual) ● p0494[0...n] Equivalent zero mark input terminal ● p0495 Equivalent zero mark input terminal ● p2596 BI: EPOS set reference point ● p2597 BI: EPOS referencing type selection ●... - Page 252 Drive functions 7.3 Function modules Requirements ● The position of the zero mark that has the shortest distance to the position when the BERO signal switches is to be determined. ● The appropriate mechanical preconditions must be fulfilled when mounting the BERO. ●...
- Page 253 BERO signal ↔ zero mark. Overview of important parameters (see SINAMICS S110 List Manual) ● p0488 Measurement probe 1 input terminal ● p0489 Measurement probe 2 input terminal ●...
-
Page 254: Traversing Blocks
Drive functions 7.3 Function modules 7.3.6.5 Traversing blocks Description Up to 16 different traversing blocks can be saved. The maximum number is set using parameter p2615 (maximum number of traversing tasks). All parameters which describe a traversing order are effective during a block change, i.e. if: ●... - Page 255 Drive functions 7.3 Function modules ● Task mode (p2623[0...63]) The execution of a traversing task can be influenced by parameter p2623 (task mode). This is automatically written by programming the traversing blocks in STARTER. Value = 0000 cccc bbbb aaaa –...
- Page 256 Drive functions 7.3 Function modules Accepting traversing blocks You can transfer traversing blocks from one SINAMICS S110 to another. To do this, proceed as follows: Note It is possible to accept traversing blocks from other SINAMICS devices. SINAMICS S110, however, only imports the first 16 traversing blocks; any additional traversing blocks are declined at the time of the import and a fault message is generated.
- Page 257 Drive functions 7.3 Function modules FIXED STOP The FIXED STOP task triggers a traversing movement with reduced torque to fixed stop. The following parameters are relevant: ● p2616[x] Block number ● p2617[x] Position ● p2618[x] Velocity ● p2619[x] Acceleration override ●...
- Page 258 Drive functions 7.3 Function modules JERK Jerk limitation can be activated (command parameter = 1) or deactivated (task parameter = 0) by means of the JERK task. The signal at the binector input p2575 "Active jerk limitation" must be set to zero. The value parameterized in "jerk limit" p2574 is the jerk limit. A precise stop is always carried out here regardless of the parameterized continuation condition of the task preceding the JERK task.
- Page 259 Any two of the SET_O, RESET_O and GOTO orders can be processed in an interpolation cycle and a subsequent POSITION and WAIT order can be started. Function diagrams (see SINAMICS S110 List Manual) ● 3616 Traversing blocks operating mode Function Manual...
-
Page 260: Travel To Fixed Stop
Drive functions 7.3 Function modules Overview of important parameters (see SINAMICS S110 List Manual) ● p2616 EPOS traversing block, block number ● p2617 EPOS traversing block, position ● p2618 EPOS traversing block, velocity ● p2619 EPOS traversing block, acceleration override ●... - Page 261 Drive functions 7.3 Function modules Fixed stop is reached As soon as the axis comes into contact with the mechanical fixed stop, the closedloop control in the drive raises the torque so that the axis can move on. The torque increases up to the value specified in the task and then remains constant.
- Page 262 Drive functions 7.3 Function modules Fixed stop is not reached If the brake application point is reached without the "fixed stop reached" status being detected, then the fault F07485 "Fixed stop is not reached" is output with fault reaction OFF1, the torque limit is canceled and the drive cancels the traversing block. Note ...
- Page 263 ● 3617 Travel to fixed stop (r0108.4 = 1) ● 4025 Dynamic following error monitoring, cam controllers (r0108.3 = 1) Overview of important parameters (see SINAMICS S110 List Manual) ● p1528 CI: Torque limit, upper/motoring, scaling ● p1529 CI: Torque limit, lower/regenerative scaling ●...
-
Page 264: Direct Setpoint Input (Mdi)
Drive functions 7.3 Function modules 7.3.6.7 Direct setpoint input (MDI) Features ● Select direct setpoint input (p2647) ● Select positioning type (p2648) ● Direction selection (p2651, p2652) ● Setting-up (p2653) ● Fixed setpoints – CO: Position setpoint (p2690) – CO: Velocity setpoint (p2691) –... - Page 265 Drive functions 7.3 Function modules If continuous acceptance (p2649 = 1) is activated, changes to the MDI parameters are accepted immediately. Otherwise the values are only accepted when there is a positive edge at binector input p2650 (setpoint acceptance edge). Note Continuous acceptance p2649 = 1 can only be set with free telegram configuration p0922 = 999.
- Page 266 ● 3618 EPOS - direct setpoint input mode/MDI, dynamic values ● 3620 EPOS - direct setpoint input mode/MDI Overview of important parameters (see SINAMICS S110 List Manual) ● p2577 BI: EPOS modulo offset activation ● p2642 CI: EPOS direct setpoint input/MDI, position setpoint ●...
-
Page 267: Jog
Drive functions 7.3 Function modules 7.3.6.8 Features ● Jog signals (p2589, p2590) ● Velocity (p2585, p2586) ● Incremental (p2587, p2588, p2591) Description Using parameter p2591 it is possible to change over between jog incremental and jog velocity. The traversing distances p2587 and p2588 and velocities p2585 and p2586 are entered using the jog signals p2589 and p2590. -
Page 268: Status Signals
7.3 Function modules Function diagrams (see SINAMICS S110 List Manual) ● 3610 EPOS - jog mode Overview of important parameters (see SINAMICS S110 List Manual) ● p2585 EPOS jog 1 setpoint velocity ● p2586 EPOS jog 2 setpoint velocity ● p2587 EPOS jog 1 traversing distance ●... - Page 269 Drive functions 7.3 Function modules Stop cam minus active (r2684.13) Stop cam plus active (r2684.14) These status signals indicate that the STOP cam minus p2569 or STOP cam plus p2570 has been reached or passed. The signals are reset if the cams are left in a directly opposing the approach direction.
- Page 270 Drive functions 7.3 Function modules Target position reached (r2684.10) The status signal "target position reached" indicates that the drive has reached its target position at the end of a traversing command. This signal is set as soon as the actual drive position is within the positioning window p2544 and is reset, if it leaves this window.
-
Page 271: Extended Setpoint Channel
Drive functions 7.3 Function modules 7.3.7 Extended setpoint channel Description In the servo control mode, the extended setpoint channel is deactivated by default. If an extended setpoint channel is required, it has to be activated. The extended setpoint channel is always activated in the vector control mode. Properties of servo mode without the "extended setpoint channel"... - Page 272 Drive functions 7.3 Function modules Figure 7-55 Extended setpoint channel Properties of the extended setpoint channel ● Main/supplementary setpoint, setpoint scaling ● Direction of rotation limiting and direction of rotation changeover ● Suppression bandwidths and setpoint limitation ● Ramp-function generator Setpoint sources The closed-loop control setpoint can be interconnected from various sources using BICO technology (e.g.
-
Page 273: Jog
Drive functions 7.3 Function modules 7.3.7.3 Description This function can be selected via digital inputs or via a field bus (e.g. PROFIBUS). The setpoint is, therefore, predefined via p1058[D] and p1059[D]. When a jog signal is present, the motor is accelerated to the jog setpoint with the acceleration ramp of the ramp-function generator (referred to the maximum speed p1082;... - Page 274 Drive functions 7.3 Function modules Jog properties ● If both jog signals are issued at the same time, the current speed is maintained (constant velocity phase). ● Jog setpoints are approached and exited via the ramp-function generator. ● The jog function can be activated from the "ready for switching on" status and from the OFF1 deceleration ramp.
- Page 275 Drive functions 7.3 Function modules Jog sequence Figure 7-58 Jog sequence Function Manual Function Manual, 01/2011, 6SL3097-4AB10-0BP3...
- Page 276 Function diagrams (see SINAMICS S110 List Manual) ● 2610 Sequence control - sequencer ● 3030 Setpoint addition, setpoint scaling, jog Overview of important parameters (see SINAMICS S110 List Manual) ● p1055[C] BI: Jog bit 0 ● p1056[C] BI: Jog bit 1 ●...
-
Page 277: Fixed Speed Setpoints
– Unused binector inputs have the same effect as a "0" signal Function diagrams (see SINAMICS S110 List Manual) ● 1550 Overviews - setpoint channel ● 3010 Fixed speed setpoints Overview of important parameters (see SINAMICS S110 List Manual) Adjustable parameters ● p1001[D] CO: Fixed speed setpoint 1 ● ... -
Page 278: Motorized Potentiometer
Drive functions 7.3 Function modules 7.3.7.5 Motorized potentiometer Description This function is used to simulate an electromechanical potentiometer for setpoint input. You can switch between manual and automatic mode for setpoint input. The specified setpoint is routed to an internal ramp-function generator. Setting values, start values and braking with OFF1 do not require the ramp-function generator of the motorized potentiometer. - Page 279 ● 1550 Setpoint channel ● 2501 Control word sequence control ● 3020 Motorized potentiometer Overview of important parameters (see SINAMICS S110 List Manual) ● p1030[D] Motorized potentiometer, configuration ● p1035[C] BI: Motorized potentiometer, setpoint, raise ● p1036[C] BI: Motorized potentiometer, setpoint, lower ●...
-
Page 280: Main/Supplementary Setpoint And Setpoint Modification
Figure 7-60 Setpoint addition, setpoint scaling Function diagrams (see SINAMICS S110 List Manual) ● 1550 Setpoint channel ● 3030 Main/supplementary setpoint, setpoint scaling, jog Function Manual... - Page 281 Drive functions 7.3 Function modules Overview of important parameters (see SINAMICS S110 List Manual) Adjustable parameters ● p1070[C] CI: Main setpoint ● p1071[C] CI: Main setpoint scaling ● p1075[C] CI: Supplementary setpoint ● p1076[C] CI: Supplementary setpoint scaling Display parameters...
-
Page 282: Direction Limitation And Setpoint Inversion
Function diagrams (see SINAMICS S110 List Manual) ● 1550 Setpoint channel ● 3040 Direction limitation and direction reversal Overview of important parameters (see SINAMICS S110 List Manual) Adjustable parameters ● p1110[C] BI: Inhibit negative direction ● p1111[C] BI: Inhibit positive direction ●... -
Page 283: Suppression Bandwidths And Setpoint Limits
The limit speeds can be set via p1080[D] and p1082[D]. These limits can also be changed during operation with the connectors p1085[C] and p1088[C]. Figure 7-62 Suppression bandwidths, setpoint limitation Function diagrams (see SINAMICS S110 List Manual) ● 1550 Setpoint channel ● 3050 Suppression bandwidth and speed limiting Function Manual... - Page 284 Drive functions 7.3 Function modules Overview of important parameters (see SINAMICS S110 List Manual) Setpoint limitation ● p1080[D] Minimum speed ● p1082[D] Maximum speed ● p1083[D] CO: Speed limit in positive direction of rotation ● r1084 Speed limit positive effective ●...
-
Page 285: Ramp-Function Generator
Drive functions 7.3 Function modules 7.3.7.9 Ramp-function generator Description The ramp-function generator is used to limit acceleration in the event of abrupt setpoint changes, which helps prevent load surges throughout the drive train. The ramp-up time p1120[D] and ramp-down time p1121[D] can be used to set mutually independent acceleration and deceleration ramps. - Page 286 Drive functions 7.3 Function modules ● Set ramp-function generator – Ramp-function generator setting value p1144[C] – Set ramp-function generator signal p1143[C] ● Freezing of the ramp-function generator using p1141 (not in jog mode r0046.31 = 0) Properties of the extended ramp-function generator Figure 7-65 Extended ramp-function generator ●...
- Page 287 Drive functions 7.3 Function modules ● Select ramp-function generator rounding type p1134[D] – p1134 = "0": continuous smoothing rounding is always active. Overshoots may occur. If the setpoint changes, final rounding is carried out and then the direction of the new setpoint is adopted.
- Page 288 The "ramp-function generator" parameter screen is selected via the following icon in the toolbar of the STARTER commissioning tool: Figure 7-67 STARTER icon for "ramp-function generator" Overview of important parameters (see SINAMICS S110 List Manual) Adjustable parameters ● p1115 Ramp-function generator selection ● p1120[D] Ramp-function generator ramp-up time ●...
-
Page 289: Free Function Blocks
This functionality is only available as a "free function blocks" function module (FBLOCKS) on the SERVO drive object type of SINAMICS S110. In the free function blocks, analog signals are treated as dimensionless per unit variables (see the "Connection to the drive"... - Page 290 9999 (i.e. the function block is not computed) is assigned to each function block. Example: For function block ADD 0 (see the SINAMICS S110 List Manual, function diagram 7220), the runtime group is set in p20096. The runtime groups are divided into one "fixed runtime group" and several "free runtime groups".
- Page 291 Drive functions 7.3 Function modules Example p20000[0] = p20000[3] = p20000[9] = 9003 The computing sequence is: runtime group 0 first, then runtime group 3, then runtime group 9, and then the setpoint channel. The minimum sampling time is 1 ms. The actual sampling time in ms is displayed for each runtime group in parameter r20001[0...9].
- Page 292 This will only be detected after the Control Unit has been downloaded and generates fault F01042 (parameter error during project download). The basic sampling time for the SERVO drive object type in SINAMICS S110 is as follows: r20002 = 0.25 ms (current controller sampling time) ●...
- Page 293 Drive functions 7.3 Function modules Example for the adjustable sampling times in SINAMICS S110: The basic sampling time (r20002) on the SERVO drive object is 250 µs, which means that the following sampling times are possible: ● Hardware sampling times: p20000[x] = 0 (runtime group not computed) p20000[x] = 1 x 250 µs = 250 µs (not permitted because less than 1 ms)
- Page 294 Drive functions 7.3 Function modules Run sequence In the factory setting, each free function block is assigned a default setting for the run sequence. The run sequence of consecutive free function blocks within a runtime group can be optimized by changing these values accordingly. A run sequence value can be used on a drive object once only.
- Page 295 The table below shows the range of free function blocks available. For details of individual function blocks, see the "Description of function blocks" chapter. For information on the special technical properties of the individual function blocks, see the function diagrams in the SINAMICS S110 List Manual. Table 7- 29 Range of "free function blocks"...
- Page 296 Note The following manual contains function diagrams for "free function blocks" and all the product-dependent function diagrams available for SINAMICS S110 (e.g. function diagram 3010): SINAMICS S110 List Manual, "Function diagrams" chapter. Example 1: Interconnecting the input value The actual fixed speed setpoint (CO: r1024, function diagram 3010) is to be read to the free function block ADD 0 (function diagram 7220) for further processing.
- Page 297 Drive functions 7.3 Function modules Example 2: Interconnecting the output value The per unit output value of the free function block LIM 0 (function diagram 7260) is to be switched in as additional torque M_additional 2 (function diagram 5060) in SERVO control mode.
- Page 298 Drive functions 7.3 Function modules Example 3: Interconnecting the PROFIBUS receive word (WORD) The PZD receive word 2 (CO: r2050[1], function diagram 2460) is to be interconnected with the free function block ADD 0 (function diagram 7220). ADD 0 Runtime group p20096 = 0 ADD 0 Input X p20094 [0 ]...
- Page 299 Drive functions 7.3 Function modules Example 4: Interconnecting the PROFIBUS send word (DWORD) The output of the free function block LIM 1 (CO: r20234, function diagram 7260) is to be interconnected with a PZD send word (function diagram 2470) of data type DWORD. The input of the free function block LIM 1 is supplied with a fixed speed setpoint (p1002, function diagram 3010).
-
Page 300: Commissioning
Drive functions 7.3 Function modules 7.3.8.2 Commissioning Activating the "free function blocks" function module STARTER commissioning software Activation with the STARTER commissioning software is only possible offline and is performed via the "Properties" dialog box for the drive objects. The "free function blocks" can be selected on the "Function modules"... - Page 301 When the system is in offline mode, SIZER offers an approximate statement regarding whether a configuration can be computed on SINAMICS S110. The additional calculation time load is not taken into account when the "free function blocks" function module is activated.
- Page 302 Drive functions 7.3 Function modules Calculation time load for firmware version 4.3 and higher For firmware version 4.3 and higher, after a download or a parameter change (e.g. where the sampling time of a runtime group is changed) using the configuration data, the Control Unit (CU) determines the calculation time load to be expected (including the load associated with FBLOCKS).
- Page 303 T_sampling < r20003 - r20002) used by the basic SINAMICS system and "free function blocks" is restricted as follows: ● SINAMICS S110 → no. of hardware sampling times = 11 The assignment of the available hardware sampling times is displayed in r20008[0...12] as follows (STARTER/SCOUT: in online mode only): ●...
-
Page 304: And
Drive functions 7.3 Function modules Project download, fault message, and procedure If too many different hardware sampling times are configured offline, a fault message is not output until the project is downloaded. In this case, proceed as follows: 1. When the project is in offline mode, switch the free runtime groups assigned hardware sampling times to software sampling times. -
Page 305: Xor (Exclusive Or)
Drive functions 7.3 Function modules 7.3.8.4 Brief description BOOL-type OR function block with four inputs Mode of operation This function block links the binary variables at inputs I to a logic OR (disjunction) and outputs the result to its digital output Q. Q = I Output Q = 0 when the value 0 is present at every input from I to I... -
Page 306: Add (Adder)
Drive functions 7.3 Function modules 7.3.8.7 ADD (adder) Brief description REAL-type adder with four inputs Mode of operation This function block adds (in accordance with the sign) the values entered at inputs X to X The result is limited to a range of -3.4E38 to +3.4E38 and output at output Y. Y = X 7.3.8.8 SUB (subtracter) -
Page 307: Div (Divider)
Drive functions 7.3 Function modules 7.3.8.10 DIV (divider) Brief description REAL-type divider with two inputs Mode of operation This function block divides the value entered at input X by the value entered at input X . The result is output at the outputs as follows: ●... -
Page 308: Mfp (Pulse Generator)
Drive functions 7.3 Function modules 7.3.8.12 MFP (pulse generator) Brief description ● Timer for generating a pulse with a fixed duration ● Used as a pulse-contracting or pulse-stretching monoflop Mode of operation The rising edge of a pulse at input I sets output Q to 1 for pulse duration T. The pulse generator cannot be retriggered. -
Page 309: Pde (On Delay)
Drive functions 7.3 Function modules 7.3.8.14 PDE (ON delay) Brief description BOOL-type timer with ON delay Mode of operation The rising edge of a pulse at input I sets output Q to 1 after pulse delay time T. Output Q become 0 when I is 0. If the duration of input pulse I is less than pulse delay time T, Q remains 0. -
Page 310: Pdf (Off Delay)
Drive functions 7.3 Function modules 7.3.8.15 PDF (OFF delay) Brief description Timer with OFF delay Mode of operation The falling edge of a pulse at input I resets output Q to 0 after OFF delay time T. Output Q becomes 1 when I is 1. Output Q becomes 0 when input pulse I is 0 and OFF delay time T has expired. -
Page 311: Pst (Pulse Stretcher)
Drive functions 7.3 Function modules 7.3.8.16 PST (pulse stretcher) Brief description Timer for generating a pulse with a minimum duration and an additional reset input Mode of operation The rising edge of a pulse at input I sets output Q to 1. Output Q does not return to 1 until input pulse I is 0 and pulse duration T has expired. -
Page 312: Dfr (D Flip-Flop, Reset Dominant)
Drive functions 7.3 Function modules 7.3.8.18 DFR (D flip-flop, reset dominant) Brief description BOOL-type function block for use as a D flip-flop with reset dominance Mode of operation If inputs S and R are logical 0, the D input data is switched through to output Q when a rising edge is present at trigger input I. -
Page 313: Nsw (Numeric Change-Over Switch)
Drive functions 7.3 Function modules 7.3.8.20 NSW (numeric change-over switch) Brief description This function block switches one of two numeric input variables (REAL type) to the output. Mode of operation If input I = 0, X0 is switched to output Y. If input I = 1, X1 is switched to output Y. -
Page 314: Pt1 (Smoothing Element)
Drive functions 7.3 Function modules 7.3.8.22 PT1 (smoothing element) Brief description ● First-order delay element with setting function ● Used as smoothing element Mode of operation Setting function not active (S = 0) Input variable X, dynamically delayed by smoothing time constant T, is switched to output Y. T determines the steepness of the rise of the output variable. -
Page 315: Int (Integrator)
Drive functions 7.3 Function modules 7.3.8.23 INT (integrator) Brief description ● Function block with integrating action ● Integrator functions: – Set initial value. – Adjustable integral time constant – Adjustable limits – For normal integrator operation, a positive limit value must be specified for LU and a negative limit value for LL. -
Page 316: Dif (Derivative Action Element)
Drive functions 7.3 Function modules 7.3.8.24 DIF (derivative action element) Brief description Function block with derivative action behavior Mode of operation Output variable Y is proportional to the rate of change of input variable X multiplied by derivative time constant TD. The discrete values are calculated according to the following algorithm: Yn = (Xn –... -
Page 317: Lvm (Double-Sided Limit Monitor With Hysteresis)
Drive functions 7.3 Function modules 7.3.8.25 LVM (double-sided limit monitor with hysteresis) Brief description ● This BOOL-type function block monitors an input variable by comparing it with selectable reference variables. ● Application: – Monitoring setpoints, actual, and measured values – Suppressing frequent switching (jitter) ●... - Page 318 Drive functions 7.3 Function modules Function Manual Function Manual, 01/2011, 6SL3097-4AB10-0BP3...
-
Page 319: Safety Integrated Functions
Safety Integrated Functions Standards and regulations 8.1.1 General information 8.1.1.1 Aims Manufacturers and operating companies of equipment, machines, and products are responsible for ensuring the required level of safety. This means that plants, machines, and other equipment must be designed to be as safe as possible in accordance with the current state of the art. -
Page 320: Functional Safety
Safety Integrated Functions 8.1 Standards and regulations 8.1.1.2 Functional safety Safety, from the perspective of the object to be protected, cannot be split-up. The causes of hazards and, in turn, the technical measures to avoid them can vary significantly. This is why a differentiation is made between different types of safety (e.g. -
Page 321: Machinery Directive
Safety Integrated Functions 8.1 Standards and regulations 8.1.2.1 Machinery Directive The basic safety and health requirements specified in Annex I of the Directive must be fulfilled for the safety of machines. The protective goals must be implemented responsibly to ensure compliance with the Directive. - Page 322 Safety Integrated Functions 8.1 Standards and regulations A further sub-division has been made for B standards: ● Type B1 standards for higher-level safety aspects (e.g. ergonomic principles, safety clearances from sources of danger, minimum clearances to prevent parts of the body from being crushed).
-
Page 323: Standards For Implementing Safety-Related Controllers
Safety Integrated Functions 8.1 Standards and regulations 8.1.2.3 Standards for implementing safety-related controllers If the functional safety of a machine depends on various control functions, the controller must be implemented in such a way that the probability of the safety functions failing is sufficiently minimized. -
Page 324: En Iso 13849-1 (Previously En 954-1)
Safety Integrated Functions 8.1 Standards and regulations Systems for executing safety-related control EN ISO 13849-1 EN 62061 functions Non-electrical (e.g. hydraulic, pneumatic) Not covered Electromechanical (e.g. relay and/or basic Restricted to the designated All architectures and max. up to electronics) architectures (see comment 1) SIL 3 and max. -
Page 325: En 62061
Safety Integrated Functions 8.1 Standards and regulations The standard describes how the performance level (PL) is calculated for safety-related components of the controller on the basis of designated architectures. In the event of any deviations from this, EN ISO 13849-1 refers to EN 61508. When combining several safety-related parts to form a complete system, the Standard explains how to determine the resulting PL. - Page 326 Safety Integrated Functions 8.1 Standards and regulations ● λ: Failure rate ● B10 value: For elements that are subject to wear ● T1: Lifetime For electromechanical devices, a manufacturer specifies a failure rate λ with reference to the number of operating cycles. The failure rate per unit time and the lifetime must be determined using the switching frequency for the particular application.
-
Page 327: Series Of Standards En 61508 (Vde 0803)
Safety Integrated Functions 8.1 Standards and regulations 8.1.2.6 Series of standards EN 61508 (VDE 0803) This series of standards describes the current state of the art. EN 61508 is not harmonized in line with any EU directives, which means that an automatic presumption of conformity for fulfilling the protective requirements of a directive is not implied. -
Page 328: Risk Analysis/Assessment
Safety Integrated Functions 8.1 Standards and regulations 8.1.2.7 Risk analysis/assessment Risks are intrinsic in machines due to their design and functionality. For this reason, the Machinery Directive requires that a risk assessment be performed for each machine and, if necessary, the level of risk reduced until the residual risk is less than the tolerable risk. To assess these risks, the following standards must be applied: ●... - Page 329 Safety Integrated Functions 8.1 Standards and regulations Figure 8-2 Iterative process to achieve the required level of safety to ISO 14121-1 Risks must be reduced by designing and implementing the machine accordingly (e.g. by means of controllers or protective measures suitable for the safety-related functions). If the protective measures involve the use of interlocking or control functions, these must be designed in accordance with EN ISO 13849-1.
-
Page 330: Risk Reduction
Safety Integrated Functions 8.1 Standards and regulations 8.1.2.8 Risk reduction Risk reduction measures for a machine can be implemented by means of safety-related control functions in addition to structural measures. To implement these control functions, special requirements must be taken into account, graded according to the magnitude of the risk. -
Page 331: Minimum Requirements Of The Osha
Safety Integrated Functions 8.1 Standards and regulations 8.1.3.1 Minimum requirements of the OSHA The Occupational Safety and Health Act (OSHA) from 1970 regulates the requirement that employers must offer a safe place of work. The core requirements of OSHA are specified in Section 5 "Duties". -
Page 332: Nfpa 79
Safety Integrated Functions 8.1 Standards and regulations 8.1.3.3 NFPA 79 Standard NFPA 79 (Electrical Standard for Industrial Machinery) applies to electrical equipment on industrial machines with rated voltages of less than 600 V. A group of machines that operate together in a coordinated fashion is also considered to be one machine. -
Page 333: Machine Safety In Japan
Safety Integrated Functions 8.1 Standards and regulations 8.1.4 Machine safety in Japan The situation in Japan is different from that in Europe and the US. Legislation such as that prescribed in Europe does not exist. Similarly, product liability does not play such an important role as it does in the US. -
Page 334: Other Safety-Related Issues
Safety Integrated Functions 8.1 Standards and regulations 8.1.6 Other safety-related issues 8.1.6.1 Information sheets issued by the Employer's Liability Insurance Association Safety-related measures to be implemented cannot always be derived from directives, standards, or regulations. In this case, supplementary information and explanations are required. -
Page 335: General Information About Sinamics Safety Integrated
General information about SINAMICS Safety Integrated 8.2.1 Supported functions This chapter covers all the Safety Integrated functions available for SINAMICS S110. A distinction is made between Safety Integrated Basic Functions and Safety Integrated Extended Functions. The safety functions listed here conform to: ●... - Page 336 Safety Integrated Functions 8.2 General information about SINAMICS Safety Integrated ● Safety Integrated Extended Functions These functions require an additional Safety license. Extended Functions with encoder require an encoder with Safety capability (see section "Reliable actual value acquisition with the encoder system"). –...
-
Page 337: Control Of Safety Integrated Functions
Safety Integrated Functions 8.2 General information about SINAMICS Safety Integrated Prerequisites for the Extended Functions ● Safety Integrated Extended Functions can only be operated with the relevant license. The associated license key is entered in parameter p9920 in ASCII code. The license key can be activated via parameter p9921 = 1. -
Page 338: Drive Monitoring With Or Without Encoder
Safety Integrated Functions 8.2 General information about SINAMICS Safety Integrated 8.2.3 Drive monitoring with or without encoder If motors without an encoder are being used, not all Safety Integrated functions can be used. In operation without encoder the speed actual values are calculated from the measured electrical actual values. -
Page 339: Parameter, Checksum, Version, Password
Safety Integrated Functions 8.2 General information about SINAMICS Safety Integrated Monitoring without an encoder The encoderless Safety Integrated functions are configured in the expert list using p9506 = p9306 = 1 or p9506 = p9306 = 3 or by selecting "without encoder" in the Safety screen form. For speed monitoring without encoder, the drive is braked along a ramp, which is set using Safe Brake Ramp (SBR encoderless). - Page 340 Safety Integrated Functions 8.2 General information about SINAMICS Safety Integrated Checking the checksum For each monitoring channel, the Safety parameters include one parameter for the actual checksum for the Safety parameters that have undergone a checksum check. During commissioning, the actual checksum must be transferred to the corresponding parameter for the reference checksum.
- Page 341 2. Recommission the drive unit and drive. 3. Recommission Safety Integrated. Or contact your regional Siemens office and ask for a readout of the password (complete drive project must be made available). Overview of important parameters (see SINAMICS S110 List Manual) ●...
-
Page 342: System Features
Go into the Internet under: http://automation.siemens.com To subscribe to the newsletter, please proceed as follows: 1. Select the desired language for the webpage. -
Page 343: Certification
● Systematic capability according to EN 62061 In addition, most of the safety functions of the SINAMICS S have been certified by independent institutes. An up-to-date list of certified components is available on request from your local Siemens office. Function Manual Function Manual, 01/2011, 6SL3097-4AB10-0BP3... -
Page 344: Safety Instructions
Safety Integrated Functions 8.3 System features 8.3.3 Safety instructions Note Additional safety information and residual risks not specified in this section are included in the relevant sections of this Function Manual. DANGER Safety Integrated can be used to minimize the level of risk associated with machines and plants. - Page 345 Safety Integrated Functions 8.3 System features WARNING EN 60204-1 The Emergency Stop function must bring the machine to a standstill in accordance with stop category 0 or 1 (STO or SS1). The machine must not restart automatically after EMERGENCY STOP. When the safety functions (Extended functions) are deactivated, an automatic restart is permitted under certain circumstances depending on the risk analysis (except when EMERGENCY STOP is reset).
- Page 346 Safety Integrated Functions 8.3 System features WARNING Encoder faults within a single-encoder system are detected by means of various HW and SW monitoring functions. It is not allowed to disable these monitoring functions and they must be parameterized carefully. Depending on the fault type and responding monitoring function, stop function category 0 or 1 in accordance with EN 60204-1 (fault response functions STOP A or STOP B in accordance with Safety Integrated) is selected.
-
Page 347: Probability Of Failure For Safety Functions
PFH values of other components used for this safety function. Corresponding PFH values are provided for the SINAMICS S110 drive unit, depending on the hardware configuration (control type, ...). The various integrated safety functions are not differentiated. - Page 348 Safety Integrated Functions 8.3 System features Control of Basic Functions via PROFIsafe The following table lists the response times from receiving the PROFIsafe telegram at the Control Unit up to initiating the particular response. Table 8- 4 Response times when controlling the Basic Functions via PROFIsafe Function Typical Worst case...
- Page 349 Safety Integrated Functions 8.3 System features Control of Extended Functions with encoder via terminals The table below shows the response times after the appearance of a signal at the terminals. Table 8- 6 Response times when controlling the Extended Functions with encoder via safe on-board terminals Function Typical Worst case...
- Page 350 Safety Integrated Functions 8.3 System features CAUTION If the safety functions SLS without encoder or SDI without encoder are already selected when the gating pulses for the Power Module are enabled, then during the starting phase, it is absolutely imperative that you take into account the response times when limit values are violated and for system errors in order to extend the time value set in parameters p9586 and p9386 with respect to the standard values (see the table above).
- Page 351 8. Restart the machine, and keep the trace function activated. 9. Unnecessary messages/signals should no longer occur. Overview of important parameters (see SINAMICS S110 List Manual) ● p0799[0...2] CU inputs/outputs sampling time ● p9500 SI Motion monitoring clock cycle (processor 1) ●...
-
Page 352: Residual Risk
Safety Integrated Functions 8.3 System features 8.3.6 Residual risk The fault analysis enables the machine manufacturer to determine the residual risk at his machine with regard to the drive unit. The following residual risks are known: WARNING Due to the intrinsic potential of hardware faults, electrical systems are subject to additional residual risk, which can be expressed by means of the PFH value. - Page 353 Safety Integrated Functions 8.3 System features WARNING Within a single-encoder system: a) a single electrical fault in the encoder (or loose encoder shaft coupling), or a loose encoder housing will cause a static state of the encoder signals (that is, they no longer follow a movement while still returning a correct level), and prevent fault detection while the drive is in stop state (for example, drive in SOS state).
-
Page 354: Safety Integrated Basic Functions
Safety Integrated Functions 8.4 Safety Integrated Basic Functions Safety Integrated Basic Functions Note You can ask your local sales office regarding the PFH values of the individual safety functions (also refer to the Section "Probability of failure of safety functions"). 8.4.1 Safe Torque Off (STO) In conjunction with a machine function or in the event of a fault, the "Safe Torque Off"... - Page 355 Safety Integrated Functions 8.4 Safety Integrated Basic Functions ● The input terminals can be debounced to prevent signal faults triggering other faults. Parameters p9651 and p9851 are used to set filter times. WARNING Appropriate measures must be taken to ensure that the motor does not move once the motor power supply has been disconnected ("coast down") (e.g.
- Page 356 Safety Integrated Functions 8.4 Safety Integrated Basic Functions ● Each monitoring channel cancels safe pulse suppression via its switch-off signal path. ● The safety prompt "Apply motor holding brake" is canceled. ● Any pending STOP F or STOP A commands are canceled (see r9772/r9872). ●...
-
Page 357: Safe Stop 1 (Ss1, Time Controlled)
Safety Integrated Functions 8.4 Safety Integrated Basic Functions 8.4.2 Safe Stop 1 (SS1, time controlled) General description The "Safe Stop 1" function can be used to stop the drive in accordance with EN 60204-1, stop category 1. The drive decelerates with the OFF3 ramp (p1135) once "Safe Stop 1" is selected and switches to "Safe Torque Off"... - Page 358 Alternatively, the status of the functions can be displayed using the configurable messages N01621 and N30621 (configured using p2118 and p2119). Overview of important parameters (see SINAMICS S110 List Manual) ● p1135[0...n] OFF3 ramp-down time ● p9650 SI F-DI changeover tolerance time (processor 1) ●...
-
Page 359: Safe Brake Control (Sbc)
To ensure that this function can be used for Blocksize Power Modules, a Safe Brake Relay must be used (for more information, see the Equipment Manual SINAMICS S110). When the Power Module is configured automatically, the Safe Brake Relay is detected and the motor holding brake type is defaulted (p1278 = 0). - Page 360 A relay cannot be used to apply the brake if "Safe Brake Control" is being used. It may result in faults being triggered in the brake control. Overview of important parameters (see SINAMICS S110 List Manual) ● p9602 SI enable safe brake control (CPU 1) ●...
-
Page 361: Safety Faults
Safety Integrated Functions 8.4 Safety Integrated Basic Functions 8.4.4 Safety faults The fault messages for Safety Basic Functions are stored in the standard message buffer and can be read from there. In contrast, the fault messages for Safety Integrated Extended Functions are stored in a separate safety message buffer (see section "Message buffer"). - Page 362 (STW bit 7). A falling edge in this signal resets the status "Internal Event" and so acknowledges the fault. Description of faults and alarms Note The faults and alarms for SINAMICS Safety Integrated are described in the following documentation: References: SINAMICS S110 List Manual Function Manual Function Manual, 01/2011, 6SL3097-4AB10-0BP3...
-
Page 363: Forced Dormant Error Detection
Safety Integrated Functions 8.4 Safety Integrated Basic Functions 8.4.5 Forced dormant error detection Forced dormant error detection or test of the switch-off signal paths for Safety Integrated Basic Functions The forced dormant error detection function at the switch-off signal paths is used to detect software/hardware faults at both monitoring channels in time and is automated by means of activation/deactivation of the "Safe Torque Off"... -
Page 364: Safety Integrated Extended Functions
For SINAMICS S110, the Control Unit can also be supplied from the line connection of the Power Module. For SINAMICS S110, a POWER OFF/POWER ON means line supply off/on for the Power Module and –... - Page 365 Safety Integrated Functions 8.5 Safety Integrated Extended Functions Restrictions for Safety Integrated Extended Functions "without encoder" The following restrictions apply for the Safety Extended Functions "without encoder": Only operation with motors of type SIEMOSYN No operation for units with the following design Blocksize GX Chassis Technological restrictions...
-
Page 366: Safe Torque Off
Safety Integrated Functions 8.5 Safety Integrated Extended Functions CAUTION Safety Integrated Extended Functions "without encoder" must not be used if the motor, after it has been switched off, can still be accelerated by the mechanical elements of the connected machine component. Whether or not a mechanical brake is installed is irrelevant here. -
Page 367: Safe Stop 1 (Ss1)
Safety Integrated Functions 8.5 Safety Integrated Extended Functions 8.5.3 Safe Stop 1 (SS1) 8.5.3.1 Safe Stop 1 (SS1, time and acceleration controlled) The SS1 function with an encoder monitors whether motor acceleration reaches impermissible levels during the SS1 time. The "Safe Stop 1" function can be used to stop the drive in accordance with EN 60204-1, stop category 1. - Page 368 Safety Integrated Functions 8.5 Safety Integrated Extended Functions Note Activating SS1 may cause the higher-level control (PLC, motion controller), which enters the speed setpoint, to interrupt the ramp function by triggering OFF2. The device behaves in this way as a result of a fault reaction triggered by OFF3 activation. This fault reaction must be avoided using the appropriate parameterization/configuration.
-
Page 369: Safe Stop 1 Without Encoder (Time And Speed Controlled)
Safety Integrated Functions 8.5 Safety Integrated Extended Functions Responses Speed limit violated (SAM): ● STOP A ● Safety message C01706/C30706 System errors: 1. STOP F with subsequent STOP A 2. Safety message C01711/C30711 Status for "Safe Stop 1" The status of the "Safe Stop 1" function is displayed using the following parameters: ●... - Page 370 Safety Integrated Functions 8.5 Safety Integrated Extended Functions Brake ramp monitoring The motor is immediately decelerated along the OFF3 ramp as soon as SS1 is triggered. Monitoring is activated once the delay time in p9582/p9382 has elapsed. The drive is monitored during braking to ensure the set brake ramp is adhered to.
-
Page 371: Safe Stop 1 - Parameter
8.5 Safety Integrated Extended Functions 8.5.3.3 Safe Stop 1 - Parameter Overview of important parameters (see SINAMICS S110 List Manual) ● p1135[0...n] OFF3 ramp-down time ● p9301 SI Motion enable safety functions (CPU 2) ● p9501 SI Motion enable safety functions (CPU 1) ●... -
Page 372: Safe Stop 2 (Ss2)
Safety Integrated Functions 8.5 Safety Integrated Extended Functions 8.5.4 Safe Stop 2 (SS2) The "Safe Stop 2" (SS2) safety function is used to brake the motor safely on the OFF3 ramp down (p1135) with subsequent transition to the SOS state (see the "Safe Operating Stop" chapter) after the delay time expires (p9352/p9552). - Page 373 System errors: ● STOP F with subsequent STOP A ● Safety message C01711/C30711 Overview of important parameters (see SINAMICS S110 List Manual) ● p1135[0...n] OFF3 ramp-down time ● p9301 SI Motion enable safety functions (CPU 2) ● p9501 SI Motion enable safety functions (CPU 1) ●...
-
Page 374: Epos And Safe Stop 2
2. Enter the maximum necessary braking time from EPOS (depending on the values set in p2573 and p2645) with a safety addition (approx. +5%) in the SOS delay time (p9551/p9351). Overview of important parameters (see SINAMICS S110 List Manual) ● p2645 CI: EPOS direct setpoint input/MDI, deceleration override ● p2573 EPOS maximum deceleration ●... -
Page 375: Safe Operating Stop (Sos)
Safety Integrated Functions 8.5 Safety Integrated Extended Functions 8.5.5 Safe Operating Stop (SOS) General description This function serves for fail-safe monitoring of the standstill position of a drive. Personnel can enter the protected machine areas without having to shut down the machine as long as SOS is active. - Page 376 System errors: ● STOP F ● Safety message C01711/C30711 Overview of important parameters (see SINAMICS S110 List Manual) ● p9301 SI Motion enable safety functions (CPU 2) ● p9501 SI Motion enable safety functions (CPU 1) ● p9330 SI Motion standstill tolerance (CPU 2) ●...
-
Page 377: Safely Limited Speed (Sls)
Safety Integrated Functions 8.5 Safety Integrated Extended Functions 8.5.6 Safely Limited Speed (SLS) The Safely Limited Speed (SLS) function is used to protect a drive against unintentionally high speeds in both directions of rotation. This is achieved by monitoring the current drive speed up to a speed limit. - Page 378 Safety Integrated Functions 8.5 Safety Integrated Extended Functions By contrast to SLS limit parameters, this parameter specifies limits on the motor side instead of limits on the load side. ● r9733[0] = p9531[x] * p9533; x = selected SLS stage ●...
-
Page 379: Safely Limited Speed Without Encoder
Safety Integrated Functions 8.5 Safety Integrated Extended Functions Overview of important parameters (see SINAMICS S110 List Manual) ● p9301.0 SI Motion enable safety functions (CPU 2) ● p9501.0 SI Motion enable safety functions (CPU 1) ● p9331[0...3] SI Motion SLS limits (CPU 2) ●... - Page 380 Safety Integrated Functions 8.5 Safety Integrated Extended Functions Configuring the limits ● The speed limits for Safely Limited Speed without encoder are configured in exactly the same way as described for Safely Limited Speed with encoder. ● Only STOP A and STOP B may be configured as stop responses for "Safely Limited Speed"...
- Page 381 Safety Integrated Functions 8.5 Safety Integrated Extended Functions Restart after OFF2 If the drive has been switched off via OFF2/STO, the following steps need to be carried out before a restart can be performed: 1st scenario: ● State after power-on: SLS selected, STO selected, OFF2 active ●...
-
Page 382: Safely Limited Speed - Parameter
8.5 Safety Integrated Extended Functions 8.5.6.3 Safely Limited Speed - Parameter Overview of important parameters (see SINAMICS S110 List Manual) ● p9301.0 SI Motion enable safety functions (CPU 2) ● p9306 SI Motion function specification (CPU 2) ● p9331[0...3] SI Motion SLS limits (CPU 2) ●... -
Page 383: Epos And Safely-Limited Speed
SLS limit. This required braking time is determined by the current speed, the jerk limit in p2574 and the maximum delay in p2573. Overview of important parameters (see SINAMICS S110 List Manual) ● p2573 EPOS maximum deceleration ●... -
Page 384: Safe Speed Monitor (Ssm)
Safety Integrated Functions 8.5 Safety Integrated Extended Functions 8.5.7 Safe Speed Monitor (SSM) 8.5.7.1 Safe Speed Monitor with encoder General description The "Safe Speed Monitor" (SSM) function provides a reliable method for detecting when a speed limit has been undershot (p9346/p9546) in both directions of rotation, e.g. for zero speed detection. - Page 385 Safety Integrated Functions 8.5 Safety Integrated Extended Functions Functional features of "Safe Speed Monitor" with encoder The parameter p9346/p9546 "SI Motion SSM (SGA n < nx) speed limit n_x" is used to set the speed limit. The abbreviation "SGA n < nx" indicates the safety function required for determining an output signal when a parameterizable velocity limit has been undershot.
- Page 386 Safety Integrated Functions 8.5 Safety Integrated Extended Functions The following diagram shows the characteristic of the safe output signal SSM when the hysteresis is active: Hysteresis (p 9547 ) 9546 9 5 4 6 Hysteresis (p 9547 ) SSM -Output signal Figure 8-9 Safe output signal for SSM with hysteresis Note...
-
Page 387: Safe Speed Monitor Without Encoder
Safety Integrated Functions 8.5 Safety Integrated Extended Functions 8.5.7.2 Safe Speed Monitor without encoder Function Set p9306 = p9506 = 1 or p9306 = p9506 = 3 (factory setting = 0) to activate Safety Integrated functions without encoder. You can also make this setting by selecting "Without encoder"... - Page 388 Safety Integrated Functions 8.5 Safety Integrated Extended Functions Figure 8-10 Safe Speed Monitor without encoder (p9309.0 = p9509.0 = 0) If p9309.0 = p9509.0 = 1, the SSM monitoring is ended after the pulse suppression. The feedback signal p9722.15 drops to 0. The SSM monitoring is only reactivated after the pulses have been re-enabled.
-
Page 389: Safe Speed Monitor Restart
Safety Integrated Functions 8.5 Safety Integrated Extended Functions 8.5.7.3 Safe Speed Monitor restart Restart after pulse suppression for p9309/p9509 = 0 If the drive pulses have been suppressed using OFF1/OFF2/STO, the following steps must be carried out for a restart: 1st scenario: ●... -
Page 390: Overview Of Important Parameters
8.5 Safety Integrated Extended Functions 8.5.7.4 Overview of important parameters Overview of important parameters (see SINAMICS S110 List Manual) ● p9301 SI Motion enable safety functions (CPU 2) ● p9501 SI Motion enable safety functions (CPU 1) ● p9306 SI Motion function specification (CPU 2) ●... -
Page 391: Safe Acceleration Monitor (Sam)
Safety Integrated Functions 8.5 Safety Integrated Extended Functions 8.5.8 Safe Acceleration Monitor (SAM) Safe Acceleration Monitor with encoder The "Safe Acceleration Monitor" (SAM) function is used for safe monitoring of drive acceleration. This function is part of the SS1 (time and acceleration controlled) and SS2 (or STOP B and STOP C) Safety functions. - Page 392 ● Element of the SS1 (time and acceleration controlled) and SS2 functions ● Parameterizable minimum shutdown speed to be monitored (p9368/p9568) Overview of important parameters (see SINAMICS S110 List Manual) ● p9346 SI Motion speed limit n_x (CPU 2) ● p9546 SI Motion speed limit n_x (CPU 1) ●...
-
Page 393: Safe Brake Ramp (Sbr)
Safety Integrated Functions 8.5 Safety Integrated Extended Functions 8.5.9 Safe Brake Ramp (SBR) The Safe Brake Ramp (SBR) function provides a safe method for monitoring the brake ramp. The Safe Brake Ramp function is used to monitor braking when using the "SS1 without encoder"... - Page 394 Safety Integrated Functions 8.5 Safety Integrated Extended Functions Figure 8-12 Safe Brake Ramp without encoder (for SLS) Parameterization of the brake ramp p9581/p9381 (SI Motion brake ramp reference value, Control Unit/Motor Module) and p9583/p9383 (SI Motion brake ramp monitoring time, Control Unit/Motor Module) are used to set the steepness of the brake ramp.
- Page 395 ● Part of the "SS1 without encoder" and "SLS without encoder" functions. ● Parameterizable safe brake ramp Overview of important parameters (see SINAMICS S110 List Manual) ● p9360 SI Motion pulse suppression shutdown speed (CPU 2) ● p9560 SI Motion pulse suppression shutdown speed (CPU 1) ●...
-
Page 396: Safe Direction (Sdi)
Safety Integrated Functions 8.5 Safety Integrated Extended Functions 8.5.10 Safe Direction (SDI) 8.5.10.1 Safe Direction with encoder The Safe Direction function (SDI) allows reliable monitoring of the direction of motion of the drive. If this function is activated, the drive can only move in the enabled, safe direction. Functional principle After SDI has been selected via terminals or PROFIsafe, the delay time p9365/p9565 is started. - Page 397 Safety Integrated Functions 8.5 Safety Integrated Extended Functions Figure 8-13 Functional principle SDI with encoder Enabling the Safe Direction function The "Safe Direction" function is enabled via the following parameters: ● p9501.17 = 1, p9301.17 = 1 Function Manual Function Manual, 01/2011, 6SL3097-4AB10-0BP3...
-
Page 398: Safe Direction Without Encoder
Safety Integrated Functions 8.5 Safety Integrated Extended Functions 8.5.10.2 Safe Direction without encoder Function Set p9306 = p9506 = 1 or p9506 = p9306 = 3 (factory setting = 0) to activate Safety Integrated functions without encoder. You can also make this setting by selecting "Without encoder"... - Page 399 Safety Integrated Functions 8.5 Safety Integrated Extended Functions 3rd scenario ● Situation: Run until standstill with SDI selected, then OFF2 activated ● Deselect SDI ● Select SDI STO activated internally via OFF2: This activation must be undone by deselecting SDI. ●...
-
Page 400: Overview Of Parameters And Function Diagrams
● 2856 – Extended Functions, safe state selection ● 2857 – Extended Functions, assignment (F-DO 0) Overview of important parameters (see SINAMICS S110 List Manual) ● p1821[0...n] Direction of rotation ● p9301.17 SI Motion enable safety functions (CPU 2): SDI enable ●... -
Page 401: Safety Faults
Safety Integrated Functions 8.5 Safety Integrated Extended Functions 8.5.11 Safety faults Stop responses Faults with Safety Integrated Extended Functions and violation of limits can trigger the following stop response: Table 8- 11 Stop response overview Stop Triggered ... Action Effect response STOP A For all acknowledgeable safety... - Page 402 Safety Integrated Functions 8.5 Safety Integrated Extended Functions Note A delay time between STOP F and STOP B should only be set if an additional response is initiated during this time when the "Internal Event" (r9722.7) message signal is evaluated. A monitoring function should also always be active even in automatic mode (e.g.
- Page 403 Safety Integrated Functions 8.5 Safety Integrated Extended Functions Priorities of stop responses and Extended Functions Table 8- 13 Priorities of stop responses and Extended Functions Highest Lowest priority priority Stop response / Extended Function STOP A STOP B STOP C STOP D STOP E STOP F...
- Page 404 If STO is selected/deselected (and p9307.0/p9507.0 = 1 are set), safety messages, in addition to fault messages, are also canceled automatically. Description of faults and alarms Note The faults and alarms for SINAMICS Safety Integrated are described in the following documentation: References: SINAMICS S110 List Manual Function Manual Function Manual, 01/2011, 6SL3097-4AB10-0BP3...
-
Page 405: Message Buffer
Safety Integrated Functions 8.5 Safety Integrated Extended Functions 8.5.12 Message buffer In addition to the fault buffer for F... faults and the alarm buffer for A... alarms, a special message buffer for C... safety messages is available for Safety Extended Functions. The fault messages for the Safety Basic Functions are stored in the standard fault buffer (see "Buffer for faults and alarms"). - Page 406 The message buffer can be deleted as follows: p9752 = 0. Parameter p9752 (SI message cases, counter) is also reset to 0 during POWER ON. Overview of important parameters (see SINAMICS S110 List Manual) ● r2139.0...8 CO/BO: Status word, faults/alarms 1 ●...
-
Page 407: Safe Actual Value Acquisition
Supported encoder systems The Safety Functions used to monitor motion (e.g. SS1, SS2, SOS, SLS and SSM) require reliable actual value acquisition. For safe speed/position sensing for SINAMICS S110, only a single-encoder system may be used. Single-encoder system Encoders within single-encoder systems are used to generate the failsafe actual values of the drive. - Page 408 Information on the internal realization of the encoder must come from the encoder manufacturer. The FMEA must be created by the machine manufacturer. Certain Siemens motors with and without DRIVE-CLiQ connection can also be used for Safety Integrated functions, see: http://support.automation.siemens.com/WW/view/de/33512621 For these motors, the fault listed under 2.
- Page 409 Safety Integrated Functions 8.5 Safety Integrated Extended Functions Overview of important parameters (see SINAMICS S110 List Manual) ● p9301.3 SI Motion enable safety functions (CPU 2), enable actual value synchronization ● p9501.3 SI Motion enable safety functions (CPU 1), enable actual value synchronization ●...
-
Page 410: Safe Current Actual Value Acquisition Without Encoder
You have found a suitable value if unnecessary messages/signals no longer occur. Overview of important parameters (see SINAMICS S110 List Manual) ● p9386 SI Motion delay time of the evaluation, encoderless (processor 2) ●... -
Page 411: Forced Dormant Error Detection
Safety Integrated Functions 8.5 Safety Integrated Extended Functions 8.5.14 Forced dormant error detection Forced dormant error detection and function test through test stop The functions and switch-off signal paths must be tested at least once within a defined period to establish whether they are working properly in order to meet the requirements of EN ISO 13849-1 and IEC 61508 in terms of timely error detection. - Page 412 For SINAMICS S110, the Control Unit can also be supplied from the line connection of the Power Module. For SINAMICS S110, a POWER OFF/POWER ON means line supply off/on for the Power Module and –...
-
Page 413: Safety Info Channel
Safety Integrated Functions 8.5 Safety Integrated Extended Functions 8.5.15 Safety Info Channel The Safety Info Channel (SIC) enables Safety Integrated functionality status information of the drive to be transmitted to the higher-level control. Telegram 700 The predefined PROFIdrive telegram 700 is available for this transmission: You can find further information on communication via PROFIdrive in the Manual "S120 Drive Functions", section "Communication according to PROFIdrive"... - Page 414 Safety Integrated Functions 8.5 Safety Integrated Extended Functions S_ZSW1B Safety Info Channel: Status word Table 8- 15 Description S_ZSW1B Meaning Remarks Parameter STO active STO active r9734.0 STO not active SS1 active SS1 active r9734.1 SS1 not active SS2 active SS2 active r9734.2 SS2 not active...
-
Page 415: Controlling The Safety Functions
Safety Integrated Functions 8.6 Controlling the safety functions Controlling the safety functions Safety Integrated functions can be controlled via on-board terminals or via a PROFIsafe telegram using PROFIBUS. The Extended Functions can be controlled via on-board terminals or PROFIsafe, control of the Basic Functions can be selected via on-board terminals (F-DI 0) or PROFIsafe and on-board terminals (F-DI 0). -
Page 416: Control Of The Basic Functions Via A Safe Input Terminal Pair
Module to prevent incorrect trips due to signal disturbances or asymmetrical test signals. Parameters p9651 and p9851 are used to set filter times. Overview of the safety function terminals for SINAMICS S110 The digital input terminals DI16 and DI17 are defined as F-DI0 for the control of the Basic Functions, if these are enabled (see diagram "Internal connection of DI/DO of the CU305... -
Page 417: Control Of The Extended Functions Using Safe Input Terminals
Safety Integrated Functions 8.6 Controlling the safety functions 8.6.2 Control of the Extended Functions using safe input terminals General information Control Unit CU305 has 6 digital inputs, which can be used as 3 safe input terminal pairs (F- DI) for controlling the Extended Functions. Furthermore, a single digital output on the CU305 can be extended as a safe output terminal pair (F-DO) and used for the Extended Functions. - Page 418 Safety Integrated Functions 8.6 Controlling the safety functions Figure 8-17 Internal connections of the DI/DO of the CU305 with the safety function Function Manual Function Manual, 01/2011, 6SL3097-4AB10-0BP3...
- Page 419 Safety Integrated Functions 8.6 Controlling the safety functions Description Failsafe digital inputs (F-DI) consist of two digital inputs. The cathode of the optocoupler is routed to the second digital input in order to allow the connection of an M-switching F-DO output (the anode must be connected to 24 V DC).
- Page 420 Safety Integrated Functions 8.6 Controlling the safety functions F-DI features ● Failsafe configuration with two digital inputs per F-DI ● Input filter for test signals with an adjustable gating time (p10017/p10117) ● Configurable connection of NC/NC or NC/NO contacts by means of parameter p10040/p10140 ●...
-
Page 421: Note On F-Dis
This is because these F-DIs are monitored for discrepancy even when no Safety functions are assigned to them. Overview of important parameters (see SINAMICS S110 List Manual) ● r0722 CO/BO: CU digital inputs, status ●... -
Page 422: Overview Of The F-Dos
Safety Integrated Functions 8.6 Controlling the safety functions 8.6.4 Overview of the F-DOs Description The failsafe digital output (F-DO) consists of two digital outputs. At the first digital output DO16+ the 24 V potential connected to the terminal 24V1 is switched, and at the second terminal the ground potential connected to terminal M1 is switched (see diagram below "Overview F-DO"). - Page 423 ● 2856 Safety Integrated - Extended Functions, safe state selection ● 2857 Safety Integrated - Extended Functions, assignment F-DO 0 Overview of important parameters (see SINAMICS S110 List Manual) ● p10039 SI Safe State signal selection ● p10042[0..5] SI F-DO 0 signal sources ●...
-
Page 424: Control By Way Of Profisafe
Safety Integrated Functions 8.6 Controlling the safety functions 8.6.5 Control by way of PROFIsafe Safety Integrated functions can also be controlled via PROFIsafe, as opposed to control via terminals. PROFIsafe telegram 30 is used for communication via PROFIBUS. Control via PROFIsafe is available for both Safety Integrated Basic Functions and Safety Integrated Extended Functions. -
Page 425: Structure Of Telegram 30
Safety Integrated Functions 8.6 Controlling the safety functions 8.6.5.2 Structure of telegram 30 Structure of telegram 30 (Basic Functions) PROFIsafe control word (STW) S_STW1, PZD1 in telegram 30, output signals See function diagram [2840]. Table 8- 16 Description of the PROFIsafe STW Meaning Remarks Deselect STO... - Page 426 Safety Integrated Functions 8.6 Controlling the safety functions PROFIsafe status word (ZSW) S_ZSW1, PZD1 in telegram 30, input signals See function diagram [2840]. Table 8- 17 Description of the PROFIsafe status word (ZSW) Meaning Remarks STO active STO active STO not active SS1 active SS1 active SS1 not active...
- Page 427 Safety Integrated Functions 8.6 Controlling the safety functions Structure of telegram 30 (Extended Functions) PROFIsafe control word (STW) S_STW1, PZD1 in telegram 30, output signals See function diagram [2840]. Table 8- 18 Description of the PROFIsafe STW Meaning Remarks Deselect STO Select STO Deselect SS1 Select SS1...
- Page 428 Safety Integrated Functions 8.6 Controlling the safety functions PROFIsafe status word (ZSW) S_ZSW1, PZD1 in telegram 30, input signals See function diagram [2840]. Table 8- 19 Description of the PROFIsafe status word (ZSW) Meaning Remarks STO active STO active STO not active SS1 active SS1 active SS1 not active...
-
Page 429: Commissioning
The list of permissible Sfety firmware version combinations which must be used as a reference during the test, can be found under "Product Support" at the following address: http://support.automation.siemens.com/WW/view/de/28554461 The procedure for checking is described in the following. Procedure for checking the Safety firmware version combinations... -
Page 430: Commissioning Of Safety Integrated Functions
Safety Integrated Functions 8.7 Commissioning 8.7.2 Commissioning of Safety Integrated functions 8.7.2.1 General information PROFIsafe commissioning with STARTER 1. The Safety Integrated Basic Functions can be commissioned using STARTER in three ways: – STO/SS1/SBC via terminals – STO/SS1/SBC via PROFIsafe –... - Page 431 The following applies to safety-related functions that have been enabled (p9501 > 0): – The parameters are checked to ensure that they match the corresponding encoder parameters (e.g. p0410, p0474, ...). Please refer to the parameter descriptions in the SINAMICS S110 List Manual for additional information. Function Manual...
-
Page 432: Prerequisites For Commissioning The Safety Integrated Functions
Safety Integrated Functions 8.7 Commissioning Note Activating changed Safety parameters On exiting commissioning mode (p0010 = 0), most of the changed parameters become active immediately. For some parameters, however, a POWER ON is required: If this is the case, a STARTER message or an alarm from the drive will inform you about this. When performing an acceptance test, a POWER ON is always required. - Page 433 Safety Integrated Functions 8.7 Commissioning 2. In the project window, open the ramp-function generator by double-clicking on <Drive unit> → <Drive> → Setpoint channel → Ramp-function generator: Figure 8-22 Ramp-function generator Function Manual Function Manual, 01/2011, 6SL3097-4AB10-0BP3...
- Page 434 Safety Integrated Functions 8.7 Commissioning 3. Click the button with the ramp to open the following window: Figure 8-23 Drive-ramp 4. Enter data to define the drive-ramp in this window. 5. Then you must carry out the motor measurements: Start with static measurements and then take rotating measurements.
- Page 435 Safety Integrated Functions 8.7 Commissioning Activating Safety Integrated 1. Open the Safety Integrated selection window via <Drive unit> → <Drive> → Functions → Safety Integrated and select the Safety function you require. 2. Select "[1] Safety without encoder" in the pull-down menu below this. 3.
-
Page 436: Information Pertaining To Series Commissioning
Safety Integrated Functions 8.7 Commissioning 8.7.2.4 Information pertaining to series commissioning Standard commissioning of the safety functions 1. A commissioned project that has been uploaded to STARTER can be transferred to another drive unit keeping the existing Safety parameterization. 2. If the source and target devices have different software versions, the reference checksums may have to be adapted. -
Page 437: Setting The Sampling Times
● If Extended Safety Functions are being used, p9311/p9511 must be set ≥ 4 * current controller cycle, however at least ≥ 2 ms. Overview of important parameters (see SINAMICS S110 List Manual) ● p9300 SI Motion monitoring clock cycle (Power Module) ●... -
Page 438: Commissioning The Safety Terminals By Means Of Starter/Scout
Safety Integrated Functions 8.7 Commissioning 8.7.3 Commissioning the safety terminals by means of STARTER/SCOUT 8.7.3.1 Basic sequence of commissioning The following conditions must be met before you can configure the safety terminals: ● Concluded initial commissioning of the drive ● Measuring function (static or rotating measurement) completed Table 8- 20 Configuration sequence Step... -
Page 439: Configuration Start Screen
Safety Integrated Functions 8.7 Commissioning 8.7.3.2 Configuration start screen Description The start screen helps you to start configuring the Safety Integrated functions. Depending on whether you are using Basic Functions, Extended Functions with encoder or Extended Functions without encoder, the setup options on this screen have different scopes. Figure 8-24 Safety Integrated start screen (example Basic Functions) ●... - Page 440 Safety Integrated Functions 8.7 Commissioning ● Change/activate settings – Change settings You can select this button and enter the password in order to edit the configuration data. The button function changes to "Activate settings". – Activate settings This function accepts your parameter settings, calculates the actual CRC, and transfers this to the target CRC.
-
Page 441: Configuration Of The Safety Terminals (Extended Functions)
Safety Integrated Functions 8.7 Commissioning 8.7.3.3 Configuration of the Safety terminals (Extended Functions) Configuration screen of the terminals for Safety Integrated Figure 8-25 Configuring safety terminals You can find this screen underSafety inputs/outputs > Configuration. Functions of this screen: ● F-DI discrepancy time (p10002) The signal states at the two terminals of an F-DI are monitored in order to determine whether these have assumed the same logical state within the discrepancy time. - Page 442 Safety Integrated Functions 8.7 Commissioning ● Signal source forced dormant error detection (p10007) Selection of an input terminal for the start of the test stop: The test stop is initiated by a 0/1 signal from the input terminal and can only be performed when the drive is not in commissioning mode.
-
Page 443: Test Stop
Failsafe I/O must be tested at defined intervals in order to validate their failsafe state (test stop or forced dormant error detection). For this purpose, SINAMICS S110 contains a function block which carries out this forced dormant error detection when selected via a BICO source. - Page 444 DIAG signal expectation 0 ... 3 – – Synchronization HIGH Test sequence for test stop mode 1 You can find a complete list of the steps in the SINAMICS S110 List Manual under message F01773. Function Manual Function Manual, 01/2011, 6SL3097-4AB10-0BP3...
- Page 445 DIAG signal expectation 0 ... 3 – – Synchronization HIGH HIGH Test sequence for test stop mode 2 You can find a complete list of the steps in the SINAMICS S110 List Manual under message F01773. Function Manual Function Manual, 01/2011, 6SL3097-4AB10-0BP3...
- Page 446 HIGH Test sequence for test stop mode 3 You can find a complete list of the steps in the SINAMICS S110 List Manual under message F01773. Overview of important parameters (see SINAMICS S110 List Manual) ● p10001 SI wait time for test stop at DO ●...
-
Page 447: F-Di/F-Do Configuration
Safety Integrated Functions 8.7 Commissioning 8.7.3.5 F-DI/F-DO configuration Inputs screen F-DI Figure 8-29 Inputs screen ● NC/NO contact (p10040) Terminal property F-DI 0-2 (p10040.0 = F-DI 0, ... p10040.2 = F-DI 2): Configure only the property of the second (lower) digital input. Always connect an NC contact to digital input 1 (upper). - Page 448 Safety Integrated Functions 8.7 Commissioning F-DO output screen Figure 8-30 Output screen ● Signal source for F-DO (p10042) A six-way AND is connected downstream of the output terminal pair of the F-DO; the signal sources for the inputs of the AND can be selected: –...
-
Page 449: Control Interface
Safety Integrated Functions 8.7 Commissioning 8.7.3.6 Control interface Figure 8-31 Drive screen Functions of this screen: Function Manual Function Manual, 01/2011, 6SL3097-4AB10-0BP3... -
Page 450: Profisafe Configuration With Starter
Safety Integrated Functions 8.7 Commissioning ● Selection of an F-DI for the STO, SS1, SS2, SOS and SLS functions and for SLS speed limits (bit coded) (p10022 to p10028) and SDI. An F-DI can be assigned several functions. ● Configuration of the "Safe State" signal (p10039) A failsafe output signal "Safe State"... -
Page 451: Procedure For Configuring Profisafe Communication
Procedure for configuring PROFIsafe communication Example configuration The next sections deal with a sample configuration of PROFIsafe communication between a SINAMICS S110 drive unit and higher-level SIMATIC F-CPU operating as PROFIBUS master. The configuration and operation of failsafe communication (F communication) is based on... - Page 452 The next sections describe the configuration of PROFIsafe communication between a SIMATIC F-CPU and a drive unit. Create an F-CPU such as CPU 317F-2 and a SINAMICS S110 in HW Config in accordance with the hardware installed. 1. Set up SINAMICS S110 for operation as a DP slave and the connected F-CPU as associated DP master.
- Page 453 Safety Integrated Functions 8.7 Commissioning Setting F parameters: Figure 8-34 PROFIsafe properties (HW Config) The top five failsafe parameters in this list are configured by default and cannot be edited. The following range of values is valid for the two remaining parameters: F_Dest_Add: 1-65534 F_Dest_Add determines the PROFIsafe destination address of the drive object.
- Page 454 Safety Integrated Functions 8.7 Commissioning Figure 8-35 STARTER: Configuration "Motion Monitoring via PROFIsafe" F_WD_Time: 10- 65535 A valid current safety message frame must be received from the F-CPU within the monitoring time. The drive will otherwise go into safe state. Select a monitoring time of sufficient length to let the communication functions tolerate telegram delays, however, make allowances for appropriate short fault reaction times (e.g.
-
Page 455: Information Pertaining To Component Replacements
Safety Integrated Functions 8.7 Commissioning 8.7.6 Information pertaining to component replacements Replacing a component from the perspective of Safety Integrated Note When replacing certain components (Sensor Modules or motors with DRIVE-CLiQ interface), this process must be acknowledged to safeguard the communication connections to be renewed within the device. -
Page 456: Application Examples
Safety Integrated Functions 8.8 Application examples WARNING Before re-entering the danger area and before resuming operation, a (partial) acceptance test must be carried out for all the drives affected by the component exchange (see the "Acceptance test" chapter). Application examples 8.8.1 Input/output interconnections for a safety switching device with CU305 Interconnecting an F-DO with a safe input of a safety device... - Page 457 Safety Integrated Functions 8.8 Application examples Interconnecting an F-DI with a plus-minus switching output on a safety device WARNING In contrast to mechanical switching contacts (e.g. Emergency Stop switches), leakage currents can still flow in semiconductor switches such as those usually used at digital outputs even when they have been switched off.
- Page 458 Safety Integrated Functions 8.8 Application examples The following two figures show exactly how the protective circuits for F-DIs with additional load resistors are wired. Figure 8-37 F-DI at plus-minus switching safe output on safety device XY (e.g. safety PLC) Interconnecting an F-DI with a plus-plus switching output on a safety device Figure 8-38 F-DI at plus-plus switching safe output on safety device XY (e.g.
- Page 459 Safety Integrated Functions 8.8 Application examples Dimensioning of load resistors - example 1: According to manufacturer documentation, the leakage current of an F-DO on a safety PLC is 1 mA for the P and F channel; in other words, it is 0.5 mA higher than is permissible for the F-DI.
-
Page 460: Acceptance Test And Acceptance Report
Safety Integrated Functions 8.9 Acceptance test and acceptance report Acceptance test and acceptance report 8.9.1 General information The acceptance test requirements (configuration check) for electrical drive safety functions emanate from DIN EN 61800-5-2, Chapter 7.1 Point f). The acceptance test "configuration check"... -
Page 461: Acceptance Test Structure
Observe the information in the chapter "Procedures for initial commissioning". The acceptance report presented below is both an example and recommendation. An acceptance report template in electronic format is available at your local Siemens sales office. Necessity of an acceptance test A complete acceptance test (as described in this chapter) is required after initial commissioning of Safety Integrated functionality on a machine. -
Page 462: Content Of The Complete Acceptance Test
Safety Integrated Functions 8.9 Acceptance test and acceptance report Note on the acceptance test mode The acceptance test mode can be activated for a definable period (p9358/p9558) by setting the appropriate parameters (p9370/p9570). It tolerates specific limit violations during the acceptance test. - Page 463 Safety Integrated Functions 8.9 Acceptance test and acceptance report B) Functional testing of safety functions Detailed function test and evaluation of SI functions used. For some functions this contains trace recordings of individual parameters. The procedure is described in detail in section Acceptance tests.
- Page 464 Safety Integrated Functions 8.9 Acceptance test and acceptance report 5. Test of the SI function "Safe Operating Stop" (SOS) – Only required when used in Extended Functions – This test is also required if you are not explicitly using SOS, but just one function for which STOP D or STOP E occurs as an error response.
-
Page 465: Content Of The Partial Acceptance Test
Safety Integrated Functions 8.9 Acceptance test and acceptance report 8.9.2.2 Content of the partial acceptance test A) Documentation Documentation of the machine and of safety functions 1. Extending/changing the hardware data 2. Extending/changing the software data (specify version) 3. Extending/changing the configuration diagram 4. - Page 466 Safety Integrated Functions 8.9 Acceptance test and acceptance report 3. Test of the SI function "Safe Brake Control (SBC)" – Required when using Basic and/or Extended Functions – You do not need to prepare trace recording for this test. 4. Test of the SI function "Safe Stop 2" (SS2) –...
- Page 467 Safety Integrated Functions 8.9 Acceptance test and acceptance report D) Functional testing of actual value acquisition 1. General testing of actual value acquisition – After exchanging a hardware component, initial activation and brief operation in both directions. WARNING During this process, all personnel must keep out of the danger area. 2.
-
Page 468: Test Scope For Specific Measures
Safety Integrated Functions 8.9 Acceptance test and acceptance report 8.9.2.3 Test scope for specific measures Table 8- 21 Scope of partial acceptance tests for specific measures Measure A) Documentation B) Functional testing C) Functional testing D) Functional E) Conclusion of safety functions of forced dormant error testing of actual of the report... -
Page 469: Safety Logbook
Safety Integrated Functions 8.9 Acceptance test and acceptance report 8.9.3 Safety logbook The "Safety Logbook" function is used to detect changes to safety parameters that affect the associated CRC sums. CRCs are only generated when p9601/p9801 (SI enable drive- integrated functions CPU 1/2) is > 0. Data changes are detected when the CRCs of the SI parameters change. -
Page 470: Acceptance Reports
Safety Integrated Functions 8.9 Acceptance test and acceptance report 8.9.4 Acceptance reports 8.9.4.1 Plant description - Documentation part 1 Table 8- 22 Machine description and overview diagram Designation Type Serial number Manufacturer End customer Electrical drives Other drives Overview diagram of machine Table 8- 23 Values of relevant parameters Versions of the firmware and of Safety Integrated... -
Page 471: Description Of Safety Functions - Documentation Part 2
Safety Integrated Functions 8.9 Acceptance test and acceptance report 8.9.4.2 Description of safety functions - Documentation Part 2 Introduction Note This description of a system is for illustration purposes only. In each case, the actual settings for the system concerned will need to be modified as required. Function table Table 8- 24 Example table: Active monitoring functions depending on the operating mode, the... - Page 472 Safety Integrated Functions 8.9 Acceptance test and acceptance report Drive-specific Safety parameters Table 8- 26 Drive-specific data SI function Parameter processor 2 / Value CPU 2 ≙ CPU 1 processor 1 Enable safety functions p9301 / p9501 0000 bin Axis type p9302 / p9502 Function specification p9306 / p9506...
- Page 473 Safety Integrated Functions 8.9 Acceptance test and acceptance report SI function Parameter processor 2 / Value CPU 2 ≙ CPU 1 processor 1 Sensor Module node identifier p9328[0] 0000 hex p9328[1] 0000 hex p9328[2] 0000 hex p9328[3] 0000 hex p9328[4] 0000 hex p9328[5] 0000 hex...
- Page 474 Safety Integrated Functions 8.9 Acceptance test and acceptance report SI function Parameter processor 2 / Value CPU 2 ≙ CPU 1 processor 1 Forced dormant error detection p9559 8.00 h timer Pulse suppression delay bus p9380 / p9580 100.00 μs failure Brakeramp reference value p9381 / p9581...
- Page 475 Safety Integrated Functions 8.9 Acceptance test and acceptance report Safety equipment Protective door The protective door is unlocked by means of single-channel request key Protective door switch The protective door is equipped with a safety door switch. The safety door switch returns the dual- channel signal "Door closed and locked".
-
Page 476: Acceptance Tests
Safety Integrated Functions 8.9 Acceptance test and acceptance report 8.9.5 Acceptance tests Note As far as possible, the acceptance tests are to be carried out at the maximum possible machine speed and acceleration rates to determine the maximum braking distances and braking times that can be expected. -
Page 477: Acceptance Tests - Basic Functions
Safety Integrated Functions 8.9 Acceptance test and acceptance report 8.9.5.1 Acceptance tests – Basic Functions Acceptance test Safe Torque Off (Basic Functions) Table 8- 28 "Safe Torque Off" acceptance test Description Status Note: The acceptance test must be individually conducted for each configured control. The control can be realized via terminals and/or via PROFIsafe. - Page 478 Safety Integrated Functions 8.9 Acceptance test and acceptance report Description Status Deselect STO and check the following: No Safety faults and alarms (r0945[0..7], r2122[0..7]) r9772.17 = r9872.17 = 0 (STO deselection via terminals - DI CU / EP terminal Motor ...
- Page 479 Safety Integrated Functions 8.9 Acceptance test and acceptance report Acceptance test for Safe Stop 1 (Basic Functions) Table 8- 29 "Safe Stop 1" function Description Status Note: The acceptance test must be individually conducted for each configured control. The control can be realized via terminals and/or via PROFIsafe. Initial state Drive in "Ready"...
- Page 480 Safety Integrated Functions 8.9 Acceptance test and acceptance report Description Status STO is initiated after the SS1 delay time expires (p9652, p9852). No Safety faults and alarms (r0945[0...7], r2122[0...7]) r9772.0 = r9772.1 = 1 (STO selected and active – P1) ...
- Page 481 Safety Integrated Functions 8.9 Acceptance test and acceptance report Acceptance test for Safe Brake Control (Basic Functions) Table 8- 30 "Safe Brake Control" function Description Status Note: The acceptance test must be individually conducted for each configured control. The control can be realized via terminals and/or via PROFIsafe. Initial state Drive in "Ready"...
- Page 482 Safety Integrated Functions 8.9 Acceptance test and acceptance report Description Status Acknowledge "Switching On Inhibited" and run the drive. Check whether the correct drive is operational. The following is tested: The brake is connected properly The hardware is functioning properly ...
-
Page 483: Acceptance Tests For Extended Functions (With Encoder)
Safety Integrated Functions 8.9 Acceptance test and acceptance report 8.9.5.2 Acceptance tests for Extended Functions (with encoder) Acceptance test Safe Torque Off with encoder (Extended Functions) Table 8- 31 "Safe Torque Off" function Description Status Notes: The acceptance test must be individually conducted for each configured control. The control can be realized via terminals or via PROFIsafe. - Page 484 Safety Integrated Functions 8.9 Acceptance test and acceptance report Description Status Deselect STO and check the following: No Safety faults and alarms (r0945[0...7], r2122[0...7], r9747[0...7]) r9772.18 = r9872.18 = 0 (STO deselected via Safe Motion Monitoring) r9772.0 = r9772.1 = 0 (STO deselected and inactive – P1) ...
- Page 485 Safety Integrated Functions 8.9 Acceptance test and acceptance report Acceptance test for Safe Stop 1 with encoder (Extended Functions) Table 8- 32 "Safe Stop 1" function Description Status Note: The acceptance test must be individually conducted for each configured control. The control can be realized via terminals or via PROFIsafe.
- Page 486 Safety Integrated Functions 8.9 Acceptance test and acceptance report Example Trace SS1 with encoder Figure 8-39 Example Trace SS1 with encoder Trace evaluation: ● SS1 function is selected (time axis 0 ms; see bit "deselection SS1") ● Response bit "SS1 active" is set (time axis approx 20 ms) ●...
- Page 487 Safety Integrated Functions 8.9 Acceptance test and acceptance report Acceptance test for Safe Brake Control with encoder (Extended Functions) Table 8- 33 "Safe Brake Control" function Description Status Note: The acceptance test must be individually conducted for each configured control. The control can be realized via terminals or via PROFIsafe.
- Page 488 Safety Integrated Functions 8.9 Acceptance test and acceptance report Description Status Acknowledge "Switching On Inhibited" and run the drive. Check whether the correct drive is operational. The following is tested: The brake is connected properly The hardware is functioning properly ...
- Page 489 Safety Integrated Functions 8.9 Acceptance test and acceptance report Description Status Analyze trace: SOS is triggered after the SS2 timer (p9352/9552) has expired. Save/print the trace and add it to the acceptance report (refer to the example below) Deselect SS2 Ensure that the drive is running with the setpoint again ...
- Page 490 Safety Integrated Functions 8.9 Acceptance test and acceptance report Trace evaluation: ● SS2 function is selected (time axis 0 ms; see bit "deselection SS2") ● Response bit "SS2 active" is set (time axis approx 20 ms) ● The drive decelerates along the configured OFF3 ramp (p1135) ●...
- Page 491 Safety Integrated Functions 8.9 Acceptance test and acceptance report Acceptance test for Safe Operating Stop (SOS) Table 8- 35 "Safe Operating Stop" function Description Status Note: The acceptance test must be individually conducted for each configured control. The control can be realized via terminals or via PROFIsafe. Initial state Drive in "Ready"...
- Page 492 Safety Integrated Functions 8.9 Acceptance test and acceptance report Description Status Analyze trace: As soon as r9713[0] (unit µm or m°) leaves the tolerance window, a Safety message (r9722.7 = 0) becomes active As a consequence, the drive is brought to a standstill with STOP B and STOP A ...
- Page 493 Safety Integrated Functions 8.9 Acceptance test and acceptance report Trace evaluation: ● SOS function is activated (see bits "deselect SOS" and "SOS active") ● The drive starts moving (time axis approx -100 ms) ● Exiting the SOS tolerance window is recognized (time axis approx 0 ms) ●...
- Page 494 Safety Integrated Functions 8.9 Acceptance test and acceptance report Acceptance test for Safely-Limited Speed with encoder (Extended Functions) SLS with stop response "STOP A" Table 8- 36 Function "Safely Limited Speed with encoder" with STOP A Description Status Note: The acceptance test must be carried out separately for each configured control and each SLS speed limit used. Control may be via terminals or PROFIsafe.
- Page 495 Safety Integrated Functions 8.9 Acceptance test and acceptance report Description Status Analyze trace: If r9714[0] exceeds the active SLS limit, a Safety message (r9722.7 = 0) becomes active STOP A is initiated as a consequence Save/print the trace and add it to the acceptance report (refer to the example below) Deselect SLS and acknowledge Safety messages No Safety faults and alarms (r0945[0...7], r2122[0...7], r9747[0...7]) ...
- Page 496 Safety Integrated Functions 8.9 Acceptance test and acceptance report Trace evaluation: ● SLS function with SLS level 1 is active (see bits "deselection SLS", "selection SLS bit 0", "selection SLS bit 1" and "SLS active", "active SLS level bit 0" and "active SLS level bit 1") ●...
- Page 497 Safety Integrated Functions 8.9 Acceptance test and acceptance report SLS with stop response "STOP B" Table 8- 37 Function "Safely Limited Speed with encoder" with STOP B Description Status Note: The acceptance test must be carried out separately for each configured control and each SLS speed limit used. Control may be via terminals or PROFIsafe.
- Page 498 Safety Integrated Functions 8.9 Acceptance test and acceptance report Description Status Analyze trace: If r9714[0] exceeds the active SLS limit, a Safety message (r9722.7 = 0) becomes active A STOP B is initiated as a consequence (with subsequent stop STOP A) ...
- Page 499 Safety Integrated Functions 8.9 Acceptance test and acceptance report Trace evaluation: ● SLS function with SLS level 2 is active (see bits "deselection SLS", "selection SLS bit 0", "selection SLS bit 1" and "SLS active", "active SLS level bit 0" and "active SLS level bit 1") ●...
- Page 500 Safety Integrated Functions 8.9 Acceptance test and acceptance report SLS with stop response "STOP C" Table 8- 38 Function "Safely Limited Speed with encoder" with STOP C Description Status Note: The acceptance test must be carried out separately for each configured control and each SLS speed limit used. Control may be via terminals or PROFIsafe.
- Page 501 Safety Integrated Functions 8.9 Acceptance test and acceptance report Description Status Save/print the trace and add it to the acceptance report (refer to the example below) Deselect SLS and acknowledge Safety messages Ensure that the drive is running with the setpoint again ...
- Page 502 Safety Integrated Functions 8.9 Acceptance test and acceptance report Trace evaluation: ● SLS function with SLS level 1 is active (see bits "deselection SLS", "selection SLS bit 0", "selection SLS bit 1" and "SLS active", "active SLS level bit 0" and "active SLS level bit 1") ●...
- Page 503 Safety Integrated Functions 8.9 Acceptance test and acceptance report SLS with stop response "STOP D" Table 8- 39 Function "Safely Limited Speed with encoder" with STOP D Description Status Note: The acceptance test must be carried out separately for each configured control and each SLS speed limit used. Control may be via terminals or PROFIsafe.
- Page 504 Safety Integrated Functions 8.9 Acceptance test and acceptance report Description Status Analyze trace: If r9714[0] exceeds the active SLS limit, a Safety message (r9722.7 = 0) becomes active STOP D is initiated as a consequence. As a consequence of STOP D (selection SOS) the above-described responses will ...
- Page 505 Safety Integrated Functions 8.9 Acceptance test and acceptance report Trace evaluation: ● SLS function with SLS level 2 is active (see bits "deselection SLS", "selection SLS bit 0", "selection SLS bit 1" and "SLS active", "active SLS level bit 0" and "active SLS level bit 1") ●...
- Page 506 Safety Integrated Functions 8.9 Acceptance test and acceptance report SLS with stop response "STOP E" Table 8- 40 Function "Safely-Limited Speed with encoder" with STOP E Description Status Note: The acceptance test must be carried out separately for each configured control and each SLS speed limit used. Control may be via TM54F or PROFIsafe.
- Page 507 Safety Integrated Functions 8.9 Acceptance test and acceptance report Description Status Analyze trace: If r9714[0] (unit [µm/Safety clock cycle] or [m°/Safety clock cycle]) exceeds the active SLS limit, a Safety message (r9722.7 = 0) becomes active STOP E is initiated as a consequence. ...
- Page 508 Safety Integrated Functions 8.9 Acceptance test and acceptance report Trace evaluation: ● SLS function with SLS level 2 is active (see bits "deselection SLS", "selection SLS bit 0", "selection SLS bit 1" and "SLS active", "active SLS level bit 0" and "active SLS level bit 1") ●...
- Page 509 Safety Integrated Functions 8.9 Acceptance test and acceptance report Acceptance test for Safe Speed Monitor (Extended Functions) Table 8- 41 "Safe Speed Monitor" function Description Status Initial state Drive in "Ready" state (p0010 = 0) Safety Integrated Extended Functions enabled (p9601.2 = 1) ...
- Page 510 Safety Integrated Functions 8.9 Acceptance test and acceptance report Example Trace SSM (with hysteresis) Figure 8-47 Example Trace SSM (with hysteresis) Trace evaluation: ● Drive is accelerated (time axis from approx. -300 ms) ● SSM limit value (p9546/p9346) is exceeded (time axis 0 ms) ●...
-
Page 511: Acceptance Tests For Extended Functions (Without Encoder)
Safety Integrated Functions 8.9 Acceptance test and acceptance report 8.9.5.3 Acceptance tests for Extended Functions (without encoder) Acceptance test Safe Torque Off without encoder (Extended Functions) Table 8- 42 Function "Safe Torque Off without encoder" Description Status Notes: The acceptance test must be individually conducted for each configured control. The control can be realized via terminals or via PROFIsafe. - Page 512 Safety Integrated Functions 8.9 Acceptance test and acceptance report Description Status Deselect STO and check the following: No Safety faults and alarms (r0945[0...7], r2122[0...7], r9747[0...7]) r9772.18 = r9872.18 = 0 (STO deselected via Safe Motion Monitoring) r9772.0 = r9772.1 = 0 (STO deselected and inactive – P1) ...
- Page 513 Safety Integrated Functions 8.9 Acceptance test and acceptance report Acceptance test for Safe Stop 1 without encoder (Extended Functions) Table 8- 43 Function "Safe Stop 1 without encoder" Description Status Note: The acceptance test must be individually conducted for each configured control. The control can be realized via terminals or via PROFIsafe.
- Page 514 Safety Integrated Functions 8.9 Acceptance test and acceptance report Figure 8-48 Example Trace SS1 without encoder Trace evaluation: ● SS1 function is selected (time axis 0 ms; see bit "deselection SS1") ● Response bit "SS1 active" is set (time axis approx 20 ms) ●...
- Page 515 Safety Integrated Functions 8.9 Acceptance test and acceptance report Acceptance test for Safe Brake Control without encoder (Extended Functions) Table 8- 44 Acceptance test "Safe Brake Control without encoder" Description Status Note: The acceptance test must be individually conducted for each configured control. The control can be realized via terminals or via PROFIsafe.
- Page 516 Safety Integrated Functions 8.9 Acceptance test and acceptance report Description Status Acknowledge "Switching On Inhibited" and run the drive. Check whether the correct drive is operational. The following is tested: The brake is connected properly The hardware is functioning properly ...
- Page 517 Safety Integrated Functions 8.9 Acceptance test and acceptance report Description Status Select SLS with level x Switch on the drive and specify the setpoint above the SLS limit Check that the drive is moving, and after the SLS limit (p9331[x]/9531[x]) has been ...
- Page 518 Safety Integrated Functions 8.9 Acceptance test and acceptance report Figure 8-49 Example trace SLS without encoder with STOP A Trace evaluation: ● SLS function with SLS level 1 is active (see bits "deselection SLS", "selection SLS bit 0", "selection SLS bit 1" and "SLS active", "active SLS level bit 0" and "active SLS level bit 1") ●...
- Page 519 Safety Integrated Functions 8.9 Acceptance test and acceptance report SLS with stop response "STOP B" Table 8- 46 Function "Safely Limited Speed without encoder" with "STOP B" Description Status Note: The acceptance test must be carried out separately for each configured control and each SLS speed limit used. Control may be via terminals or PROFIsafe.
- Page 520 Safety Integrated Functions 8.9 Acceptance test and acceptance report Description Status Analyze trace: If r9714[0] exceeds the active SLS limit, a Safety message (r9722.7 = 0) becomes active A STOP B is initiated as a consequence (with subsequent stop STOP A) ...
- Page 521 Safety Integrated Functions 8.9 Acceptance test and acceptance report Trace evaluation: ● SLS function with SLS level 1 is active (see bits "deselection SLS", "selection SLS bit 0", "selection SLS bit 1" and "SLS active", "active SLS level bit 0" and "active SLS level bit 1") ●...
-
Page 522: Completion Of Certificate
Safety Integrated Functions 8.9 Acceptance test and acceptance report 8.9.6 Completion of certificate SI parameters Specified values checked? (check) Control Unit Motor Module Checksums Basic Functions + Extended Functions Drive name Drive number SI reference checksum SI SI reference checksum SI parameters (Control Unit) parameters (Motor Module) p9799 =... -
Page 523: Communication
Communication Fieldbus configuration Fieldbus configuration As an alternative, you can switch the fieldbus interface to communication via PROFIBUS or USS protocol. Note The PROFIdrive configuration is not active if you have set USS. Configuration in STARTER To configure the fieldbus interface in STARTER, proceed as follows: 1. -
Page 524: Communication According To Profidrive
Communication 9.2 Communication according to PROFIdrive Communication according to PROFIdrive 9.2.1 General information about PROFIdrive for SINAMICS General information PROFIdrive V4.1 is the PROFIBUS profile for drive technology with a wide range of applications in production and process automation systems. Note PROFIdrive for drive technology is standardized and described in the following document: References: /P5/ PROFIdrive Profile Drive Technology... -
Page 525: Application Classes
Communication 9.2 Communication according to PROFIdrive 9.2.2 Application classes Description There are different application classes for PROFIdrive, depending on the scope and type of the application processes. There are a total of 6 application classes in PROFIdrive, of which 4 are discussed here. Application class 1 (standard drive) In the most basic case, the drive is controlled via a speed setpoint by means of PROFIBUS. - Page 526 Communication 9.2 Communication according to PROFIdrive Application class 2 (standard drive with technology function) The total process is subdivided into a number of small subprocesses and distributed among the drives. This means that the automation functions no longer reside exclusively in the central automation device but are also distributed in the drive controllers.
- Page 527 Communication 9.2 Communication according to PROFIdrive Application class 3 (positioning drive) In addition to the drive control, the drive also includes a positioning control, so that the drive operates as an autonomous basic positioning drive, while the higher-level technological processes are executed on the controller. Positioning requests are transmitted to the drive controller via PROFIBUS and launched.
- Page 528 Communication 9.2 Communication according to PROFIdrive Application class 4 (central motion control) This application class defines a speed setpoint interface with execution of the speed control on the drive and of the positioning control in the controller, such as is required for robotics and machine tool applications with coordinated motions on multiple drives.
- Page 529 Communication 9.2 Communication according to PROFIdrive Selection of telegrams as a function of the application class The telegrams listed in the table below (see also chapter "Telegrams and process data") can be used in the following application classes: Table 9- 2 Selection of telegrams as a function of the application class Telegram Description...
-
Page 530: Cyclic Communication
Communication 9.2 Communication according to PROFIdrive 9.2.3 Cyclic communication Cyclic communication is used to exchange time-critical process data. 9.2.3.1 Telegrams and process data General information The selection of a telegram via p0922 determines which data on the drive unit side (Control Unit) will be transferred. - Page 531 Communication 9.2 Communication according to PROFIdrive 2. Manufacturer-specific telegrams The manufacturer-specific telegrams are structured in accordance with internal company specifications. The internal process data links are set up automatically in accordance with the telegram number setting. The following vendor-specific telegrams can be set via p0922: –...
- Page 532 Communication 9.2 Communication according to PROFIdrive Telegram interconnections When you change p0922 = 999 (factory setting) to p0922 ≠ 999, the telegrams are interconnected and blocked automatically. Note Telegram 111 is the exception: Here, PZD12 in the transmit telegram or PZD12 in the receive telegram can be interconnected as required.
- Page 533 Structure of the telegrams You can find an overview of the structure of telegrams in function diagrams 2420, 2422, and 2423 in the SINAMICS S110 List Manual. Depending on the drive object, only certain telegrams can be used: Drive object...
-
Page 534: Description Of Control Words And Setpoints
Communication 9.2 Communication according to PROFIdrive 9.2.3.2 Description of control words and setpoints Note This chapter describes the assignment and meaning of the process data in SINAMICS interface mode (p2038 = 0). The reference parameter is also specified for the relevant process data. The process data are generally normalized in accordance with parameters p2000 to r2004. - Page 535 Communication 9.2 Communication according to PROFIdrive Table 9- 4 Overview of control words and setpoints, manufacturer-specific Abbreviation Name Signal Data type Interconnection number parameters MOMRED Torque reduction p1542 MT-STW Probe control word P0682 POS_STW Positioning control word (bit-serial) OVERRIDE Override in positioning mode p2646 POS_STW1 Positioning control word 1...
- Page 536 Communication 9.2 Communication according to PROFIdrive Meaning Remarks Parameter Inhibit ramp-function generator Set ramp-function generator output to zero Restart ramp-function generator Restart ramp-function generator BI: p1141 Freeze ramp-function generator Note: The ramp-function generator cannot be frozen via p1141 in jog mode (r0046.31 = 1). Enable speed setpoint Enable setpoint BI: p1142...
- Page 537 Acknowledge fault Acknowledge fault BI: p2103 No effect Jog 1 Jog 1 ON BI: p2589 See also SINAMICS S110 List Manual, function diagram 3610 No effect Jog 2 Jog 2 ON BI: p2590 See also SINAMICS S110 List Manual, function...
- Page 538 Communication 9.2 Communication according to PROFIdrive Meaning Remarks Parameter Master control by PLC BI: p0854 Control by PLC This signal must be set so that the process data transferred via PROFIdrive are accepted and become effective. No control by PLC Process data transferred via PROFIdrive are rejected - i.e.
- Page 539 Communication 9.2 Communication according to PROFIdrive NSOLL_A (speed setpoint A (16-bit)) ● Speed setpoint with a 16-bit resolution with sign bit. ● Bit 15 determines the sign of the setpoint: – Bit = 0 → Positive setpoint – Bit = 1 → Negative setpoint ●...
- Page 540 Communication 9.2 Communication according to PROFIdrive MOMRED (torque reduction) This setpoint can be used to reduce the torque limit currently active on the drive. When you use manufacturer-specific PROFIdrive telegrams with the MOMRED control word, the signal flow is automatically interconnected up to the point where the torque limit is scaled.
- Page 541 Communication 9.2 Communication according to PROFIdrive POS_STW (positioning mode, p0108.4 =1) See function diagram [2462]. Table 9- 9 Description of POS_STW (positioning mode, p0108.4 = 1) Meaning Remarks Parameter Tracking mode Activate tracking mode BI: 2655 Tracking mode deactivated Set reference point Set reference point BI: 2596 Do not set reference point...
- Page 542 Communication 9.2 Communication according to PROFIdrive POS_STW1 (control word 1, positioning mode, r0108.4 = 1) See function diagram [2463]. Table 9- 10 Description of POS_STW1 (control word 1) Meaning Remarks Parameter EPOS traversing block selection bit 0 Traversing block selection BI: p2625 EPOS traversing block selection bit 1 BI: p2626...
- Page 543 Communication 9.2 Communication according to PROFIdrive POS_STW2 (control word 2, positioning mode, p0108.4 =1) See function diagram [2464]. Table 9- 11 Description of POS_STW2 (control word 2, positioning mode, p0108.4 = 1) Meaning Remarks Parameter Tracking mode Activate tracking mode BI: p2655 Tracking mode deactivated Set reference point...
- Page 544 Communication 9.2 Communication according to PROFIdrive OVERRIDE (Pos Velocity Override) This process data defines the percentage for the velocity override. Normalization: 4000 hex (16384 dec) = 100 % Range of values: 0 ... 7FFF hex Values outside this range are interpreted as 0%. MDI_TARPOS (MDI position) This process data defines the position for MDI sets.
- Page 545 Communication 9.2 Communication according to PROFIdrive MDI_MOD For a detailed table see function diagram [2480]. Table 9- 12 Signal targets for MDI_MOD (positioning mode, r0108.4 = 1) Meaning Interconnection parameter 0 = Relative positioning is selected p2648 = r2094.0 1 = Absolute positioning is selected 0 = Absolute positioning through the shortest distance p2651 = r2094.1 1 = Absolute positioning in the positive direction...
-
Page 546: Description Of Status Words And Actual Values
Communication 9.2 Communication according to PROFIdrive 9.2.3.3 Description of status words and actual values Description of status words and actual values Note This chapter describes the assignment and meaning of the process data in SINAMICS interface mode (p2038 = 0). The reference parameter is also specified for the relevant process data. - Page 547 Communication 9.2 Communication according to PROFIdrive Table 9- 14 Overview of status words and actual values, manufacturer-specific Abbreviation Name Signal Data type Interconnection number parameters MELDW Message word r2089[2] MT_ZSW Probe status word r0688 MT1_ZS_F Probe 1 time stamp falling edge r0687[0] MT1_ZS_S Probe 1 time stamp rising edge...
- Page 548 Communication 9.2 Communication according to PROFIdrive ZSW1 (status word 1) See function diagram [2452] Table 9- 15 Description of ZSW1 (status word 1) Meaning Remarks Parameter Ready for switching on Ready for switching on BO: r0899.0 Power supply on, electronics initialized, line contactor released if necessary, pulses inhibited.
- Page 549 Communication 9.2 Communication according to PROFIdrive Meaning Remarks Parameter Speed BO: r2197.7 Setpoint/actual value monitoring within tolerance setpoint-actual value deviation band within the tolerance bandwidth Actual value within a tolerance band; dynamic overshoot or undershoot for t < t permissible, e.g.
- Page 550 Communication 9.2 Communication according to PROFIdrive ZSW1 (status word 1, positioning mode, r0108.4 = 1) See function diagram [2479] *Valid for p0922 = 111 (telegram 111). For p0922 = 110 (telegram 110): Bits 14 and 15 reserved. Table 9- 16 Description of ZSW1 (status word 1, positioning mode) Meaning Remarks...
- Page 551 Communication 9.2 Communication according to PROFIdrive Meaning Remarks Parameter Following error within the tolerance BO: r2684.8 Setpoint/actual value monitoring within tolerance range band Actual value within a tolerance bandwidth; The tolerance bandwidth can be parameterized. Setpoint/actual value monitoring not within tolerance band Control request to PLC Control requested...
- Page 552 Communication 9.2 Communication according to PROFIdrive ZSW2 (status word 2) See function diagram [2454] Table 9- 17 Description of ZSW2 (status word 2) Meaning Remarks Parameter DDS eff., bit 0 – Drive data set effective (2-bit counter) BO: r0051.0 DDS eff., bit 1 –...
- Page 553 Communication 9.2 Communication according to PROFIdrive E_DIGITAL MT_ZSW MTn_ZS_F/MTn_ZS_S CU_ZSW1 These process data are part of the central process data. MELDW (message word) See function diagram [2456] Table 9- 18 Description of MELDW (message word) Meaning Remarks Parameter Ramp-up/ramp-down Ramp-up/ramp-down completed. BO: r2199.5 completed/ramp-function generator The ramp-up procedure is completed once the...
- Page 554 Communication 9.2 Communication according to PROFIdrive Meaning Remarks Parameter Application: This message indicates that the motor is overloaded and appropriate measures need to be taken to rectify the situation (e.g. stop the motor or reduce the load). |n_act| < p2161 |n_act| <...
- Page 555 Communication 9.2 Communication according to PROFIdrive Meaning Remarks Parameter No thermal overload in power unit BO: r2135.15 No thermal overload in power unit alarm alarm The temperature of the heat sink in the power unit is within the permissible range. Thermal overload in power unit alarm The temperature of the heat sink in the power unit is outside the permissible range.
- Page 556 Communication 9.2 Communication according to PROFIdrive POS_ZSW See function diagram [3645]. Table 9- 20 Description of POS_ZSW (status word, positioning mode) Meaning Remarks Parameter Tracking mode active Tracking mode active BO: r2683.0 Tracking mode not active Velocity limiting active Active BO: r2683.1 Not active Setpoint static...
- Page 557 Communication 9.2 Communication according to PROFIdrive POS_ZSW1 (status word 1, positioning mode, r0108.4 = 1) See function diagram [2466]. Table 9- 21 Description of POS_ZSW1 (status word 1, positioning mode, r0108.4 = 1) Meaning Remarks Parameter Active traversing block, bit 0 –...
- Page 558 Communication 9.2 Communication according to PROFIdrive S_ZSW1B Safety Info Channel: Status word Table 9- 22 Description S_ZSW1B Meaning Remarks Parameter STO active STO active r9734.0 STO not active SS1 active SS1 active r9734.1 SS1 not active SS2 active SS2 active r9734.2 SS2 not active SOS active...
- Page 559 Communication 9.2 Communication according to PROFIdrive WARN_CODE Display of the alarm code (see function diagram 8065). FAULT_CODE Display of the fault code (see function diagram 8060). POS_ZSW2 (status word 2, positioning mode, r0108.4 = 1) See function diagram [2467]. Table 9- 23 Description of POS_ZSW2 (status word 2, positioning mode, r0108.4 = 1) Meaning Remarks...
-
Page 560: Control And Status Words For Encoder
Communication 9.2 Communication according to PROFIdrive 9.2.3.4 Control and status words for encoder Description The process data for the encoders is available in various telegrams. For example, telegram 3 is provided for speed control with 1 position encoder and transmits the process data of encoder 1. - Page 561 Communication 9.2 Communication according to PROFIdrive Encoder n control word (Gn_STW, n = 1, 2) The encoder control word controls the encoder functions. Table 9- 24 Description of the individual signals in Gn_STW Name Signal status, description Find reference Functions If bit 7 = 0, then find reference mark request applies: mark or flying Meaning...
- Page 562 Communication 9.2 Communication according to PROFIdrive Name Signal status, description Parking encoder Request parking encoder (handshake with Gn_ZSW bit 14) No request Acknowledge encoder error Request to reset encoder errors No request Function Manual Function Manual, 01/2011, 6SL3097-4AB10-0BP3...
- Page 563 Communication 9.2 Communication according to PROFIdrive Example 1: Find reference mark Assumptions for the example: ● Distance-coded reference mark ● Two reference marks (function 1/function 2) ● Position control with encoder 1 Figure 9-9 Sequence chart for "Find reference mark" Function Manual Function Manual, 01/2011, 6SL3097-4AB10-0BP3...
- Page 564 Communication 9.2 Communication according to PROFIdrive Example 2: Flying measurement Assumptions for the example: ● Measuring probe with rising edge (function 1) ● Position control with encoder 1 Figure 9-10 Sequence chart for "Flying measurement" Encoder 2 control word (G2_STW) ●...
- Page 565 Communication 9.2 Communication according to PROFIdrive Encoder n status word (Gn_ZSW, n = 1, 2) The encoder status word is used to display states, errors and acknowledgements. Table 9- 25 Description of the individual signals in Gn_ZSW Name Signal status, description "Find Status: Valid for "Find reference mark"...
- Page 566 Communication 9.2 Communication according to PROFIdrive Name Signal status, description Reserved Transmit absolute value Acknowledgement for Gn_STW.13 (request absolute value cyclically) cyclically Note: Cyclic transmission of the absolute value can be interrupted by a function with higher priority. See Gn_XIST2 ...
- Page 567 Communication 9.2 Communication according to PROFIdrive Encoder 1 actual position value 2 (G1_XIST2) Different values are entered in Gx_XIST2 depending on the function. ● Priorities for Gx_XIST2 The following priorities should be considered for values in Gx_XIST2: Figure 9-12 Priorities for functions and Gx_XIST2 Function Manual Function Manual, 01/2011, 6SL3097-4AB10-0BP3...
- Page 568 Communication 9.2 Communication according to PROFIdrive ● Resolution: Encoder pulses ∙ 2n n: fine resolution, no. of bits for internal multiplication Figure 9-13 Subdivision and settings for Gx_XIST2 ● Encoder lines of incremental encoder – For encoders with sin/cos 1Vpp: Encoder lines = no.
- Page 569 Communication 9.2 Communication according to PROFIdrive Error code in Gn_XIST2 Table 9- 26 Error code in Gn_XIST2 n_XIST2 Meaning Possible causes / description Encoder error One or more existing encoder faults. Detailed information in accordance with drive messages. Zero marker monitoring –...
-
Page 570: Central Control And Status Words
● 4735 Find reference mark with equivalent zero mark, encoders n ● 4740 Measuring probe evaluation, measured value memory, encoders n Overview of important parameters (see SINAMICS S110 List Manual) Adjustable parameter drive, CU_S parameter is marked ● p0418[0...15] Fine resolution Gx_XIST1 ●... - Page 571 Communication 9.2 Communication according to PROFIdrive CU_STW1 (control word for Control Unit, CU) See function diagram [2495]. Table 9- 27 Description of CU_STW1 (control word for Control Unit) Meaning Remarks Parameter Synchronization flag – This signal is used to synchronize the joint system time between the BI: p0681[0] controller and drive unit.
- Page 572 Communication 9.2 Communication according to PROFIdrive A_DIGITAL (digital outputs) This process data can be used to control the Control Unit outputs. See function diagram [2497] Table 9- 28 Description of A_DIGITAL (digital outputs) Meaning Remarks Parameter Digital input/output 8 – DI/DO 8 on the Control Unit must be parameterized as an output BI: p0738 (DI/DO 8)
- Page 573 Communication 9.2 Communication according to PROFIdrive CU_ZSW1 (status word of the DO1 telegram (telegrams 39x)) See function diagram [2496]. Table 9- 30 Description of CU_ZSW1 (status word of the CU) Meaning Remarks Parameter 0...3 Reserved – – – Fault active Fault active.
- Page 574 Communication 9.2 Communication according to PROFIdrive E_DIGITAL (digital inputs) See function diagram [2498]. Table 9- 31 Description of E_DIGITAL (digital inputs) Meaning Remarks Parameter Digital input/output 8 – DI/DO 8 on the Control Unit must be parameterized as an input BO: p0722.8 (DI/DO = 8) (p0728.8 = 0).
- Page 575 Communication 9.2 Communication according to PROFIdrive MTn_ZS_F and MTn_ZS_S Display of the measuring time determined The measuring time is specified as a 16-bit value with a resolution of 0.25 μs. Features of the central probe ● The time stamps from probes in more than one drive can be transferred simultaneously in a single telegram.
-
Page 576: Motion Control With Profidrive
Communication 9.2 Communication according to PROFIdrive 9.2.3.6 Motion Control with PROFIdrive Description The "Motion Control with PROFIBUS" or "Motion Control with PROFINET" function can be used to implement an isochronous drive link between a master and one or more slaves via the PROFIBUS field bus or an isochronous drive link via PROFINET. - Page 577 Communication 9.2 Communication according to PROFIdrive ● The slaves synchronize their speed and/or current controller cycle with the position controller cycle on the master. ● The speed setpoint is specified by the master. Figure 9-15 Overview of "Motion Control with PROFIBUS" (example: master and 3 slaves) Function Manual Function Manual, 01/2011, 6SL3097-4AB10-0BP3...
- Page 578 Communication 9.2 Communication according to PROFIdrive Structure of the data cycle The data cycle comprises the following elements: 1. Global Control telegram (PROFIBUS only) 2. Cyclic part – Setpoints and actual values 3. Acyclic part – Parameters and diagnostic data 4.
-
Page 579: Acyclic Communication
Communication 9.2 Communication according to PROFIdrive 9.2.4 Acyclic communication 9.2.4.1 General information about acyclic communication Description With acyclic communication, as opposed to cyclic communication, data transfer takes place only when an explicit request is made (e.g. in order to read and write parameters). The read data set/write data set services are available for acyclic communication. -
Page 580: Structure Of Orders And Responses
Communication 9.2 Communication according to PROFIdrive Characteristics of the parameter channel ● One 16-bit address each for parameter number and subindex. ● Concurrent access by several PROFIBUS masters (master class 2). ● Transfer of different parameters in one access (multiple parameter request). ●... - Page 581 Communication 9.2 Communication according to PROFIdrive Parameter response Offset Values for Response header Request reference mirrored Response ID read access Axis mirrored No. of parameters only 1. parameter value(s) Format No. of values Error values Values or error values for negative response only nth parameter value(s) Format...
- Page 582 Communication 9.2 Communication according to PROFIdrive Field Data type Values Remark No. of elements Unsigned8 0x00 Special function 0x01 ... 0x75 No. 1 ... 117 Limited by DPV1 telegram length Number of array elements accessed. Parameter number Unsigned16 0x0001 ... 0xFFFF No.
- Page 583 Communication 9.2 Communication according to PROFIdrive Error values in DPV1 parameter responses Table 9- 33 Error values in DPV1 parameter responses Error Meaning Remark Additional value info 0x00 Illegal parameter number Access to a parameter which does not exist. – 0x01 Parameter value cannot be changed Modification access to a parameter value which cannot be...
- Page 584 Communication 9.2 Communication according to PROFIdrive Error Meaning Remark Additional value info 0x6E Parameter %s [%s]: Write access – – only in the commissioning state, motor (p0010 = 3). 0x6F Parameter %s [%s]: Write access – – only in the commissioning state, power unit (p0010 = 2).
-
Page 585: Determining The Drive Object Numbers
Communication 9.2 Communication according to PROFIdrive Error Meaning Remark Additional value info 0x7D Parameter %s [%s]: Write access – – only in the commissioning state, device parameter reset (device: p0009 = 30). 0x7E Parameter %s [%s]: Write access – – only in the commissioning state, device ready (device: p0009 = 0). -
Page 586: Example 1: Read Parameters
Communication 9.2 Communication according to PROFIdrive 9.2.4.4 Example 1: read parameters Requirements 1. The PROFIdrive controller has been commissioned and is fully operational. 2. PROFIdrive communication between the controller and the device is operational. 3. The controller can read and write data sets in conformance with PROFIdrive DPV1. Task description Following the occurrence of at least one fault (ZSW1.3 = "1") on drive 2 (also drive object number 2), the active fault codes must be read from the fault buffer r0945[0] ... - Page 587 Communication 9.2 Communication according to PROFIdrive ● Attribute: 10 hex → The parameter values are read. ● No. of elements: 08 hex → The actual fault incident with 8 faults is to be read. ● Parameter number: 945 dec → p0945 (fault code) is read. ●...
-
Page 588: Example 2: Write Parameters (Multi-Parameter Request)
Communication 9.2 Communication according to PROFIdrive 9.2.4.5 Example 2: write parameters (multi-parameter request) Requirements 1. The PROFIdrive controller has been commissioned and is fully operational. 2. PROFIdrive communication between the controller and the device is operational. 3. The controller can read and write data sets in conformance with PROFIdrive DPV1. Special requirements for this example: 4. - Page 589 Communication 9.2 Communication according to PROFIdrive 2. Invoke the request. 3. Evaluate the response. Activity 1. Create the request. Parameter request Offset Request header Request reference = 40 Request ID = 02 hex 0 + 1 Axis = 02 hex No.
- Page 590 Communication 9.2 Communication according to PROFIdrive Information about the parameter request: ● Request reference: The value is selected at random from the valid value range. The request reference establishes the relationship between request and response. ● Request ID: 02 hex → This identifier is required for a write request. ●...
-
Page 591: Communication Via Profibus Dp
Communication 9.3 Communication via PROFIBUS DP Information about the parameter response: ● Request reference mirrored: This response belongs to the request with request reference 40. ● Response ID: 02 hex → Write request positive ● Axis mirrored: 02 hex → The value matches the value from the request. ●... - Page 592 Communication 9.3 Communication via PROFIBUS DP Master and slave ● Master and slave properties Table 9- 34 Master and slave properties Properties Master Slave As bus node Active Passive Send messages Permitted without external Only possible on request by request master Receive messages Possible with no restrictions...
-
Page 593: Commissioning Profibus
Communication 9.3 Communication via PROFIBUS DP 9.3.2 Commissioning PROFIBUS 9.3.2.1 General information about commissioning Interfaces and diagnostic LED A PROFIBUS interface with LEDs and address switches is available on the Control Unit. Figure 9-19 Interfaces and diagnostic LED Function Manual Function Manual, 01/2011, 6SL3097-4AB10-0BP3... - Page 594 9.3 Communication via PROFIBUS DP ● PROFIBUS interface The PROFIBUS interface is described in the following documentation: References: SINAMICS S110 Equipment Manual ● PROFIBUS diagnostic LED Note A teleservice adapter can be connected to the PROFIBUS interface (X126) for remote diagnostics purposes.
- Page 595 – Other nodes in the line: switch off terminating resistor ● Shielding for the PROFIBUS cables The cable shield in the plug must be connected at both ends with the greatest possible surface area. References: SINAMICS S110 Equipment Manual Function Manual Function Manual, 01/2011, 6SL3097-4AB10-0BP3...
-
Page 596: Commissioning Procedure
● The telegram type for each drive object is known by the application. PROFIBUS master ● The communication properties of the SINAMICS S110 slave must be available in the master (GSD file or Drive ES slave OM). Commissioning steps (example with SIMATIC S7) 1. -
Page 597: Simatic Hmi Addressing
Communication 9.3 Communication via PROFIBUS DP 9.3.2.4 SIMATIC HMI addressing You can use a SIMATIC HMI as a PROFIBUS master (master class 2) to access SINAMICS directly. With respect to SIMATIC HMI, SINAMICS behaves like a SIMATIC S7. For accessing drive parameters, the following simple rule applies: ●... -
Page 598: Monitoring: Telegram Failure
Communication 9.3 Communication via PROFIBUS DP Note You can operate a SIMATIC HMI together with a drive unit independently of an existing control. A basic "point-to-point" connection can only be established between two nodes (devices). The "variable" HMI functions can be used for drive units. Other functions cannot be used (e.g. -
Page 599: Motion Control With Profibus
Communication 9.3 Communication via PROFIBUS DP After a telegram failure and the additional monitoring time has elapsed (p2047), bit r2043.0 is set to "1" and alarm A01920 is output. Binector output r2043.0 can be used for an emergency stop, for example. Once the delay time (p2044) has elapsed, fault F01910 is output. - Page 600 Communication 9.3 Communication via PROFIBUS DP Motion Control /Isochronous drive link with PROFIBUS Figure 9-23 Motion Control/Isochronous drive link with PROFIBUS, optimized cycle with T = 2 ∙ MAPC Sequence of data transfer to closed-loop control system 1. Position actual value G1_XIST1 is read into the telegram image at time T before the start of each cycle and transferred to the master in the next cycle.
- Page 601 Communication 9.3 Communication via PROFIBUS DP Name Limit Description Master application cycle time MAPC This is the time frame in which the master application generates new setpoints (e.g. in the position controller cycle). = integer multiple * T MAPC 250 µs Time basis for T BASE_IO ≤...
- Page 602 Communication 9.3 Communication via PROFIBUS DP Setting criteria for times ● Cycle (T – T must be set to the same value for all bus nodes. – T > T and T > T is thus large enough to enable communication with all bus nodes. NOTICE After T has been changed on the PROFIBUS master, the drive system must be...
- Page 603 Communication 9.3 Communication via PROFIBUS DP User data integrity User data integrity is verified in both transfer directions (master ↔ slave) by a sign of life (4- bit counter). The sign of life counters are incremented from 1 to 15 and then start again at 1. ●...
-
Page 604: Slave-To-Slave Communication
Communication 9.3 Communication via PROFIBUS DP 9.3.4 Slave-to-slave communication 9.3.4.1 General information Description With PROFIBUS DP, the master addresses all of the slaves one after the other in a DP cycle. In this case, the master transfers its output data (setpoints) to the particular slave and receives as response the input data (actual values). - Page 605 Communication 9.3 Communication via PROFIBUS DP Subscriber The subscribers evaluate the broadcast telegrams, sent from the publishers, and use the data which has been received as setpoints. The setpoints are used, in addition to the setpoints received from the master, corresponding to the configured telegram structure (p0922).
-
Page 606: Setpoint Assignment In The Subscriber
Communication 9.3 Communication via PROFIBUS DP 9.3.4.2 Setpoint assignment in the subscriber Setpoints Information about setpoints: ● Number of setpoint When bus communication is being established, the master signals the slave the number of setpoints (process data) to be transferred using the configuring telegram (ChkCfg). ●... - Page 607 Communication 9.3 Communication via PROFIBUS DP Parameterizing telegram (SetPrm) The filter table is transferred, as dedicated block from the master to the slave with the parameterizing telegram when a bus communication is established. Figure 9-25 Filter block in the parameterizing telegram (SetPrm) Configuration telegram (ChkCfg) Using the configuration telegram, a slave knows how many setpoints are to be received from the master and how many actual values are to be sent to the master.
-
Page 608: Commissioning Of The Profibus Slave-To-Slave Communication
Communication 9.3 Communication via PROFIBUS DP 9.3.4.4 Commissioning of the PROFIBUS slave-to-slave communication The commissioning of slave-to-slave communication between two SINAMICS drive devices using the additional Drive ES Basic package is described below in an example. Settings in HW Config The project below is used to describe the settings in HW Config, using the example "Standard telegrams". - Page 609 Communication 9.3 Communication via PROFIBUS DP 2. Select a SINAMICS S as a slave and use its properties dialog to configure the telegram portions for the individual drive objects. Figure 9-27 Telegram selection for drive object 3. Then switch to the detailed view. Slots 4/5 contain the actual and setpoint values for the first drive object, e.g.
- Page 610 Communication 9.3 Communication via PROFIBUS DP 4. The "Insert slot" button is used to create a new setpoint slot for the first drive object behind the existing setpoint slot. Figure 9-29 Insert new slot 5. Assign the setpoint slot the type "slave-to-slave communication". 6.
- Page 611 Communication 9.3 Communication via PROFIBUS DP 7. The "I/O address" column displays the start address for every drive object. Select the start address of the data of the drive object to be read. This is 268 in the example. If the complete data of the Publisher are not read, set this via the "Length" column. You may also offset the start address for the request, so that data can be read out in the middle of the drive object telegram portion.
- Page 612 Communication 9.3 Communication via PROFIBUS DP 9. After the slave-to-slave communication link has been created, instead of showing "Standard telegram 2" for the drive object, "User-defined" appears in the configuration overview. Figure 9-32 Telegram assignment for slave-to-slave communication 10. The details after creation of the slave-to-slave communication link for a drive object of the SINAMICS S drive device are as follows: Figure 9-33 Details after the creation of the slave-to-slave communication link...
- Page 613 Communication 9.3 Communication via PROFIBUS DP Commissioning in STARTER Slave-to-slave communication is configured in HWConfig and is simply an extension of an existing telegram. Telegrams can be extended in STARTER (p0922 = 999). Figure 9-34 Configuring the slave-to-slave communication links in STARTER To complete the configuration of slave-to-slave communication for the drive objects, the telegram portions of the drive objects in STARTER must be matched to those in the HW Config and extended.
- Page 614 Communication 9.3 Communication via PROFIBUS DP 2. Enter the telegram lengths for the input data and output data according to the settings in HW Config. For slave-to-slave communication links, the input data consists of the telegram portion of the master and the slave-to-slave communication data. 3.
- Page 615 Communication 9.3 Communication via PROFIBUS DP Figure 9-36 Configuring the PROFIBUS slave-to-slave communication in STARTER To connect the drive objects to the process data which is received via slave-to-slave communication, you also need to connect the appropriate connectors to the corresponding signal sinks.
- Page 616 Communication 9.3 Communication via PROFIBUS DP Figure 9-37 Combinding the PZDs for slave-to-slave communication with external signals Function Manual Function Manual, 01/2011, 6SL3097-4AB10-0BP3...
-
Page 617: Gsd File
Communication 9.3 Communication via PROFIBUS DP 9.3.4.5 GSD file Generic station description file (GSD) A special generic station description file exists for the SINAMICS family to permit integration of the PROFIBUS slave-to-slave communication in the SINAMICS drive. Figure 9-38 Hardware catalog of the generic station description file with slave-to-slave communication functionality The SINAMICS S DXB GSD file contains standard telegrams, free telegrams and slave-to- slave telegrams for configuring slave-to-slave communication. -
Page 618: Diagnosing The Profibus Slave-To-Slave Communication In Starter
Communication 9.3 Communication via PROFIBUS DP 9.3.4.6 Diagnosing the PROFIBUS slave-to-slave communication in STARTER Diagnostics Since the PROFIBUS slave-to-slave communication is implemented on the basis of a broadcast telegram, only the subscriber can detect connection or data faults, e.g. via the Publisher data length (see "Configuration telegram"). -
Page 619: Communication Via Profinet Io
Communication 9.4 Communication via PROFINET IO Communication via PROFINET IO 9.4.1 General information about PROFINET IO 9.4.1.1 Real-time (RT) and isochronous real-time (IRT) communication Real-time communication When communication takes place via TCP/IP, the resultant transmission times may be too long and non-deterministic to meet production automation requirements. When communicating time-critical IO user data, PROFINET IO therefore uses its own real-time channel, rather than TCP/IP. -
Page 620: Data Transfer
Communication 9.4 Communication via PROFINET IO 9.4.1.2 Data transfer Properties The PROFINET interface on a drive unit supports the simultaneous operation of: ● IRT – isochronous real-time Ethernet ● RT – real-time Ethernet ● Standard Ethernet services (TCP/IP, LLDP, UDP and DCP) PROFIdrive telegram for cyclic data transmission, acyclic services Telegrams to send and receive process data are available for each drive object of a drive unit with cyclic process data exchange. - Page 621 Communication 9.4 Communication via PROFINET IO PROFINET IO Within the context of Totally Integrated Automation (TIA), PROFINET IO is the systematic development of the following systems: ● PROFIBUS DP, the established field bus, ● Industrial Ethernet, the communications bus for the cell level. Experience gained from both systems was and is being integrated into PROFINET IO.
-
Page 622: Addresses
Communication 9.4 Communication via PROFINET IO Cycle communication using PROFINET IO with IRT or using RT is possible on all drive units equipped with a PROFINET interface. This means that problem-free communication using other standard protocols is guaranteed within the same network. Note PROFINET for drive technology is standardized and described in the following document: PROFIBUS Profile PROFIdrive –... - Page 623 Communication 9.4 Communication via PROFINET IO IP address To allow a PROFINET device to be addressed as a node on Industrial Ethernet, this device also requires an IP address that is unique within the network. The IP address is made up of 4 decimal numbers with a range of values from 0 through 255.
-
Page 624: Profinet: Address Parameters
Communication 9.4 Communication via PROFINET IO 9.4.1.5 PROFINET: Address parameters Overview of important parameters (see SINAMICS S110 List Manual) For integrated PROFINET interface ● p8920[0...239] PN Name of station ● p8921[0...3] PN IP Address of station ● p8922[0...3] PN Default gateway of station ●... - Page 625 3. Click on the "Browse" button. 4. The "Browse Network" dialog box opens and displays the connected nodes. 5. After the SINAMICS S110 with CU305 PN has been selected as a node, activate the "DCP flashing" function by means of the "Flash" button.
-
Page 626: Rt Classes For Profinet Io
Communication 9.4 Communication via PROFINET IO Connecting the IO supervisor You can go online with the STARTER in a number of ways, which are illustrated below: Figure 9-40 Connecting the IO supervisor 9.4.3 RT classes for PROFINET IO PROFINET IO is a scalable realtime communication system based on Ethernet technology. The scalable approach is expressed with three realtime classes. - Page 627 Communication 9.4 Communication via PROFINET IO Software preconditions for configuring IRT: ● STEP 7 5.4 SP4 (HW Config) Note For further information about configuring the PROFINET interface for the I/O controller and I/O device, please refer to the following document: SIMOTION SCOUT Communication System Manual.
- Page 628 Communication 9.4 Communication via PROFINET IO Comparison between RT and IRT Table 9- 39 Comparison between RT and IRT RT class IRT "high flexibility" IRT "high performance" Transfer mode Switching based on the MAC Switching using the MAC Path-based switching address;...
- Page 629 Communication 9.4 Communication via PROFINET IO Synchronization domain The sum of all devices to be synchronized form a synchronization domain. The whole domain must be set to a single, specific RT class (real-time class) for synchronization, Different synchronization domains can communicate with one another via RT. For IRT, all IO devices and IO controllers must be synchronized with a common synchronization master.
- Page 630 Communication 9.4 Communication via PROFINET IO Table 9- 40 Settable send cycles and update cycles Send cycle Reduction ratio between update and send cycles IRT "high performance" IRT "high flexibility" Range 250, 500, 1,2,4,8,16,32,64,128,256,512 1,2,4,8,16 "even" 1000 µs 2000 µs 1,2,4,8,16,32,64,128,256 1,2,4,8,16 4000 µs...
-
Page 631: Selection Of The Profinet Variant
The names of GSD files for devices which contain IRT end in …PN-V2.2. 9.4.4 Selection of the PROFINET variant SINAMICS S110 supports the PROFINET variant: ● PROFINET version 2.2 (RT class IRT) The PROFINET variant required is stored in a separate UFW file for each variant. The pointer file optboard.txt contains the names of the UFW files to be loaded. -
Page 632: Profinet Gsd
Communication 9.4 Communication via PROFINET IO 9.4.5 PROFINET GSD For integration into a PROFINET network, SINAMICS S110 supports two different PROFINET GSD versions (device master file): ● PROFINET GSD for compact modules ● PROFINET GSD with subslot configuring PROFINET GSD for compact modules With the PROFINET GSD for compact modules, you can precisely configure a complete module which corresponds to a drive object. - Page 633 Communication 9.4 Communication via PROFINET IO Configuring Configuring the three versions is only briefly sketched out in the following: ● Compact module: – Insert a module "DO Servo/Servo/...". – Assign the I/O addresses. ● Subslot configuring without new functionality: – Insert a module "DO with telegram xyz". –...
-
Page 634: Motion Control With Profinet
Communication 9.4 Communication via PROFINET IO 9.4.6 Motion Control with PROFINET Motion Control/Isochronous drive link with PROFINET Figure 9-42 Motion Control/Isochronous drive link with PROFINET, optimized cycle with CACF = 2 Sequence of data transfer to closed-loop control system 1. Position actual value G1_XIST1 is read into the telegram image at time T before the IO_Input start of each cycle and transferred to the master in the next cycle. - Page 635 Communication 9.4 Communication via PROFINET IO Designations and descriptions for motion control Table 9- 43 Time settings and meanings Name Limit value Description Time basis for cycle time T DC_BASE calculation: =T_DC_BASE ∙ 31.25 µs = 4 ∙ 31.25 µs = DC_BASE 125 µs T_DC_MIN ≤...
- Page 636 Communication 9.4 Communication via PROFINET IO Setting criteria for times ● Cycle (T – T must be set to the same value for all bus nodes. T is a multiple of SendClock. – T > T and T ≧ T CA_Valid IO_Output is thus large enough to enable communication with all bus nodes.
-
Page 637: Profinet With 2 Controllers
9.4.7.1 Settings for SINAMICS S SINAMICS S110 permits the simultaneous connection of an automation control (A-CPU) and a Safety control (F-CPU) to a Control Unit via PROFINET. For this communication, SINAMICS S only supports the standard telegram 30 of the Safety control. - Page 638 Communication 9.4 Communication via PROFINET IO Example The following diagram shows an example configuration of a SINAMICS S110 with 3 axes. The A-CPU sends the standard telegram 105 and the standard telegram 102. The F-CPU sends two PROFIsafe telegrams 30.
- Page 639 Communication 9.4 Communication via PROFINET IO Configuration Proceed as follows to configure the connection: ● Use parameter p8929 = 2 to specify that data from 2 controls is to be received via the PROFINET-interface. ● Enable PROFIsafe with parameter p9601.3 = p9801.3 = 1. ●...
-
Page 640: Configuring The Controls
Communication 9.4 Communication via PROFINET IO 9.4.7.2 Configuring the controls You have two options for configuring both the controls A-CPU and F-CPU in HW Config : Configure ● both controls using the Shared Device function in a common project or ●... -
Page 641: Overview Of Important Parameters
PROFIsafe telegram 30. 9.4.7.3 Overview of important parameters Overview of important parameters (see SINAMICS S110 List Manual) ● p8929 PN Number of remote controllers ● p9601 SI enable, functions integrated in the drive (CPU 1) ● p9801 SI enable, functions integrated in the drive (CPU 2) -
Page 642: Communication Using Uss
● PZD length ● PIV drive object ● PIV length For details on parameters, please refer to the SINAMICS S110 List Manual. Overview of important parameters (see SINAMICS S110 List Manual) ● p2020 fieldbus interface baud rate ● p2021 fieldbus interface address ●... -
Page 643: Transferring Pzd
Communication 9.5 Communication using USS 9.5.2 Transferring PZD Prerequisite The communications interface must be set to USS protocol. Defining the process data to be transferred To define the process data (PZD) to be transferred, proceed as follows: 1. Select <drive> → Communication in STARTER. Figure 9-47 USS: Defining the PZD receive direction 2. -
Page 644: General Information About Communication With Uss Over Rs485
Communication 9.5 Communication using USS 9.5.3 General information about communication with USS over RS485 General information Communication using the USS protocol takes place over the RS485 interface with a maximum of 31 slaves. The following character frame applies for the USS telegram: For information about connection, please refer to the Equipment Manual. - Page 645 Communication 9.5 Communication using USS Start delay The duration of the start delay must at least be as long as the time for two characters and depends on the baud rate. Table 9- 44 Duration of the start delay Baud rate in Transmission time per character Transmission time Min.
-
Page 646: User Data Range Of The Uss Telegram
Communication 9.5 Communication using USS The ADR range is a single byte which contains the address of the slave node (e.g. inverter). The individual bits in the address byte are addressed as follows: Special Mirror Broadcast 5 Address bits telegram telegram ●... -
Page 647: Data Structure Of The Uss Parameter Channel
Communication 9.5 Communication using USS Structure of the user data The user data range of the USS protocol is used to transmit application data. This comprises the parameter channel data and the process data (PZD). The user data occupy the bytes within the USS frame (STX, LGE, ADR, BCC). The size of the user data can be configured using parameters p2023 and p2022. - Page 648 Communication 9.5 Communication using USS Parameter identifier (PKE), first word The parameter identifier (PKE) is always a 16-bit value. Figure 9-50 PKE structure ● Bits 0 to 10 (PNU) contain the remainder of the parameter number (value range 1 to 61999).
- Page 649 Communication 9.5 Communication using USS Table 9- 46 Response identifier (inverter → master) Response identifier Description No response Transfer parameter value (word) Transfer parameter value (double word) Transfer descriptive element Transfer parameter value (field, word) Transfer parameter value (field, double word) Transfer number of field elements Request cannot be processed, task cannot be performed (with error number) 1) The required element of the parameter description is specified in IND (second word).
- Page 650 Communication 9.5 Communication using USS Parameter index (IND) second word The field subindex is simply referred to as "subindex" in the PROFIdrive profile. Data transfer structure Figure 9-51 IND structure ● The field subindex is an 8-bit value that is transferred in the low-value byte (bits 0 to 7) of the parameter index (IND).
- Page 651 Communication 9.5 Communication using USS Rules for the parameter range The bit for selecting the parameter page functions as follows: When it is set to 1, an offset of 2000 is applied in the inverter to the parameter number (PNU) in the parameter channel request before transfer. Figure 9-52 IND page index Table 9- 48...
- Page 652 Communication 9.5 Communication using USS Parameter value (PWE) With communication over USS, the number of PWEs can vary. One PWE is required for 16- bit values. Two PWEs are required if 32-bit values are exchanged. Note U8 data types are transferred as U16 with the upper byte set to zero. U8 fields therefore require one PWE per index.
-
Page 653: Time-Out And Other Errors
Communication 9.5 Communication using USS 9.5.7 Time-out and other errors Telegram timeouts The character runtime is important for timeout monitoring: Table 9- 50 Character runtime Baud rate in Transmission time per character (= Transmission time Character runtime bits/s 11 bits) per bit 9600 1.146 ms... - Page 654 Communication 9.5 Communication using USS Character delay time Off time between characters; must be less than 2x character runtime, but can also be zero Start delay Off time between USS messages; must be > 2 character runtime. Response delay Processing time of the slave; must be < 20 ms, but larger than the start delay.
-
Page 655: Uss Process Data Channel (Pzd)
Communication 9.5 Communication using USS 9.5.8 USS process data channel (PZD) Description In this area of the telegram, process data (PZD) is continuously exchanged between the master and slave. Depending on the direction of transmission, the process data channel contains either request data for the USS slave or response data for the USS master. The request contains control words and setpoints for the slaves and the response contains status words and actual values for the master. - Page 656 Communication 9.5 Communication using USS Function Manual Function Manual, 01/2011, 6SL3097-4AB10-0BP3...
-
Page 657: Basic Information About The Drive System
Basic information about the drive system 10.1 Parameter Parameter types The following adjustable and display parameters are available: ● Adjustable parameters (write/read) These parameters have a direct impact on the behavior of a function. Example: Ramp-up and ramp-down time of a ramp-function generator ●... - Page 658 Basic information about the drive system 10.1 Parameter The CDS and DDS can be switched over during normal operation. Further types of data set also exist, however these can only be activated indirectly by means of a DDS changeover. ● EDS Encoder Data Set ●...
- Page 659 = 1; automatically reset to 0 Access level The parameters are subdivided into access levels. The SINAMICS S110 List Manual specifies the access level at which the parameter can be displayed and modified. The required access levels 0 to 4 can be set in p0003.
-
Page 660: Data Sets
– CI: Speed controller speed setpoint 1 (p1155) – Torque limits and scaling factors (p1522, p1523, p1528, p1529) SINAMICS S110 can manage 2 command data sets. The following parameters are available for selecting command data sets and for displaying the currently selected command data set: The binector input p0810 is used to select a command data set. - Page 661 Basic information about the drive system 10.2 Data sets Example: Changeover between command data set 0 and 1 Figure 10-3 Switching the command data set (example) Function Manual Function Manual, 01/2011, 6SL3097-4AB10-0BP3...
-
Page 662: Dds: Drive Data Set
List Manual by "Data Set DDS" and are assigned an index [0...n]. SINAMICS S110 can manage up to 2 drive data sets. The number of drive data sets is configured with p0180. The parameters of the drive data sets are switched with an index. -
Page 663: Eds: Encoder Data Set
(encoder 1: motor encoder) or p0188 (encoder 2: external encoder) to a drive data set. Only one of the two encoders can be used at a time. With SINAMICS S110, the only possible change is between encoder data set 0 and "encoderless". -
Page 664: Mds: Motor Data Set
● Switching over different windings in a motor (e.g. star-delta changeover) ● Adapting the motor data SINAMICS S110 can manage up to 2 motor data sets. The number of motor data sets in p0130 must not exceed the number of drive data sets in p0180. -
Page 665: Using Data Sets
Basic information about the drive system 10.2 Data sets Overview of important parameters (see SINAMICS S110 List Manual) Adjustable parameters ● p0130 Motor data sets (MDS) number ● p0139 Copy motor data set (MDS) ● p0140 Encoder data sets (EDS) number ●... - Page 666 Basic information about the drive system 10.2 Data sets Start copying. Copying is finished when p0819[2] = 0. Note In STARTER, you can copy the drive data sets (Drive → Configuration → "Drive data sets" tab). You can select the displayed drive data set in the relevant STARTER screens. Copying the motor data set Set parameter p0139 as follows: 1.
-
Page 667: Working With The Memory Card
3. An optionally available portable memory card. The CU305 only accepts memory cards which have been prepared for SINAMICS S110 by Siemens. During operation, SINAMICS S110 uses the work memory. It is here that all project data and application programs for operation are stored. -
Page 668: Using Parameter Data Sets
Basic information about the drive system 10.3 Working with the memory card 10.3.1 Using parameter data sets Parameter backup There are several ways of copying parameter data sets from non-volatile memory to the memory card: ● Automatic backup of parameters to the memory card when the system is switched off/on: Delete all data on memory card Memory card empty? - Page 669 Basic information about the drive system 10.3 Working with the memory card Alternatively, you can back up parameter sets without switching the CU305 off/on as follows: ● The system is switched on: – Insert a memory card into the CU305. –...
- Page 670 Parameter backup the desired with index 0 to parameter memory card? backup Insert memory card into CU305 Switch SINAMICS S110 off and on again Parameter backup with setting 0 is copied to CU305 Log memory card off (p9400 = 2)
-
Page 671: Working With Firmware Versions
Note Saving/loading all parameters via p0976 and p0977: You can save or reload all parameters via parameters p0976 and p0977. For more details, refer to the parameter description in the SINAMICS S110 List Manual. 10.3.2 Working with firmware versions Firmware update/downgrade The firmware must be updated if the functional scope is extended in a more recent version and the corresponding functions need to be used. - Page 672 Basic information about the drive system 10.3 Working with the memory card Memory Use memory card card only without parameter contains backup and with firmware version desired firmware version Insert memory card into CU305 Switch SINAMICS S110 off and on again Firmware version on memory card =...
-
Page 673: Replacing The Device
Basic information about the drive system 10.3 Working with the memory card 10.3.3 Replacing the device A CU305 has failed. You want to replace the device but retain the firmware version. You receive a new CU305 with the firmware version currently on release at the time of delivery. To replace a device, proceed as follows: Function Manual Function Manual, 01/2011, 6SL3097-4AB10-0BP3... - Page 674 CU305 CU305 into CU305 Caution: Any existing parameter backup on CU305 will be overwritten if setting is 0! Switch SINAMICS S110 Switch SINAMICS S110 Switch SINAMICS S110 off and on off and on off and on again again...
-
Page 675: Removing The Memory Card Safely
= 2. 10.3.5 Integration Overview of important parameters (see SINAMICS S110 List Manual) ● p0977: Save all parameters ● p0802: Data transfer with memory card as source/target ● p0803: Data transfer with device memory as source/target ●... -
Page 676: Bico Technology: Interconnecting Signals
Basic information about the drive system 10.4 BICO technology: Interconnecting signals 10.4 BICO technology: Interconnecting signals 10.4.1 Description Description Every drive contains a large number of interconnectable input and output variables and internal control variables. BICO technology (Binector Connector Technology) allows the drive to be adapted to a wide variety of conditions. -
Page 677: Binectors, Connectors
Basic information about the drive system 10.4 BICO technology: Interconnecting signals 10.4.2 Binectors, connectors Binectors, BI: Binector Input, BO: Binector Output A binector is a digital (binary) signal without a unit which can assume the value 0 or 1. Binectors are subdivided into binector inputs (signal sink) and binector outputs (signal source). -
Page 678: Interconnecting Signals Using Bico Technology
Example: FloatingPoint32 The possible interconnections between the BICO input (signal sink) and the BICO output (signal source) are listed in the following documents: References: SINAMICS S110 List Manual Section "Explanation of list of parameters", table "Possible combinations for BICO interconnections". -
Page 679: Internal Encoding Of The Binector/Connector Output Parameters
Basic information about the drive system 10.4 BICO technology: Interconnecting signals 10.4.4 Internal encoding of the binector/connector output parameters The internal codes are required for writing BICO input parameters via PROFIBUS, for example. Figure 10-9 Internal encoding of the binector/connector output parameters 10.4.5 Sample interconnections Example: Interconnection of digital signals... -
Page 680: Bico Technology
Basic information about the drive system 10.4 BICO technology: Interconnecting signals 10.4.6 BICO technology: Copying drives When a drive is copied, the interconnection is copied with it. Binector-connector converters and connector-binector converters Binector-connector converter ● Several digital signals are converted to a 32-bit integer double word or to a 16-bit integer word. -
Page 681: Scaling
Basic information about the drive system 10.4 BICO technology: Interconnecting signals 10.4.7 Scaling Signals for the analog outputs Table 10- 4 List of signals for analog outputs Signal Parameter Unit Normalization (100 % = ...) Speed setpoint before the setpoint r0060 p2000 filter... -
Page 682: Inputs/Outputs
Note For detailed information about the hardware properties of I/Os, please refer to: Reference: SINAMICS S110 Equipment Manual Control Units For detailed information about the structural relationships between all I/Os of a component and their parameters, please refer to the function diagrams in:... -
Page 683: Digital Inputs/Outputs
– Jumper closed, non-floating. The reference potential of the digital inputs is the ground of the Control Unit. Function diagrams (see SINAMICS S110 List Manual) ● 2020 Digital inputs, electrically isolated (DI 0 ... DI 3) ● 2021 Digital inputs, electrically isolated (DI 16 ... DI 19) ●... - Page 684 – as a connector output Note Before the digital output can function, its own electronics power supply must be connected. Function diagrams (see SINAMICS S110 List Manual) ● 2032 digital output (DO 16) Bidirectional digital inputs/outputs Properties ● Can be parameterized as digital input or output.
-
Page 685: Analog Input
Replacement of SINAMICS Sensor Module Integrated or DRIVE-CLiQ Sensor Integrated If a defect occurs in a SINAMICS Sensor Module Integrated (SMI) or a DRIVE-CLiQ Sensor Integrated (DQI), contact your local Siemens office for a repair. Function Manual Function Manual, 01/2011, 6SL3097-4AB10-0BP3... -
Page 686: System Sampling Times
Basic information about the drive system 10.7 System sampling times 10.7 System sampling times The software functions installed in the system are executed cyclically at different sampling times. The sampling times of the functions are pre-assigned automatically when the drive unit is configured. -
Page 687: Licensing
Licensing Description SINAMICS S110 requires that a license purchased specifically for this purpose is assigned to the hardware if the Extended Functions of Safety Integrated are to be used. In doing this you will receive a license key, which links the Extended Functions of Safety Integrated with the hardware electronically. - Page 688 ● Serial number for the memory card ● License number and delivery note number of the license (on the Certificate of License) 1. Call up the "WEB License Manager". http://www.siemens.com/automation/license 2. Choose "Direct access". 3. Enter the license number and delivery note number of the license.
- Page 689 Basic information about the drive system 10.8 Licensing Entering the license key Note You need to insert the memory card into the Control Unit before entering the license key. With the STARTER commissioning tool, the ASCII characters are not entered in code, but the letters and numbers in the license key can be input directly as they appear on the license certificate.
- Page 690 ASCII code Table 10- 7 Excerpt of ASCII code Letter/number decimal Letter/number decimal Blanks Overview of important parameters (see SINAMICS S110 List Manual) ● p9920 Licensing, enter license key ● p9921 Licensing, activate license key Function Manual Function Manual, 01/2011, 6SL3097-4AB10-0BP3...
-
Page 691: Appendix
Appendix 11.1 Availability of SW functions In conjunction with the Control Unit, SINAMICS S110 Version 4.1 supports the following functions: SW function Control type: Servo Control Fixed clock cycles Current controller 250 μs Speed controller 250 μs Position controller 1 ms ... - Page 692 Extended brake control Armature short-circuit brake Speed controller optimization Motor identification Pole position identification In conjunction with the Control Unit, Version 4.3 SP1 of SINAMICS S110 supports the following new functions: SW function Pulse/direction interface for positioning mode on an S7-1200 Communication USS (alternative to PROFIBUS via X21 on a CU305-DP) for positioning mode on an S7- ...
-
Page 693: Availability Of Hardware Components
Appendix 11.2 Availability of hardware components In conjunction with the Control Unit, Version 4.4 of SINAMICS S110 supports the following new functions: SW function Safety Integrated functions SLS without encoder for synchronous motors SSM without encoder for synchronous motors ... -
Page 694: List Of Abbreviations
Appendix 11.3 List of abbreviations 11.3 List of abbreviations Function Manual Function Manual, 01/2011, 6SL3097-4AB10-0BP3... - Page 695 Appendix 11.3 List of abbreviations Function Manual Function Manual, 01/2011, 6SL3097-4AB10-0BP3...
- Page 696 Appendix 11.3 List of abbreviations Function Manual Function Manual, 01/2011, 6SL3097-4AB10-0BP3...
- Page 697 Appendix 11.3 List of abbreviations Function Manual Function Manual, 01/2011, 6SL3097-4AB10-0BP3...
- Page 698 Appendix 11.3 List of abbreviations Function Manual Function Manual, 01/2011, 6SL3097-4AB10-0BP3...
- Page 699 Appendix 11.3 List of abbreviations Function Manual Function Manual, 01/2011, 6SL3097-4AB10-0BP3...
- Page 700 Appendix 11.3 List of abbreviations Function Manual Function Manual, 01/2011, 6SL3097-4AB10-0BP3...
- Page 701 Appendix 11.3 List of abbreviations Function Manual Function Manual, 01/2011, 6SL3097-4AB10-0BP3...
- Page 702 Appendix 11.3 List of abbreviations Function Manual Function Manual, 01/2011, 6SL3097-4AB10-0BP3...
- Page 703 Function Manual Function Manual, 01/2011, 6SL3097-4AB10-0BP3...
- Page 704 Appendix Function Manual Function Manual, 01/2011, 6SL3097-4AB10-0BP3...
-
Page 705: Index
Index Alarm value, 109, 403 Alarms, 105 Alarm buffer, 109, 403 " Alarm history, 109, 403 configure, 110 "high-speed inputs", Analog inputs, 680 Properties, 683 Signal processing, 683 Analog outputs, 680 Application classes, 523 Absolute encoder Armature short-circuit brake, 193 Adjustment, 243 Armature short-circuit braking Acceptance test, 448... - Page 706 Index Change password Bidirectional, 682 Safety Integrated, 438 If they are not functioning, 681 Closed-loop position control, 217 Properties, 681 Commissioning Signal processing, 681 Checklist, 38 Digital outputs, 680 PROFIsafe with STARTER, 449 Bidirectional, 682 Safety terminals, 436 Properties, 682 with STARTER, 46 Signal processing, 682 Communication...
- Page 707 Index BICO interconnections, 113 Free telegrams, 529 FBLOCKS, 287 FREEBLOCKS, 287 Find reference mark, 561 Function generator Firmware update/downgrade, 669 Properties, 94 Fixed setpoints, 275 Function module Fixed speed setpoints, 275 Closed-loop position control, 217 Flying measurement, 562 Extended brake control, 212 Flying referencing Function modules, 204 EPOS, 247...
- Page 708 Index Jerk limitation, 239 OFF3 Jog, 265 Torque limits, 196 EPOS, 265 Online operation with STARTER, 50 Operating hours counter, 202 Jog, 271 Operation without an encoder Servo, 150 Overview of Safety Integrated functions, 336 Kinetic buffering, 166 p8604, 81 p8609, 81 p8641, 81 LEDs...
- Page 709 Index MDI_ACC, 542 Telegrams, 528 MDI_DEC, 542 Terminating resistor, 593 MDI_MOD, 543 PROFIdrive, 522 MDI_TARPOS, 542 Controller, Supervisor, Drive Unit, 522 MDI_VELOCITY, 542 read parameters, 584 MDIAcc, 532 Write parameter, 586 MDIDec, 532 Profile velocity mode, 69 MDIMode, 532, 533 PROFINET MDIPos, 532 Data transfer, 618...
- Page 710 Index Safe Brake Ramp Operation without an encoder, 150 SBR, 337, 391 Vdc control, 166 Safe Brake Ramp without encoder Servo control, 123 SBR without encoder, 391 Activate setpoint channel, 269 Safe Direction, 394 Current controller, 134 With encoder, 394 Optimization, 147 Safe direction of motion, 394 Speed controller, 123...
- Page 711 Index DQI replacement, 683 Stop F, 359 Sockets for measurement, 101 Stop responses, 359 Software limit switches, 238 Priorities vis-à-vis Extended Functions, 401 Priority classes, 400 Acceptance test, 489 Support, 5 Safe Operating Stop, 373 Switches for PROFIBUS address, 592 Speed controller Switching on inhibited, 546, 548 Limitations, 123...
- Page 712 Index Unit changeover, 187 Update, 627 User interface, 21 V/f control Servo control, 144 Vdc control Servo, 166 Vdc_min control Servo, 167 Voltage boost Servo, 146 Voltage protection Internal, 193 WARN_CODE, 557 Working area, 21 Function Manual Function Manual, 01/2011, 6SL3097-4AB10-0BP3...
- Page 714 Siemens AG Subject to change Industry Sector © Siemens AG, 2011 Drive Technologies Motion Control Systems P.O. Box 3180 91050 ERLANGEN GERMANY www.siemens.com/motioncontrol...