Canon imageFORMULA DR-G2140 User Manual
Hide thumbs
Also See for imageFORMULA DR-G2140:
- Service manual (196 pages) ,
- Service manual (25 pages) ,
- User manual (161 pages)

Related Manuals for Canon imageFORMULA DR-G2140


Summary of Contents for Canon imageFORMULA DR-G2140
- Page 1 User Manual • Please read this manual before operating this scanner. • After you finish reading this manual, store it in a safe place for future reference.
- Page 2 The standards and logos are uniform among participating nations. should be made, you could be required to stop operation of the This model doesn’t provide setting options for power management. equipment. Canon U.S.A. Inc. ONE CANON PARK, MELVILLE, NY 11747, U.S.A. Tel. No. (800)652-2666...
- Page 3 WEEE products, please This is not an exhaustive list. visit www.canon-europe.com/environment. Canon is not responsible for how this scanner is used by an individual. (EEA: Norway, Iceland and Liechtenstein) Please note that certain intellectual property is protected by copyright law, and copyrighted items may not be reproduced without the Für EMVG...
- Page 4 Trademarks Disclaimers • Canon and the Canon logo are registered trademarks, of Canon Inc. The information in this document is subject to change without notice. in the United States and may also be trademarks or registered trademarks in other countries.
-
Page 5: Setup Guide
Setup Guide Please read first. STEP 1 Checking Your Purchased Model Scanner Models Scanner models include those with USB connector only, and those with both USB and wired LAN connectors. This manual describes both USB and wired LAN connection functions. Check your model before reading this manual. - Page 6 STEP 2 Checking the Accessories If any of the items listed below are missing or damaged, contact your local authorized Canon dealer or service representative. Power Cord USB Cable Warranty Card (U.S.A. and Canada only) Main Unit Setup Disc Cleaning Cloth...
- Page 7 Setup Disc Contents Install the following software necessary for using the scanner from the supplied Setup Disc. ● CaptureOnTouch This is a dedicated scanning application for DR Series scanners. ● Scanner driver This is the scanner driver for this product. ●...
- Page 8 Hard disk: 3 GB or more available space required for For details, consult your local authorized Canon dealer. installation of all software • Scanning speeds are lower if your computer’s standard USB USB interface: USB3.1 Gen1/USB2.0...
- Page 9 Installation Click [Typical Installation]. IMPORTANT • Install the software before connecting the scanner to the computer with the USB cable. • Log on to Windows as an Administrator. • Close all other applications before installing the software. Insert the Setup Disc into the disk drive of the computer. The setup menu automatically starts up when you insert the disc into the drive.
- Page 10 In that case, return to the desktop after processing in the browser is completed, and continue the installation process. Click [Exit] to finish installing the software. * Download the latest software from the Canon website.
-
Page 11: Interface Connector Locations
STEP 4 Connecting to a Computer and the Power Connect the scanner to the computer and the power supply. The Power Supply Connection scanner can be connected to a USB port or LAN port on the computer. IMPORTANT Connect the supplied power cord into the power Before connecting the scanner to the computer, verify that the power connector on the back of the scanner. -
Page 12: Connecting To A Computer
Connecting via wired LAN Connecting to a Computer Use a LAN cable to connect the scanner to a wired LAN router. The scanner supports either USB connection or wired LAN connection. IMPORTANT The scanner automatically recognizes the connection method when the USB cable or the LAN cable is connected. - Page 13 STEP 5 Turning the Power ON The power of the scanner can be turned ON and OFF with the power Hint switch on the front of the scanner. • When connected with the USB cable, the following message balloon appears on the task bar when the scanner's power switch Make sure that the scanner and computer are connected is turned on the first time.
-
Page 14: Turning Off The Power
The scanner’s auto power off setting is enabled by default, and the scanner will turn off automatically if it is not operated for 4 hours. To override this setting, please see "About the Canon imageFORMULA Driver Setting Tool" on p. 127. -
Page 15: Introduction
Introduction Thank you for purchasing the Canon imageFORMULA DR-G2140/ Hint DR-G2110/DR-G2090. • The manual (User Manual) for this scanner is stored on the Setup Please read the following manuals carefully and familiarize yourself Disc as an electronic manual in PDF format. -
Page 16: Symbols Used In This Manual
Hint Symbols Used in This Manual In Windows 8.1, it is registered at the following location. The following symbols are used in this manual to explain procedures, restrictions, handling precautions, and instructions that should be observed for safety. Indicates a warning concerning operations that may lead to death or injury to persons if not performed correctly. -
Page 17: Table Of Contents
Table of Contents Setup Guide ................. 5 Assigning a Function to the Function Key ....59 Interface Connector Locations ..........11 User Mode Operations ....... 61 Power Supply Connection............. 11 About User Mode............61 Connecting to a Computer ............ 12 User Mode Operating Procedure .......... - Page 18 Detaching the Separation Pad (Retard Roller Cover) ..151 Setting Tool ..............127 Attaching the Separation Pad (Retard Roller Cover) ..152 What is Canon imageFORMULA Driver Setting Tool? ..127 Imprinter Ink Cartridge Replacement and Start-up of the Canon imageFORMULA Driver Setting Cleaning ..............
- Page 19 Appendix ..........171 Specifications............. 171 Options................172 Consumables ..............173 Dimensions ................. 173 Other Specifications ..........174 Barcode Specifications............174 Imprinter Specifications............176 Index................177...
-
Page 20: Before Using The Scanner
Before Using the Scanner Important Safety Instructions To ensure the safe operation of this scanner, be sure to read the safety warnings and precautions described below. ● Avoid installing the machine in direct sunlight. If this is unavoidable, Installation Location use curtains to shade the scanner. -
Page 21: Power Supply
● If you have any questions regarding the power supply, contact your scanner. local authorized Canon dealer or service representative for further information. Handling Moving the Scanner WARNING ●... - Page 22 ● Do not allow water or flammable substances (alcohol, paint thinner, power switch OFF, and disconnect the power plug from the power outlet. Then, contact your local authorized Canon dealer or service benzene, etc.) to spill into the scanner, as this may result in a fire or representative to have the unit serviced.
-
Page 23: Disposal
To ensure safe handling, be sure to observe all safety precautions. Disposal When disposing of the scanner, be sure to follow all local ordinances and laws, or consult with your local authorized Canon dealer or service representative. -
Page 24: Features Of The Scanner
Features of the Scanner The main features of the scanner are described below. ● Adjustable Document Feed Tray Scanner Features The position of the Document Feed Tray can be adjusted according ● Variety of Scanning Modes to the number of document sheets to be loaded. "Preparing the The scanner is equipped with the following scanning modes. - Page 25 ● Double feed detection by length Detection Functions The scanner stops feeding when a double feed is detected by ● Auto Color Detection comparing document page lengths. "Double Feed" (See p. 67) Automatically detects whether scanned documents are color, * Based on the length of the first document page, the scanner grayscale, or black and white.
- Page 26 ● Color Unevenness Reduction Function ● Binding Hole Removal You can control or reduce the color irregularity at the time of the Erases shadows that appear on scanned images from binding scan. holes on the document. ● Document orientation The text orientation on each fed page is detected, and the scanned Monthly Report Monthly Report image is rotated in 90-degree increments as necessary to match.
- Page 27 ● Folio Scan ● Background smoothing Documents that are too large to fit in the feeder inlet can be folded Processes scanned images to smooth the background. It can be and scanned on both sides, with the images then combined into a used when [Detect automatically], [256-level Gray], or [24-bit Color] single image.
- Page 28 Option ● Imprinter Use to print on scanned documents.
-
Page 29: Names And Functions Of Parts
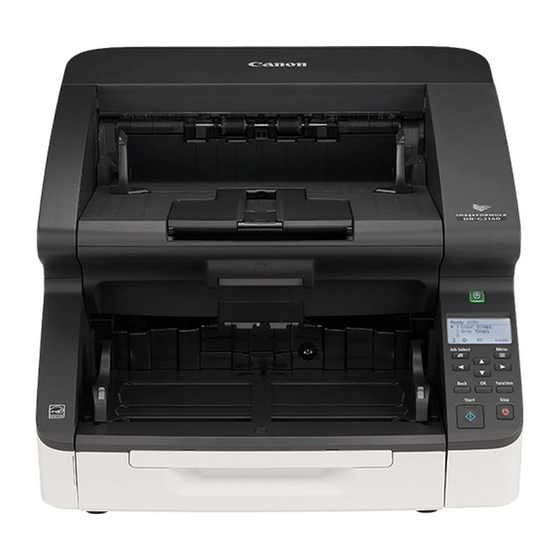
Names and Functions of Parts Front View A Upper Unit Open when cleaning the rollers or clearing paper jams. (See p. 137) B Imprinter Cover Open when replacing the ink cartridge for the optional imprinter or when cleaning the imprinter. (See p. - Page 30 Front View (with Document Feed and Eject Trays extended) F Document Eject Tray Extension Open the Document Eject Tray Extension to prevent documents from falling off of the Document Eject Tray. (See p. 43) G Document Eject Stopper Adjust to fit the length of documents, to avoid document spillage. (See p.
- Page 31 Back View Operation Panel A Ventilation Holes (Exhaust Fan) Exhausts heat from inside the scanner. B Power Connector Connect the supplied power cord here. (See p. 11) C USB Connector (Type B) A Display Panel Connect the supplied USB cable here. (See p.
- Page 32 E Function Key Display panel examples Executes the assigned function. (See p. 59) The information displayed on the display panel changes depending on the status of the scanner. F OK Key The following are representative examples. Selects the user mode, and accepts settings. ●...
- Page 33 ● Menu Screen (Stop) Key (Menu) Key (Job) Key (Back) Key (Function) Key D Display count area Displays the number of documents that have been scanned. ● Jobs Screen When the Jobs screen is displayed, pressing the Menu key displays the Menu screen.
- Page 34 When an error occurs, error code, and error details are displayed. ● About the Function Key The following functions can be assigned to the Function key with the Canon imageFORMULA Driver Setting Tool. "Assigning a Function to the Function Key" (See p. 59) •...
-
Page 35: Basic Operation
Basic Operation Documents This scanner can scan documents ranging in size from business cards Hint and checks up to A3 size, and documents of the following sizes and Continuous feeding feeds document pages from the Document paper thicknesses can be used depending on the paper feed method. Feed Tray one by one by the feed and retard rollers until the Size batch of documents has been scanned. - Page 36 • Scanning the following types of documents can cause a paper jam or malfunction. To scan such a document, make a photocopy of the document and then scan the photocopy. There are creases or fold Carbon paper. lines. There are curls. The surface is coated.
-
Page 37: Document Feed And Eject Tray Preparation
Document Feed and Eject Tray Preparation Before scanning, prepare the Document Feed and Eject Trays for the desired paper size. Setting with the Scanner Driver Preparing the Document Feed Tray By default, the height of the Document Feed Tray is set by the scanner driver. - Page 38 Setting by User Mode This procedure sets the height of the Document Feed Tray by the User Mode. To make this setting in the User Mode, first allow it by the Canon imageFORMULA Driver Setting Tool. "Configuring Scanner Driver Settings" (See p. 63) Hint The [500 sheets] setting is not available in the DR-G2090.
- Page 39 Document Guides Check the setting. Slide the document guides to match the document width. [500]: to load up to 500 sheets [300]: to load up to 300 sheets [100]: to load up to 100 sheets Hint The [500] setting is not available in the DR-G2090. Press the ▲▼...
-
Page 40: Adjusting The Document Guides
Document Feed Tray Extension/Wire Adjusting the Document Guides Extend as needed to fit the document length. The document guides normally extend the same distance left and right from the center of the feed tray, so that documents are centered at the feeder inlet. - Page 41 Place the document. Lock the right document guide (1), and unlock the left document guide (2). Lock the left document guide (1), then slide the right document guide to the right edge of your documents (2). Slide the left document guide to the left edge of your documents.
- Page 42 Resetting the Document Guides Lock the left document guide (1), and unlock the right To reset the guides so that they are equidistant from the center, document guide (2). perform the following procedure to spread the guides to the left and right as far as they can go.
-
Page 43: Preparing The Document Eject Tray
Preparing the Document Eject Tray Unlock the left document guide. The Document Eject Tray includes two Document Eject Guides, the Eject Tray Extension and Eject Paper Stopper, to be adjusted to fit the width and length of your documents. Document Guides Slide the Document Eject Guides to fit the width of your documents. - Page 44 Document Eject Tray Extension When LTR/A4-size documents are loaded, close the Document Eject Tray Extension and raise the Document Eject Stopper. When A3-size Open the Document Eject Tray Extension when documents may eject documents are loaded, open the Document Eject Tray Extension and beyond the Document Eject Tray.
-
Page 45: Document Feeding Methods
Document Feeding Methods Two document feeding methods are available: continuous feeding, which feeds documents automatically from the Document Feed Tray by the pickup roller; and manual feeding, which requires manually feeding one document at a time for transport by the feed roller, while the pickup roller is disabled. - Page 46 Continuous manual feeding mode IMPORTANT Enable the Continuous Manual Feeding Mode from the User Mode • Because pages are not separated by the retard roller during when document pages do not separate properly using Continuous manual feeding, a paper jam will occur if multiple pages are fed Feeding.
- Page 47 Setting with the Scanner Driver Select the [Manual feed mode] check box. By default, the continuous manual feeding mode have to be set by the With selected: Disables the Pickup Roller so that loaded scanner driver. documents have to be hand fed for transport by the Feed Roller one page at a time.
-
Page 48: Scanning Documents Larger Than A3
Folio Scan enables you to scan documents that are larger than A3 and To make this setting in the User Mode, first allow it by the Canon therefore do not fit in the feeder. To use the function, fold the imageFORMULA Driver Setting Tool. - Page 49 IMPORTANT IMPORTANT When [Scanning Side] is set to [Folio], [Detect by Ultrasonic] in A portion of the scanned image will be missing at the fold line. the [Error Detection] tab sheet – [Double Feed Detection] is automatically turned off. Place the document with the folded edge facing right. Set [Feeding Option] on the [Feeding] tab to [Manual Feeding].
-
Page 50: Scanning With Carrier Sheets
Scanning with Carrier Sheets Insert the document into the carrier sheet. You can set up to three Carrier sheets at a time in the scanner. To scan without damaging documents or contaminating the rollers and feed path with documents such as carbon paper, insert each document sheet into an optional carrier sheet before loading it in the scanner. -
Page 51: Long Document Scanning
CAUTION Long Document Scanning If the document is not placed properly inside the carrier sheet, Setting the scanner to the Long Document Mode enables scanning you may get a document jam or not get a scan image as documents up to 5,588 mm long (220") (or up to 3,000 mm (118.11") intended. - Page 52 Document Mode (5588 mm)]. Setting with User Mode The Long Document Mode can be set from User Mode. To make this setting in the User Mode, first allow it by the Canon imageFORMULA Driver Setting Tool. "Configuring Scanner Driver Settings" (See p. 63) Press the Menu key on the operation panel.
- Page 53 • If a sheet is loaded at a skewed angle when scanning long Press the ▲▼ keys to specify the long document mode. documents, it may be damaged by contacting both sides of the feed path. Be careful to place the document so that it is not According to the document length, select [Long Document skewed.
-
Page 54: Detecting A Document Double Feed
Setting procedure Detecting a Document Double Feed This scanner includes a function to detect document double feeds. Open the scanner driver's setting screen. (See p. 107) This function causes the scanner to automatically stop when it detects that multiple document sheets have been fed at the same time. Open the [Error Detection] tab. - Page 55 To also use the double feed detection ignore function, Click the [OK] button to close the settings screen. open the [Others] tab, select the [Rapid recovery system] IMPORTANT check box, and click the [Setting] button. • If documents like plastic cards are scanned, it may be falsely The [Rapid Recovery System Settings] dialog box opens.
- Page 56 When using the double feed detection ignore function Buttons of Operation If a document double feed is detected during scanning, document [Rapid Recovery Description Panel Keys feeding stops when the double fed documents are ejected. The System] Screen following error is displayed in the operation panel. Saves the preview image as a [SAVE &...
-
Page 57: Count The Number Of Document Sheets
Hint Count the Number of Document To stop document feeding, press the Stop key. Sheets Verify Scan This function counts the number of document sheets before scanning. The scanner compares the document page count obtained from the Count-Only Mode Count-Only Mode (or entered manually) with the actual count of The number of loaded document sheets is counted by simply feeding document pages scanned, and an error message is displayed if the them through the scanner. - Page 58 Press the ▲▼ keys to select [Count Clear], and press Click the [OK] button to close the settings screen. [OK]. Set the counter in the Count-Only Mode. (See p. 57) Count-Only Mode is enabled. Hint Hint If "Count Clear" is assigned to the Function key, press the The document page count can be specified by using the count Function key to reset the counter.
-
Page 59: Assigning A Function To The Function Key
By pressing the Function key, you can enable/disable the assigned function. IMPORTANT A USB connection is required to make this setting with the Canon imageFORMULA Driver Setting Tool. When connected via wired LAN, making this setting with the Canon imageFORMULA Driver Setting Tool is ineffective. - Page 60 Select the function to assign to the Function key from the [FUNCTION] list on the [Button control] tab sheet. Click the [OK] button to close the settings screen.
-
Page 61: User Mode Operations
User Mode Operations About User Mode The User Mode provides the user with the capability to change certain scanner functions. The menu hierarchy and menu items that can be selected are as User Mode Operating Procedure follows. User Mode operations are controlled by the following procedure. First hierarchy Second hierarchy Third hierarchy Hint... - Page 62 First hierarchy Second hierarchy Third hierarchy First hierarchy Second hierarchy Third hierarchy Double Feed — Total Scan — Separation Force — Image Sensor LED — Separation Off On/Off (continuous manual Feed Cleaning Sheet — Roller Rotating Time feeding) Pick Roller Kit —...
-
Page 63: Configuring Scanner Driver Settings
MAC Address IMPORTANT The LAN setting screens are displayed Network A USB connection is required to make this setting with the Canon in the following order. imageFORMULA Driver Setting Tool. When connected via wired LAN, DHCP (Off) → IP LAN Setting making this setting with the Canon imageFORMULA Driver Setting Address →... - Page 64 On the [Control] tab sheet, click the [Setting] button for Change the setting method on the [Settings change [Hardware]. method] tab sheet. The Hardware Settings dialog box opens. • To make setting with the scanner, select [on Scanner panel]. • To make setting with the scanner driver, select [on PC].
- Page 65 Hint The menu item names in the Canon imageFORMULA Driver Setting Tool and those in the scanner correspond as follows. Driver Setting Tool Menu Item Scanner Menu Item Name Name Long Document Mode (Max Long Document Mode Document Length) Long Document Mode...
-
Page 66: User Mode Functions
User Mode Functions The User Mode has the following functions. Enables the File Separation function, and icon appears. When Separation Off scanning documents in multiple batches, batch file separation occurs each time you load the next batch and resume scanning. In order to use this function, [Panel] must first be selected for [Batch Separation] on the [Others] tab sheet in the scanner driver. -
Page 67: Scan Setting
Auto Power Off Hint Sets the Auto Power Off Function. Key repeat is effective in the following situations. When set to [On], the Auto Power Off Function automatically turns off • When using the Job Function the power supply after four hours without scanning or other operation. •... - Page 68 Separation Force Staple Detection If double feeding or a paper jam occurs, consider changing the Set the Staple Detection sensitivity level. Separation Mode. High Sensitivity: High Staple Detection sensitivity. High Separation Mode: Use when high friction between fed sheets Normal: Normal Staple Detection sensitivity. makes their separation difficult.
-
Page 69: Count Only
Speed Dust Detection Sets the document feeding speed in the Long Document Mode. Sets whether to detect dust in the scanning unit. Normal: Documents are fed at normal speed. On (Message & Interrupt): When dust is detected in the scanning Slow: Documents are fed at low speed. -
Page 70: Count Clear
Staple Detection Imprint Test Enable/disable staple detection in Count Only Mode. On: Staple detection is enabled in Count Only Mode. Off: Staple detection is disabled in Count Only Mode. Start When [Start] is selected, the documents are fed and counting is started. -
Page 71: Maintenance
Cartridge Ink Maintenance The amount of remaining cartridge ink is displayed. This is displayed only when the optional Imprinter is installed. IMPORTANT The amount of remaining cartridge ink displayed is an approximation and may differ from the actual amount remaining. Image Sensor On Time Displays the total lighting time of the image sensor. -
Page 72: Network
The LAN setting screens are displayed in the following order. Network Select On LAN Setting Back key This menu item is displayed only on network models. Select the menu items below to check/change network settings. Back key Select Off LAN Information The following network information stored in the scanner is displayed. - Page 73 IMPORTANT • If the entered IP address is "0.0.0.0", "255.255.255.255", "127.xxx.xxx.xxx", or "169.254.xxx.xxx", a warning screen is displayed and the entry is rejected. • If the entered subnet mask is not a contiguous left-justified value, a warning screen is displayed and the entry is rejected. •...
-
Page 74: Scanning Methods
Scanning Methods Selecting a Scan Job This scanner's scan methods include the "job function", which executes scanning by operation panel operation. About the Job Function Press Start. Scanning starts. The job function selects and executes jobs (favorites) that have been registered with CaptureOnTouch by pressing the Job key on the Executing Jobs (with LAN connection) operation panel. - Page 75 Press the ▲▼ keys to select the job. Press Start. Scanning starts.
-
Page 76: Scanning With Captureontouch
Scanning with CaptureOnTouch CaptureOnTouch is provided with multiple scanning methods that can IMPORTANT be selected according to the purpose and application. When the [Imprint Test], [Count Only] or [Feed Cleaning Sheet] menu is selected on the operation panel and the Start key LED is lit, scan Save to a specified Print from a specified Cloud... - Page 77 Scanning Shortcut CaptureOnTouch supports the following scanning methods. Standard Scanning Scanning with You can register in advance combinations of frequently-used Scanning Shortcut Start Button document selections and output methods as a "Scanning Shortcut". Just click the Scanning shortcut panel to implement the scan. "Scanning Shortcut"...
-
Page 78: Starting And Exiting Captureontouch
Exiting CaptureOnTouch Starting and Exiting CaptureOnTouch To close the CaptureOnTouch window, click at the top of the window. This closes the window, but CaptureOnTouch will continue to By default, CaptureOnTouch becomes resident in the reside in the system. system when you start your computer. To quit the CaptureOnTouch application, click in the taskbar, and select [Exit] from the menu. -
Page 79: Selecting A Scanner
Restarting CaptureOnTouch Selecting a Scanner To use CaptureOnTouch after it has been made not resident in the The following is an explanation of how to select a scanner using system, use one of the following procedures to restart it. CaptureOnTouch. CaptureOnTouch will start and become resident in the system again. -
Page 80: Screen Descriptions
Screen Descriptions Standard Scanning There are two areas in the CaptureOnTouch main screen, [Scanning Operations; Selecting the Select document panel Selecting the Select output Shortcut] and [Standard Scanning]. panel Start scanning Use the [ ] at the top right of the main window to move between sections. - Page 81 Click the output panel for the scan image application from Click the [SCAN] button. [2 Select output]. The selected [Output] panel will be displayed in orange. To edit the [Output] panel, see "Setting the Output" on p. The document is scanned. While scanning is in progress, the number of pages scanned is displayed in addition to the scanner settings.
- Page 82 CAUTION • If you configure scanning conditions that consume a large amount of the computer's memory, scanning may stop because of insufficient memory. If an error message appears due to insufficient memory while scanning is in progress, stop scanning, change the scanning conditions, and then try scanning again.
-
Page 83: Scanning Shortcut
This completes the Standard Scanning. To check the scanned image, click the [Finish] button. Hint If you click [Open storage folder], the folder in which the saved scanned images were saved opens. Depending on the output settings, the [Open storage folder] link may not be displayed. Scanning Shortcut Operations;... - Page 84 Registering and editing scanning Hint shortcuts You can also create a new Destination panel by clicking [ ] on Multiple scanning shortcuts can be allocated to CaptureOnTouch. the [New] button, and in the menu that appears, selecting the type of Scanning Shortcut. Either click the [New shortcut] button in [Scanning shortcut], or select the document scan and output in The Edit Scanning Shortcut Panel dialog box appears...
- Page 85 Click the [Document] tab and set the scan mode. "Select Click the [Batch separation] tab to set the batch Document Settings" (See p. 95) separation. "Setting the Batch Separation" (See p. 97)
- Page 86 Click the [Output] tab to set the outputs. "Setting the Click the [Index] tab to set the index file. "Setting the Output" (See p. 98) Index" (See p. 100)
- Page 87 [Edit after scanning] Click the [Option] tab to set the options. Check it on to enable modifying the scanned images in Scan Editing screen. When unchecked, the Edit window is not displayed in Scan Editing screen. "Operations for the scanned image edit window"...
- Page 88 Selecting and scanning shortcuts Click the [General] tab to make other settings. Place the document in the scanner. "Basic Operation" (See p. 35) Click the scanning shortcut panel. The document is scanned. While scanning is in progress, the number of pages scanned is displayed in addition to the scanner settings.
- Page 89 • A multiple-page scan cannot be saved when it reaches the file To check the scanned image, click the [Finish] button. size of 2 GB. Change the save settings if an error message is displayed. Hint Change the save settings if an error message is displayed. If scanning continuously, set the next document, and click the [Scan more pages] button to start the document scan.
- Page 90 Scan by pressing the start button Hint If you set frequently-used scans to the scanning shortcuts and assign If [Edit after scanning] is disabled in the scanning shortcut them as jobs, you can run shortcut scans from the operation panel. settings, the edit window will not be displayed.
- Page 91 Operations for the scanned image edit (1) Toolbar This tool bar enables operations to thumbnails and preview images. window When scanning has finished, a preview window of the scanned image Tools Description will be displayed. Switches the image selection for the To display the edit window in the preview window, click on the tool thumbnail area.
- Page 92 (2) Thumbnail Display Area [Color adjustment] (Easy settings) Thumbnails of the scanned documents will be displayed. You can implement the following operations. Click a thumbnail to display a preview of the scanned image in the preview window. Drag a thumbnail to change pages. (3) Preview Area The preview images of scanned documents are displayed.
- Page 93 [Color adjustment] (Manual settings) [Image alignment] Move the slider to the left or right to adjust the brightness and contrast Click [Image alignment] to display. of the image, checking the preview image. The preview image or the slider can be used for the straightening and Click the [Grayscale] button to render the image in grayscale.
- Page 94 [Rotate] [Information] Click [Rotate] to display. Click [Information] to display information found in the scanned images. The scanned image can be rotated in 90 degrees to the left or the If you select a page thumbnail and then click the "Detection string" right.
-
Page 95: Select Document Settings
(5) Information Display Area Edit [Select document] panel The information regarding the "Select document" and "Select output" The [Select document edit screen] opens when you click the [ is displayed. button in the [Select document] panel. Click the button, and the Output Settings dialog will appear. Click the [Select document] tab in the shortcuts editing window. - Page 96 Scan settings [Automatically straightens skewed images] If a document is not straight when fed, the scanner detects that the Makes the scan settings. document is not straight from the scanned image and straightens the Color mode skewed image. Select the setting from below. Select the color mode for scanning from below.
-
Page 97: Setting The Batch Separation
Setting of [Use Setting the Batch Separation Basic advanced settings Other than basic items items Set the batch separation. dialog box] Settings of Settings of the advanced [Scanner settings dialog box of the setting] scanner driver Settings of the advanced settings dialog box of the scanner driver For the advanced settings other than the basic items, see the help in the driver settings dialog box. -
Page 98: Setting The Output
Separation method Separator page Select the batch separation method and click the [Detail settings] Select the separator page from the following. button, to display the [Batch separation settings] and you can set the [Discard page] details of separation method. [Include in the current document] Select the batch separation method from the following. - Page 99 Edit [Output] panel Select output method The Edit output screen opens when you click the [ ] button in the File formats and save locations that can be selected depend on the Output panel. output method selected. Click the [Output] tab in the shortcuts editing window. Save to folder Saves the scanned image to the specified folder.
-
Page 100: Setting The Index
Other output methods Setting the Index CaptureOnTouch supplies output methods other than [Save to folder] as plugins. You can set the index file. By installing the plug-in, you can use various services such as printing the scanned image or attaching it in an email. To install plugins, enable the checkbox when installing CaptureOnTouch. -
Page 101: Scanning Shortcut Setting
Select stream Scanning Shortcut Setting When [Use MultiStream] is enabled in the scanner driver, [Select a By default, CaptureOnTouch enables the [Full auto] scan setting, so stream] is displayed. scanning is implemented using the scan conditions that match the Page index document. -
Page 102: About File Formats
PDF setting About File Formats Set the file format of the scanned image. When you select a file format other than BMP or PNG, the [Detail Settings] button is enabled, allowing you to make the detail settings for the selected file format. Hint You can select one of the following file formats for the scanned image. - Page 103 TIFF setting JPEG setting [Output settings] Specify the method used for saving when scanning the multi-page document. You can specify the compression rate of JPEG images. • Create one file for the pages of a document (Save all the pages of PPTX settings the document in one file).
-
Page 104: Environmental Settings
Launch method setting Environmental Settings By default, CaptureOnTouch becomes resident in the system when To configure the environmental settings of CaptureOnTouch, open the you start your computer. [Environmental settings] dialog box. Clear the [Make CaptureOnTouch resident] check box to not make Click (CaptureOnTouch icon) in the taskbar, and select CaptureOnTouch resident in the system. - Page 105 [Plugin] tab [Enable] [Disable] button On the [Plugin] tab, confirm the plugins that have been added to This button is used to toggle between Enable/Disable modes for the CaptureOnTouch. plugin selected from the plugin list. If you click the [Disable] button, the following dialog is displayed. [Maintenance] tab On the [Maintenance] tab, you can configure the log settings for the maintenance of CaptureOnTouch and initialize the settings.
- Page 106 Back Up / Restore [Initialize] Use the [Back Up] and [Restore] buttons to back up the configuration A confirmation dialog box appears when you click the [Initialize] file (settings, registered jobs, etc.) of CaptureOnTouch and restore the button. settings from the backup data. [Back Up] button Back up the settings of CaptureOnTouch to a backup file (*.cot).
-
Page 107: Setting The Scanner Driver
Setting the Scanner Driver When you load the driver for the first time, the selected scanner and a [Basic] tab dialog for selecting the default paper size are displayed. Hint • These settings will apply when [Default] is clicked in the ISIS driver dialog box. - Page 108 [Image processing] tab [Brightness] tab Set the processing method for scanned images. [Image control] tab Adjust the brightness and contrast of scanned images. In addition, you can also click [Gamma] and set the gamma correction value for scanned images. Set the image control method for the scanned image.
- Page 109 [Feeding] tab [Others] tab Configure special scan method and image processing settings. Specify scanner operations related to document feeding. [Imprinter/Addon Dialog] tab [Error Detection] tab Configure add-ons for scanned images. Also, when the optional Set the items to be detected as errors during the scan. Imprinter Unit is attached to the scanner, configure imprinting.
-
Page 110: Setting Basic Scanning Conditions
User's Guide Informs you about the settings changed automatically by the driver. Color mode In addition, displays the image for which settings were currently made, Select the scanning mode. in the illustrations. Setting Basic Scanning Conditions This section provides an overview of the basic setting items that are the minimum requirements when configuring the scanner settings. - Page 111 • [Active Threshold] is intended for batch processing various kinds of Dots per inch documents at once, such as those with thin (light) text or stains. For Select the scanning resolution. example, you can batch process documents such as photocopies at once.
- Page 112 Scanning Documents of Unregistered Specifying the Scan Area Page Sizes Configure the following settings when you want to specify the area of the document to be scanned. You can register an unregistered paper of non-standard size with a name, as a custom paper size. Specifying an area Click the [Setting] button of [Page Size] in the [Basic] tab, to display To scan one area of a larger document, click [Setting] on [Page Size]...
- Page 113 Configuring Scanner Settings According When you want to enhance contours in images Adjust the edge emphasis setting on the [Image control] tab. to Purpose Set the scanning conditions according to the scanning purpose. When you want to delete the images of the blank pages in two-sided documents Set the scanning side setting to [Skip Blank Page] on the [Basic] tab to delete the images of the blank pages in the document.
- Page 114 To thicken lines and text in scanned images Hint Drag the [Character Emphasis] slider in the [Image processing] tab to Moire reduction can be enabled when the resolution is 300 dpi or make lines and text in the scanned images thicker or thinner. less, and [High Speed Moire Reduction] is displayed when the resolution is 240 dpi or less.
- Page 115 When you want to enhance text that is difficult to read • [Active Threshold] is intended for batch processing various kinds of documents at once, such as those with thin (light) text or stains. For because of factors such as the background of the example, you can batch process documents such as photocopies at scanned document once.
- Page 116 When you want to match the orientation of images to the text when scanning a mixture of pages with different text orientations Select [Text orientation recognition] in [Document Orientation] on the [Others] tab. The text orientation on each page is detected, and the scanned image is rotated in 90-degree increments to correct the orientation.
- Page 117 • Set [Batch Separation] on the [Others] tab to [Auto]. When [Batch Separation] is set to [Auto], the batch is separated after the next document is placed and scanning is continued. A When you want to specify different scanning conditions for the front For more details about [Blank Page] and [Patchcode], "More and back pages of a document, select [Both] for [Scanning Side] on...
- Page 118 To scan barcodes Items that can be set After installing the included Barcode Module, you can scan barcodes [Color mode] and [Dots per inch] (excluding on documents. Click the [Barcode] button on the [Others] tab to [Basic] tab [Auto-detection] for both) configure barcode scanning conditions.
- Page 119 When you want to save a scanner driver setting When you finish configuring a setting, click the [Save] button of [User Preference] to save the setting. The saved setting is registered to the list. You can delete a setting from the list with the [Delete] button, and save or load a configuration file with the [Back Up] or [Restore] button.
- Page 120 Function Restrictions Depending on Color Mode Setting Some of the setting items in each of the driver tabs are disabled as follows depending on the setting for [Color Mode] on the [Basic] tab. [Brightness] tab [Image processing] tab Setting value Contrast [Character Setting value...
- Page 121 [Image control] tab Prevent Bleed Color Edge Background Erase Reverse Setting value Through/Remove Erase Dot Unevenness emphasis smoothing Notch Image Background Reduction Detect automatically Black and White Error Diffusion Advanced Text Enhancement Advanced Text Enhancement II Active Threshold 256-level Gray 24-bit Color (O: Available for setting, X: Not available for setting, or auto) 1)Not available for setting if all of the following conditions in the [Auto Image Type Detection Settings] dialog box are met.
- Page 122 [Others] tab Setting value Prescan Detect automatically Black and White Error Diffusion Advanced Text Enhancement Advanced Text Enhancement II Active Threshold 256-level Gray 24-bit Color (O: Available for setting, X: Not available for setting, or auto)
-
Page 123: More Advanced Scanning Methods (Batch Separation)
More Advanced Scanning Methods (Batch Separation) IMPORTANT Batch Separation (Insert blank page) • When [Simplex] is selected in [Scanning Side], blank pages on the Recognizes blank pages as batch separators and performs batch scanned side will be recognized as separators. When [Duplex], separation (automatic file separation) when documents containing [Skip blank page], or [Folio] is selected in [Scanning Side], blank pages are scanned. -
Page 124: Batch Separation Using Patch Code Sheets
Sheets Print patchcode with a printer. This scanner supports batch separation (automatic file separation) Click [Start] – [All Programs] – [Canon DR-G2000 Series] and functions by using patchcodes. then select [Patchcode] from the menu. By tucking patchcode sheets supplied with this scanner into a Patchcodes can be printed in A4 and letter (LTR) sizes. - Page 125 Hint IMPORTANT In Windows 8.1, it is registered at the following location. • Patchcodes must be printed in their normal size. If patchcodes are enlarged or reduced, they may not be recognized correctly. • When copying provided patchcodes to create different sized patchcodes, ensure that the patchcode fits inside the effective range shown in the following diagram.
- Page 126 Place the documents in the scanner after inserting the Open the scanner driver settings screen and select patchcode sheet in front of the page that separates the [Patchcode] in [Batch Separation] on the [Others] tab. files. Insert the patchcode sheets at the beginning of documents to change file...
-
Page 127: About The Canon Imageformula Driver Setting Tool
IMPORTANT settings. A USB connection is required to make this setting with the Canon Canon imageFORMULA Driver Setting Tool consists of the following imageFORMULA Driver Setting Tool. When connected via wired LAN, tabs. -
Page 128: Start-Up Of The Canon Imageformula Driver Setting Tool
Start-up of the Canon imageFORMULA Driver Setting Tool Click the Start button, then click [All Programs] – [Canon DR-G2000 Series] – [Canon imageFORMULA Driver Setting Tool], in that order. Canon imageFORMULA Driver Setting Tool will start. Hint In Windows 8.1, it is registered at the following location. -
Page 129: Web Menu
Displaying the Scanner's Web Menu up the network when connecting to a wired LAN, and to configure various Web services. Scanner settings can be configured using a Web browser. Open the Canon imageFORMULA Driver Setting Tool's Settings screen. (See p. 128) IMPORTANT •... - Page 130 IMPORTANT Select the scanner from the list, and click [Properties]. To ensure security, we recommend changing the administrator The scanner’s Web page opens, and the login screen is password without leaving it as shipped from the factory. Change displayed. the password in the [Password Setting] screen of the Web menu. "Password Setting"...
-
Page 131: Web Menu Pages
Web Menu Pages When you click the items on the left menu, the following pages are displayed. Scanner Name Setting: Displays the scanner name. Network Setting: Configures the network settings. mDNS Setting: Configures the mDNS settings. Password Setting: Configures the administrator password used to log into the Web menu. -
Page 132: Web Menu Settings
Web Menu Settings This section describes the setting items on each of the Web menu pages. Scanner Name Setting Network Setting If you click [Scanner Name Setting] on the left menu, the page below If you click [Network Setting] on the left menu, the page below is is displayed. -
Page 133: Mdns Setting
Default mDNS Setting Item Description Value If you click [mDNS Setting] on the left menu, the page below is Set the IP address of the scanner. If displayed. DHCP is enabled, the IP address obtained from it will be applied. IP Address The value must be four decimal None... -
Page 134: Password Setting
Password Setting Maintenance Setting If you click [Password Setting] on the left menu, the page below is If you click [Maintenance Setting] on the left menu, the page below is displayed. displayed. On this page, you can restore the scanner’s factory default settings and update the firmware. - Page 135 Item Description You can load and change the server certificate used to access the Web menu with "https://". Click Import the [Import] button, and the [Import certificate] certificate dialog appears. Specify the certificate file (pfx file) and click [Send] to import.
-
Page 136: Maintenance
Maintenance Daily Maintenance Clean the scanner on a regular basis, as described below, to maintain Cleaning the Scanner Exterior peak scanning quality. To clean the outside of the scanner, wipe off any dirt with a cloth that has been dampened with water and thoroughly wrung out, and then CAUTION wipe the scanner dry with a clean dry cloth. -
Page 137: Cleaning The Sensors
Cleaning the Sensors Opening and Closing he Upper Unit Dust and debris that collect on the sensors may cause documents to When cleaning the inside of the scanner, make sure to open and close be recognized incorrectly. Clean the sensors periodically using a the upper unit using the following procedure. -
Page 138: Cleaning The Scanning Glass, Roller, And Pad
Closing the Upper Unit contact your local authorized Canon dealer or service representative to have the glass replaced. Smoothly close the upper unit (1). Further, press both ends of the upper unit to verify that it is securely closed (2). - Page 139 Wipe the rollers using a moistened and firmly wrung- out Wipe the rollers that you removed using a moistened and cloth while rotating the rollers. firmly wrung-out cloth. The rollers are located at the positions indicated in the figure below. Pickup Roller Feed Roller Feed...
-
Page 140: Adjusting The Compression
In such cases, using the [Reduction ratio adjustment] function may reduce the stretching. The reduction ratio adjustment can be made with the Canon imageFORMULA Driver Setting Tool. "About the Canon imageFORMULA Driver Setting Tool" (See p. 127) Auto Power OFF Function An auto power OFF function is built into the device. -
Page 141: Replacing The Feed Roller
Replacing the Feed Roller As the rollers start to wear out, feeding quality declines, and document IMPORTANT feed errors, such as paper jams, become more likely. • When the roller replacement message appears, purchase the Roller If document feed errors continue to occur after cleaning the rollers, Replacement Kit and replace the rollers by following the relevant purchase the Roller Replacement Kit and replace the transport rollers steps in the following sections. -
Page 142: Checking And Resetting The
Checking and Resetting the Page The Roller Replacement Kit consists of replacement pickup, feed, and Counter retard rollers. For details, contact your local authorized Canon dealer or service representative. When replacing the rollers and separation pads, the scanner's internal Product Name: Roller Replacement Kit counter must be reset. - Page 143 The number of sheets fed by the feed rollers or separation pads is reset. imageFORMULA Driver Setting Tool IMPORTANT A USB connection is required to make this setting with the Canon imageFORMULA Driver Setting Tool. When connected via wired LAN, making this setting with the Canon imageFORMULA Driver Setting Tool is ineffective.
-
Page 144: Removing And Reinstalling The Rollers
Removing and Reinstalling the Pickup Removing and Reinstalling the Roller Rollers To clean or replace the pickup, feed or retard rollers, follow the Open the upper unit smoothly. (See p. 137) procedure below to remove and reinstall the rollers. Open the roller cover. CAUTION •... - Page 145 Hint Close the roller cover. Make sure that the front unit is The roller holder returns to its original position when released. completely closed by pushing until you hear a click. Remove the pickup roller, and install a clean or replacement Pickup Roller.
- Page 146 Removing and Reinstalling the Feed Slide the feed roller to the right, and then pull them Roller towards you. Open the upper unit smoothly. (See p. 137) Open the roller cover. Remove the feed roller. Pull the roller lock lever down.
- Page 147 Place the new feed roller on the pin. Push the roller lock lever up to lock the feed roller. Put the feed roller in place (1), and align the notch in the Close the roller cover. Make sure that the front unit is roller’s axle with the shaft on the scanner (2).
- Page 148 Smoothly close the upper unit. (See p. 138) Push the roller lock lever up (1) and move it to the left (2) to unlock the roller. Removing and Reinstalling the Retard Roller Open the upper unit smoothly. (See p. 137) Grasp and pull the retard roller cover with your fingers to remove it.
- Page 149 Align the roller cutout to the axle on the scanner, and Replace the retard roller cover. slide the roller securing lever in the direction of the arrow. Push the front of the retard roller cover in. Make sure that Pull the roller lock lever down to lock the retard roller in the front unit is completely closed by pushing until you place.
- Page 150 Smoothly close the upper unit. (See p. 138) CAUTION Make sure that the hook is completely latched and the retard roller cover is not loose. If the retard roller cover is loose, the Document Feed Tray will catch on it causing the scanner to malfunction.
-
Page 151: Detaching And Attaching The Separation Pad (Retard Roller Cover)
Detaching and attaching the separation pad (retard roller cover) When replacing the separation pad, perform the following steps to detach it from and attach it to the unit. • Make sure to reset the counter after replacing the separation pad. When to Replace the Separation Pad "Checking and Resetting the Page Counter"... -
Page 152: Attaching The Separation Pad (Retard Roller Cover)
Attaching the Separation Pad (Retard Smoothly close the upper unit. (See p. 138) Roller Cover) CAUTION Make sure that the hook is completely latched and the retard Replace the retard roller cover. roller cover is not loose. If the retard roller cover is loose, the Document Feed Tray will catch on it causing the scanner to malfunction. -
Page 153: Imprinter Ink Cartridge Replacement And Cleaning
The imprinter cover unlocks and opens to the front. Preparing an Ink Cartridge Use one of the following red or blue HP ink cartridges. For details, contact your local authorized Canon dealer or service representative. Product Name: Ink Cartridge (Blue) Product Code: 3693A002... - Page 154 Open the imprinter cover until it makes contact with the Remove the ink cartridge. eject tray. Peel off the seal covering the nozzles of a new ink Hint cartridge. Perform the steps that follow with the imprinter cover fully open. Pull the lock lever outward (1) to release the ink cartridge lock (2).
- Page 155 WARNING Push the ink cartridge as indicated by the arrow until it Peel off the seal covering the nozzles of a cartridge only if you are clicks into place. going to use it immediately. Also, avoid touching the metal contacts or nozzles of the ink cartridge. Finely adjust the carriage position by moving it left or Install the new cartridge with the nozzles facing to the right, then make sure you can feel it click in.
-
Page 156: Specifying The Printing Position
Hint Specifying the Printing Position If you do not feel it click in, the carriage is not aligned correctly Manually specify the printing position in the horizontal direction of the with a positioning hole. Always move the carriage to a position document. -
Page 157: Cleaning The Imprinter
Cleaning the Imprinter Finely adjust the carriage position by moving it left or right, then make sure you can feel it click in. Cleaning the Guide Plate Positioning holes (13 places) Ink that collects on the guide plate inside the optional imprinter may stain the documents when they are scanned. -
Page 158: Imprinter Testing
Cleaning the Ink Cartridges Imprinter Testing If the imprinter print head nozzles are dirty, printing may become After replacing an ink cartridge or cleaning the print head, perform a streaked or spotty. To prevent this, periodically remove the ink test print to confirm proper printing. Test printing is performed by the cartridge and clean the print head with a soft, dry cloth or cotton swab. -
Page 159: Head Cleaning
Head Cleaning Press the ▲▼ keys to select [Imprint Test], and press [OK]. If lines or streaks appear in the imprinter printout, the printhead nozzle The imprinter test settings are displayed. may be clogged. This can be corrected by performing head cleaning. IMPORTANT Press the ▲▼... -
Page 160: Troubleshooting
If you have a problem that is not solved by the following, contact your (1) Check the LAN cable connection. local authorized Canon dealer. (2) The specified IP address may already be in use by another device. Contact your network's system Problem 1 The scanner will not turn on. - Page 161 Scanning Side is set to [Skip blank page], images of problem cannot be solved by cleaning, the internal glass blank pages are not saved. may be scratched. Contact your local authorized Canon Problem 9 A black margin appears around scanned document dealer.
- Page 162 Problem 10 The scanned image is abnormal for certain Problem 13 Documents are collectively fed documents. Solutions Click the [Advanced setting] button on the scanner Solutions A detection function such as border removal is enabled driver's [Feeding] tab sheet, and check the [Increase when scanning documents that include text or photos separation force] checkbox in the [Advanced feed that extend to the edge of the page, preventing proper...
- Page 163 Problem 16 Scanner does not feed document (or document has Problem 18 All of the placed documents have been scanned, but stopped in the feeding path). the scanned image does not appear on the application. Solutions (1) If the continuous manual feeding mode is enabled, documents may not feed correctly.
- Page 164 Problem 20 Multifeeding when scanning multiple bound pages. (3) Depending on document thickness and condition, extra time may be needed for documents to fall into Solutions Place the bound edge against the feed inlet and scan by the eject tray, causing them to be pushed out by manual feeding.
-
Page 165: Software Troubleshooting
Software Troubleshooting This section describes troubleshooting problems and solutions for If scanned image files cannot be opened in an application operating the supplied software (CaptureOnTouch). (1) Scanned images saved as multi-page TIFF files can be opened only by programs that support this file format. If scanning is too slow (2) Images saved as compressed TIFF files (single- as well as multi- (1) Close other running programs, if any. -
Page 166: Useful Tips
Useful tips Here are some useful tips for scanning documents with How do I scan half-folded documents (folio scanning)? CaptureOnTouch. Fold the document in half, and set it in the scanner with the fold at the right. Specify half-size document (the size after folding) and then scan. Where are scanned images saved? Can the save destination be For details, see changed? - Page 167 I want to save to other folders • In CaptureOnTouch, destinations other than [Save to folder] are provided as a plug-in. • By installing the plug-in, the scanned image can be printed, attached in an e-mail, or shared using various cloud services. •...
-
Page 168: Paper Jam, Skew And Staple Detection Processing
Paper Jam, Skew and Staple Detection Processing When a paper jam, skew, or staple is detected, any documents Smoothly close the upper unit. Further, press both ends remaining in the Eject Tray and scanner must be removed. of the upper unit to verify that it is securely closed. (See CAUTION p. -
Page 169: Error Message
Error Message When an error occurs in the scanner, you will see the following error messages on the display panel. Title area Comments area Error [P***] Paper jammed in scanner. Error [C***] Scanner cover is open. Error [J***] Paper feed error detected. Error [J***] A document was skewed. -
Page 170: Uninstalling The Software
Uninstalling the Software If the ISIS/TWAIN driver or CaptureOnTouch is not operating normally, uninstall the software by the following procedure. Then, re- install the software from the Setup disc. (See p. 9) IMPORTANT Log on to Windows as an Administrator. From the Windows task bar, click the [Start] button and then [Control Panel]. -
Page 171: Appendix
Appendix Specifications Main Unit Scanning Resolution 100, 150, 200, 240, 300, 400 and 600 dpi Type Desktop sheetfed scanner Scanning Speed (A4 landscape) Scannable Document DR-G2140 Grayscale Simplex 200 dpi 140 sheets/min. Width: 50.8 to 305 mm (2" to 12.00") 300 dpi 140 sheets/min. -
Page 172: Options
External Dimensions Options 480 (W) × 569 (D) × 315 (H) mm 18.9" (W) × 12.4" (D) × 12.4" (H) Imprinter Unit (product code: 3601C001) Maximum External Dimensions The imprinter unit prints a text string on scanned document pages. (with Document Feeder Tray/Wire Extensions, Document Eject Tray Extension, and Eject Paper Stopper open) Carrier sheet (product code: 0697C001) 480 (W) ×... -
Page 173: Consumables
569 mm • For details about the Exchange Roller Kit and Separation Pads, 22.4" contact your local authorized Canon dealer or service representative. 632 mm 24.9" Ink Cartridge: Blue (product code: 3693A002) This blue ink cartridge is used by the imprinter. -
Page 174: Other Specifications
Other Specifications 1D Barcode Recognition Conditions This section describes the specifications for the included Barcode Module and separately sold (See p. 172) Imprinter products. Refer to Item Condition "Batch Separation Using Patch Code Sheets" (See p. 124) for the specifications of the patchcodes that can be detected by the Printed Side Front or back (or both, but at reduced speed) patchcode decoder. - Page 175 2D Code Recognition Conditions Item Condition Feed At least 2 mm (0.1") from the edge of Item Specifications Direction the page Position Perpendicul Printed Side Front or back (or both) At least 5 mm (0.2") from the edge of ar to Feed Minimum cell (module) size (width the page Direction...
-
Page 176: Imprinter Specifications
Imprinter Specifications Printing Side Front Position Horizontal: adjust by moving the carriage left or right (13 places) (See p. 156) Vertical: set by the ISIS/TWAIN driver Printing Content Set by the ISIS/TWAIN driver Printing Font 12 × 12 or 12 × 8 dots Inter-Character Setting Yes (set by the ISIS/TWAIN driver) Printable Digits... -
Page 177: Index
Index Document Eject Stopper ............44 Document Eject Tray ..............43 Auto Power Off ................. 140 Document Eject Tray Extension ..........44 Document Feed Tray ..............37 Batch Separation ..............116 Document Feed Tray Extension ..........40 Document Feeding Method Continuous Feeding ............. 45 CaptureOnTouch ................ - Page 178 Cover ................. 153 Routine Precautions ..............21 Test Printing ............... 158 Ink Cartridge ................153 Scan ................... 74 Cleaning ................158 Scan by Job Selection ............74 Replace ................153 Scan with CaptureOnTouch ..........76 Installation Location ..............20 Scanner driver ................107 Installing ..................
- Page 179 Safety-related markings on the machine Marquages de sécurité sur la machine Marcature di sicurezza sulla macchina Sicherheitshinweise auf der Maschine Marcas de la máquina relacionadas con la seguridad Veiligheidsmarkeringen op de machine Makine üzerindeki güvenlik i aretleri [English] Switch (On) Power on [Français] Commutateur (Marche)
- Page 180 [English] Switch (Push-On/Push-Off) Power on/off (no standby current) [Français] Commutateur (Appuyer pour Sous/hors tension (pas de courant de veille) mettre en marche/Appuyer pour arrêter) [Italiano] Interruttore a pulsante Alimentazione on/off (nessuna corrente di standby) bistabile (On/Off) [Deutsch] Schalter (Ein- und Ausschalten Ein- und Ausschalten (ohne Ruhestromaufnahme) durch Drücken) [Español]...
- Page 181 [English] DC symbol Indicates direct current Indique qu’il s’agit de courant continu [Français] Symbole CC [Italiano] Simbolo corrente continua (C.C.) Indica la corrente continua Kennzeichnet Gleichstrom [Deutsch] Gleichstrom-Symbol [Español] Símbolo CC Indica corriente continua [Nederlands] DC-pictogram Geeft gelijkstroom aan [Türkçe] DC sembolü...
- Page 182 CANON ELECTRONICS INC. 3-5-10 SHIBAKOEN, MINATO-KU, TOKYO 105-0011, JAPAN CANON U.S.A. INC. ONE CANON PARK, MELVILLE, NY 11747, U.S.A. CANON CANADA INC. 8000 MISSISSAUGA ROAD, BRAMPTON, ONTARIO L6Y 5Z7, CANADA CANON EUROPA N.V. BOVENKERKERWEG 59, 1185 XB AMSTELVEEN, THE NETHERLANDS CANON AUSTRALIA PTY.