Table of Contents
Advertisement
Cat. No. 01021713
Rev. E 04/02/13
DCO 013630
Installation,
Operation and
Service
Instructions
CULLIGAN
®
Series G1 Reverse Osmosis
Water Treatment Systems
Models from 2011
©2013 Culligan International Com pa ny
Advertisement
Table of Contents

Related Manuals for Culligan G1 Series


Summary of Contents for Culligan G1 Series
- Page 1 Cat. No. 01021713 Rev. E 04/02/13 DCO 013630 Installation, Operation and Service Instructions CULLIGAN ® Series G1 Reverse Osmosis Water Treatment Systems Models from 2011 ©2013 Culligan International Com pa ny...
- Page 2 We encourage Culligan users to learn about Culligan products, but we believe that product knowledge is best obtained by consulting with your Culligan dealer. Untrained individuals who use this manual assume the risk of any resulting property damage or personal injury.
-
Page 3: Table Of Contents
Installation Operation Instructions Culligan ® Series G1 Reverse Osmosis Water Treatment Systems Models From 2011 Contents GBE RO Controller Menu Structure ........ G1 RO Parts Diagrams and Lists ........Introduction ................ Flow Diagram ..............G1 RO Features ..............Electrical Installation ............ - Page 4 (psi) 0.0689 degrees Fahrenheit (F) degrees Centigrade (C ) (F-32) x 0.556 pounds (lbs) kilograms (kg) 0.4536 Inches (in) millimeters (mm) 25.4 parts per million (ppm) mg/l 1.00 Cat. No. 01021713 Culligan® Series G1 Reverse Osmosis...
-
Page 5: Introduction
Introduction Read this Manual First Before you operate the Culligan® Series G1 reverse osmosis systems, read this manual to become familiar with the device and its capabilities. Culligan Series G1 reverse osmosis systems are designed to meet the needs of applications for high quality water. This ®... -
Page 6: G1 Ro Features
The Series G1 Reverse Osmosis systems are the direct result of Culligan’s long time experience in membrane appli- cations around the world. From process water for any size business to treating water for an entire city, Culligan has the knowledge and the range of products you need to get the job done. - Page 7 An optional modem and monitoring service can be used to remotely monitor the RO performance over time. This service can also be used to alert the customer and the Culligan dealer in the event that an alarm or error condition occurs.
-
Page 8: G1 Ro Series Specifications
*Nominal capacity based on new RO membranes operating on a properly pretreated feed water of 500 ppm TDS as NaCl, 77 °F (25 °C), Silt Density Index (SDI) below 3, and supplying water to atmosphere. Productivity will vary depending on the actual feed water quality and temperature. Cat. No. 01021713 Culligan® Series G1 Reverse Osmosis... -
Page 9: G1 Ro System Configurations
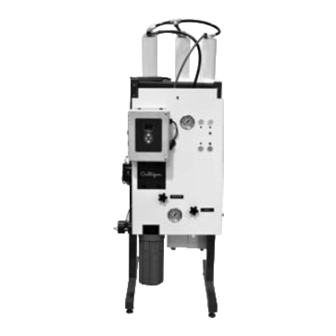
G1 RO System Configurations A G1-4L is pictured in Figure 1 and Figure 2. Width of membrane rack varies with model. See parts section on page 80 for a list of component part numbers. MOUNTING BRACKETS MEMBRANE FEED PRESSURE MEMBRANES GBE RO CONTROLLER RECIRCULATION CONTROL INLET FEED PRESSURE... -
Page 10: G1 Ro Installation
The system must not be located near any corrosive chemicals which may cause fail- ure of the plastic or metal parts of the unit. In addition, do not locate the unit where the temperature may exceed the feed water temperature limits. Cat. No. 01021713 Culligan® Series G1 Reverse Osmosis... - Page 11 Assembly Concrete Wall Installation Refer to Figure 3 to install the G1 RO system to a concrete wall. Place the unit against the wall, level the unit and mark the wall through the mounting holes. Drill the holes in the wall and mount the unit. Horizontal holes are on 16" centers. Vertical holes are on 2"...
- Page 12 Remove the paper wrapper from the cartridge, place the cartridge in the bowl, and screw the bowl onto the head. Pressure Inlet Relief Button Outlet Filter Cartridge Figure 6. Installing the Prefilter. Cat. No. 01021713 Culligan® Series G1 Reverse Osmosis...
- Page 13 Feed Flow Meter Install the feed flow meter on the prefilter. Install the flow meter cable. Figure 7. Feed flow meter installed on prefilter. Membranes Before mounting the membrane housings, the membranes must be inserted into the housings. Take care to not damage the end cap O-rings or membrane brine seal.
- Page 14 OUTLET 1/2" TUBE SYSTEM INLET 1/2" TUBE SYSTEM WASTE (CONCENTRATE) 3/8" TUBE Figure 9. G1 tubing configuration. WARNING! The system must be grounded. An improperly grounded unit could cause injury from electrical shock! Cat. No. 01021713 Culligan® Series G1 Reverse Osmosis...
- Page 15 Plumbing Installation Refer to the appropriate tubing installation instructions (Figure 11 on page 13 through Figure 15 on page 17) for further information. Feed Water Connections Connect tubing to the Feed water inlet. Observe the following: To minimize pressure loss, the tubing size should be at least 1/2”. Install an optional pressure gauge (P/N D1006272) before the pre-filter.
- Page 16 The connection of the main product tubing to service plumbing will depend on how the product water will be stored. CAUTION! Reverse osmosis elements will fail immediately if pressurized product water is allowed to flow backward into the Series G1 unit. Cat. No. 01021713 Culligan® Series G1 Reverse Osmosis...
- Page 17 2S/2L Tubing Assembly Instructions 1/2" TUBE FOR FEED INSERT 1/2"X3/8" ELBOW USED FOR FLOOR OVER 3/8" STEM STAND APPLICATION 3/8" TUBE FOR RECIRCULATION/WASTE 1/2" TUBE FOR PRODUCT INSERT 3/8"X3/8" ELBOW OVER 3/8" STEM REMOVE CAPS ON 3/8" STEMS INSERT PRODUCT FITTING ASSEMBLY OVER 3/8"...
- Page 18 3S/3L Tubing Assembly Instructions Figure 12. RO 3S/3L tubing assembly instructions. Cat. No. 01021713 Culligan® Series G1 Reverse Osmosis...
- Page 19 4S/4L Tubing Assembly Instructions Figure 13. RO 4S/4L tubing assembly instructions. Cat. No. 01021713 G1 RO Installation...
- Page 20 1F Tubing Assembly Instructions Figure 14. RO 1F tubing assembly instructions. Cat. No. 01021713 Culligan® Series G1 Reverse Osmosis...
- Page 21 2F Tubing Assembly Instructions Figure 15. RO 2F tubing assembly instructions. Cat. No. 01021713 G1 RO Installation...
- Page 22 Valve SV4 closes when the RO pump runs; SV4 opens when the pump stops, allowing all membrane back proessure to be relieved. NOTICE Product back pressure will decrease the net pressure pushing water through the reverse osmosis elements. Therefore, the flow of product water will decrease. Cat. No. 01021713 Culligan® Series G1 Reverse Osmosis...
-
Page 23: Gbe Ro Controller Program Data
GBE RO Controller Program Data Program Data Input There are a few items to note that can make programming the Culligan Global RO Controller easier: ® Slew Rates This term refers to the speed at which the display moves through the input of material. For ex- ample, holding down the up arrow key for (5) seconds when inputting minutes for Time of Day will cause the minutes to pass in (10) minute blocks of time. -
Page 24: First Time Setup
The S/N, firmware, and date displayed in this manual are examples only. NOTE If this unit will be installed with a modem, it is required that this electronic serial number be reported to Culligan on the IQR form. Setting Up Date and Time The screen displays the month setting. Press... - Page 25 Other First Time Setup Settings Screen Display Range Procedure The screen displays the day setting. Press 1–31 then to change the value and see the next setting. SET YEAR 2012 The screen displays the year setting. Press 2010–2040 then to change the value and see the next setting. CLOCK TYPE 12 HR The screen displays the clock type setting.
- Page 26 4 = n/c, 3 = ground, 2 = flow pulse signal, 1 = 5 VDC supply NOTE: Pin 1 is identified with a small WHITE dot. Figure 17. Flow Meter Connections on GBE Board Cat. No. 01021713 Culligan® Series G1 Reverse Osmosis...
- Page 27 Start with both the recirc valve and the waste valves fully open (turn the valve all the way in a counter-clockwise direction). Start the RO. When the pump turns on, slowly close the waste and recirc valves clockwise. Try to close the waste valve until the flow rates to product and to drain are approximately even, then begin to close the recirc valve, to bring the membrane feed pressure within the range of 80–120 psi.
- Page 28 5)ACCESSORIES. The screen displays the ac- 4) FLUSH MODES cessories menu. >5) ACCESSORIES 1) WIRELESS REM 2) MODEM Press to select 3)FLOW METERS. The screen displays the flow meter >3) FLOW METERS settings. 4) SWITCH INPTS Cat. No. 01021713 Culligan® Series G1 Reverse Osmosis...
- Page 29 Flow Meter Settings Screen Display Range Changing the Setting FLOW METERS The screen displays the installation status of the flow meter. Press Installed INSTALLED to change the state to installed if a flow meter is in- Not Installed stalled in the RO system. FM1 K FACTOR 80.0 Press...
-
Page 30: Normal Operation
100 gpd, or 18% (100/570) = 0.18. The elements should be cleaned. 10. If the problem cannot be corrected with the troubleshooting guide and assistance is required, please have the following information available when calling the Culligan dealer: • Product flow rate • Concentrate flow rate... - Page 31 Switch Inputs Several switch types may be installed in an RO system, including • Low Pressure Switch • Pretreatment Lockout Switch • Float (Level Control) Switch “GBE RO Controller Wiring” on page 102 for a diagram of all three switches. Low Pressure Switch The GBE RO Controller is equipped with a low pressure switch to protect the pump from starvation/cavitation.
- Page 32 Connect another wire from the POSITION (J2), PIN 4 terminal on the AUX board to terminal 4 on the relay. SW6 Dip Switch Battery Motor Comm P9 Power 2.5VAC 24V Aux1 Aux2 P7 Sol Aqua Flow Valve Sensor Meter Relay GROC BOARD Figure 18. MVP to GBE RO controller relays. Cat. No. 01021713 Culligan® Series G1 Reverse Osmosis...
- Page 33 Wiring for Softeners and Filters with GBE RO Controller For these systems, you must add a 24 VAC relay, part number 01016156, to provide the pretreatment contact. GBE to Relay: Connect a wire from terminal 5 of the relay to the left terminal of Aux 4 on the GBE softener/filter circuit board.
- Page 34 RO water or it is possible that the storage tank could run dry. NOTICE Do not apply power to these terminals. Use dry contacts only. Cat. No. 01021713 Culligan® Series G1 Reverse Osmosis...
-
Page 35: Basic Operation
Basic Operation After the first-time setup has been completed, the RO system will be online (RUNNING) or offline (OFFLINE). You can change the operation status of the system from the main menu on the Global RO Controller. RUNNING JAN-01-12 12:01A This is the home screen. -
Page 36: Setup
The screen displays the month setting. Press MONTH Jan–Dec and then to change the value and see the next setting. The screen displays the day setting. Press 1–31 then to change the value and see the next setting. Cat. No. 01021713 Culligan® Series G1 Reverse Osmosis... - Page 37 Screen Display Range Procedure SET YEAR 2012 The screen displays the year setting. Press 2010–2040 then to change the value and see the next setting. CLOCK TYPE 12 HR The screen displays the clock type setting. Press 12 or 24 and then to change the value and see the next setting.
- Page 38 In this mode any time that the system state is in STANDBY, the inlet AND fast flush solenoids open for a specified number of minutes every specified number of hours. This is a line-pressure-level flush (ie the pump does NOT turn on during this flush). Cat. No. 01021713 Culligan® Series G1 Reverse Osmosis...
- Page 39 Time Trigger Flush In this mode, any time that the system state is in RUNNING, the fast flush solenoid (SV-2) will open for a specified number of minutes every specified number of hours. Note that the pump is ON during this flush. Flow Trigger Flush In this mode, any time that the system state is in RUNNING, the fast flush solenoid (SV-2) will open for a specified number of minutes every specified number of PRODUCT RO water generated.
- Page 40 3) INFORMATION Press to select the SETUP menu. >4) SETUP 1) TIME/DATE 2) LANGUAGE Set Time/Date is the first menu item, so press to select 4)FLUSH 3) POWERON MODE MODES. >4) FLUSH MODES Cat. No. 01021713 Culligan® Series G1 Reverse Osmosis...
- Page 41 Flush Mode Settings Screen Display Range Procedure >1) STARTUP Startup 2) STANDBY Standby The screen displays the Flush Modes menu. Press Time Trigger 3) TIME TRIGGER to scroll through the menu and then to select a flush mode Flow Trigger 4) FLOW TRIGGER setting.
- Page 42 20. If permeate flush mode is set to ON, the screen displays the 1–180 flush duration setting. Press and then SECONDS change the value and then display the next setting. RUNNING JAN-01-12 12:01P 21. Press to return to the home screen. Cat. No. 01021713 Culligan® Series G1 Reverse Osmosis...
- Page 43 Switch Inputs Programming RUNNING JAN-01-12 12:01P From the default home screen, press . The screen displays the main menu. 1) GO TO RUNNING 2) GO TO OFFLINE Press to scroll to 4) SETUP. 3) INFORMATION Press to select the SETUP menu. >4) SETUP 2) LANGUAGE 3) POWERON MODE...
- Page 44 Used only when using the float switch high contacts. This sets how Delay: 0–120 long the float switch stays closed after transitioning from high to low level. MINUTES RUNNING JAN-01-12 12:01P Press to save the settings and return to the home screen. Cat. No. 01021713 Culligan® Series G1 Reverse Osmosis...
-
Page 45: Accessories
Accessories There are several components of the G1 RO that can be configured from the Accessories manu, including: • Wireless Remote • Modem • Flow Meter • Pressure and Level Control Switches • Pressure Gauges • Total Dissoved Solids Probes • Error or Status Monitor • SV3 or Target TDS Monitor Wireless Remote... - Page 46 Use this setting to select the correct radio frequency. Do not change the RF fre- or 915 quency for North America installations. RUNNING JAN-01-12 12:01P Press to save the settings and return to the home screen. Cat. No. 01021713 Culligan® Series G1 Reverse Osmosis...
- Page 47 GBE-Wireless Communication Setup Now set up the RO controller to communicate with the wireless remote. RUNNING JAN-01-12 12:01P From the default home screen, press . The screen displays the main menu. 1) GO TO RUNNING 2) GO TO OFFLINE Press to scroll to 4) SETUP.
- Page 48 RSSI is at least 4, then the installation is complete. It the SSI drops below 4, then it may be necessary to select an alternate location for the wireless remote. RUNNING JAN-01-12 12:01P Press to save the settings and return to the home screen. Cat. No. 01021713 Culligan® Series G1 Reverse Osmosis...
- Page 49 Modem NOTE The modem can be installed into either the back of the RO controller or the back of the remote control board. The functionality of the modem is the same in either installation. NOTE Use of the modem kit requires a one-year subscription to either a Level 1 or Level 2 Telecom package. Self-service registration is available at www.myculligan.com.
- Page 50 5)ACCESSORIES. The screen displays the ac- 4) FLUSH MODES cessories menu. >5) ACCESSORIES 1) WIRELESS REM >2) MODEM Press to select 2)MODEM. The screen displays the modem settings. 3) FLOW METERS 4) SWITCH INPTS Cat. No. 01021713 Culligan® Series G1 Reverse Osmosis...
- Page 51 GROC Modem Settings Screen Display Range Changing the Setting TELEPHONE MODEM Installed, INSTALLED Press and then to select INSTALLED if a telephone modem is installed inside the Smart Controller. Installed MODEM CONNECTION LandLine LANDLINE Press and then to change the Modem connection setting. CellModem See the note on the previous page about analog and digital phone lines.
- Page 52 (as opposed to installed in the remote control) then this testing process will also check to see if there is an updated version of firmware available on the Culligan servers. After conducting a phone line test, it is important to verify that the new time and date settings on the controller are correct.
- Page 53 From the Setup menu, press to select 2)MODEM SETUP. The screen dis- >2)MODEM SETUP plays the modem settings. Use these to set up the communication between the wireless remote and the Culligan servers. GBE RO Controller Modem Settings (on Remote) Screen Display Range...
- Page 54 Please do not change this value unless you are told to do so by Cul- 0.025 ligan Rosemont. This value changes the slope used to interpret the temperature. RUNNING JAN-01-12 12:01P Press to save the settings and return to the home screen. Cat. No. 01021713 Culligan® Series G1 Reverse Osmosis...
- Page 55 Alarm Relay Board The GBE RO controller board offers support for the Culligan Alarm Relay board (P/N 01022238). See Figure 28. To use the alarm relay board, install it onto the back of the GBE RO controller board. See Figure 29.
- Page 56 “error condition.” Alternatively, the Alarm Signal Output contact terminals can be wired to a customer supplied PLC or SCADA system to provide an indication to the customer of the status of the GBE RO controller-controlled equipment. Cat. No. 01021713 Culligan® Series G1 Reverse Osmosis...
- Page 57 G1 Series Two-Pass Pairings NOTE The RO G1 Series Two-Pass requires that the unit have the firmware version FWR202LT04 with a born- on-date no earlier than FEB 01 2013. For hardware, plumbing, and wiring, order the following: Required Kit Part Numbers Two-Pass Offerings Feed TDS>500...
- Page 58 When either unit is the “running” unit, it operates as a single unit. Connector for Additional Units (used for certain multiple unit configurations) Unit #1 (Master) Unit #2 (Slave) Figure 32. Wiring for two-pass and alternating mode. Cat. No. 01021713 Culligan® Series G1 Reverse Osmosis...
- Page 59 Figure 33. RO duplex alternating plumbing. Cat. No. 01021713 Accessories...
- Page 60 MASTER if the selected RO will control the functions of the entire RO system. Select SLAVE if the selected RO will be controlled by Slave the master RO. NOTE The Master RO must be set up first. Cat. No. 01021713 Culligan® Series G1 Reverse Osmosis...
- Page 61 SV3 (Solenoid Valve) Mode/TDS Target Solenoid valve SV3 is physically connected to the mini-aux board AUX4. When connected to AUX4, the TDS probe is set up as PRODUCT. NOTE Unlike SV1 and SV2, which operate at line voltage (115VAC for G1, 230VAC for M2), SV3 must be a 24V solenoid valve such as P/N 01021310.
-
Page 62: Error Limits
MAX TDS OUT est product quality) accepted by the G1 or M2 RO. Product water 1–500 that exceeds the maximumTDS level will trigger an error condition, HIGH TDS OUT (see page 63). Cat. No. 01021713 Culligan® Series G1 Reverse Osmosis... - Page 63 Specify the maximum number of hours per day that the pump is MAX PUMPTIME to run. If the value is set to 0 then this feature is ignored. If the 0–23 value is non-zero then each day (at the time of the daily email) the system checks to see if, within the past 24 hours, the pump run Hours/Day time has exceeded the specified number of hours.
-
Page 64: System Operating Information
PS1 = OPEN PTLO = OPEN Indicates whether the pressure switch, pretreatment lockout, high FS HI = OPEN float switch or low float switch is open or closed (if installed). FS LO = OPEN Cat. No. 01021713 Culligan® Series G1 Reverse Osmosis... - Page 65 Screen Display Range Procedure TOTAL FEED WATER Displays the total number of incoming untreated water gallons since the unit was put into service. GALLONS TOTAL PROD WATER Displays the total number of product water gallons since the unit was put into service. GALLONS PUMPING TIME Displays the total number of hours the unit has been in service...
-
Page 66: Service And Maintenance
Service and Maintenance Serial Numbers The Culligan G Series units have a serial number located directly behind the electronic controller on the side panel. Do not remove or destroy these serial number labels. They must be referenced if you require repairs or parts replacement under warranty. -
Page 67: Cat. No.
Error Codes When the G Series RO Controller encounters an error, the screen displays a PROBLEM FOUND message. Press to scroll to the error message. STANDBY JAN-01-12 1:55P Problem Found No Remote Signal This message is triggered when the rejection rate goes below the value set in MIN RE- REJECTION RATE LOW JECT %. - Page 68 Emailing now status of the test before displaying the results. Do not press any buttons before the Please Wait ... test is complete or the controller will return to the Diagnostics menu. Cat. No. 01021713 Culligan® Series G1 Reverse Osmosis...
- Page 69 Possible Results MODEM EMAIL MODEM TEST MODEM TEST MODEM TEST ERROR SUCCESS NOT POSSIBLE NOW TIME NO TONE!! TRY LATER! SET SUCCESS Use Data Port 1) TST WIRELESS 2) TESTPHONELIN 10. Press to select 3)USE DATA PORT. The screen displays the data re- >3) USE DATA PORT port status screen.
-
Page 70: Membrane Replacement
DO NOT use a petroleum-based lubricant, because it will damage the synthetic rubber and the membrane. Make sure the brine seal is located in the direction of the incoming feed to that vessel according to the flow arrow and the original membrane orientation. Cat. No. 01021713 Culligan® Series G1 Reverse Osmosis... - Page 71 Lubricate the O-ring on the end plugs with a silicone-based lubricant or use a mixture of 70% glycerin and 30% water. Re-install the end plugs in to the vessels same as the original orientation. Reinstall the retaining clips. Refer to the section on Initial Startup for information on flushing the shipping solution form the new elements. NOTE Do not forget to record the new values for flow, pressure, temperature, and TDS.
- Page 72 NOTICE Some replacement motors may be prewired for 220 Volt operation at shipment. Refer to wiring schematic on the motor label and verify that the motor is wired for 110 Volt operation. Cat. No. 01021713 Culligan® Series G1 Reverse Osmosis...
- Page 73 Sanitizing Modules The modules may need sanitizing if either of the following conditions exist: • The RO system is subject to biofouling and the operator wants to reduce the cleaning frequency. • The water treatment application limits the microbial count in the product water. CAUTION! The bottom of the tank must be higher than the pump on the RO unit to prevent cavita- tion of the pump when solution is drawn from the tank.
- Page 74 Choose GO TO RUNNING from the main menu. Slowly close the recirculation and drain valves until the system operating pressure increases to normal pressure. NOTE Increase the pressure no faster than 5 psi per second. Cat. No. 01021713 Culligan® Series G1 Reverse Osmosis...
- Page 75 Allow the unit to run for at least 30 minutes. Check the product water until the pH for the concentrate and prod- uct remains stable for five (5) minutes and the TDS is greater than 95 percent rejection. Choose GO TO OFFLINE from the main menu. Connect the concentrate tubing from the membrane to the motor panel.
- Page 76 Tank stand, to elevate solution tank to level above pump. Tubing 1/2” O.D. to connect cleaning adapter ahead of Pre-filter. A pH meter. A pre-filter cartridge (P/N 00955004). Before proceeding record the “NOW” values in Table 7. Cat. No. 01021713 Culligan® Series G1 Reverse Osmosis...
- Page 77 Prepare the Equipment for Cleaning Choose GO TO OFFLINE from the main menu. Place the solution tank on the tank stand. Connect the tubing to the cleaning adapter then place the other end of the tubing at the bottom of the solution tank. NOTICE The tubing length should be as short as possible to prevent excessive pressure drop.
- Page 78 The temperature of the chemical solution will rise as it is recirculated. If the tempera- ture exceeds 95°F, choose GO TO OFFLINE from the main menu and allow the solution to cool to prevent damage to the RO elements. Cat. No. 01021713 Culligan® Series G1 Reverse Osmosis...
- Page 79 Compare these values with the “new” and “now” values to determine if cleaning has been successful. If cleaning has not been successful, contact the service department at Culligan International Company for suggestions on alternate cleaning chemicals. If cleaning has been successful, note which chemicals were effective. Use the same chemical(s) when the unit is cleaned again.
-
Page 80: Gbe Ro Controller Menu Structure
GBE RO Controller Menu Structure FWR***LT04 MON DD YEAR Cat. No. 01021713 Culligan® Series G1 Reverse Osmosis... - Page 81 Cat. No. 01021713 GBE RO Controller Menu Structure...
- Page 82 Cat. No. 01021713 Culligan® Series G1 Reverse Osmosis...
- Page 83 FWR***LT04 MON DD YEAR Cat. No. 01021713 GBE RO Controller Menu Structure...
-
Page 84: G1 Ro Parts Diagrams And Lists
To Membrane Feed 1/2” Tube From Membrane Product 1/2” Tube From Membrane System Product Concentrate 3/8” Tube 1/2” Tube System Inlet 1/2” Tube System Waste 3/8” Tube Figure 37. G1 RO rear view. Cat. No. 01021713 Culligan® Series G1 Reverse Osmosis... - Page 85 G1 RO Series Item Part No. Description Qty Qty Qty Qty Qty Qty Qty Qty 01024508 Motor Panel Assembly, G1-2S, 3S, 4S 01024517 Motor Panel Assembly, G1-2L, 3L 01024518 Motor Panel Assembly, G1-4L 01024519 Motor Panel Assembly, G1-1F, 2F 01021992 Assembly, Feed, G1 01021993 Assembly, Return, G1...
- Page 86 Solenoid Assy, 120V/60Hz with bullet connectors — 01023070 Solenoid Coil, Repl, 110-120V/50–60Hz 01007604 Pressure Gauge, 1/4" NPT, 0–200 PSI, Liquid filled — Tee, 1/2" Socket, PVC Sch. 80 — Plug, 1/2", Spig 01024477 Cable, Solenoid, E1/M1/G1 Cat. No. 01021713 Culligan® Series G1 Reverse Osmosis...
- Page 87 Return/Recycle Assembly and Pressure Transducer To Pump Inlet Figure 39. Return/Recycle assembly with pressure transducer. Item Part No. Description Quantity 01021993 Assembly, Return (items 1–11) — 1/2" Sch.80 Pipe, 3.5" length — Tee, 1/2” Socket, PVC Sch.80 — Tee, 1/2", Threaded, PVC Sch.80 —...
- Page 88 Connector, Male, 1/2 NPT x 3/8 Tube, PI, Polypropylene — Elbow, Union, 3/8 Tube, PI, Polypropylene 01023380 Solenoid Valve, 1/2” NPT, 120V/60Hz, Wiring Harness 01023070 Replacement Coil for Solenoid 01024477 Cable, Solenoid Cat. No. 01021713 Culligan® Series G1 Reverse Osmosis...
- Page 89 Product Assembly For G1 2S, 3S, 4S, 2L, 3L, 4L Product from Membrane Assy Item Part No. Description 01024512 Assembly, Product Flow Meter, G1 — Nipple, 1/2"x5, PVC Sch. 80, TBE 11.53 REF. 01021033 Adapter Assembly, Flow Meter, 1/2" NPT —...
- Page 90 Part No. Description Quantity 01021997 System Pressure Gauge Asembly — Bushing, 1/2"x1/4", TxT, PVC Sch. 80 — Tee, 1/2”, Threaded, PVC Sch. 80 — 1/2”-1/2” NPT Tube, Male Connector 01007604 Pressure Gauge Cat. No. 01021713 Culligan® Series G1 Reverse Osmosis...
- Page 91 Membrane Vessel Screws Retaining Rings End Cap O-Rings Housing Membrane Brine Seal Figure 43. Membrane vessel. Item Part No. Description 1S 2S 3S 4S 2L 3L 4L 1F 2F 01023417 Assy, Membrane Housing, Single, 2.5"x40" 01023412 Assy, Membrane Housing, Single, 2.5"x21" 01022875 Assy, Membrane Housing, Single, 4"x40"...
- Page 92 Part No. Description Qty. 01021033 Feed Flow Meter P1009099 O-ring, Meter #126 01021877 Meter Body Assembly with Impaller, O-Rings 01022706 Nozzle for low flow (used on feed flow meter for G1-2S, 3S, 4S) Cat. No. 01021713 Culligan® Series G1 Reverse Osmosis...
- Page 93 2S/2L Sub-Assembly Used Only When Mounting on Floor Stand FEED PRODUCT Note orientation of flow Top View A = to Feed Port B = to Recirculating Assy C = to Center Port (Product) Bottom View Figure 45. 2S/2L sub-assembly. Item Part No.
- Page 94 Elbow, 3/8" stem, 3/8 tube 3 EA 5 EA Polypropylene — Tube, 3/8", cut length 4.4" 2 EA — Tube, 1/2", Length 4.25" 2 EA — Stem Adapter, 1/4Tx3/8 Stem, 9 EA Polypropylene Cat. No. 01021713 Culligan® Series G1 Reverse Osmosis...
- Page 95 4S/4L Sub-Assembly Top View Used Only When Mounting on Floor Stand FEED PRODUCT Note Orientation of Flow A = to Feed Port B = to Recirculating Assy C = to Center Port (Product) Bottom View Figure 47. 4S/4L sub-assembly. Item Part No. Description Item Part No.
- Page 96 G1-1F Sub-Assembly Figure 48. G1-1F sub-assembly. Cat. No. 01021713 Culligan® Series G1 Reverse Osmosis...
- Page 97 Item Part No. Description Quantity 01022875 Assembly, Membrane Housing, Single, 4.0"x40" 01023922 Kit, Tube and Fittings, 1F (includes items 1–7) — Elbow, Union, Reducing, 1/2 x 3/8, PI, Polypropylene 1 EA Elbow, Plug In, 3/8" stem, 3/8 tube 3 EA —...
- Page 98 G1-2F Sub-Assembly Figure 49. G1-2F sub-assembly. Cat. No. 01021713 Culligan® Series G1 Reverse Osmosis...
- Page 99 Item Part No. Description Quantity 01022875 Assembly, Membrane Housing, Single, 4.0"x40" 01023914 Kit, Tube and Fittings, 2F (includes items 1–8) — Elbow, Union, Reducing, 1/2 x 3/8, PI, Polypropylene 1 EA — Elbow, Union, 1/2 Tube, Polypropylene 4 EA — Stem Adapter, 1/2Tx1/2 Stem, Polypropylene 6 EA —...
- Page 100 Controller Sub-Assembly Figure 50. G1 Controller front panel. Figure 51. G1 Controller main and auxiliary boards. Cat. No. 01021713 Culligan® Series G1 Reverse Osmosis...
- Page 101 Figure 52. G1 Controller cords and miscellaneous parts. Figure 53. G1 Controller circuit board, auxiliary board, and relay board. Cat. No. 01021713 G1 RO Parts Diagrams and Lists...
- Page 102 G1 Global RO Controller Parts Item Part No. Description 01021977 Controller, G1 Series Matrix Solutions 01020674 Enclosure,GBE Control 01021527 Circuit Board,Main GBE,Commercial RO 01023100 GBE 115/230V RELAY BOARD 01024179 Power Cord, C Plus Control — Gasket,Pilot Valve 01022953 CABLE, 22 AWG, 2 CONDUCTOR W/MTA100 CONN —...
-
Page 103: Flow Diagram
Flow Diagram Process Flow Diagram Cat. No. 01021713 Flow Diagram... - Page 104 Time Flow Diagram Cat. No. 01021713 Culligan® Series G1 Reverse Osmosis...
-
Page 105: Electrical Installation
Electrical Installation CAUTION! Observe the precautions listed below before the electrical installation of your GROC controller. Failure to do so might cause permanent damage to the RO controller. Electrical Installation of G1 RO Controller Pre-Installation Recommendations • Follow the local electrical code requirements. • Be sure electrical power is off and disconnected at the source before completing any wiring/cabling connections. -
Page 106: Gbe Ro Controller Wiring
GBE RO Controller Wiring GROC Basic Sub-Panel Wiring Diagram NOTE For Series G1 RO Systems, make sure the voltage selector switch is set at 115 VAC. Figure 55. GBE RO Controller Basic sub-panel wiring. Cat. No. 01021713 Culligan® Series G1 Reverse Osmosis... -
Page 107: Remote Display Template
Remote Display Template Remote Display Template Figure 56. Hole drilling template Cat. No. 01021713 Remote Display Template... -
Page 108: Appendix A G1 Ro International
*Nominal capacity based on new RO membranes operating on a properly pretreated feed water of 500 ppm TDS as NaCl, 77 °F (25 °C), Silt Density Index (SDI) below 3, and supplying water to atmosphere. Productivity will vary depending on the actual feed water quality and temperature. Cat. No. 01021713 Culligan® Series G1 Reverse Osmosis... - Page 109 GROC Basic Sub-Panel Wiring Diagram, 230V NOTE For Series G1 RO Systems, make sure the voltage selector switch (see * below) is set at 230 VAC. Figure 57. GBE RO Controller Basic sub-panel wiring. NOTE *Agency certified and marked by VDE, HAR, or equivalent agency 6A, 250 VAC, 65C, PVC, VW-1, or FV-1 Flame Rating.
- Page 110 REMOVE CAPS ON 10mm STEMS NOTE DIRECTION OF FLOW REMOVE CAPS ON 10mm STEMS INSERT FEED FITTING ASSEMBLY OVER 10mm STEMS (BOTTOM SIDE OF MEMBRANES) Figure 58. RO 2S/2L tubing assembly instructions, 230V. Cat. No. 01021713 Culligan® Series G1 Reverse Osmosis...
- Page 111 3S/3L Tubing Assembly Instructions, 230V Figure 59. RO 3S/3L tubing assembly instructions, 230V. Cat. No. 01021713 G1 RO International...
- Page 112 REMOVE CAPS ON 10mm STEMS NOTE DIRECTION OF FLOW REMOVE CAPS ON 10mm STEMS INSERT FEED FITTING ASSEMBLIES OVER 10mm STEMS (BOTTOM SIDE OF MEMBRANES) Figure 60. RO 4L tubing assembly instructions, 230V. Cat. No. 01021713 Culligan® Series G1 Reverse Osmosis...
- Page 113 G1 RO Major 230V Components and Water Connections Figure 61. G1 RO front view. To Membrane Feed 10mm Tube From Membrane Product 10mm Tube System Product 10mm Tube From Membrane Concentrate 10mm Tube System Inlet 10mmTube System Waste 10mm Tube Figure 62.
- Page 114 GBE RO Controller—see page 10. 01025825 Cable, Meter, 48"L w/ Strain Relief 01025327 Reducer, Stem 15mm, Tube 10 mm 01025326 Adapter, Stem to Tube, 1/2" Stem, 15mm Tube 01025328 Enlarger, Stem 3/8", Tube 1/2" Cat. No. 01021713 Culligan® Series G1 Reverse Osmosis...
- Page 115 International Feed Assembly Figure 63. International feed assembly. Item Part No. Description Quantity 01024238 Assembly, Feed, 220V (items 1–8) — Tee, 1/2", Threaded, PVC Sch. 80 — Male Adapter, 1/2" Spigot x NPT, Sch. 80 — Elbow, 1/2" Soc, PVC Sch. 80 —...
- Page 116 Stem Adapter, 1/4NPT x 3/8 Stem, Polypropylene — Fitting, Male Adapter, 3/8 x 1/2 NPTE, PI — Fitting, Union Elbow, 3/8T, PI 01022601 Solenoid Assembly, 1/2", 220V/50Hz — 01024635 Coil, Solenoid, Repl, 220–240/50–60 01025739 Cable, Solenoid Cat. No. 01021713 Culligan® Series G1 Reverse Osmosis...
- Page 117 G1 Membrane Vessel, International Screws Retaining Rings End Cap O-Rings Housing Membrane Brine Seal Figure 65. G1 membrane vessel. Item Part No. Description 2S 3S 2L 3L 4L 01025333 Assembly, Membrane Housing, Single, 2.5"x21" 01025334 Assembly, Membrane Housing, Single, 2.5"x40" 01025336 Housing, FRP, 2.5"x21"with endcaps 01025335...
- Page 118 — Stem Adapter, 1/4 BSPP, 10mm 6 EA — Connector, 1/4 BSPP, 10mm 2 EA — Tee, Union, 10mm 1 EA — Elbow, Stem, 10mm 1 EA — Plug, 10mm 2 EA Cat. No. 01021713 Culligan® Series G1 Reverse Osmosis...
- Page 119 3S/3L Sub-Assembly, International For Recirculating Assembly on Motor Panel Top View Used Only When Mounting on Floor FEED Stand PRODUCT Note orientation of flow A = to Feed Port B = to Recirculating Assy C = to Center Port (Product) Bottom View Figure 67.
- Page 120 Tube, 10mm 3 EA — Stem Adapter, 1/4BSPP, 10mm 12 EA — Connector, 1/4BSPP, 10mm 4 EA — Tee, Union, 10mm 3 EA — Elbow,10mm Stem 1 EA — Plug, 10mm 4 EA Cat. No. 01021713 Culligan® Series G1 Reverse Osmosis...
- Page 121 Controller Sub-Assembly, Intenational Figure 69. G1 Controller front panel. Figure 70. G1 Controller main and auxiliary boards. Cat. No. 01021713 G1 RO International...
- Page 122 Figure 71. G1 Controller. SET TO 230V YELLOW/ BLUE BROWN Figure 72. G1 Controller circuit board, auxiliary board, and relay board. Cat. No. 01021713 Culligan® Series G1 Reverse Osmosis...
- Page 123 G1 Global RO Controller Parts, International Item Part No. Description 01024591 Controller, G1 Series Matrix Solutions 220V 01024191 Enclosure,GBE Control 01021527 Circuit Board,Main GBE,Commercial RO 01023100 GBE 115/230V RELAY BOARD NOTE Set the voltage switch to 230V. — Gasket,Pilot Valve...
- Page 124 Part No. Description Quantity — 01021987 Floor Stand Assembly, 1 Series RO — Stand, Side Rail Assembly 2 EA — Trim, Edge, Length 17" 1 EA — Bracket, Membrane Hanger Mount 1 EA Cat. No. 01021713 Culligan® Series G1 Reverse Osmosis...
-
Page 125: Appendix B Basic Principles
Appendix B Basic Principles Reverse Osmosis In order to understand reverse osmosis, we must first define osmosis. Osmosis is the passage of a liquid through a semi-permeable membrane. A semi-permeable membrane is a membrane which allows one component of a solution to pass through it and not the others. - Page 126 *Short term cleaning is acceptable for pH ranges between 2.0/12.0. Additional treatment is required when chloramines are present and the pH levels exceed 9.0. NOTICE In some applications, a water softener is not required. Consult an independently operated Culligan dealer for further information on these special applications. Cat. No. 01021713...
-
Page 127: Appendix C Menu And Key Navigation
Appendix C Menu and Key Navigation Key Pad Familiarization UP ARROW button CHECK MARK button CANCEL (X) button DOWN ARROW button UP ARROW button: scrolls up the menu DOWN ARROW button: scrolls down the menu CHECK MARK button: selects the highlight- ed option, opens a new screen, or accepts a Controller changed setting... - Page 128 >1)GO TO RUNNING 2)GO TO OFFLINE 11. Press to exit from the setting. The GROC screen displays the parent menu. 3)INFORMATION 4)SETUP RUNNING JAN-01-12 12:01A 12. Press repeatedly to return to the home screen. Cat. No. 01021713 Culligan® Series G1 Reverse Osmosis...
- Page 129 Appendix D Quick Programming Guide Quick Programming Guide—First Time Setup with Modem in Controller Press to select a setting. Press to change the setting. Press to save. Press to exit from a menu. Select Language Install Modem LANGUAGE 1)GOTO RUNNING ENGLISH 2)GOTO OFFLINE Press...
- Page 130 Select METRIC for units out- side the United States. Press to save the settings and return to the home screen. RUNNING The “home” screen displays JAN-01-12 12:01P the RUNNING or OFFLINE status of the RO system. Cat. No. 01021713 Culligan® Series G1 Reverse Osmosis...
- Page 131 First Time Setup with Wireless Remote, High and Low Float Switches Press to select a setting. Press to change the setting. Press to save. Press to exit from a menu. Select Language Set Up GROC-Remote Communication LANGUAGE >1)WIRELESS REM From the main menu, select ENGLISH 2)MODEM Select the controller language.
- Page 132 Select the system status at OFFLINE startup—offline or running. You can change status after setup. Set Up Units of Measure/Initialize System SYSTEM UNITS US INCH Select METRIC for units out- side the United States. Cat. No. 01021713 Culligan® Series G1 Reverse Osmosis...
-
Page 133: Electrical Connections
M = Date and Time. i.e. 102320111027 is Oct 23 2011 (102311) at 10:27 am (1027). Time is in 24 hr format. Electrical Connections The Culligan Data Cable Connector is terminated with a D-sub9 style female termination. The customer must provide the following pin connections:... - Page 134 The following data cable styles are available from Culligan (cables for Modbus, BACNET, and Profibus are also available from your Culligan dealer): Cable Part No. Description 01021507 USB style output cable—comes with CD-ROM which includes device drivers for Microsoft ®...
- Page 135 Send a Test Message from the GBE RO Controller RUNNING JAN-01-12 12:01P From the default home screen, press . The screen displays the main menu. 1) GO TO RUNNING 2) GO TO OFFLINE Press to scroll to 4) SETUP. 3) INFORMATION Press to select the SETUP menu.
- Page 136 COM ports. The status message on the screen is updated every minute and will look similar to this: CULL,009.30,004.60,1,050,096,0,0,00050202,00000,00000,00000,000,000,000,1023111027 This message was described at the beginning of this Appendix. Cat. No. 01021713 Culligan® Series G1 Reverse Osmosis...
-
Page 137: Appendix F Programming Log
Appendix F Programming Log Use this section to record the program settings for this system. Circle or enter the observed value. Make additional copies to keep on file near the installation and with your local Culligan dealer. Program Date: ___________ Installer: _____________________________... -
Page 138: Index
Flush, Time Trigger Electrical Installation Check Signal Strength Between Error Codes the GBE RO Controller and Error Limits Remote G1-1F Sub-Assembly Cleaning G1-2F Sub-Assembly Cleaning Procedure, Finish G1 Global RO Controller Parts Cat. No. 01021713 Culligan® Series G1 Reverse Osmosis... - Page 139 Parts, International, G1 Membrane Ves- G1 RO Series Specifications 4 sel, Name the New Connection G1 RO System Configurations 5 International, G1 RO Non-Pressurized Product Water G1 Series Two-Pass Pairings Introduction Storage Tank G1 Tubing Configuration 10 NO REMOTE SIGNAL GBE Historical Data Normal Operation GBE RO Controller Board, Install-...
- Page 140 Set Up Power On Mode Controller, Send a Remote, Test Wireless Setup, System Test Modem Remote, Wireless Set Up Time/Date Test Phone Line Replacement, Membrane Setup, Wireless Remote Test the Data Port Cat. No. 01021713 Culligan® Series G1 Reverse Osmosis...
- Page 141 Tubing Assembly Instructions, 2S/2L Tubing Assembly Instructions, 3S/3L Tubing Assembly Instructions, 4S/4L Tubing Configuration, G1 10 Two-Pass Pairings, G1 Series Two-Pass RO Two-Pass RO Start Up Sequence Units of Measure Conversion Unpacking the G1 RO Use Data Port Wall Mounting Kit (optional) Water Connections, Concentrate...
Need help?
Do you have a question about the G1 Series and is the answer not in the manual?
Questions and answers