Table of Contents
Advertisement
Quick Links
- 1 Connecting the M10 Jewel Machine to a Pc
- 2 Problems
- 3 Make the M10 Jewel Machine Ready to Engrave with Gravostyle
- 4 Positioning a Wide Ring Onto the Jaws and Inside Engraving
- 5 Adjusting the Machine (Reference Points)
- 6 To Adjust the M10 Jewel Machine on the X,Y Axis for an Inside Engraving of a Ring
- 7 To Adjust the M10 Jewel Machine on the X,Y Axis for an Outside Engraving of a Ring
- Download this manual
Advertisement
Table of Contents

Related Manuals for GRAVOGRAPH M10 JEWEL


Summary of Contents for GRAVOGRAPH M10 JEWEL
- Page 1 User Manual Machine Electronic Engraving Machine First Contact Before installing and using this machine, you must read this user guide carefully. Keep it in a safe place, in case you need to refer to it later. F5120 701 - 01.2012 - ENG - (UPDATED EDITION NUMBER : 1)
- Page 2 Neither does it convey a license under its patent rights nor the patent rights of third parties. GravoTech Marking SAS provides no warranties whatsoever on any software used in connection with a Gravograph Laser Engraving System, express or implied. Neither does it guarantee software compatibility with any off-the-shelf software package or any software program that has not been written by GravoTech Marking SAS.
-
Page 3: Table Of Contents
General maintenance .................41 Adjusting the machine (reference points) ..................41 To adjust the M10 JEWEL machine on the X,Y axis for an inside engraving of a ring ......42 To adjust the M10 JEWEL machine on the X,Y axis for an inside engraving of a bracelet .... - Page 4 Technical characteristics ..............47 Physical characteristics ........................47 Electrical characteristics ........................48 Engraving softwares characteristics ....................48 Optional accessories ........................48 Appendices ..................49 Gravograph Machines - Soft setup ....................49 M10 JEWEL Machine - Electronic Engraving Machine . 4 First Contact...
-
Page 5: Information About Regulations
The equipment must be disposed of at an appropriate collection point for processing, sorting, and recycling of Waste Electrical and Electronic Equipment (DEEE). The elements which compose Electrical and Electronic Equipment may contain substances which have harmful effects on the environment or on human health. By following these instructions, you are helping the environment, contributing to the preservation of our natural resources, and protecting human health. M10 JEWEL Machine - Electronic Engraving Machine . 5 First Contact... -
Page 6: Presentation
GRAVOTECH MARKING SAS (example : lubrication). • The machine should never be used with anything other than Gravograph accessories and tools. • Never hold the material to be engraved in your hands. Only use the Gravograph clamping systems designed for your machine. -
Page 7: Stages Of Unpacking
Stages of unpacking Before opening the cardboard box, check that it is the right way up. 1. Open the box. 2. Take out the machine with the inside box using the two handles. 3. Take out the accessories: Make sure that no components are missing from the packaging. If any part has been forgotten please get in touch with your GRAVOGRAPH dealer. Keep all the packaging materials so that you can move your machine in total safety. This packing was conceived to guarantee the protection of the machine during its transport (for a return in repair for example). This packaging is in conformity with European recycling standards. M10 JEWEL Machine - Electronic Engraving Machine . 7 First Contact... -
Page 8: Unpacking - Contents Of Package
Unpacking - Contents of package Check the condition of the packaging when you receive it. If there are any signs of damage, inform the carrier and your GRAVOGRAPH dealer immediately by recorded delivery, specifying the exact nature of the problem. Content of package A M10 JEWEL engraving machine User instructions (on CD) An accessories drawer One mains cable for the external power supply (F) One external power supply... - Page 9 - Outside Engraving : A dimond tip for bracelets A dimond tip for rings (longer) 3 rings/outside engraving jaws D10. An adjustable diamond tip holder for outside engraving (for D7 and D8) M10 JEWEL Machine - Electronic Engraving Machine . 9 First Contact...
-
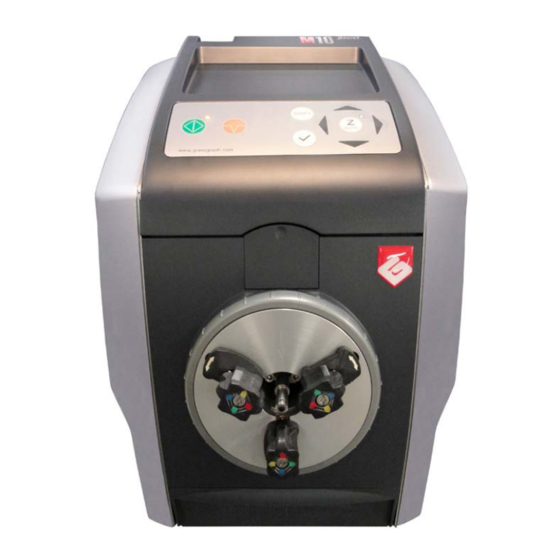
Page 10: Description
Description The M10 JEWEL machine is a machine for engraving bracelets, wedding rings and rings. It has a keyboard for controlling the machine. Files to be engraved are transferred from the computer to the machine by the intermediary of a cable which is plugged into the USB port on the M10 JEWEL machine. -
Page 11: Rear View Of The Machine
Each connection responds to one of the following security levels : - Dangerous voltage. - Very low security level. N1 - External power supply 24V - 30W - Very low security level USB slot - Very low security level First Contacts M10 JEWEL Machine - Electronic Engraving Machine . 11... -
Page 12: Control Panel Of The Machine
JOYSTICK Z MACHINE SETTING VALIDATION ENGRAVING CYCLE Z REF SHIFT If the LED is lit, the key is activated If the LED is lit, the machine is switched on M10 JEWEL Machine - Electronic Engraving Machine . 12 First Contacts... -
Page 13: Installation
In order to avoid outside interference, the user is advised to carry out the following points. • Plug the Gravograph machine into a mains line, avoiding having several machines on the same line (several plugs on the same line or using a multi-plug). -
Page 14: Electrical Connections Of The Machine
To cut off the mains supply to your machine in the case of severe problems, unplug the mains cable or switch off the machine with the main stop button at the side of the machine. Make sure that you can reach them easily. M10 JEWEL Machine - Electronic Engraving Machine . 14 First Contacts... -
Page 15: Connecting The M10 Jewel Machine To A Pc
They must be in conformity with the electromagnetic compatibility standards, norm EN 55022 - class B and protect from external electric «attacks» (conform to the norms of immunity and CEM susceptibility). • Do not use cables which are too long. Keep the machines as close as possible and use a short a cable as possible. • Separate the mains cable and the transmission cable (avoid connecting the transmission and mains cables to the same socket, etc ...). Follow the connection procedure depending on the connection cable supplied with the M10 JEWEL machine. The machine is delivered with the following cables : • USB cable (P) First Contact... - Page 16 Connecting the M10 JEWEL machine/PC via an USB link Plug the USB cable (P) into the USB port of the machine (pict. 1). 2. Plug the USB cable (P) into the USB port of the PC. Refer to the installation manual of the computer for the USB port (1.1). M10 JEWEL Machine - Electronic Engraving Machine . 16...
-
Page 17: Switching The Machine On
If this happens, switch the machine off. Wait 30 seconds and switch it on again. Respect this rule. This time allows any electric shock to the machine, possibly damaging the power supply, to be avoided. First Contact M10 JEWEL Machine - Electronic Engraving Machine . 17... -
Page 18: Make The M10 Jewel Machine Ready To Engrave With Gravostyle
"Gravograph Machines Soft setup" in order to install the GT Smartstream 3.xx driver and the Gravostyle 7 engraving software on your PC. Then add the M10 JEWEL machine in the "Installed printer list" of the GravoStyle 7 engraving software. M10 JEWEL Machine - Electronic Engraving Machine . 18... -
Page 19: Engraving
In the engraving programme, make sure that you have indicated the good engraving parameters, the good machine parameters, the Z speed and the engraving orientation : transfer the composition to the M10 JEWEL machine using the key (Launch). M10 JEWEL Machine - Electronic Engraving Machine . 19... -
Page 20: Inside Engraving
Diamond tip (D2) (adjustable) for bracelets mounted in the center of the chuck. The 3 rings/bracelets jaws (D3) mounted on Green position. Wide Bracelet montage procedure - Inside Engraving described pages 28-30. M10 JEWEL Machine - Electronic Engraving Machine . 20 First Contact... -
Page 21: Positioning A Thin Ring Onto The Jaws And Inside Engraving
Proper fastening contributes towards reducing machine noise and vibrations during engraving. Check that the object is properly fastened so it does not pop out during engraving and that no object poses an obstacle to the movable parts’ movements. M10 JEWEL Machine - Electronic Engraving Machine . 21 First Contact... - Page 22 To stop engraving completely, touch one of the arrows of the joystick. Engraving is finished, when the machine is ready to receive a new file : You can remove the ring, or launch again the engraving process for a better result. M10 JEWEL Machine - Electronic Engraving Machine . 22 First Contact...
-
Page 23: Positioning A Wide Ring Onto The Jaws And Inside Engraving
Proper fastening contributes towards reducing machine noise and vibrations during engraving. Check that the object is properly fastened so it does not pop out during engraving and that no object poses an obstacle to the movable parts’ movements. M10 JEWEL Machine - Electronic Engraving Machine . 23 First Contact... - Page 24 To stop engraving completely, touch one of the arrows of the joystick. Engraving is finished, when the machine is ready to receive a new file: You can remove the ring, or launch again the engraving process for a better result. M10 JEWEL Machine - Electronic Engraving Machine . 24 First Contact...
-
Page 25: Positioning A Thin Bracelet Onto The Jaws And Inside Engraving
Touch (START) on the control panel of the machine and follow the instructions indicated on the screen of the computer : M10 JEWEL Machine - Electronic Engraving Machine . 25 First Contact... - Page 26 The diamond tip is the material to be engraved exactly where the engraving should start. Lower the diamond tip using the screw (V2) until it touches slightly the bracelet. Tighten the screw (V2). M10 JEWEL Machine - Electronic Engraving Machine . 26 First Contact...
- Page 27 To stop engraving completely, touch one of the arrows of the joystick. Engraving is finished, when the machine is ready to receive a new file: You can remove the bracelet, or launch again the engraving process for a better result. M10 JEWEL Machine - Electronic Engraving Machine . 27 First Contact...
-
Page 28: Positioning A Wide Bracelet Onto The Jaws And Inside Engraving
Touch (START) on the control panel of the machine and follow the instructions indicated on the screen of the computer: M10 JEWEL Machine - Electronic Engraving Machine . 28 First Contact... - Page 29 The diamond tip is the material to be engraved exactly where the engraving should start 10. Lower the diamond tip using the screw (V2) until it touches slightly the bracelet. Tighten the screw (V2). M10 JEWEL Machine - Electronic Engraving Machine . 29 First Contact...
- Page 30 To stop engraving completely, touch one of the arrows of the joystick. Engraving is finished, when the machine is ready to receive a new file: You can remove the bracelet, or launch again the engraving process for a better result. M10 JEWEL Machine - Electronic Engraving Machine . 30 First Contact...
-
Page 31: Outside Engraving
(E) above the chuck and equipped with the diamond tip (D7) for bracelets. The 3 rings/bracelets jaws (D3) mounted on Green position Wide bracelet montage procedure - Outside Engraving described pages 38-40 M10 JEWEL Machine - Electronic Engraving Machine . 31 First Contact... -
Page 32: Positioning A Ring Onto The Jaws And Outside Engraving
Touch (START) on the control panel of the machine and follow the instructions indicated on the screen of the computer: M10 JEWEL Machine - Electronic Engraving Machine . 32 First Contact... - Page 33 Open the trapdoor of the location (E) above the chuck and Loosen the 2 screws (V3) slightly. If necessary, replace the diamond tip (D7) by the diamond tip (D8) on the diamond tip holder for outside engraving and tighten (V4). M10 JEWEL Machine - Electronic Engraving Machine . 33 First Contact...
- Page 34 To stop engraving completely, touch one of the arrows of the joystick. Engraving is finished, when the machine is ready to receive a new file: You can remove the ring, or launch again the engraving process for a better result. M10 JEWEL Machine - Electronic Engraving Machine . 34 First Contact...
-
Page 35: Positioning A Thin Bracelet Onto The Jaws And Outside Engraving
Touch (START) on the control panel of the machine and follow the instructions indicated on the screen of the computer: M10 JEWEL Machine - Electronic Engraving Machine . 35 First Contact... - Page 36 Open the trapdoor of the location (E) above the chuck and Loosen the 2 screws (V3) slightly. If necessary, replace the diamond tip (D8) by the diamond tip (D7) on the diamond tip holder for outside engraving and tighten (V4). M10 JEWEL Machine - Electronic Engraving Machine . 36 First Contact...
- Page 37 To stop engraving completely, touch one of the arrows of the joystick. Engraving is finished, when the machine is ready to receive a new file: You can remove the bracelet, or launch again the engraving process for a better result. M10 JEWEL Machine - Electronic Engraving Machine . 37 First Contact...
-
Page 38: Positioning A Wide Bracelet Onto The Jaws And Outside Engraving
Touch (START) on the control panel of the machine and follow the instructions indicated on the screen of the computer: M10 JEWEL Machine - Electronic Engraving Machine . 38 First Contact... - Page 39 Open the trapdoor of the location (E) above the chuck and Loosen the 2 screws (V3) slightly. If necessary, replace the diamond tip (D8) by the diamond tip (D7) on the diamond tip holder for outside engraving and tighten (V4). M10 JEWEL Machine - Electronic Engraving Machine . 39 First Contact...
- Page 40 To stop engraving completely, touch one of the arrows of the joystick. Engraving is finished, when the machine is ready to receive a new file: You can remove the bracelet, or launch again the engraving process for a better result. M10 JEWEL Machine - Electronic Engraving Machine . 40 First Contact...
-
Page 41: General Maintenance
Z position at the mechanical stop is above or below its normal position). The M10 JEWEL machine has a very simple adjustment system which can be carried out by an expert user (which enables the machine to be adjusted without having to return it to the distributor). -
Page 42: To Adjust The M10 Jewel Machine On The X,Y Axis For An Inside Engraving Of A Ring
To adjust the M10 JEWEL machine on the Y,X axis for an inside engraving of a ring To adjust the machine in Y,X you need to transfer a job of an inside engraving on the reference ring (D6) provided with the machine. -
Page 43: To Adjust The M10 Jewel Machine On The X,Y Axis For An Inside Engraving Of A Bracelet
To adjust the M10 JEWEL machine on the Y,X axis for an inside engraving of a bracelet To adjust the machine in Y,X you need to transfer a job of an inside engraving on the reference bracelet (D11) provided with the machine : Transfer the inside engraving composition of the bracelet to the M10 JEWEL machine using the key (Launch). -
Page 44: To Adjust The M10 Jewel Machine On The X,Y Axis For An Outside Engraving Of A Ring
To adjust the M10 JEWEL machine on the Y,X axis for an outside engraving of a ring To adjust the machine in Y,X you need to transfer a job of an outside engraving on the reference ring (D6) provided with the machine. -
Page 45: To Adjust The M10 Jewel Machine On The X,Y Axis For An Outside Engraving Of A Bracelet
To adjust the M10 JEWEL machine on the Y,X axis for an outside engraving of a bracelet To adjust the machine in Y,X you need to transfer a job of an outside engraving on the reference bracelet (D11) provided with the machine : Transfer the outside engraving composition of the bracelet to the M10 JEWEL machine using the key (Launch). -
Page 46: To Adjust The M10 Jewel On The Z Axis
To adjust the M10 JEWEL machine on the Z axis To adjust the machine in Z you need to transfer a job of an inside engraving on the reference ring (D6) provided with the machine. Transfer the inside engraving composition of the ring to the M10 JEWEL machine using the key (Launch). -
Page 47: Technical Characteristics
10 mm/s - 0.4 in/s Max. X,Y,Z off-load speed 10 mm/s - 0.4 in/s Max. engraving precision 0.05 mm - 0.002 in Engraving repeatability < 0.05 mm - 0.002 in M10 JEWEL Machine - Electronic Engraving Machine . 47 First Contact... -
Page 48: Electrical Characteristics
Windows XP pack 3 / Windows Vista pack 2 / Windows 7 pack 1 (for the engraving software) Languages Fre, Eng, Ger, Ita, Spa, ... Firmware/OS >1.57 Optional accessories M10 JEWEL Machine - Electronic Engraving Machine . 48 First Contact... -
Page 49: Appendices
Gravograph Machines - Soft setup Follow the installation procedure described on the page 18 "Make the M10 JEWEL machine ready to engrave with GravoStyle (mini. Version 7)" of this manual. It indicates you the various parts of this appendix which you specifically need for your machine. - Page 50 Contents Contents GRAVOGRAPH MACHINES - SOFT SETUP ....................1 HOW TO MAKE GRAVOGRAPH MACHINE READY TO ENGRAVE .............1 MAKE A GRAVOGRAPH ROTARY MACHINE READY TO ENGRAVE............2 PLUG ONTO USB PORT AN ADDITIONAL GRAVOGRAPH MACHINE............5 LEGAL TERMS ...........................7...
- Page 51 Gravograph Machines - Soft setup Gravograph Machines - Soft setup How to make Gravograph machine ready to engrave Install physically the machine on workspace, in accordance with Gravograph user manual. Locate the power button. • Button on 0: machine powered off, out of order •...
- Page 52 Run a session as Administrator. A standard user has no right to make a setup in Windows. Have the digital media used to set up your Gravograph engraving program. Explore contents of support iconized as a driver identified by a letter in Computer (for example F: or H:).
- Page 53 Gravograph Machines - Soft setup Setting softlink between PC and engraving machine Plug a single machine onto an USB port of your PC. Power up it. connection > Plug machine onto port, power up it The setup wizard checks the compatibility between GT Smartstream 3.xx and machine firmware (embedded program that carries out engraving instructions).
- Page 54 Gravograph Machines - Soft setup Enabling laser machine in your Gravograph engraving program GravoStyle 7 Double-click G7 in Start menu to run the program. Click tab Open Machines: click Config. machines command in Engraving menu. Click Add machine. Click your machine type.
- Page 55 Use MajFirmware.exe tool to control and to configure the parameters of the additional machine, before connecting it onto an USB port of your PC. To connect onto USB ports several Gravograph machines , your PC must have at least 4 USB ports free.
- Page 56 Gravograph Machines - Soft setup Updating additional machine firmware When the driver that matches the additional machine has been already set up on PC check its compatibility with this machine firmware. Run MajFirmware.exe tool. Check Number parameter. When value is •...
- Page 57 Publisher GRAVOTECH MARKING SAS http://www.gravograph.com Gravograph, Intelligent System, L-Solution, GravoStyle 7, GravoStyle Quick Click, GT Smartstream are either registered trademarks or trademarks of GRAVOTECH MARKING SAS, in the U.S. and/or other countries. Microsoft, Windows 98, Windows NT, Windows ME, Windows 2000, Windows XP, Microsoft Word, WordPad, Internet Explorer, Explorer, HTML Help Viewer, Windows Media Player are either registered trademarks or trademarks Microsoft Corporation, in the U.S.
Need help?
Do you have a question about the M10 JEWEL and is the answer not in the manual?
Questions and answers