Table of Contents
Advertisement
Quick Links
Advertisement
Chapters
Table of Contents

Related Manuals for Rain Bird ESP-LXME


Summary of Contents for Rain Bird ESP-LXME
- Page 1 ESP-LXME Controller Installation, Programming & Operation Guide...
- Page 2 To be in compliance with FCC regulations, the user must use shielded cables and connectors and install them per instructions. For technical assistance contact Rain Bird at 800 RAINBIRD (1-800-724-6247) U.S. and Canada Visit us on the web at www.rainbird.com...
-
Page 3: Table Of Contents
Contents Section A - Introduction & Overview ....1 Section B - Basic Programming ......13 Welcome to Rain Bird ............1 Program Select Switch ...........13 ESP-LXME Controller ............1 Select Program ..................13 Weather Sensor Bypassed/Active Switch ......13 Controller Features ..................1 Controls, Switches and Indicators ............2... - Page 4 Station/MV Settings ............46 View Mainline Flow Alarms ............71 Station Settings ..................46 Clear Flow Alarms ................72 Set Up Cycle+Soak ................48 View Flow Rates ..................73 Module Status ..................49 View and Clear Flow Logs ..............74 MV Settings ....................50 View Current Flow .................75 ESP-LXME Controller...
- Page 5 Connect Field Wiring ............105 OFF ..................90 Connect Valve Wires ................. 105 Adjust Display Contrast ..............90 Connect Local Weather Sensor ........... 106 Close the Master Valve ................91 Complete Installation ...........108 Install Front Door ................108 Verify Field Installation ..............108 ESP-LXME Controller...
- Page 6 this page intentionally left blank...
-
Page 7: Section A - Introduction & Overview
Section A - Introduction & Overview Controller Features The ESP-LXME controller has a variety of advanced features to help Welcome to Rain Bird you manage water efficiently, including: l Flow, power, and station priority management Thank you for purchasing your new state-of-the-art Rain Bird ESP- LXME controller. -
Page 8: Controls, Switches And Indicators
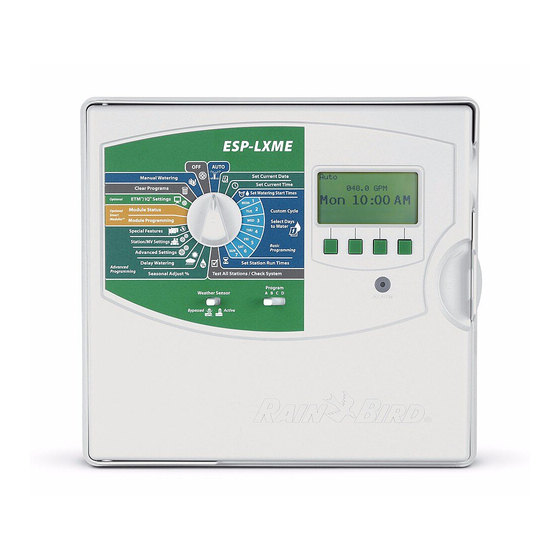
Controls, Switches and Indicators Display Displays time of day during normal operation; shows commands Key operational features of the ESP-LXME Controller front panel: during programming; shows active station and remaining run Programming Dial time during watering. Used for programming and to turn the controller on and off. -
Page 9: Basic Operation
Basic Operation The ESP-LXME lets you set a delay between stations. For example, if you set a one minute delay, station 1 will run until finished, followed Valves (or stations) operate at times as specified by irrigation programs. by a one minute delay. Then station 2 will run, followed by another one The controller sends power to the first valve solenoid to open. -
Page 10: Esp-Lxme Model Variants
24 VAC. remove the jumper wire unless you install a weather sensor. See Section H, Installation, Connect Local Weather Sensor for more BM-LXME Base Module details. The BM-LXME Base Module is the standard base module for ESP-LXME Controller models. ESP-LXME Controller... -
Page 11: Esplxm-Sm Station Modules
ESPLXM-SM Station Modules install in module slots 1 through 4 and provide wiring terminals for irrigation valves and a valve common. Each ESP-LXME controller comes standard with either an 8 or 12 station module. This can easily be expanded by adding one to three additional Station Expansion Modules. -
Page 12: Programming Overview
Irrigation Controller Definitions the Programming Chart instructions for more details. Programs Locate the Programming Chart that came with the ESP-LXME The process of telling the controller exactly when and for how long controller. you want to water. The controller opens and closes the remote control valves according to a program you set. -
Page 13: Storing The Programming Chart
Cabinet in Section H for more details. Remote Programming CAUTION: The controller can not run irrigation or system The ESP-LXME controller front panel can be programmed while diagnostics with the front panel detached. Re-connect the front operating under battery power. -
Page 14: Programming Checklist
Programming Checklist Set Up Programs (Optional) Set seasonal adjust ............. Page 31 When programming the ESP-LXME controller for the first time, it is recommended that you complete the following steps in order. Create a water window ............. Page 36 For your convenience a check-off box is provided for each step. -
Page 15: Auto
OFF position when all irrigation is canceled. Turn the controller dial to AUTO. To cancel a currently running program, turn the controller dial to OFF for three seconds and then return the dial to AUTO. ESP-LXME Controller... -
Page 16: Alarm Conditions
NOTE: Take the appropriate action to address each alarm condition. When all alarms have been addressed, the alarm light on the front panel will no longer be illuminated. Turn the controller dial to AUTO. ESP-LXME Controller... -
Page 17: Resetting The Controller
Resetting the Controller Use a pen or pencil to depress the RESET button. Sometimes you may want to reset (or reboot) the ESP-LXME controller. The “Rain Bird” screen appears, confirming reset. Using the controller’s reset feature does not change or delete the programs you have programmed into the controller. - Page 18 ESP-LXME Controller...
-
Page 19: Section B - Basic Programming
Program Select Switch Weather Sensor Bypassed/Active Switch Always begin programming by setting the Program Select switch to A weather sensor is not required for the ESP-LXME controller, but can the desired program. increase functionality by allowing you to prevent or pause irrigation based on changing weather conditions. -
Page 20: Set Current Date
Turn the controller dial to Set Current Date. The Set Current Date screen appears. Press the + and – buttons to set the current day; then press Next. Press the + and – buttons to set the current month; then press Next. ESP-LXME Controller... -
Page 21: Set Current Time
NOTE: Be sure to set the hour correctly to either AM or PM. l Press and HOLD buttons to accelerate settings for hours and minutes. Press the + and – buttons to set the current minute; then press Next. ESP-LXME Controller... -
Page 22: Set Watering Start Times
Station Run Time into smaller cycle times. If you plan to use Cycle+Soak, only a single Watering Start Time is required for each program. See Section D, Set Up Cycle+Soak for more details. ESP-LXME Controller... -
Page 23: Select Days To Water
NOTE: If the desired program is not selected, use the Program The ESP-LXME controller can be programmed to irrigate on different Select switch to change it. See Section B, Program Select Switch days, dates and cycles. Regardless of which Watering Cycle you set, for more details. -
Page 24: Station Run Times
NOTE: Seasonal Adjust % adjustments will adjust the Station Run Time down to the second. For example, if the Run Time is set for 1 minute and the Seasonal Adjust % is set to 50% then the adjusted Run Time equals 30 seconds. ESP-LXME Controller... -
Page 25: Section C - System Diagnostics
Review and confirm scheduled irrigation Programs, Program Run Times and Station Run Times. Confirm Programs The ESP-LXME controller can make calculations and provide feedback on Start Times and total Run Times for programs and stations. Program Summary Review program information for all programs: Turn the controller dial to Test All Stations/Check System. -
Page 26: Review Program
Next. days displayed. Press Next. The Confirm Programs screen appears. Press the Down Arrow The Run Times review screen appears with run times for each button to select Review Program; then press Next. station displayed. Press Next. ESP-LXME Controller... - Page 27 The Weather Sensor Assignment review screen appears with remaining until next watering date displayed. Press Next. stations that use sensor override displayed. Press Next. The Calendar Day Off review screen appears with all selected calendar days off displayed. Press Next. ESP-LXME Controller...
- Page 28 The Maximum Number of SimulStations for controller review screen appears with the maximum number of stations that can operate simultaneously for that controller are displayed. Press Next. The Backup Programs review screen appears with the Contractor Default backup program status displayed. Press Next. ESP-LXME Controller...
-
Page 29: Program Run Time
If SimulStations have been set to more than 1, total irrigation time will be less. Change the Program Select switch and repeat this process to review and confirm Program Run Times for other programs as desired. ESP-LXME Controller... -
Page 30: Station Run Time
Station Run Time calculations. See Section D, Set The Check System screen appears with Confirm Programs Up Cycle+Soak for more details. selected; press Next. The Confirm Programs screen appears. Press the Down Arrow button to select Station Run Time; then press Next. ESP-LXME Controller... -
Page 31: Test All Stations
The Check System screen appears. Press the Down Arrow button to select Test All Stations; then press Next. The Test All Stations screen appears. Press the + and – buttons to adjust the Test Run Time (adjustable from 1 to 10 minutes) per station; then press Run. ESP-LXME Controller... -
Page 32: Wiring Diagnostics
Wiring Diagnostics Raster Wiring Test The ESP-LXME controller can quickly test to determine if any stations Although finding the exact location of issues in the field often requires have shorted or open wires or valve solenoids. some amount of in-the-field troubleshooting, the controller has some built-in features to help you narrow down the possible issues. - Page 33 When the test is complete, the results are displayed on the screen. Press the + and - buttons to scroll through all stations that have short circuits or open circuits. ESP-LXME Controller...
-
Page 34: Weather Sensor Status
Auto screen. This is not considered an alarm, so the controller The Check System screen appears. Press the Down Arrow button alarm light will not illuminate. to select Wthr Sensor Status; then press Next. The Weather Sensor Status screen appears, showing the status of the installed weather sensor. ESP-LXME Controller... -
Page 35: Master Valve Status
Turn the controller dial to Test All Stations/Check System. The Check System screen appears. Press the Down Arrow button to select Master Valve Status; then press Next. The MV Status screen appears, showing the status of the installed master valve. ESP-LXME Controller... - Page 36 ESP-LXME Controller...
-
Page 37: Section D - Advanced Programming
Section D - Advanced Programming Adjust Individual Program Turn the controller dial to Seasonal Adjust %. The ESP-LXME controller has a wide variety of advanced but easy-to- use features designed to simplify irrigation. Seasonal Adjust % Seasonal Adjust % allows you to use the heaviest irrigation season as a baseline and adjust to lesser amounts of watering at other times of the year. -
Page 38: Adjust By Month
By Month; then press Next. programs as desired. The Seasonal Adjust by Month screen appears with % Adjust selected; press Next. NOTE: The % Adjust will automatically change to the new month’s percentage setting on the first day of the month. ESP-LXME Controller... -
Page 39: Select Programs To Adjust
The Seasonal Adjust screen appears. Press the Down Arrow button to select By Month; then press Next. The Seasonal Adjust by Month screen appears. Press the Down Arrow button to select Select PGMs; then press Next. ESP-LXME Controller... -
Page 40: Delay Watering
Rain Delay calculates and displays automatically. The ESP-LXME can also be equipped with an optional Rain Bird ET Manager Cartridge to automatically calculate and automate rain shutdown. Ask your Rain Bird distributor for more details or visit the Rain Bird web site, www.rainbird.com. -
Page 41: Calendar Day Off
The Calendar Day off screen appears, showing (up to 5) scheduled calendar days off in chronological order. Unprogrammed days will The ESP-LXME controller can be programmed to suspend irrigation on show as Unused. a particular calendar date, up to 5 different days of the year. -
Page 42: Water Windows
– buttons to set both the Open and Close times to OFF (between 11:59 and 12:00 AM). To set another program, change the Program Select switch to the desired program; a confirmation appears. Repeat this process to set or clear Water Windows for other programs as desired. ESP-LXME Controller... -
Page 43: Station Delay
The Delay Watering screen appears. Press the Down Arrow button to select PGM Station Delay; then press Next. The ESP-LXME controller can be programmed to include a delay between stations. The Station Delay screen appears. Press the + and – buttons to set the delay time (from 00:01 second to 10:00 minutes). -
Page 44: Weather Sensor
Custom Prevent Sensors When a weather condition becomes true, a Custom Prevent sensor A weather sensor is not required for the ESP-LXME controller, but will stop irrigation but allow the irrigation timer to continue to run. it can increase functionality by allowing you to prevent or pause When the condition becomes false again, irrigation will resume at the irrigation based on changing weather conditions. -
Page 45: Weather Sensor Setup
NOTE: The weather sensor is turned on (Active) or off (Bypassed) The Weather Sensor Setup screen appears. Press the + and – using the Weather Sensor switch on the controller front panel. buttons to set the weather sensor type; then press Next. ESP-LXME Controller... -
Page 46: Advanced Settings
The process for setting up Custom, Odd, Odd no 31st, and Even Watering Day Cycles Watering Cycles is very similar. The ESP-LXME controller supports a variety of flexible watering day Turn the controller dial to Advanced Settings. cycle options. Watering Cycle Definitions Custom Days: irrigation starts on selected days of the week. -
Page 47: Cyclical Days
Cyclical Days Press the + and – buttons to set the first date for the Watering Cycle to begin; then press Next. Turn the controller dial to Advanced Settings. l Press and HOLD buttons to accelerate settings for dates. ESP-LXME Controller... - Page 48 Change the Program Select switch and repeat this process to set Cyclical Watering for other programs as desired. NOTE: Watering day selections carry over to Watering Days dial positions and vice-versa. See Section B, Select Days to Water for more details. ESP-LXME Controller...
-
Page 49: Set Up Simulstations
The Advanced Settings screen appears. Press the Down Arrow button to select SimulStations; then press Next. The ESP-LXME controller defaults to operating a single station at a time. Systems with larger water sources may support operating two or more The Station Settings screen appears with PGM SimulStations stations simultaneously. -
Page 50: Set Simulstations Tm For Controller
The ESP-LXME Maximum Number of SimulStations screen Set SimulStations for Controller appears. Press the + and – buttons to set the maximum number of NOTE: The LXME SimulStations settings will supersede program- irrigation stations (from 1 to 5) that can operate simultaneously;... -
Page 51: Station Sequencing
Station Sequencing Turn the controller dial to Advanced Settings. The ESP-LXME offers advanced programming features to optimize water windows. The Station Sequencing option allows you to select from two methods of station sequencing for program operation: l Sequence by Station Number (system default). -
Page 52: Station/Mv Settings
Station Settings NOTE: Station Priorities are only used when Station Sequencing The Station Settings option tells the ESP-LXME controller how to is set to Sequence by Station Priority. If you’re using the default interact with other stations, the master valve, and the weather Sequence by Station Numbers, then skip the next step by pressing sensor. - Page 53 – buttons to select Obey or Ignore; then press Next. NOTE: The weather sensor can be turned on (Active) or off (Bypassed) using the Weather Sensor switch on the controller front panel. Repeat this process to set up additional stations. ESP-LXME Controller...
-
Page 54: Set Up Cycle+Soak Tm
Set Up Cycle+Soak The ESP-LXME controller Cycle+Soak feature allows water to be applied to stations intermittently and without creating complex programs. It can apply to any station and is useful for locations such as hillsides which can be difficult to irrigate effectively. -
Page 55: Module Status
Turn the controller dial to Station/MV Settings. The Station/MV Settings screen appears. Press the Down Arrow button to select Module Status; then press Next.. The Module Status screen appears. The current status of any installed station modules is displayed. ESP-LXME Controller... -
Page 56: Mv Settings
The MV Settings screen appears. Press the + and – buttons to select Normally Open or Normally Closed for the MV; then press The ESP-LXME supports one master valve which must be set up in the Next. controller. Both Normally Open master valves (NOMVs) and Normally Closed master valves (NCMVs) are supported. -
Page 57: Section E - Flow Management
Section E - Flow Management The ESP-LXME controller offers several tools to dynamically manage The Special Features screen appears. Press the Down Arrow the hydraulics of the irrigation system including: button to select Set Flow Units; then press Next. FloManager The Flow Units screen appears. -
Page 58: Flomanager Tm Overview
FloManager Overview Set Up and Use FloManager FloManager is a standard feature of the ESP-LXME controller which Enable (Or Disable) FloManager manages flow demands on the water source and can be used with or without an actual flow sensor. Turn the controller dial to Advanced Settings. - Page 59 If Station Sequencing was previously set to Station Numbers, then turning FloManager ON will automatically change the setting to Station Priorities. Press Accept to make the change or else press Reject. See Section D, Advanced Programming, Station Sequencing for more details. ESP-LXME Controller...
-
Page 60: Set Flomanager Tm Flow Rate
The Advanced Settings screen appears with Watering Day Cycles selected. Press the Down Arrow button to select FloManager; then press Next. The FloManager screen appears with FloManager On/Off selected. Use the Down arrow to select FloManager Flow Rate; then press Next. ESP-LXME Controller... -
Page 61: Set Station Flow Rates Manually
The Advanced Settings screen appears with Watering Day Cycles selected. Press the Down Arrow button to select FloManager; then press Next. The FloManager screen appears with FloManager On/Off selected. Use the Down arrow to select Station Flow Rates; then press Next. ESP-LXME Controller... -
Page 62: Flowatch Tm Overview
Module. irrigation system. NOTE: If you purchased a flow-enabled version of the ESP-LXME FloWatch features include: Controller such as the ESP-LXMEF, this step is unnecessary, since l Learn Flow Utility your controller shipped with the FSM-LXME Flow Smart Module. - Page 63 CAUTION: Be careful not to bend the pins in the sockets when installing the module. Orient the connector on the bottom of the FSM-LXME Flow Smart Module with the connection socket in Slot 0 on the controller backplane. ESP-LXME Controller...
-
Page 64: Connect Flow Sensor
Module Programming Install the flow sensor in the field according to the manufacturer’s Setup Flow Sensor instructions, and run the flow sensor wire to the ESP-LXME Turn the controller dial to Module Programming. controller. Route the flow sensor wire through the knockout on the bottom of the controller. - Page 65 NOTE: Some flow sensor types require extra parameter settings, such as inside pipe diameter or K-factor and Offset. Consult the manufacturers documentation or contact Rain Bird for assistance if required. ESP-LXME Controller...
-
Page 66: Seef And Self Settings And Actions
Press the + and – buttons to set the Settling Time; then press Next. The Smart Module PGM screen appears with Flow Smart Module selected; press Next. The Flow Smart Module PGM screen appears. Use the Down Arrow to select SEEF/SELF Settings; then press Next. ESP-LXME Controller... - Page 67 SEEF Low flow Threshold. Using a higher percentage can result in false alarms due to normal hydraulic variability. NOTE: If the selected action for both SEEF and SELF is Alarm Only, then the system is not disabled and the Delay to Re-Enable screen will not be shown. ESP-LXME Controller...
- Page 68 Press and HOLD buttons to accelerate settings for hours and minutes. Press the + and – buttons to set minutes before Re-Enable; then press Next. NOTE: SEEF and SELF settings are not active until FloWatch is activated. ESP-LXME Controller...
-
Page 69: Station Flow Rates
Next. A Learn Flow confirmation screen appears; press Next. The Flow Smart Module PGM screen appears. Press the Down A second Learn Flow confirmation screen appears; press Next. arrow to select Station Flow Rates; press Next. ESP-LXME Controller... - Page 70 An overwrite warning screen appears; press Start. The Learn Flow Starting confirmation screen appears, confirming the delay time until the Learn Flow operation will start. NOTE: The Learn Flow Utility can take up to 5 minutes per station. ESP-LXME Controller...
-
Page 71: Learn Flow Automatically (Custom Stations)
The Flow Smart Module PGM screen appears. Press the Down controller will issue an error message and cancel the Learn Flow arrow to select Station Flow Rates; press Next. exercise. A Learn Flow confirmation screen appears; press Next. A second Learn Flow confirmation screen appears; press Next. ESP-LXME Controller... - Page 72 NOTE: You can choose a delay between 0 hours, 0 minutes up to 24 hours. A confirmation screen appears; press Start again to set the Learn Flow exercise. The Learn Flow Starting confirmation screen appears, confirming the delay time until the Learn Flow operation will start. ESP-LXME Controller...
-
Page 73: Set Station Flow Rates Manually
The Smart Module PGM screen appears with Flow Smart Module selected; press Next. The Flow Smart Module PGM screen appears with Set Flow Rates selected; press Next. Repeat this process to manually set up Flow Rates for additional stations as desired. ESP-LXME Controller... -
Page 74: Clear Flow Rates
Turn the controller dial to Module Programming. The Smart Module PGM screen appears with Flow Smart Module selected; press Next. The Flow Smart Module PGM screen appears. Press the Down Arrow button to select Station Flow Rates; press Next. ESP-LXME Controller... -
Page 75: Enable (Or Disable) Flowatch
FloWatch to react appropriately to the SEEF and SELF settings. The Smart Module PGM screen appears with Flow Smart Module selected; press Next. The Flow Smart Module PGM screen appears. Use the Down Arrow to select FloWatch On/Off; then press Next. ESP-LXME Controller... -
Page 76: Module Status
Flow Alarm conditions will be created. View Station Flow Alarms Turn the controller dial to Module Status. The Smart Module Status screen appears with Flow Smart Module selected; press Next. The Flow Module Status screen appears with View Flow Alarms selected; press Next. ESP-LXME Controller... -
Page 77: View Mainline Flow Alarms
The Smart Module Status screen appears with Flow Smart Module selected; press Next. NOTE: Mainline alarms indicate alarms for mainline flow conditions, not stations. The Flow Module Status screen appears with View Flow Alarms selected; press Next. ESP-LXME Controller... -
Page 78: Clear Flow Alarms
The Smart Module Status screen appears with Flow Smart Module NOTE: Mainline alarms indicate alarms for mainline flow selected; press Next. conditions, not stations. The Flow Module Status screen appears with View Flow Alarms selected; press Next. ESP-LXME Controller... -
Page 79: View Flow Rates
NOTE: POC rate is the maximum flow rate for the water source. The Smart Module Status screen appears with Flow Smart Module selected; press Next. The Flow Module Status screen appears. Press the Down Arrow button to select View Flow Rates; then press Next. ESP-LXME Controller... -
Page 80: View And Clear Flow Logs
The Smart Module Status screen appears with Flow Smart Module The confirmation screen appears; press Yes to clear the logs. selected; press Next. The Flow Module Status screen appears. Press the Down Arrow button to select View Flow Logs; then press Next. ESP-LXME Controller... -
Page 81: View Current Flow
SEEF or SELF condition (see Setting Up SEEF and SELF for more details). The Smart Module Status screen appears with Flow Smart Module selected; press Next. The Flow Module Status screen appears. Press the Down Arrow button to select View Current Flow; then press Next. ESP-LXME Controller... - Page 82 ESP-LXME Controller...
-
Page 83: Section F - Options & Special Features
Set Hours Mode You can set the ESP-LXME controller to one of six supported languages; You can set the ESP-LXME controller to display time in one of three English, Spanish, French, Portuguese, Italian or German. Changes to the hours modes: Auto (default for your region), AM/PM or 24 Hour. -
Page 84: Backup And Recall Programs
Backup and Recall Programs The Special Features screen appears. Press the Down Arrow button to select Backup Programs; then press Next. The ESP-LXME controller comes standard with a simple to use backup The Backup Programs screen appears with Store Programs programs feature. -
Page 85: Recall Default Programs
Recall Programs they can not be restored. The Special Features screen appears. Press the Down Arrow button to select Backup Programs; then press Next. The Backup Programs screen appears. Press the Down Arrow button to select Recall Programs; then press Next. ESP-LXME Controller... -
Page 86: Delayed Recall
Turn the controller dial to Special Features. The Special Features screen appears. Press the Down Arrow button to select Backup Programs; then press Next. The Backup Programs screen appears. Press the Down Arrow button to select Delayed Recall; then press Next. ESP-LXME Controller... -
Page 87: Section G - Auxiliary Operation
A confirmation screen appears. To clear the selected Program, press and hold down the Yes button for four seconds. If you’re not The ESP-LXME controller allows you to clear an individual Program, sure, press No. all of your Programs, or to Restore the controller to its factory default condition. -
Page 88: Clear All Programs
The Clear Programs screen appears. Press the Down Arrow button to select All Programs; then press Next. A confirmation screen appears. To Clear All Programs, press and hold down the Yes button for four seconds. If you’re not sure, press No. ESP-LXME Controller... -
Page 89: Restore Defaults
Restore Defaults A confirmation screen appears. Restore the ESP-LXME controller’s factory default settings. Turn the controller dial to Clear Programs. CAUTION: Be very careful about using the Restore Defaults option as all previous settings will be permanently cleared from system memory. Consider using the Clear All Programs option instead. -
Page 90: Manual Watering
The Station Run Time will default to the Program Run Time. Press the + and – buttons to adjust the station Run Time (from 0 hours, The ESP-LXME controller allows you to manually start a station, a 1 minute to 12:00 hours). Press the Run button to start irrigation program, or to open a Normally Closed Master Valve (NCMV) to provide for that station. -
Page 91: Start Program Manually
The Manual Watering Start Program screen appears. Press Run to start the Program or else press Back to cancel. NOTE: If the desired program is not selected, use the Program Select switch to change it. See Section B, Program Select Switch for more details. ESP-LXME Controller... -
Page 92: Mv Water Window
MV Water Window calculates automatically; then press Next. NOTE: To clear a previously set MV Water Window, press the + and – buttons to set both the Open and Close times to OFF (between 11:59 PM and 12:00 AM). ESP-LXME Controller... - Page 93 MV Water Window. Press the + and – buttons to enter a sufficiently large value so that flow from hoses and other manual watering devices will not trigger a FloWatch SEEF High Flow alarm. ESP-LXME Controller...
-
Page 94: Manually Opening A Mv
The Manual Watering screen appears. Press the Down Arrow button to select MV Water Window ; then press Next. The MV Water Window screen appears. Press the Down Arrow button to select Manual MV Open ; then press Next. ESP-LXME Controller... -
Page 95: Test All Stations
Test All Stations; then press Next. The Test All Stations screen appears. Press the + and – buttons to adjust the Test Run Time (adjustable from 1 to 10 minutes) per station; then press Run. ESP-LXME Controller... -
Page 96: Off
Adjust the contrast settings for the controller display for better visibility. Turn the controller dial to OFF. The All Watering Off screen appears and the current contrast adjustment setting will display for 10 seconds. Press the + and – buttons to adjust contrast up or down. ESP-LXME Controller... -
Page 97: Close The Master Valve
The All Watering Off screen appears. Press the Close MV button. A confirmation screen appears. To close the normally open master valve, press and hold down the Yes button for four seconds. If you’re not sure, press Back. ESP-LXME Controller... - Page 98 ESP-LXME Controller...
-
Page 99: Section H - Installation
Installation Checklist Mounting hardware (5 screws, 5 plastic wall anchors). Controller cabinet keys. When installing the ESP-LXME controller for the first time, it is recommended that you complete the following steps in order. ESP-LXME Controller Installation, Programming, & Operation For your convenience a check-off box is provided for each step. -
Page 100: Gather Installation Tools
Thin Blade Screwdriver Wire Stripper Lineman’s Pliers Wire Nuts (Provided) Torpedo Level Marking Pencil Hammer Electric Drill (or Hammer Drill if installing in masonry or concrete wall) Grounding Strap Waterproof Caulking #8 AWG or #10 AWG Bare Ground Wire ESP-LXME Controller... -
Page 101: Install The Controller
Install the Controller 15 in. 14.32 in. The ESP-LXME controller mounts to a wall (or suitable mounting (38,1 cm) (36,4 cm) surface). NOTE: An optional metal cabinet (LXMM) and pedestal Cabinet Depth 12.69 in. (LXMMPED) are also available for the ESP-LXME controller. If you 5.5 in (14 cm) -
Page 102: Access Controller Cabinet
Pull it towards you to open the door, swinging it to the left. To remove the door, carefully pull the door away from the cabinet until the door hinges separate from the plastic posts. 6 3 4 ESP-LXME Controller... -
Page 103: Remove Modules
Remove Modules front panel by gently pulling the connector out of the socket. Every ESP-LXME Controller ships with two modules packaged inside the cabinet, one base module (Base or Flow Smart) and one station CAUTION: Be careful not to bend the pins in the sockets when module (SM8 or SM12). -
Page 104: Mount Controller
Then remove the template and drill holes in the mounting surface, installing wall anchors if necessary. NOTE: If the controller needs to be mounted on an uneven surface like stucco, place (or install) a section of exterior plywood between the controller and the wall. ESP-LXME Controller... -
Page 105: Connect Power To The Controller
Connect Power to the Controller Connect Power Source The ESP-LXME controller has an internal transformer that reduces supply Surge Protection and Grounding voltage (120 VAC in U.S. models; 230 VAC in international models; 240 The ESP-LXME controller is equipped with built-in electrical surge VAC in Australian models) to 24 VAC. - Page 106 Once wiring is completed, fill top of conduit with waterproof caulking to prevent insect intrusion into the controller cabinet. 3 wires Verify that all connections are secure. Then replace the cover of the transformer wiring compartment and secure it with the screw. ESP-LXME Controller...
-
Page 107: Re-Install Front Panel
White supply wire (neutral) to the Blue supply wire (neutral) to the white transformer wire blue transformer wire Green supply wire (ground) to the Green-with-yellow-stripe supply green transformer wire wire (ground) to the green-with- yellow-stripe transformer wire ESP-LXME Controller... -
Page 108: Install Modules
Slot 0 on the controller backplane. Install BM-LXME Base Module Install the BM-LXME Base Module in Slot 0. NOTE: If your ESP-LXME controller included an FSM-LXME Flow Smart Module, see Section E for installation procedures. Carefully fasten the module onto the controller backplane, pressing firmly until it snaps into place. -
Page 109: Install Station Module
Orient the connector on the bottom of the station module with the connection socket in Slot 1 on the controller backplane. (An Install the station module in Slot 1 that was included with your ESP-LXME ESP-LXM-SM8 is shown.) controller. Additional station modules can be purchased separately. -
Page 110: Dynamic Station Numbering
The Module Labels screen is displayed. Locate the Module Station Numbering Labels that are provided on a separate foldout sheet. The ESP-LXME controller will automatically detect any new station Press Next to continue. modules that have been installed. Follow the instructions on the front panel LCD to configure a station module. -
Page 111: Connect Field Wiring
Field wires for valves are connected to module terminals using quick connectors. Press the swing arm of the appropriate terminal and insert the wire. When you release the spring arm, the clamp will hold the wire. Master Valve Common Wire ESP-LXME Controller... -
Page 112: Connect Local Weather Sensor
Connect Local Weather Sensor caulking to prevent insect intrusion into the controller cabinet. The ESP-LXME can accept input from a single weather sensor wired directly to the controller or through a wireless receiver. A local weather sensor can be bypassed with the sensor bypass switch on the controller front panel. - Page 113 To Connect a Wireless Local Weather Sensor: Run continuous sensor wire from the weather sensor to the ESP- Run wire from the wireless receiver to the ESP-LXME controller. LXME controller. Route wire through knockout on the bottom of the controller.
-
Page 114: Complete Installation
If water is available and you would like to test some or all of your stations, the easiest way to do so is by using the Test All Stations feature of the controller. See Section C, Test All Stations for more details. ESP-LXME Controller... - Page 115 EN55022 Conducted Emissions EN61000-3-2 EN61000-3-3 EN55014-2: 2001 EN61000-4-2 EN61000-4-3 EN61000-4-4 EN61000-4-5 EN61000-4-6 EN61000-4-8 EN61000-4-11 Rain Bird Corporation Manufacturer’s Name: Manufacturer’s Address: 9491 Ridgehaven Court San Diego, CA 92123 619-671-4048 Irrigation Controller Equipment Description: Requirements for household Equipment Class: appliances, electric tools and...
- Page 116 RAIN BIRD CORPORATION 6991 E. Southpoint Road Tucson, AZ 85756 © 2012 Rain Bird Corporation ® ”Rain Bird”, “SimulStations”, “FloManager”, “FloWatch”, “FloZone” and “Cycle+Soak” are registered trademarks of Rain Bird Corporation. All rights reserved. www.rainbird.com Jan-2012 P/N: 638083-01...
Need help?
Do you have a question about the ESP-LXME and is the answer not in the manual?
Questions and answers