
Related Manuals for Whirlpool 4.3 CU FT


Summary of Contents for Whirlpool 4.3 CU FT
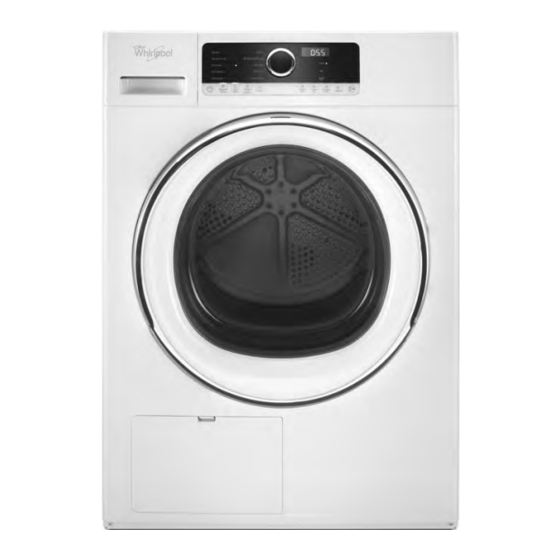
- Page 1 L-93 Multimedia Enhanced SERVICE MANUAL WHIRLPOOL 4.3 CU FT COMPACT HEAT PUMP DRYER WHD3090GW WHD5090GW W11040040A...
- Page 2 This Whirlpool Service Manual, (Part No. W11040040A), provides the In-Home Service Professional with service information for the “WHIRLPOOL 4.3 CU FT COMPACT HEAT PUMP DRYER.” The Wiring Diagram used in this Service Manual is typical and should be used for training purposes only.
-
Page 3: Table Of Contents
TABLE OF CONTENTS WHIRLPOOL COMPACT HEAT PUMP DRYER SECTION 1 — GENERAL INFORMATION DRYER SAFETY ............................1-2 GENERAL INFORMATION ........................1-3 GENERAL THEORY OF OPERATION .....................1-4 CONTROL PANEL AND FEATURES .......................1-6 DRYER MAINTENANCE ........................1-7 MODEL & SERIAL NUMBER LOCATION ....................1-8 TECH SHEET LOCATION ........................1-8 MODEL AND SERIAL NUMBER NOMENCLATURE ................1-9... - Page 4 REMOVING THE FRONT BULKHEAD ....................4-19 REMOVING THE BACK PANEL ......................4-20 REMOVING THE HEAT PUMP (BASE ASSEMBLY) ................4-21 * Video Available Look for this ICON throughout Section 4 PRODUCT SPECIFICATIONS & WARRANTY INFORMATION SOURCES (inside back cover) Whirlpool Compact Heat Pump Dryer...
-
Page 5: Section 1 - General Information
GENERAL INFORMATION Section 1: General Information This section provides general safety, parts, and information for the “Whirlpool Compact Heat Pump Dryer.” n Dryer Safety n Introduction n General Theory of Operation n Control Panel and Features n Dryer Maintenance n Model/Serial Number Location n Tech Sheet Location n Model &... - Page 6 You can be killed or seriously injured if you don't follow instructions. All safety messages will tell you what the potential hazard is, tell you how to reduce the chance of injury, and tell you what can happen if the instructions are not followed. Whirlpool Compact Heat Pump Dryer...
- Page 7 GENERAL INFORMATION General Information INTRODUCTION The Whirlpool compact dryer has a 24” width and a ventless design to take the next step in energy efficiency. It recycles air and removes moisture to provide the consumer with a more efficient drying experience. It is flexible enough to install virtually anywhere and is our most space-saving dryer available.
-
Page 8: General Theory Of Operation
3 - Post Condenser 1 - Compressor HIGH SIDE Assembly 2 - Condenser Heat Exchanger 4 - Capillary Assembly Tube LOW SIDE 5 - Evaporator Warm Humid Process Air In From Drum Figure 3 - Sealed System Whirlpool Compact Heat Pump Dryer... - Page 9 The Heat Pump Compact Dryer is not unlike its predecessor—the Whirlpool Hybrid Heat Pump Dryer. Most of the components used in the Whirlpool Hybrid Dryer are also used in the new Heat Pump Compact Dryer. Think of the compressor as the heater.
-
Page 10: Control Panel And Features
12 hours. Tumbling can be stopped any time by touching the Power button to turn off the dryer. Control Lock Use to lock the controls of the dryer and avoid an accidental change in cycle options or preferences during a drying cycle. Whirlpool Compact Heat Pump Dryer... -
Page 11: Dryer Maintenance
Press tab down and open lint screen. recommendations), firmly back into place. Whirlpool Compact Heat Pump Dryer Roll lint off the screen with your fingers. Push the lint screen linen, wool, and IMPORTANT: Clean lint screen before each dryer use firmly back into place. -
Page 12: Model & Serial Number Location
Model WHD5090G0 Serial No. MF42512345 Model & Serial Number Label Location Figure 9 - Model / Serial Number Tech Sheet Location Tech Sheet Location (Inside right side panel) Figure 10 - Tech Sheet Location Whirlpool Compact Heat Pump Dryer... -
Page 13: Model And Serial Number Nomenclature
SERIAL NUMBER 10000 PRODUCTION SITE M = MARION, OH SOURCE PRODUCTION F = Whirlpool Amiens, France YEAR OF PRODUCTION 5 = 2015, 6 = 2016, 7 = 2017 WEEK OF PRODUCTION 2 Digits that represent the week of the year... -
Page 14: Product Specifications
Locks the controls DIMENSIONS Height : 33.5” (85.09 cm) Max Width : 24” (60.96 cm) Depth : 26” (66.04 cm) Depth with door open : 43.31” (110.0 cm) Gross Weight : 101.20 lbs. (45.90 kg) 1-10 Whirlpool Compact Heat Pump Dryer... -
Page 15: Section 2 - Diagnostics & Troubleshooting
DIAGNOSTICS & TROUBLESHOOTING Section 2: Diagnostics & Troubleshooting This section provides diagnostic, fault codes, and troubleshooting information for the “Whirlpool Compact Heat Pump Dryer.” n Control Panel n Abbreviations n Diagnostic Guide n Service Diagnostic Mode/Service Test Cycle n Activating Service Diagnostic Mode... - Page 16 DIAGNOSTICS & TROUBLESHOOTING For Service Technician Use Only Whirlpool Compact Heat Pump Dryer...
-
Page 17: Abbreviations
A potential cause of a control not functioning is corrosion or contamination on connections. Use an ohmmeter to check for continuity across suspected connections. Whirlpool Compact Heat Pump Dryer... -
Page 18: Service Test Cycle
OK. If not, “F23” will be displayed. Press START to go to the next step. Verifies post condenser fan functionality. Press START to go to next step. The last error code detected by the dryer will be displayed. Press START to exit Service Test Cycle. Whirlpool Compact Heat Pump Dryer... -
Page 19: Service Test Cycle Chart
5.2 Extended Compressor Test 5.3 Extended Compressor Test Finished, Waiting to Press START Fan (Post Condenser) Display last error Last Error Code is Displayed code EXIT Exit Service Go to Selection Diagnostic Mode/ Service Test Cycle Whirlpool Compact Heat Pump Dryer... -
Page 20: Fault/Error Codes
ACU connections and harness, and perform Test #5, page 18. Relay Failure (K002 or K003) • Follow same procedure as for F01. Continued on following page . . . Whirlpool Compact Heat Pump Dryer... - Page 21 “3-2-1” and then “rES” appears in the display). Try to run a cycle; if the issue persists, turn off and unplug the dryer, check ACU connections and harness, and perform Test #10, page 21. Whirlpool Compact Heat Pump Dryer...
-
Page 22: Troubleshooting Guide
Door switch problem. See TEST #7: Door Switch, page 20. Motor problem. See TEST #3: Motor Circuit, page 14. ACU problem. See TEST #1: ACU Power Check, page 12. Continued on following page . . . Whirlpool Compact Heat Pump Dryer... - Page 23 The front of the dryer requires a minimum of 1” (25 mm) of airspace, and, for most installations, the rear of the dryer requires 5” (127 mm). Continued on following page . . . Whirlpool Compact Heat Pump Dryer...
- Page 24 STAINS OR LINT Dryer too close to wall. Move dryer away from wall and make sure you have proper BUILDUP ON WALL ventilation. BEHIND DRYER Notes 2-10 Whirlpool Compact Heat Pump Dryer...
-
Page 25: Section 3 - Component Testing
Section 3: Component Testing This section provides a wiring diagram, control board specifications, testing procedures and strip circuits for the “Whirlpool Compact Heat Pump Dryer.” n Testing: Safety Information n Wiring Diagram n Component Testing n TEST #1:ACU Power Check... - Page 26 Any attempt to repair a major appliance may result in personal injury and property damage. The manufacturer or seller cannot be responsible, nor assume any liability for injury or damage of any kind arising from the use of this data sheet. Whirlpool Compact Heat Pump Dryer...
- Page 27 COMPONENT TESTING NOTE: The door switch is a part of the ACU. For Service Technician Use Only HEAT PUMP DRYER WIRING DIAGRAM Line 1 Line 2 Neutral Ground Whirlpool Compact Heat Pump Dryer...
-
Page 28: Test #1: Acu Power Check
¾ If +12 VDC is not present, unplug dryer or disconnect power and replace the ACU. 9. Unplug dryer or disconnect power. 10. Reassemble all parts and panels. 11. Perform the Service Test Cycle on pages 3 and 4 to verify repair. Whirlpool Compact Heat Pump Dryer... - Page 29 SET2 – NTC Heater J11-1 J6-1 NTC Heat 1 J11-3 Moisture Sensor FM – Auxiliary Fan WI1 – MCU Communication J6-3 NTC Heat 2 J2-1 L1 Fan J12-2 +12 VDC J2-3 L2 Fan J12-3 IN/OUT J12-4 Whirlpool Compact Heat Pump Dryer...
-
Page 30: Test #2: Supply Connections (If)
1. Unplug dryer or disconnect power. on the terminal block and make a note of 3. With an ohmmeter, check for continuity Whirlpool Compact Heat Pump Dryer it. This will be L1 (black wire) in the wiring 2. Access the machine electronics without between the neutral (N) terminal of the plug diagram. - Page 31 4. If it is necessary to replace the power on pages 3 and 4 to verify repair. cord, remove the retaining clip that secures Whirlpool Compact Heat Pump Dryer the cord to the back panel. Disconnect the TEST #4: Heat System...
-
Page 32: Test #3 Motor Circuit (M)
Motor Belt Tension Motor Wheel Bracket Spring Bracket MOTOR MOTOR STRIP CIRCUIT MOTOR CONTROL J12-2 J12-3 IN/OUT J12-4 MOTOR RELAY K6 RELAY K5 J13-1 J4-1 J4-2 J13-2 RFI-2 RFI-1 Figure 1 - Motor Strip Circuit Whirlpool Compact Heat Pump Dryer... -
Page 33: Test #4: Heating System (Compressor)
HEAT PUMP (COMPRESSOR) STRIP CIRCUIT COMPRESSOR COMPRESSOR 8.03 ohms J13-1 J5-2 J5-1 J13-2 RFI-2 RFI-1 8.89 ohms THERMAL RELAY K3 RELAY K5 LIMIT START 17uF CAP Figure 1 - Compressor Strip Circuit Whirlpool Compact Heat Pump Dryer... - Page 34 ¾ If there is no continuity, go to step 7. 7. Remove the compressor cover and check for continuity across the thermo-switch on the compressor. ¾ If there is continuity, go to step 8. 3-10 Whirlpool Compact Heat Pump Dryer...
-
Page 35: Test #4C Thermistor (Set2)
59°F (15°C) = 18.47 k ohms M – Motor supply J6-1 J6-3 IF – RFI Figure 2 - ACU Connectors THERMISTOR (NTC) & Pinouts Figure 3 - Thermistor Strip Circuit DO NOT REMOVE OR DESTROY Whirlpool Compact Heat Pump Dryer 3-11... -
Page 36: Test #5: Moisture Sensor
ISOLATED METAL STRIP 0 to 15 M Ω IF – RFI Figure 2 - ACU Connectors HUMIDITY J11-3 & Pinouts SENSOR CHASSIS GND Figure 2 - Moisture Sensor Strip Circuit DO NOT REMOVE OR DESTROY 3-12 Whirlpool Compact Heat Pump Dryer... -
Page 37: Test #5A: Adjusting Customer-Focused Dryness Level
NOTE: If a button other than the cycle selector knob is pressed, the dryness setting is reverted back to its previous setting. 4. Press the POWER button at any time to exit from this mode. Whirlpool Compact Heat Pump Dryer 3-13... -
Page 38: Test #6: Buttons And Indicators
Service Cycle and advance through advance through steps Figure 1- Service Diagnostic Mode/Test Cycle Diagnostic Mode/Service Test Cycle. steps in Service Test Cycle. in Service Test Cycle. Figure 1 - User Interface. 3-14 Whirlpool Compact Heat Pump Dryer... -
Page 39: Test #7: Door Switch (Acu)
1. Unplug dryer or disconnect power. repair. If the failure persists, replace the ACU. DOOR SWITCH/ACU Figure 1- Door Switch Location APPLIANCE CONTROL UNIT (ACU) DOOR SWITCH - ACU DOOR SWITCH LEVER - ACU Whirlpool Compact Heat Pump Dryer 3-15... -
Page 40: Test #8: Drain Pump (Dp)
DRAIN PUMP / WATER LEVEL SWITCH STRIP CIRCUIT DRAIN PUMP J13-1 J13-2 J3-1 J3-3 210 OHMS J8-3 J8-4 WATER LEVEL WATER LEVEL WATER LEVEL REED SWITCH Figure 2 - Drain Pump / Water Level Switch Strip Circuit 3-16 Whirlpool Compact Heat Pump Dryer... -
Page 41: Test #9: Water Level Switch (Sle)
DRAIN PUMP DO NOT REMOVE OR DESTROY J13-1 J3-1 J3-3 J13-2 210 OHMS J8-3 J8-4 WATER LEVEL WATER LEVEL WATER LEVEL REED SWITCH Figure 3 - Drain Pump / Water Level Switch Strip Circuit Whirlpool Compact Heat Pump Dryer 3-17... - Page 42 ¾ If visual check passes, go to step 5. ¾ Retest fan operation. ¾ If connector is not inserted properly, reconnect J2 and retest. FAN STRIP CIRCUIT J13-1 J2-1 J2-3 J13-2 415 - 510 OHMS Figure 1 - Fan Strip Circuit 3-18 Whirlpool Compact Heat Pump Dryer...
- Page 43 HEATER EXCHANGE FILTER SWITCH STRIP CIRCUIT M – Motor supply IF – RFI Figure 2 - ACU Connectors HEATER EXCHANGE SWITCH & Pinouts J8-1 J8-2 DO NOT REMOVE OR DESTROY Figure 2 - Heater Exchange Switch Strip Circuit Whirlpool Compact Heat Pump Dryer 3-19...
-
Page 44: Test #12: Communication Between Ui And Acu (W12)
Figure 2 - ACU Connectors USER INTERFACE STRIP CIRCUIT & Pinouts USER INTERFACE J17-1 UI-4 VPOS VPOS DO NOT REMOVE OR DESTROY J17-2 UI-3 J17-3 UI-2 WIDE WIDE J17-4 UI-1 Figure 2 - User Interface Strip Circuit 3-20 Whirlpool Compact Heat Pump Dryer... -
Page 45: Section 4 - Component Access
Section 4: Component Access Multimedia Enhanced This section provides service parts, assemblies, and component locations for the “Whirlpool Compact Heat Pump Dryer.” n Parts & Assemblies-Top and Console Parts n Parts & Assemblies-Cabinet Parts n Parts & Assemblies-Base Parts n Parts & Assemblies-Drum and Bulkhead Parts n Parts &... - Page 46 12. Harness, RFI 3. Screw 8. Screw 13. Harness, Main 4. Assembly, Control Knob 9. Appliance Control Unit (ACU) 14. Harness, UI 5. Handle, Drawer White 10. Lever, Door Switch 15. Shield, UI (Foil) 16. Screw Whirlpool Compact Heat Pump Dryer...
- Page 47 29. Cover, Heater 8. Clip, Grounding 18. Hose (Inflow to Pump) 30. Seal, Heater Cover 9. Filter Door (Front Panel) 19. Hose, Over Fill (Water Tank to Pump) 31. Screw 10. Filter, Handle 20. Bracket, Hose 32. Screw Whirlpool Compact Heat Pump Dryer...
- Page 48 5. Capacitor 12. Cap, NTC 19. Compressor Thermal Overload Protector 6. Washer, Lock 13. Spring, NTC 20. Seal, Base to Rear Panel 7. Nut 14. Harness, Heat Pump (Ground) 21. Seal, Base to Front Bulkhead Whirlpool Compact Heat Pump Dryer...
- Page 49 6. Wheel, Blower 11. Cover, Blower 2. Bolt 7. Washer 12. Seal, Motor to Blower 3. Washer 8. Nut 13. Bracket, Motor 4. Pulley, Idler 9. Spring, Belt Tension 14. Screw 5. Nut 10. Screw Whirlpool Compact Heat Pump Dryer...
- Page 50 7. Belt, Drum 12. Bearing, Drum (Axis) 3. Screw 8. Assembly, Drum (Complete) 13. Washer, Spring 4. Bulkhead, Front 9. Baffle, Drum 14. Housing, Bearing (Axis) 5. Screw 10. Screw 15. Nut 16. Cover, Bearing (Axis) Whirlpool Compact Heat Pump Dryer...
- Page 51 1 Door, Outer Trim Ring 5. Bushing, Hinge (Outer) 9. Lock, Door 2. Door, Inner Trim 6. Door, Inner 10. Pin, Run/Stop 3. Door, Glass 7. Door, Inner (Hinge) 11. Screw 4. Hinge, Door 8. Door, Inner (Lock) Whirlpool Compact Heat Pump Dryer...
-
Page 52: Removing The Door Assembly & Door Components
2. Using a pair of pliers, grasp the “run/stop” pin (used to depress the door switch paddle) and rotate the pin counter-clockwise 1/4 turn. See Figure 4. Door Pin Figure 4 Figure 2 3. Remove the “run/stop” pin from the door assembly. Whirlpool Compact Heat Pump Dryer... -
Page 53: Removing The Top & Side Panels
(see Figure 3). Remove one screw from lower-front corner. Figure 2 6. Lift up on side panel(s) and remove from dryer. 7. Reverse procedure to reinstall side panel(s). Figure 1 Whirlpool Compact Heat Pump Dryer... -
Page 54: Removing The Interference Filter
Black Wire Interference L1 Top Filter Red Wire L2 Bottom Figure 1 4. Use a T20 Torx driver to remove the two (2) screws securing the Interference Filter to the rear panel. See Figure 2. 4-10 Whirlpool Compact Heat Pump Dryer... -
Page 55: Removing The Console/User Interface
Panel(s)” to remove the “left” side panel. 6. Remove the “front” T20 Torx screws located on the top- front, right-side panel (see Figure 2). Figure 4 9. Disconnect the UI harness and remove the Console/UI from the dryer. Whirlpool Compact Heat Pump Dryer 4-11... -
Page 56: Removing The Appliance Control Unit (Acu)
Water Lvl Sw 2 M – Motor Supply SET2 – NTC Heater J4-1 L1 Motor J6-1 NTC Heat 1 J4-2 L2 Motor J6-3 NTC Heat 2 WI1 – MCU Communication J12-2 +12 VDC J12-3 IN/OUT J12-4 4-12 Whirlpool Compact Heat Pump Dryer... -
Page 57: Removing The Water Tank Housing
Figure 1 3. Unclip the two front tabs on the water tank (see Figure 2). Whirlpool Compact Heat Pump Dryer 4-13... -
Page 58: Removing The Drive Motor
11. Reverse procedure to reinstall motor and blower assembly. Tension Spring Blower Cover Drive Motor Figure 1 8. Use a T20 Torx driver to remove the two screws securing the motor brackets (see Figure 2). Remove brackets and set aside. 4-14 Whirlpool Compact Heat Pump Dryer... - Page 59 Float Switch Drain Pump HX Filter Figure 1 4. If not already, remove the two hoses (drain pump and overfill hoses) from the sump assembly. Figure 3 Continued on next page . . . Whirlpool Compact Heat Pump Dryer 4-15...
- Page 60 12. Depress the release tab and slide the fan assembly out of the dryer (see Figure 7). Wire Terminals Float Sw. Sump Tab Sump Tab Release Drain Pump Figure 5 Figure 7 4-16 Whirlpool Compact Heat Pump Dryer...
-
Page 61: Removing The Front Panel
Figure 2 7. Remove the two T20 Torx screws on the opposite side of the door hinge (see Figure 1). 9. Pull front panel away from the front bulkhead. Remove 2 T20 Screws Figure 1 Whirlpool Compact Heat Pump Dryer 4-17... -
Page 62: Removing The Drum
Using a 10mm nut driver, remove the nut, then remove the drum bearing from the drum shaft. See Figure 7. Tension Spring Drum Bearing 10mm Figure 1 Figure 7 8. Spread rear & front bulkheads and lift drum away from dryer. 4-18 Whirlpool Compact Heat Pump Dryer... -
Page 63: Removing The Front Bulkhead
(see inset in Figure 2.) Lift up and remove the front bulkhead assembly from the base. Remove Screw Remove Screw R & L Bulkhead Clips Figure 2 Figure 1 Whirlpool Compact Heat Pump Dryer 4-19... -
Page 64: Removing The Back Panel
9. Disconnect the two ground terminals from the back panel (see Figure 1). Back Panel Figure 3 Continued on next page . . . Ground Terminals Figure 1 4-20 Whirlpool Compact Heat Pump Dryer... - Page 65 (as illustrated in Figure 7). Remove rear panel from base assembly. Access Cover Figure 5 Figure 7 16. Reverse procedure to reinstall the rear panel assembly. Whirlpool Compact Heat Pump Dryer 4-21...
-
Page 66: Removing The Heat Pump (Base Assembly)
Seal, Base to Front Panel (order and replace) Panel” prior to performing the following steps. Rear Base Seal Compressor Thermistor Drive Motor Blower Wheel Roller Supports Roller Supports HX Lint Filter Front Base Seal 4-22 Whirlpool Compact Heat Pump Dryer... - Page 67 WARRANTY INFORMATION SOURCES IN THE UNITED STATES: FOR PRODUCT SPECIFICATIONS AND WARRANTY INFORMATION CALL: FOR WHIRLPOOL PRODUCTS: 1-800-253-1301 FOR TECHNICAL ASSISTANCE WHILE AT THE CUSTOMER’S HOME CALL: THE TECHNICAL ASSISTANCE LINE: 1-800-832-7174 HAVE YOUR STORE NUMBER READY TO IDENTIFY YOU AS AN...
- Page 68 Whirlpool 4.3 CU FT Compact Heat Pump Dryer W11040040A...