Samsung DV210AEW User Manual
Gas and electric dryer
Hide thumbs
Also See for DV210AEW:
- User manual (68 pages) ,
- Service manual (76 pages) ,
- Fast track troubleshooting (7 pages)
Table of Contents
Advertisement
Available languages
Available languages
Advertisement
Table of Contents

Related Manuals for Samsung DV210AEW


Summary of Contents for Samsung DV210AEW
-
Page 1: User Manual
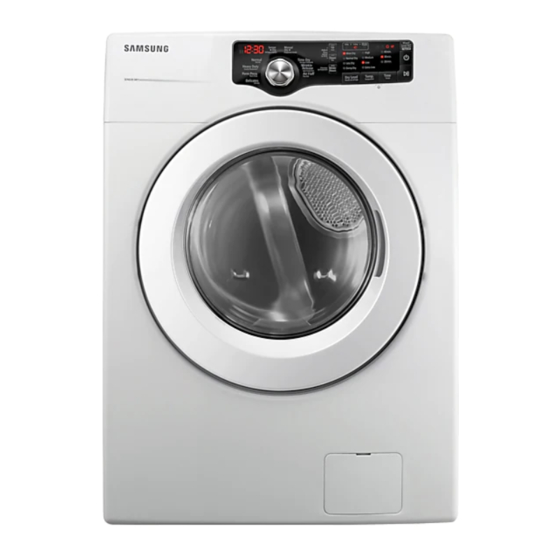
Gas and Electric Dryer imagine Thank you for purchasing this Samsung product. To receive more complete service, please register your product at www.samsung.com/register DV220AE-02810B_EN.indd 1 user manual the possibilities DV210AE* DV220AE* 2010-04-13 ¿ÀÈÄ 2:51:36... -
Page 2: Energy Saving
42 minutes! Giving you time for more important things in life. 4. Energy Saving Samsung dryers are super energy efficient. You can dry up to 3.06 pounds of laundry with 1kWh. Also, both the large capacity and Fuzzy Logic Control save energy by automatically drying your clothes the most efficient way. -
Page 3: Safety Instructions
• Install the clothes dryer according to the manufacturer’s instructions and local codes. • Do not install a clothes dryer with flexible plastic venting materials. If flexible metal (foil type) duct is installed, it must be of a specific type identified by the appliance manufacturer as suitable for use with clothes dryers. - Page 4 safety instructions WARNING: To reduce the risk of fire, electric shock, or injury to persons when using your appliance, follow basic precautions, including the following: WARNING 1. Read all instructions before using this appliance. 2. Do not dry articles that have been previously cleaned in, washed in, soaked in, or spotted with gasoline, dry-cleaning solvents, or other flammable or explosive substances, as they give off vapors that could ignite or explode.
-
Page 5: What To Do If You Smell Gas
WHAT TO DO IF YOU SMELL GAS: • Do not try to light any appliance. • Do not turn on the appliance. • Do not touch any electrical switch. • Do not use any phone in your building. • Clear the room, building or area of all occupants. •... - Page 6 Do not sit on top of the dryer. Because of continuing product improvements, Samsung reserves the right to change specifications without notice. For complete details, see the Installation Instructions packed with your product before selecting cabinetry, making cutouts, or beginning installation.
-
Page 7: Table Of Contents
contents INSTALLING YOUR DRYER OPERATING INSTRUCTIONS, TIPS CARE AND CLEANING SPECIAL LAUNDRY TIPS TROUBLESHOOTING DV220AE-02810B_EN.indd 7 Tools needed for installation See Dryer Exterior Ducting requirements Important to installer Location considerations Alcove or closet installation Mobile home installation Exhausting Gas requirements Electrical requirements Grounding Electrical connections... -
Page 8: See Dryer Exterior
installing your dryer TOOLS NEEDED FOR INSTALLATION Hire a professional to install this dryer properly. If there is a service call performed as a result of poor setup, adjustment, and connection, it is considered the responsibility of the installer. If you install the dryer, you are responsible. -
Page 9: Ducting Requirements
DUCTING REQUIREMENTS • Use a 4-inch (10.2 cm) diameter rigid aluminum or rigid galvanized steel duct. • Do not use a smaller duct. • Ducts larger than 4 inches (10.2 cm) in diameter can result in increased lint accumulation. Lint accumulation should be cleaned regularly. •... -
Page 10: Important To Installer
installing your dryer If the new Dryer is installed into an existing exhaust system you must make sure: • The exhaust system meets all local, state, and national codes. • That a flexible plastic duct is not used. • To Inspect and clean all lint buildup from inside the existing duct. •... -
Page 11: Mobile Home Installation
A minimum of 72 in² (465 cm²) of unobstructed space is required. Call 1-800-SAMSUNG(726-7864) for information on purchasing the Floor Anchoring Kit as an accessory. All mobile home installations must be exhausted to the outside with the exhaust duct termination securely fastened to the mobile home structure, using materials that will not support combustion. -
Page 12: Gas Requirements
installing your dryer GAS REQUIREMENTS Use only natural or LP (liquid propane) gases. THE INSTALLATION MUST CONFORM WITH LOCAL CODES, OR IN THE ABSENCE OF LOCAL CODES, WITH THE NATIONAL FUEL GAS CODE ANSI/Z223.1, LATEST REVISION (FOR THE UNITED STATES), OR WITH THE CAN/CGA-B149 INSTALLATION CODES (FOR CANADA). Gas dryers are equipped with a burner vent for use with natural gas. -
Page 13: Electrical Requirements
ELECTRICAL REQUIREMENTS A Wiring diagram is located on the back of the dryer. • Improper connection of the equipment grounding conductor can result in a risk of electric shock. Check with a qualified electrician or serviceman if you are in doubt as to whether your Dryer is WARNING properly grounded. -
Page 14: Electrical Connections
installing your dryer ELECTRICAL CONNECTIONS Before operating or testing, follow all grounding instructions in the Grounding section. An individual branch (or separate) circuit serving only your Dryer is recommended. DO NOT USE AN EXTENSION CORD. Gas models – U.S. and Canada A 120 volt, 60 Hz AC approved electrical service, with a 15-amp fuse or circuit breaker is required. -
Page 15: Replacement Parts And Accessories
REPLACEMENT PARTS AND ACCESSORIES If your dryer requires replacement parts or accessories, contact the dealer from whom you purchased your dryer or the SAMSUNG customer care center at INSTALLATION Gather the required tools and parts before starting the installation. Read and follow the instructions provided with any tools listed here. -
Page 16: Installing Your Dryer
installing your dryer 4. Review the Exhausting section before installing the exhaust system. Install the ductwork from your dryer to the exhaust hood. The crimped end of the duct sections must point away from your dryer. DO NOT use sheet metal screws when assembling ducting. These joints should be taped. Never use plastic flexible exhaust material. -
Page 17: Final Installation Checklist
3-WIRE system connections 1. Loosen or remove the center terminal block screw. 2. Connect the neutral wire (white or center wire) of the power cord to the center, silver-colored terminal screw of the terminal block. Tighten screw. 3. Connect the other wires to outer terminal block screws. Tighten screws. 4. -
Page 18: Dryer Exhaust Tips
installing your dryer DRYER EXHAUST TIPS Plastic or non-metal flexible duct presents a potential fire hazard. WARNING 1. Make sure your dryer is installed properly so it exhausts air easily. 2. Use a 4” diameter rigid metal duct. Tape all joints, including at the dryer. -
Page 19: Door Reversal
DOOR REVERSAL 1. Unplug the power cord. 2. Remove two door hinge screws. 3. Lift the door and remove 4. Remove a screw on the Frame Front. 5. Remove the two screws on the opposite side of the door hinge. 6. -
Page 20: Overview Of The Control Panel
operating Instructions, tips OVERVIEW OF THE CONTROL PANEL To select a cycle, rotate the Cycle Selector dial to the desired cycle. The indicator light by the cycle name will illuminate. The Normal, Heavy Duty, Perm Press and Delicates cycles are Sensor Dry cycles. Sensor Dry automatically senses the moisture in the load and shuts the dryer off when the selected dryness level (more dry to damp dry) is reached. - Page 21 Digital Graphic Display Dry Level Selection Button Temp Selection Button Time Selection Button Start/Pause selection button Power button Mixed load bell button DV220AE-02810B_EN.indd 21 The display window shows the estimated time remaining in the cycle after the Start/Pause button is pressed. The estimated time remaining may fluctuate as the cycle progresses.
-
Page 22: Child Lock
operating Instructions, tips CHILD LOCK A function to prevent children from playing with your dryer. Setting/Releasing If you want to set or release the Child Lock, press both the Temp. and Time buttons simultaneously for 3 seconds. How to Set: 1. -
Page 23: Rack Dry (Optional Part
RACK DRY (OPTIONAL PART) Installing the drying rack 1. Open the Dryer door. 2. Position the drying rack in the tumbler, placing the front lip of the drying rack on the top of the lint filter. 3. Place the rear legs in the two recessed areas of the dryer’s back wall, then push down the middle of the drying rack to fix. -
Page 24: Clean The Lint Filter
operating Instructions, tips CLEAN THE LINT FILTER • After each load. • To shorten drying time. • To operate more energy efficiently. Cleaning the Lint filter 1. Pull the case-filter out of the dryer. 2. Scrape the dust from the top part of the filter using your fingers. 3. -
Page 25: Tumbler
care and cleaning CONTROL PANEL Clean with a soft, damp cloth. Do not use abrasive substances. Do not spray cleaners directly on the panel. The control panel finish may be damaged by some laundry pre-treatment soil and stain remover products. Apply such products away from your Dryer and wipe up any spills or overspray immediately. -
Page 26: Special Laundry Tips
special laundry tips SPECIAL LAUNDRY TIPS Please follow the care label or manufacturer’s instructions for drying special items. If care label instructions are not available, use the following information as a guide. Bedspreads & Comforters Blankets Curtains & Draperies Cloth Diapers Down–filled Items (jackets, sleeping bags, comforters, etc.) -
Page 27: Troubleshooting
troubleshooting CHECK THESE POINTS IF YOUR DRYER… PROBLEM Doesn’t run. Doesn’t heat. Doesn’t dry. Is noisy. Dries unevenly. Has an odor. Shuts off before load is dry DV220AE-02810B_EN.indd 27 SOLUTION • Be sure the door is latched shut. • Be sure the power cord is plugged into a live electrical outlet. •... -
Page 28: Information Codes
Invalid Dry time Invalid heating Temp EEPROM is not communicating properly Invalid power source Frequency For any codes not listed above, call 1–800–726–7864 (1–800–SAMSUNG) 28_ troubleshooting DV220AE-02810B_EN.indd 28 MEANING Clean the screen or vent. If the problem continues call for service. -
Page 29: Fabric Care Chart
appendix FABRIC CARE CHART The following symbols provide garment care direction. The Clothing care labels include symbols for washing, bleaching, drying and ironing, or dry cleaning when necessary. The use of symbols ensures consistency among garment manufacturers of domestic and imported items. Follow care label directions to maximize garment life and reduce laundering problems. -
Page 30: Protecting The Environment
appendix PROTECTING THE ENVIRONMENT This appliance is manufactured from recyclable materials. If you decide to dispose of this appliance, please observe local waste disposal regulations. Cut off the power cord so that the appliance cannot be connected to a power source. Remove the door so that animals and small children cannot get trapped inside the appliance. -
Page 31: Cycle Chart
CYCLE CHART Cycle Normal Heavy Duty Sensor Dry Perm Press Delicates Time Dry Wrinkle Manual Dry Release Air Fluff DV220AE-02810B_EN.indd 31 Default Temp Sensor dry Time control level High Normal dry 42 min (Medium) High Normal dry 58 min (No change) Medium Normal dry 32 min... - Page 32 Warranty service can only be performed by a SAMSUNG authorized service center. The original dated bill of sale must be presented upon request as proof of purchase to SAMSUNG or SAMSUNG’s authorized service center. SAMSUNG will provide in-home service during the warranty period at no charge, subject to availability within the contiguous United States.
- Page 33 SAVINGS OR OTHER BENEFITS, OR ANY OTHER SPECIAL, INCIDENTAL OR CONSEQUENTIAL DAMAGES CAUSED BY THE USE, MISUSE, OR INABILITY TO USE THIS PRODUCT, REGARDLESS OF THE LEGAL THEORY ON WHICH THE CLAIM IS BASED, AND EVEN IF SAMSUNG HAS BEEN ADVISED OF THE POSSIBILITY OF SUCH DAMAGES.
- Page 34 QUESTIONS OR COMMENTS? Country CALL OR VISIT US ONLINE AT CANADA 1-800-SAMSUNG(726-7864) www.samsung.com Code No. DC68-02810B_EN DV220AE-02810B_EN.indd 34 2010-04-13 ¿ÀÈÄ 2:51:47...
- Page 35 Sèche-linge à gaz et Manuel d’utilisation Un monde Nous vous remercions d’avoir choisi un produit Samsung. Afin de bénéficier d’un service plus complet, veuillez enregistrer votre produit à l’adresse suivante : www.samsung.com/register DV220AE-02810B_CFR.indd 1 électrique de possibilités DV210AE* DV220AE* 2010-04-16 ¿ÀÈÄ 5:59:33...
- Page 36 Les lave-linge et sèche-linge Samsung peuvent être superposés pour optimiser l’espace utile. Les pieds du sèche-linge doivent être démontés pour pouvoir empiler celui-ci sur le lave- linge. Un kit de superposition est disponible en option auprès de votre revendeur Samsung. 2_ caractéristiques DV220AE-02810B_CFR.indd 2...
- Page 37 Félicitations pour l’achat de votre nouveau sèche-linge Samsung. Ce manuel contient de précieuses informations sur l’installation, l’utilisation et l’entretien de votre appareil. Prenez le temps de le lire pour tirer pleinement profit de tous les avantages et de toutes les fonctionnalités de votre sèche-linge.
- Page 38 consignes de sécurité AVERTISSEMENT: afin de réduire les risques d’incendie, d’électrocution ou de blessures lors de l’utilisation de l’appareil, respectez les règles de sécurité de base suivantes : AVERTISSEMENT 1. Lisez toutes les consignes de sécurité avant d’utiliser l’appareil. 2. Ne faites pas sécher de linge ayant été en contact par nettoyage, lavage ou trempage avec de l’essence, des solvants de nettoyage à...
- Page 39 QUE FAIRE EN CAS D’EMANATION DE GAZ : • Ne tentez pas d’allumer un appareil électrique. • Ne mettez pas l’appareil sous tension. • Ne touchez à aucun interrupteur électrique. • N’utilisez aucun téléphone dans le bâtiment. • Faites évacuer tous les occupants de la pièce, du bâtiment ou du secteur. •...
- Page 40 à la terre. Ne vous asseyez pas sur le sèche-linge. Dans le cadre de l’amélioration constante de ses produits, Samsung se réserve le droit de modifier les spécifications sans préavis. Pour plus de détails, consultez les instructions d’installation accompagnant votre produit avant de sélectionner du...
- Page 41 contenu INSTALLATION DU SÈCHE-LINGE INSTRUCTIONS ET CONSEILS ENTRETIEN ET NETTOYAGE CONSEILS D’ENTRETIEN DU LINGE DV220AE-02810B_CFR.indd 7 Outils requis pour l’installation Extérieur du sèche-linge Conditions requises en matière de conduits Remarque importante pour l’installateur Choix de l’emplacement d’installation Encastrement dans une niche ou installation dans un placard Installation en mobile home Evacuation...
- Page 42 installation du sèche-linge OUTILS REQUIS POUR L’INSTALLATION Laissez un professionnel installer correctement votre sèche-linge. Si vous contactez le service après- vente suite à une installation, des réglages ou un branchement mal exécutés, la responsabilité relève de l’installateur. Si c’est vous qui avez installé le sèche-linge, la responsabilité vous incombe. Vérifiez que vous disposez de tous les éléments requis pour installer correctement l’appareil, comme suit.
- Page 43 CONDITIONS REQUISES EN MATIÈRE DE CONDUITS • Utilisez un conduit en aluminium ou en acier galvanisé rigide d’un diamètre de 4”(10,2 cm). • N’utilisez pas de conduit plus petit. • Les conduits dont le diamètre est supérieur à 4”(10,2 cm) peuvent provoquer une trop grande accumulation de peluches.
- Page 44 installation du sèche-linge Si un nouveau sèche-linge est relié à un système d’évacuation existant, vous devez veiller à ce que : • Le système d’évacuation soit conforme aux réglementations locales, régionales et nationales. • Aucun conduit flexible en plastique ne soit utilisé. •...
-
Page 45: Installation En Mobile Home
Un espace dégagé minimum de 72 pouces carrés (465 cm²) est requis. Appelez le 1-800-SAMSUNG (726-7864) si vous souhaitez faire l’acquisition du kit de fixation au sol. Toutes les installations en mobile home doivent disposer d’une évacuation vers l’extérieur, l’extrémité du conduit d’évacuation étant correctement fixée à... - Page 46 installation du sèche-linge SYSTÈMES FONCTIONNANT AU GAZ Utilisez uniquement du gaz naturel ou du propane liquide (PL). L’INSTALLATION DOIT ETRE CONFORME AUX REGLEMENTATIONS LOCALES EN VIGUEUR OU, EN L’ABSENCE DE DISPOSITIONS SPECIFIQUES, A LA REGLEMENTATION NATIONALE SUR LE GAZ COMBUSTIBLE ANSI/Z223.1 (NATIONAL FUEL GAS CODE), DERNIERE REVISION (POUR LES ETATS-UNIS) OU AUX DISPOSITIONS D’INSTALLATION CAN/CGA-B149 (POUR LE CANADA).
- Page 47 NORMES ÉLECTRIQUES Le schéma de câblage est situé à l’arrière du sèche-linge. • Un branchement incorrect du conducteur de mise à la terre peut représenter un risque de surtension électrique. AVERTISSEMENT Demandez conseil à un électricien ou un réparateur agréé si vous avez des doutes quant à la mise à...
- Page 48 installation du sèche-linge RACCORDEMENT ÉLECTRIQUE Avant toute mise en marche ou test, observez les instructions de mise à la terre présentées dans la section Mise à la terre. Nous vous recommandons de relier votre sèche-linge à une dérivation individuelle ou à un circuit distinct. N’UTILISEZ PAS DE RALLONGE AVEC CET APPAREIL.
- Page 49 Rétracter entièrement Ajustez les pieds uniquement pour atteindre le niveau requis. Si vous étendez les pieds plus que nécessaire, les vibrations seront plus importantes. DV220AE-02810B_CFR.indd 15 1-800-SAMSUNG (726-7864 Pince serre-tube (modèle Cutter au gaz uniquement) Tournevis Phillips Ruban adhésif Puis desserrer Tournevis à...
- Page 50 installation du sèche-linge 4. Consultez la section Evacuation avant d’installer le système d’évacuation. Reliez le sèche-linge et la hotte avec le système de conduites. L’extrémité sertie des sections du conduit doit être orientée vers l’extérieur. N’utilisez PAS de vis métallique pour assembler les conduits. Ces jointures doivent être effectuées à l’aide de ruban adhésif.
- Page 51 Branchements à 3 FILS 1. Desserrez ou retirez la vis centrale du bornier. 2. Reliez le fil neutre (blanc ou central) du cordon d’alimentation à la borne à vis argentée centrale du bornier. Serrez la vis. 3. Reliez les autres fils aux bornes à vis extérieures. Serrez les vis. 4.
- Page 52 installation du sèche-linge CONSEILS POUR L’ÉVACUATION DU SÈCHE-LINGE Les conduits en plastique ou non métalliques représentent un danger potentiel d’incendie. AVERTISSEMENT 1. Assurez-vous que le sèche-linge a été installé de manière à ce que l’évacuation de l’air se fasse sans problème. 2.
-
Page 53: Inversion Du Hublot
INVERSION DU HUBLOT 1. Débranchez le cordon d’alimentation. 2. Retirez les deux vis de la charnière du hublot. 3. Soulevez le hublot et retirez-le du sèche-linge. 4. Retirez une vis de l’avant du cadre. 5. Retirez les deux vis sur le côté... - Page 54 instructions et conseils d’utilisation PRÉSENTATION DU PANNEAU DE COMMANDE Pour sélectionner le programme, positionnez le sélecteur sur le programme de votre choix. Le témoin lumineux s’allume en regard du programme. Les programmes Normal, Grande rendement, Perm Press et Délicats sont des cycles avec Séchage à...
- Page 55 Adjust Time(Réglage du temps) Bouton Wrinkle Prevent (Prévention du froissement) Affichage numérique Bouton Dry Level (Niveau de séchage) Bouton Temp (Température) Bouton Time (Temps) DV220AE-02810B_CFR.indd 21 vous pouvez allonger ou raccourcir la durée de séchage automatiquement préconfigurée des cycles de Programme minuté (Séchage à Minuterie, Sans froissement ou Flux d’air).
- Page 56 instructions et conseils d’utilisation Bouton Appuyez sur ce bouton pour interrompre et relancer les programmes. Start/Pause (Démarrer/Pause) Appuyez une fois sur ce bouton pour mettre le sèche-linge en marche. Réappuyez dessus pour l’éteindre. Si le sèche-linge reste allumé pendant Bouton Power plus de 10 minutes sans qu’aucun bouton ne soit actionné, il s’éteint (Mise en marche) automatiquement.
- Page 57 GRILLE DE SÉCHAGE (EN OPTION) Installation du support de séchage 1. Ouvrez le hublot du sèche-linge. 2. Placez la grille de séchage dans le tambour, en positionnant son bord avant sur le dessus du filtre à peluches. 3. Insérez les deux pieds arrière dans les orifices situés sur la paroi arrière du sèche-linge, puis appuyez sur le centre de la grille pour la fixer.
- Page 58 instructions et conseils d’utilisation NETTOYAGE DU FILTRE À PELUCHES • Après chaque séchage. • Pour réduire la durée de séchage. • Pour un meilleur rendement énergétique. Nettoyage du filtre à peluches 1. Retirez le boîtier du filtre du sèche-linge. 2. Grattez la poussière située sur la partie supérieure du filtre à l’aide de vos doigts.
-
Page 59: Mise En Marche
CHARGEMENT DU SÈCHE-LINGE • N’introduisez qu’une seule charge de linge lavé à la fois dans votre sèche-linge. • Un mélange de textiles épais et légers séchera différemment. Par conséquent, les textiles légers risquent d’être secs alors que les textiles épais seront encore humides, à la fin du programme de séchage. •... -
Page 60: Entretien Et Nettoyage
entretien et nettoyage PANNEAU DE COMMANDE nettoyez-le avec un chiffon doux et humide. N’utilisez pas de produits abrasifs. Ne vaporisez aucun produit d’entretien directement sur le panneau de commande. Certains détachants pour tissu peuvent endommager le revêtement du panneau de commande. Appliquez ces produits à... - Page 61 conseils d’entretien du linge CONSEILS D’ENTRETIEN DU LINGE Respectez les symboles textiles ou les consignes du fabricant concernant le séchage des articles spéciaux. Si aucun symbole textile n’est fourni, observez les consignes suivantes. Couvre-lits et couettes Couvertures Rideaux et tentures Couches en tissu Articles garnis de duvet (vestes, sacs de couchage,...
- Page 62 dépannage VÉRIFIEZ LES POINTS SUIVANTS SI VOTRE SÈCHE-LINGE... PROBLÈME Ne se met pas en route. Ne chauffe pas. Ne sèche pas. Fait du bruit. 28_ dépannage DV220AE-02810B_CFR.indd 28 SOLUTION • Assurez-vous que la porte est bien fermée. • Vérifiez que le cordon d’alimentation est branché sur une prise électrique opérationnelle.
- Page 63 Le circuit EEPROM ne communique pas correctement Fréquence de source d’alimentation non valide Pour tout autre code non répertorié ici, appelez le 1-800-726-7864 (1-800-SAMSUNG) DV220AE-02810B_CFR.indd 29 SOLUTION • Les coutures, les poches et les autres zones épaisses peuvent ne pas sécher complètement alors que le reste du linge a atteint le niveau...
-
Page 64: Tableau Des Symboles Textiles
annexe TABLEAU DES SYMBOLES TEXTILES Les symboles suivants fournissent des conseils d’entretien des vêtements. Les étiquettes d’entretien des vêtements incluent des symboles relatifs au lavage, au blanchiment, au séchage, au repassage et au nettoyage à sec, le cas échéant. L’utilisation de ces symboles garantit la cohérence des informations entre les fabricants de vêtements (articles domestiques ou importés). - Page 65 PROTECTION DE L’ENVIRONNEMENT Cet appareil a été fabriqué à partir de matériaux recyclables. Si vous décidez de le jeter, veuillez respecter les normes locales en matière de mise au rebut. Coupez le cordon d’alimentation de façon à ce que l’appareil ne puisse pas être raccordé...
-
Page 66: Tableau Des Programmes
annexe TABLEAU DES PROGRAMMES Sélecteur Normal (Normal) Heavy Duty (Grande Rendement) Sensor Dry (Séchage à Perm Press capteur) (Perm Press) Delicates (Délicats) Time Dry (Séchage à Minuterie) Manual Dry Wrinkle Release (Programme (Sans froissement) minuté) Air Fluff (Flux d’air) 32_ annexe DV220AE-02810B_CFR.indd 32 Valeur par défaut Séchage Refroidissement... - Page 67 Les services de garantie peuvent être pris en charge uniquement par un centre de service agréé SAMSUNG. Lors de la remise d’un produit défectueux à SAMSUNG ou à un centre de service agréé SAMSUNG, l’acheteur est tenu de présenter le coupon d’achat d’origine à la demande des intéressés à titre de preuve d’achat.
- Page 68 SAMSUNG A ÉTÉ AVISÉ DE L’ÉVENTUALITÉ DE TELS DOMMAGES. LES INDEMNITÉS FINANCIÈRES EXIGÉES AUPRÈS DE SAMSUNG NE POURRONT EN AUCUN CAS EXCÉDER LE PRIX D’ACHAT DU PRODUIT VENDU PAR SAMSUNG ET À L’ORIGINE DES DOMMAGES INVOQUÉS. SANS LIMITATION AUX DISPOSITIONS SUSDITES, L’ACHETEUR ASSUME TOUS LES RISQUES ET TOUTES LES RESPONSABILITÉS EN CAS DE PERTE, DE DOMMAGES OU DE BLESSURES...
- Page 69 memo DV220AE-02810B_CFR.indd 35 2010-04-16 ¿ÀÈÄ 5:59:44...
- Page 70 QUESTIONS OU COMMENTAIRES ? Pays APPELEZ LE OU RENDEZ-VOUS SUR LE SITE CANADA 1-800-SAMSUNG (726-7864) www.samsung.com N° de code : DC68-02810B_CFR DV220AE-02810B_CFR.indd 36 2010-04-16 ¿ÀÈÄ 5:59:44...