Table of Contents
Advertisement
Advertisement
Table of Contents

Related Manuals for HIKVISION DS-KM8301


Summary of Contents for HIKVISION DS-KM8301
- Page 1 Video Intercom Master Station User Manual UD06103B...
- Page 2 User Manual © 2017 Hangzhou Hikvision Digital Technology Co., Ltd. This user manual is intended for users of DS-KM8301 Video Intercom Master Station. It includes instructions on how to use the Product. The software embodied in the Product is governed by the user license agreement covering that Product.
- Page 3 Video Intercom Master Station·User Manual Support Should you have any questions, please do not hesitate to contact your local dealer.
- Page 4 Video Intercom Master Station·User Manual Regulatory Information FCC Information Please take attention that changes or modification not expressly approved by the party responsible for compliance could void the user’s authority to operate the equipment. FCC compliance: This equipment has been tested and found to comply with the limits for a Class A digital device, pursuant to part 15 of the FCC Rules.
- Page 5 Video Intercom Master Station·User Manual Safety Instruction These instructions are intended to ensure that user can use the product correctly to avoid danger or property loss. The precaution measure is divided into Warnings and Cautions: Warnings: Neglecting any of the warnings may cause serious injury or death. Cautions: Neglecting any of the cautions may cause injury or equipment damage.
- Page 6 Video Intercom Master Station·User Manual Exposing the equipment to direct sun light, low ventilation or heat source such as heater or radiator is forbidden (ignorance can cause fire danger). Do not aim the device at the sun or extra bright places. A blooming or smear may occur otherwise (which is not a malfunction however), and affecting the endurance of sensor at the same time.
-
Page 7: Table Of Contents
Video Intercom Master Station·User Manual Contents 1 Overview ...................... 1 1.1 Appearance ......................1 1.2 Typical Application ....................3 1.3 Terminals and Interfaces ..................3 2 Before You Start ................... 5 3 Local Operation .................... 6 3.1 Activating Device ....................6 3.2 User Interface Description ................... - Page 8 Video Intercom Master Station·User Manual 5.1 System Configuration ..................42 5.2 Device Management ..................43 5.2.1 Adding Video Intercom Devices ..............43 5.2.2 Modifying Network Information..............45 5.2.3 Resetting Password ..................46 5.3 Configuring Devices Remotely via iVMS-4200 ............. 48 5.4 Device Arming Control ..................
-
Page 9: Overview
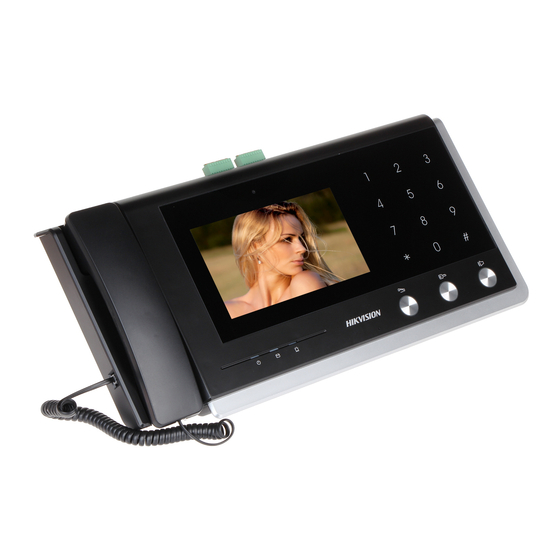
Video Intercom Master Station·User Manual 1 Overview The DS-KM8301 master station is an intelligent terminal for video intercom system management. It responses and sends the residents call, receives alarm, and unlocks door remotely. It is normally installed on the management center, it can be operated with a capacitive touch screen, touch buttons and mechanical buttons. - Page 10 Video Intercom Master Station·User Manual Table 1-1 Descriptions Description Phone Camera Display Dial Keyboard Power Indicator Information Indicator Alarm Indicator Microphone Call/End Call Button Unlock Button Speaker Button...
-
Page 11: Typical Application
Video Intercom Master Station·User Manual 1.2 Typical Application A Building PC Client Indoor Indoor Extension2 Extension1 Resident 2 Resident 1 Center Master Station Resident 2 Resident 1 Master Station (Guarding Room) Resident 2 Resident 1 Network Camera Elevator Controller Card Reader Outer Door Station Card Reader Door Station... - Page 12 Video Intercom Master Station·User Manual Name Interface Description Power Supply Power 2-Chip; DC 12V USB Interface For U-disk Connection Network Network Interface Interface JIN4 Alarm Input 4 (reserved) JIN3 Alarm Input 3 (reserved) JIN2 Alarm Input 2 (reserved) ALARM IN JIN1 Alarm Input 1 (reserved) Grounding...
-
Page 13: Before You Start
Video Intercom Master Station·User Manual 2 Before You Start For the first time use of the device, you are required to activate the device and set the device password. You can activate the device locally or remotely via internet with Batch Configuration Tool, or with iVMS-4200 client software. -
Page 14: Local Operation
Video Intercom Master Station·User Manual 3 Local Operation 3.1 Activating Device Connect the power cable to power on the master station. You must create a password to activate the master station for your first time usage and when it is not activated. Only after activating the device, you can operate it both locally and remotely. -
Page 15: Status
Video Intercom Master Station·User Manual Figure 3-2 User Interface 3.3 Status Icon Definition Description The connection between master station and indoor/door stations is normal, and the master Normal Status. station has successfully registered to the SIP server. The master station Please check the network cable of the master is offline. -
Page 16: Configuration Settings
Video Intercom Master Station·User Manual 3.4 Configuration Settings Purpose: You can set and view the local information, configure the network, manage devices, synchronize the device time, and restore the default settings. You can get to the configuration interface: Settings -> Configuration. 3.4.1 Changing Configuration Password The configuration password is required when you configure the master station locally, such as viewing the local information, setting the network, adding devices, setting the... -
Page 17: Setting Network
Video Intercom Master Station·User Manual Figure 3-3 Local Information Settings 3.4.3 Setting Network Make sure the network cable is well-connected. Purpose: The connection of the network is mandatory for the use of the master station. Steps: 1. Get to the configuration interface: Settings -> Configuration, and enter the admin password (configuration password). -
Page 18: Sip (Session Initiation Protocol) Server Management
Video Intercom Master Station·User Manual Figure 3-5 Setting Network 4. Enter a local IP address, subnet mask, and gateway. 5. Press the Save tab. Enable DHCP function to obtain an IP address automatically. 3.4.4 SIP (Session Initiation Protocol) Server Management The master station can work as a management center and SIP server simultaneously. -
Page 19: Adding Devices
Video Intercom Master Station·User Manual Figure 3-6 SIP Server Adding 3. Enter the IP address of the SIP server. 4. Press the Save button to save the SIP server added. 3.4.5 Adding Devices Purpose: The master station never works alone. You can connect the door station, outer door station, IP camera, DVR, DVS, and NVR. - Page 20 Video Intercom Master Station·User Manual Figure 3-7 Device Management Adding the Door Station or Outer Door Station Steps: 1. Press the Add Device tab to pop up the Select Device Type dialogue box. Figure 3-8 Device Type Selecting 2. Select Door Station or Outer Door Station. 3.
- Page 21 Video Intercom Master Station·User Manual Figure 3-9 Door Station Adding Figure 3-10 Outer Door Station Adding 4. Press the tab on the upper left corner of the dialogue box. When the door station being added, the device name, IP address, project number, community number, building number, and serial number need to be entered.
-
Page 22: Synchronizing Time
Video Intercom Master Station·User Manual The default Port No. is 554, the default user name is admin. The port No. should be consistent with the RTSP (Real Time Streaming Protocol) port No. of the IP camera. When the IP camera added successfully, you can get the live view of IP camera on the live view interface. -
Page 23: Restoring Default Settings
Video Intercom Master Station·User Manual 4. Set the synchronizing interval, enter the IP address of NTP server and port No., and select the time zone. The unit of synchronizing interval is minute, and the default port No. is 123. Figure 3-13 Time Synchronizing 3.4.7 Restoring Default Settings Steps: 1. -
Page 24: Video Call Settings
Video Intercom Master Station·User Manual 3.5 Video Call Settings 3.5.1 Callling Resident Steps: 1. Press the tab on the touch screen to enter the residents calling interface. 2. Enter the corresponding residents’ Room No.. 3. Press the tab to start a video intercom call. 4. -
Page 25: Adding Resident Information
Video Intercom Master Station·User Manual 3. Press the tab to start a video intercom call. 4. Press the tab to stop the video intercom call. The master station No. format should be like 1-51 as Community 1, No. 51. The community No. -
Page 26: Viewing Alarm Messages
Video Intercom Master Station·User Manual Figure 3-17 Call Log Interface Hold down a piece of call log to open the call log handling menu. Press the Call tab to call back. Press the Delete tab to delete the piece of call log. ... -
Page 27: Live View
Video Intercom Master Station·User Manual Press the New Message tab on the user interface to view alarm messages of indoor/door stations. Figure 3-18 Alarm Log Interface Hold down a piece of alarm message to open the alarm message handling menu. ... - Page 28 Video Intercom Master Station·User Manual 1. Press the tab on the touch screen to enter the Live View interface. Figure 3-19 Live View Interface 2. Press the Door Station tab and press the door station device to view the live view of the corresponding door station.
- Page 29 Video Intercom Master Station·User Manual Figure 3-21 Live View of IPC...
-
Page 30: Remote Configuration Via Batch Configuration Tool
Video Intercom Master Station·User Manual 4 Remote Configuration via Batch Configuration Tool You can configure and operate the video intercom devices via Batch Configuration Tool. Default parameters of master station are as follows: Default IP Address: 192.0.0.64. Default Port No.: 8000. ... -
Page 31: Editing Network Parameters
Video Intercom Master Station·User Manual STRONG PASSWORD RECOMMENDED– We highly recommend you create a strong password of your own choosing (Using a minimum of 8 characters, including at least three of the following categories: upper case letters, lower case letters, numbers, and special characters.) in order to increase the security of your product. -
Page 32: Adding Device
Video Intercom Master Station·User Manual Figure 4-4 Editing Network Parameters The default port No. is 8000. The default IP address of the master station is 192.0.0.64. After editing the network parameters of device, you should add the devices to the device list again. -
Page 33: Adding By Ip Address
Video Intercom Master Station·User Manual Figure 4-5 Online Devices Interface 2. Click the button to pop up the login dialog box. Figure 4-6 Login Dialog Box 3. Enter the user name and password. 4. Click the OK button to save the settings. ... -
Page 34: Adding By Ip Segment
Video Intercom Master Station·User Manual Figure 4-8 Adding by IP Address 4. Click the OK button to add the device to the device list. You cannot add the device(s) to the device list if the user name and password are not identical. -
Page 35: Configuring Devices Remotely
Video Intercom Master Station·User Manual Figure 4-10 Adding by IP Segment 5. Click the OK button to search and add the devices whose IP addresses are within the range of the defined IP segment to the device list. 4.4 Configuring Devices Remotely In the device list area, select a device and click to enter the remote configuration interface. - Page 36 Video Intercom Master Station·User Manual General Click the General button to enter device general parameters settings interface. You can view and edit the device name and device ID. Figure 4-13 General Time Steps: 1. Click the Time button to enter the device time settings interface. Figure 4-14 Time Settings 2.
- Page 37 Video Intercom Master Station·User Manual The default port No. is 123. System Maintenance Purpose: You can operate the system management and remote upgrading on the system maintenance interface. Steps: 1. Click the System Maintenance button to enter the system maintenance interface. Figure 4-15 System Maintenance 2.
- Page 38 Video Intercom Master Station·User Manual Figure 4-16 Import File 6. Click Export Configuration File and the export file window pops up. Select the saving path of remote configuration files and click Save to export the configuration file. Figure 4-17 Export File 7.
- Page 39 Video Intercom Master Station·User Manual Click Restore Default Settings button, all default settings, excluding network parameters, will be restored. Click Restore All button, all default settings, including network parameters, will be restored. The device will be reset to inactivated status. User Purpose: You can edit the password for logging in the device.
-
Page 40: Video Intercom
Video Intercom Master Station·User Manual After editing the password of device, click button from the device list, the added device will not be there. You should add the device again with new password to operate the remote configuration. RS485 Click the RS485 button to enter the RS485 setting interface. - Page 41 Video Intercom Master Station·User Manual Time Parameters 1. Click the Time Parameters button to enter time parameters settings interface. 2. Configure the maximum ring duration, maximum live view time, and maximum speaking time. 3. Click the Save button. Figure 4-23 Time Parameters ...
- Page 42 Video Intercom Master Station·User Manual Figure 4-25 Volume Configuration IP Camera Information Purpose: You can add, delete and modify devices that can be added to the master station, such as IP cameras, door stations, outer door stations, and DVR/NVR/DVS. By exporting and importing the added device information, you can edit added devices parameters in batch.
-
Page 43: Network
Video Intercom Master Station·User Manual 1. Click the Export button to export the added device information file. Figure 4-28 Export Information 2. Edit parameters of added devices in batch in the exported file. 3. Click the Import button to pop up importing box, and open the edited added device information file. - Page 44 Video Intercom Master Station·User Manual Figure 4-30 Local Network Parameters 4. Enter the local IP address, subnet mask, gateway address, and port No.. 5. Click the Save button to enable the settings. The default port No. is 8000. After editing the local network parameters of device, you should add the devices to the device list again.
-
Page 45: Video Display
Video Intercom Master Station·User Manual Figure 4-32 Advanced Network Settings 2. Enter the DNS server address1 and DNS address 2. 3. Click the Save button to enable the settings. Video Display 4.4.4 Steps: 1. Click the Video Parameters button to enter video parameters configuration interface. Figure 4-33 Local Network Parameters 4. -
Page 46: Adding Devices For Upgrading
Video Intercom Master Station·User Manual Figure 4-34 Batch Upgrading Adding Devices for Upgrading 4.5.1 You should add the device to the batch upgrading tool first before upgrading the device. There are 2 ways to add the device: adding online device, and adding by IP address/IP segment. - Page 47 Video Intercom Master Station·User Manual Figure 4-35 Login 2. Select a device, enter the user name and password, and click the Login Device button. 3. Click the Add Device button, and the device is added to the batch upgrading tool. Figure 4-36 Online Devices...
-
Page 48: Upgrading Devices
Video Intercom Master Station·User Manual Adding by IP Address/IP Segment Steps: 1. Click the Manual button to open the device adding window. 2. Enter the corresponding information (IP address, user name, password, start IP address, end IP address). 3. Click the Add button. Figure 4-37 Adding by IP Address/IP Segment Upgrading Devices 4.5.2... - Page 49 Video Intercom Master Station·User Manual Figure 4-38 Upgrade by File 3. Open the upgrading file, and click the Upgrade button.
-
Page 50: Remote Operation Via Ivms-4200
Video Intercom Master Station·User Manual 5 Remote Operation via iVMS-4200 5.1 System Configuration Purpose: You can configure the video intercom parameters accordingly. Steps: 1. Open the System Configuration page. Path: Control Panel -> Maintenance and Management -> System Configuration -> Video Intercom. -
Page 51: Device Management
Video Intercom Master Station·User Manual 5.2 Device Management Purpose: Device management includes device activation, adding device, editing device, and deleting device, and so on. After running the iVMS-4200, video intercom devices should be added to the client software for remote configuration and management. 5.2.1 Adding Video Intercom Devices ... - Page 52 Video Intercom Master Station·User Manual In the Server tab, Video Intercom Device will display, select Video Intercom Device and add indoor station and master station. To add door station: In the Server tab, select Encoding Device/Outdoor Device and add door station.
-
Page 53: Modifying Network Information
Video Intercom Master Station·User Manual Figure 5-4 Adding Device by IP/Domain Add Multiple Online Devices If you want to add multiple online devices to the client software, click and hold Ctrl key to select multiple devices, and click Add to Client to open the device adding dialog box. In the pop-up message box, enter the user name and password for the devices to be added. -
Page 54: Resetting Password
Video Intercom Master Station·User Manual Figure 5-5 Modifying Network Information You should enter the admin password of the device in the Password field of the pop-up window to modify the parameters. 5.2.3 Resetting Password According to the different video intercom devices, the software provides two different methods for restoring the default password or resetting the password. - Page 55 Video Intercom Master Station·User Manual Figure 5-6 Resetting Password (Option 1) 1. Click Export to save the device file on your computer. 2. Send the file to our technical engineers. 3. Our technical engineer will send a file to you. After receiving a file from the technical engineer, select Import File from Key Importing Mode drop-down list and click import the file.
-
Page 56: Configuring Devices Remotely Via Ivms-4200
Video Intercom Master Station·User Manual Figure 5-7 Resetting Password (Option 2) 1. Click Export to save the device file on your computer. 2. Send the file to our technical engineers. 3. Click Import and select the file received from the technical engineer. 4. - Page 57 Video Intercom Master Station·User Manual Figure 5-8 Tool Menu 2. Set the arming status of the device as armed, and the alarm information will be auto uploaded to the client software when alarm occurs. Figure 5-9 Device Arming Control Figure 5-10 Alarm Events After adding the device to the client software, it will be armed automatically.
-
Page 58: Appendix
Video Intercom Master Station·User Manual Appendix Wiring Cables Cables Specification Power Cable RVV 2*1.0 Network Cable Cat5e Warning To avoid echo and whistles, set the wire distance longer than 8 meters. 0104231070606... - Page 59 Video Intercom Master Station·User Manual...
Need help?
Do you have a question about the DS-KM8301 and is the answer not in the manual?
Questions and answers