Samsung CLX-3160FN Service Manual
Digital color laser mfp clx-3160 series
Hide thumbs
Also See for CLX-3160FN:
- User manual (302 pages) ,
- Manual del usuario (142 pages) ,
- Manual (36 pages)
Table of Contents
Advertisement
Quick Links
SERVICE
DIGITAL COLOR LASER MFP
DIGITAL COLOR LASER MFP
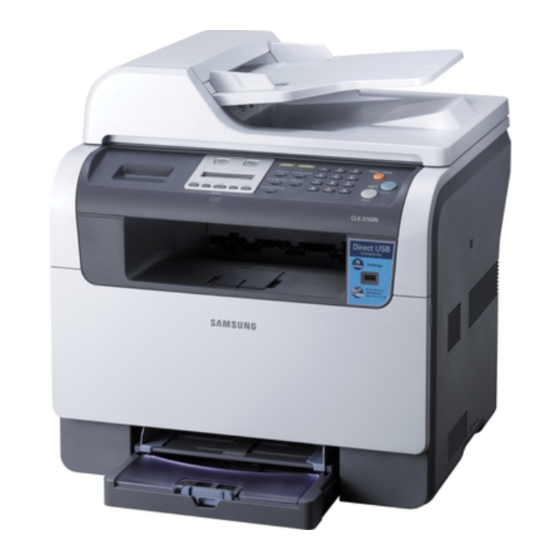
CLX-3160 Series
CLX-3160FN/XAA
Basic Model : CLX-3160FN
Manual
The keynote of Product
1. Engine Speed :
Up to 16 ppm in A4 black (17 ppm in Letter)
Up to 4 ppm in A4 color (4 ppm in Letter)
2. Resolution :
- Optical, 600 x 600 dpi
- Support, MAX: 2400 x 600 dpi class, 1200 x 600 dpi
(default), 600 x 600 dpi (Color & B&W)
3. MPU : Samsung CHORUSm 300MHz
4. Memory :
- Std.: 128 MB, Max.: 128 MB (Memory not Expansion)
5. Default Driver: SPL-C (Samsung Printer Language Color)
6. USB: USB 2.0, USB host (Scan to USB, Direct print)
7. Network : Ethernet 10/100 Base TX
8. Consumable :
- 6 (C/M/Y/K toner, Imaging Unit, Waste toner box)
- K toner : CLX-K3160A
- C toner : CLX-C3160A
- M toner : CLX-M3160A
- Y toner : CLX-Y3160A
- Imaging unit : CLP-R300A (common with CLP-300)
- Waste toner box : CLP-W300A (common with CLP-300)
- CMY Rainbow kit : CLX-P3160A
9. SET Life Cycle : 200,000 image
Advertisement
Table of Contents
Troubleshooting

Related Manuals for Samsung CLX-3160FN


Summary of Contents for Samsung CLX-3160FN
-
Page 1: Service Manual
3. MPU : Samsung CHORUSm 300MHz 4. Memory : - Std.: 128 MB, Max.: 128 MB (Memory not Expansion) 5. Default Driver: SPL-C (Samsung Printer Language Color) 6. USB: USB 2.0, USB host (Scan to USB, Direct print) 7. Network : Ethernet 10/100 Base TX 8. -
Page 2: Table Of Contents
Contents 1. Precautions 1.1 Safety Warning 1.2 Caution for safety 1.3 ESD Precautions 1.4 Super Capacitor or Lithium Battery Precautions 2. Product Specification 2.1 Product Overview 2.2 Product General Specifications 2.3 Model Comparison Table 2-14 3. System Overview 3.1 System Structure 3.2 Main PBA Description 3-14 3.3 CRUM... - Page 3 Continued 5. Disassembly and Reassembly 5.1 General Precautions on Disassembly 5.2 Cover Upper (Left, Right) 5.3 Front Cover 5.4 OPC DEV Unit 5.5 ITB Unit 5.6 T2 Roller Unit 5.7 Rear Cover 5.8 OPE Unit 5.9 Side Cover (Left, Right) 5.10 ADF Ass'y 5-10 5.11 Platen Ass'y...
- Page 4 8. Exploded Views & Parts List 8.1 Main 8.2 Middle Cover 8.3 Front Cover 8.4 Right Cover 8.5 Round Cover 8.6 Rear Cover 8.7 Cover Platen 8.8 Platen Ass'y 8.9 OPE(CLX-3160FN) 8-10 OPE(CLX-3160N) 8-11 8.10 Scan Ass'y 8-12 8.11 ADF Ass'y 8-13 8.12 ADF Lower 8-14 8.13 ADF Motor...
- Page 5 Continued 8.18 OPC DEVE 8-22 8.19 Fuser Ass'y 8-24 8.20 Cassette 8-25 10-1 9. Block diagram 9.1 Block Diagram 10. Connection Diagram 10.1 Connection Diagram 10-1 11. Reference Information 11.1 Tools for Troubleshooting 11-1 11.2 Acronyms and Abbreviations 11-2 11.3 Select a location for the printer 11-4 11.4 A4 ISO 19752 Standard Pattern 11-5...
-
Page 6: Precautions
High voltages and lasers inside this product are dangerous. This printer should only be serviced by a suitably trained and qualified service engineer. (2) Use only Samsung replacement parts There are no user serviceable parts inside the printer. Do not make any unauthorized changes or additions to the printer, these could cause the printer to malfunction and create electric shock or fire haz-ards. -
Page 7: Caution For Safety
Take care not to cut or damage the power cable or plugs when moving the machine. (9) Use caution during thunder or lightening storms. Samsung recommend that this machine be disconnected from the power source when such weather conditions are expected. Do not touch the machine or the power cord if it is still connected to the wall socket in these weather conditions. -
Page 8: Handling Precautions
1.2.4 Assembly / Disassembly Precautions Replace parts carefully, always use Samsung parts. Take care to note the exact location of parts and also cable routing before dismantling any part of the machine. Ensure all parts and cables are replaced correctly. -
Page 9: Disregarding This Warning May Cause Bodily Injury
Failure to do so could cause the printer to tip or fall possibly causing personal injury or damaging the printer. (5) Do not install the printer on a sloping or unstable surface. After installation, double check that the printer is stable. Service Manual Samsung Electronics... -
Page 10: Esd Precautions
2. Be sure to replace the battery with the same or equivalent type recommended by the manufacturer. 3. Super capacitor or Lithium batteries contain toxic substances and should not be opened, crushed, or burned for disposal. 4. Dispose of used batteries according to the manufacture’s instructions. Service Manual Samsung Electronics... -
Page 11: Product Specification
2) Concept Small size Color laser MFP(A4 Color laser MFP) Target user - Small office & small business - CLX-3160N (3in1, SPL) - CLX-3160FN (4in1, SPL) Black only printing function Auto warning sheet USB host function - PictBridge - Scan to USB memory, direct printing... -
Page 12: Product General Specifications
Samsung CHORUSm 300MHz Memory Std. 128 MB 128 MB Max. 128 MB 128 MB Memory Expansion Printer Languages SPL-C (Samsung Printer Language Color) SPL-C (Samsung Printer Language Color) Fonts Windows fonts Windows fonts Printer driver Supporting OS [Windows] [Windows] - Windows 98/Me/2000/XP... - Page 13 Product Specifications CLX-3160 Series CLX-3160N Spec. CLX-3160FN Spec. Default Driver SPL-C (Samsung Printer Language Color) SPL-C (Samsung Printer Language Color) WHQL Windows 2000/XP Windows 2000/XP Language Localization [Windows] [Windows] : Korean, English, French, German, Italian, : Korean, English, French, German, Italian, Spanish, Russian, Dutch, E.Portuguese,...
- Page 14 Product Specifications 2.2.3 Scan CLX-3160 Series CLX-3160N Spec. CLX-3160FN Spec. Scan method Color CCD Color CCD Scan Speed Linearity, Halftone 15 Sec(300dpi,USB2.0,P4 3.0GHz,512M)/Ltr 15 Sec(300dpi,USB2.0,P4 3.0GHz,512M)/Ltr Gray 20 Sec(300dpi,USB2.0,P4 3.0GHz,512M)/Ltr 20 Sec(300dpi,USB2.0,P4 3.0GHz,512M)/Ltr Color 30 Sec(300dpi,USB2.0,P4 3.0GHz,512M)/Ltr 30 Sec(300dpi,USB2.0,P4 3.0GHz,512M)/Ltr...
- Page 15 Product Specifications 2.2.4 Copy CLX-3160 Series CLX-3160N Spec. CLX-3160FN Spec. Copy Speed Simplex Copy Speed @SDMC up to 16 cpm in A4 black @SDMC up to 16 cpm in A4 black (17 cpm in Letter)Up to 4 cpm in A4 color...
- Page 16 Product Specifications 2.2.5 Fax CLX-3160 Series CLX-3160N Spec. CLX-3160FN Spec. Compatibility ITU-T G3 Communication System PSTN/PABX Modem Speed 33.6Kbps TX Speed 3sec Compression MH/MR/MMR/JBIG/JPEG Color Fax Default (But Memory Transmission & Any Reserved Transmission are not supported.) Resolution 203x98dpi Fine 203x196dpi S.Fine...
- Page 17 Product Specifications CLX-3160 Series CLX-3160N Spec. CLX-3160FN Spec. Report & Tx/Rx Journal List Print out Confirmation 2 types available (with Image TCR, w/o image TCR) Auto Dial List System Data List List all user setting Sound Control Ring Volume Yes(Off,Low,MED,HIGH)
-
Page 18: Paper Handling
Product Specifications 2.2.6 Paper Handling CLX-3160 Series CLX-3160N Spec. CLX-3160FN Spec. Standard Capa. 150-sheet Semi Cassette Tray 150-sheet Semi Cassette Tray Max. Capa. 400 sheets @75g/ 400 sheets @75g/ Printing Max. Size 216 x 356mm (8.5" x 14") 216 x 356mm (8.5" x 14") Min. - Page 19 Product Specifications CLX-3160 Series CLX-3160N Spec. CLX-3160FN Spec. Duplex Supporting Manual Manual Throughput Media sizes Media types Media weight Paper Weight 12.5~28lb (Non Coating) 12.5~28lb (Non Coating) Capacity 50 sheets ( 20lb, 75 g/ ) 50 sheets ( 20lb, 75 g/ ) Document Size Width: 142 ~ 216mm (5.6"...
- Page 20 Product Specifications 2.2.7 Consumables CLX-3160 Series CLX-3160N Spec. CLX-3160FN Spec. 6 (C/M/Y/K toner, Imaging Unit, Waste toner box) No. of CRUs 6 (C/M/Y/K toner, Imaging Unit, Waste toner box) K toner: CLX-K3160A K toner: CLX-K3160A C toner: CLX-C3160A C toner: CLX-C3160A...
- Page 21 Product Specifications 2.2.8 Reliability & Service CLX-3160 Series CLX-3160N Spec. CLX-3160FN Spec. Printing Volume(AMPV) 360 page / B&W, 240 page / Color 360 page / B&W, 240 page / Color Max Monthly Duty 24,200 images 24,200 images MPBF 40,000 pages (color 29,091 Mono 10,909...
- Page 22 Product Specifications 2.2.9 Environment CLX-3160 Series CLX-3160N Spec. CLX-3160FN Spec. Acoustic Noise Printing Less than 49.0 dBA (B/W printing) Less than 49.0 dBA (B/W printing) Level(Sound Copying Less than 52.0 dBA Less than 52.0 dBA Power/Pressure) Standby Less than 35 dBA...
- Page 23 Product Specifications 2.2.10 Packing & Accessory CLX-3160 Series CLX-3160N Spec. CLX-3160FN Spec. In-Box C/M/Y/K to be installed C/M/Y/K to be installed Power cord Power cord USB cable (China, Korea, India, Russia) USB cable (China, Korea, India, Russia) Set-up CD (Driver, manual), Application...
-
Page 24: Model Comparison Table
Product Specifications 2.3 Model Comparison Table Canon Ricoh Samsung MF8170C CLX-3160FN Service Manual 2-14 Samsung Electronics... -
Page 25: System Overview
Dev-C Dev-C Dev-K Dev-K Transfer Roller Paper Cassette Input Paper Cassette Output OPC (Organic Photo Conductor) Transfer Roller Developers (Y, M, C, & K) Fuser Toner Kits (Y, M, C, & K) ITB (Intermediate Transfer Belt) Service Manual Samsung Electronics... - Page 26 It is a power delivery unit by gearing By driving the motor, it supplies the power to the feeding unit, the fusing unit, and the distributing unit. The Main Motor is similar to CLP-300 Series Main Motor. Service Manual Samsung Electronics...
- Page 27 System Overview 3.1.2 Scanner( ADF) 3 in 1 : CLX-3160N 4 in 1 : CLX-3160FN Scanning Method: Color CCD(600 x 1200 dpi) Scan speed : SDMP 28cpm/MDSP 20cpm Roller-Pickup Roller-ADF Roller-Exit Roller-Feed Service Manual Samsung Electronics...
- Page 28 - CX86710 (SFX336): Existing Modem Chip which adds SSD (System Side Device) for interfacing between LSD and DIB of FM336Plus Core - CX20493 (LSD) : LIU (Line Interface Unit) Chip which is controlled by SSD and satisfies each PSTN Requirements by modulating internal Configuration with connecting Tel Line. Service Manual Samsung Electronics...
- Page 29 Digital speaker output to monitor received signal Two16-byte FIFO data buffers for burst data transfer with extension up to 255 bytes V.21 Channel 1Flag detect V.21 Channel 1Flag detect +3.3V only operation Typical power consumption Normal mode: 264 mW Service Manual Samsung Electronics...
- Page 30 After transferring data from SSD, RSP is transferred and LSD recognizes RSP and change LSD to output Driver transfer Data to SSD. DIB Data form SSD to LSD by Transformer has Differential structure of 180 phase difference between DIBP and DIBN for Noise Robustness Service Manual Samsung Electronics...
- Page 31 100mA (condition : Voltage = 40Vrms, Frequency = 20Hz) product Margin : over 15mA 3) False Ring Sound Ring Frequency : 750 Hz + 1020 Hz Ring interrupt Cycle : On/Off depending on input Ring Signal Cycle. Service Manual Samsung Electronics...
-
Page 32: Scan Part
Micom part, Matrix part and LCD. (2) Micom controller Micom has ROM, RAM, I/O Port built-in and displays and lights LCD by CPU command of Main Control Part and report Key recognition Data to Main Control Board. Service Manual Samsung Electronics... - Page 33 Blade Blade on OPC on OPC ITB Unit ITB Unit P2: Image P2: Image on Media on Media Media Path Media Path Blade Blade Developer Developer Eraser Eraser Charger Charger Laser Scanning Unit Laser Scanning Unit Service Manual Samsung Electronics...
- Page 34 2. No ozone is produced because corona is not used 3. Charger roll is cleaned with cleaning roll 4. Toner remained on OPC after T1 process is cleaned by cleaning blade and retrieved into waste toner box by auger and belt driving mechanism Service Manual 3-10 Samsung Electronics...
- Page 35 3. 4 times of T1 process is required to make a color image on ITB, which means multi-pass process 4. ITB has a hole as a fiducial mark for timing. Engine control for color image is synchronous with it, ITB Home Sensing Signal Service Manual 3-11 Samsung Electronics...
- Page 36 5. T2 Roll is engaged when color image is being transferred onto media. Otherwise it is disengaged. Clutch is used for driving T2 Roll engagement and disengagement Fusing 3 Roll system -> short warm-up time (45sec) Post Pressure Roll 1. Color Image on media is melted down and fixed into media by fusing process Service Manual 3-12 Samsung Electronics...
-
Page 37: Copier Section
400 Locations (46 digits maximum per location) On-hook Dial (manual fax): Last Number Redial: Automatic Redial: Pause: Yes (using Redial key) Ringer Volume: Off, Low, Medium, High Tone/Pulse: Selectable (Tech Mode Only no Telecom certification for Pulse mode) Service Manual 3-13 Samsung Electronics... -
Page 38: Main Pba Description
System Overview 3.2 Main PBA Description 3.2.1 Print Board Assembled(PBA) Pictures 1) Top View of Main Controller 2) Bottom View of Main Controller Service Manual 3-14 Samsung Electronics... - Page 39 System Overview 3) Top View of SMPS 4) Bottom View of SMPS Service Manual 3-15 Samsung Electronics...
- Page 40 System Overview 5) Top View of HVPS 6) Bottom View of HVPS Service Manual 3-16 Samsung Electronics...
- Page 41 System Overview 7) Top View of OPE 8) Bottom View of OPE Service Manual 3-17 Samsung Electronics...
- Page 42 System Overview 9) Top View of FAX 10) Bottom View of FAX Service Manual 3-18 Samsung Electronics...
- Page 43 System Overview 11) Top View of ADF 12) Bottom View of ADF Service Manual 3-19 Samsung Electronics...
- Page 44 System Overview 13) Top View of Joint B'D 14) Bottom View of Joint B'D Service Manual 3-20 Samsung Electronics...
-
Page 45: Main Pba
System Overview 3.2.2 Main PBA RJ45 RJ45 Connector Connector Service Manual 3-21 Samsung Electronics... - Page 46 5 Banks, Up to 128MB Address space per Bank Programmable Timing to Control SDRAM A.C Characteristics Support Self Refresh for Data Retention ROM Controller 32-bit width, 4 Banks, Up to 16MB Address space per Bank Burst Capability Programmable Timing per Bank Service Manual 3-22 Samsung Electronics...
- Page 47 1 Channel, Operated at max frequency 400kHz RTC Controller Engine Controller LSU Control and Interface Unit 2 Channels STEP Motor Control Unit 8 Channels PWM Control Unit 8 Channels ADC Control Unit 2 Channels DAC Control Unit Service Manual 3-23 Samsung Electronics...
- Page 48 System Overview CHORUSm (Internal Block Diagram) Service Manual 3-24 Samsung Electronics...
- Page 49 GPIO controller built in CHORUSm collects the status of all sensors. According to this status of sensors, it controls printer mechanism to help normal printing. There are sensors such as Paper Empty Sensor, Registration Sensor and Developer Home Sensor, etc. Service Manual 3-25 Samsung Electronics...
- Page 50 2nd transfer voltage and current, fusing temperature, used-up toner and toner amount, and interior temperature, etc. 14) DAC Control It is controlled by DAC Controller built in CHORUSm and used to set standard level of light amount of LSU Laser Diode. Service Manual 3-26 Samsung Electronics...
- Page 51 2) AC Output Fuser Unit(Heat Lamp, Thermostat) 3) Output Voltage CHANNEL +5.0V +24V +24VF V_out +5.0V +/-5% +24.0V +15%/-10% +24.0V +15%/-10% Load MicroController, MOTOR, CLUTCH, CMOS, LOGIC HVPS CON3 To Main PBA CON1 AC Input Service Manual 3-27 Samsung Electronics...
- Page 52 HVPS PBA generates high voltage of charger, supply, T1 and T2 which is supplied to Developer, ensuring optimum con- dition for image formation. HVPS receives input of 24V and generates high voltage, supplying it to Toner, OPC, Cartridge, ITB Unit and Transfer Roller. Service Manual 3-28 Samsung Electronics...
- Page 53 1.5% (supply voltage is connected to ZENER Diode 300V) DC -50V ~ -600V DC +/- 3% ERROR type: 1. if Deve is GND, density will be extremely down. 2. if Deve is floating (for insecure terminal contact), density will be extremely down. Service Manual 3-29 Samsung Electronics...
-
Page 54: Crum
2) Copy the information of Operating Area into Back up Area. 3) Write-Protect Back up Area. 4) Clear some information of Operation Area. -> Supplier/Model Name/MFC date/Serial Number (Manufacture Information) -> Let cartridge refiller initialize manufacture information and life span information. Service Manual 3-30 Samsung Electronics... - Page 55 System Overview CRUM Position Agitator Washer Bottle Cap- CRUM Agitator Seal CRUM Coupling Service Manual 3-31 Samsung Electronics...
-
Page 56: General Description
System Overview 3.4 General Description This chapter is the product specification for the CLX-3160FN Series. The CLX-3160FN Series is a Color Laser Printer. The CLX-3160FN Series series can be expanded to multi functional printer (MFP). CLX-3160FN Series is developed for two target users. - Page 57 KEY TYPE: CARBON COATING S/W 3.4.7 Periodic Replacing Parts Samsung shall specify parts requiring replacement and the frequency of replacement. The parts identified may be deemed customer replaceable parts. Periodic replacement parts shall be recommended as follows * Average A4-/letter-sized page count based on Std. coverage of individual colors on each page. Usage conditions and print patterns may cause results to vary.
-
Page 58: Power Switch
The consumable low and out behavior on CLX-3160 Series engine is specified by SEC. Device for life end Law(90%) Life(100%) Hard stop Reset to 0 message detection Toner CRUM Yes(115%) Imaging Kit CRUM Fuser T2 Roller Pick-up Service Manual 3-34 Samsung Electronics... -
Page 59: S/W Structure And Descriptions
Host. 2. Kernel that control and management the whole procedure include of Control flow and Printing Job before transfer to Service Manual Samsung Electronics... -
Page 60: Data And Control Flow
4. Port Monitor that manages the network communication between spooler and Network Interface Card, or various additional application and Network Interface Card,(this is, at first, make communication logical port, manage the data, transfer them from spooler to network port, and offer the result of printing). Service Manual Samsung Electronics... - Page 61 Engine print the received data to required paper with the sequential developing process. The additional printing function are realized in (1) Web environment (2) Window environment. On addition, Kernel informs a status of printing status and printer status to user made printing job with the Status Monitor. Service Manual Samsung Electronics...
-
Page 62: Alarm Shortage
5. Service Call : Unrecoverable Error Engine LSU Error Main Motor Error / Dev. Motor Error Engine Fuser Over(Low) Heat Error Rear Fan Error / Left Fan Error / SMPS Fan Error 6. Others Memory Overflow Error Ready IP Conflict Service Manual Samsung Electronics... -
Page 63: Crum Overview
- Stands for “Customer Replaceable Unit Monitor” - EEPROM is used for CRUM Memory. - CRUM stores various information on consumables (including consumables’ life). - In CLX-3160FN, total five CRUM’s are used (four on toner cartridges and one on transfer belt) CRUM stores the following information... -
Page 64: Initailize Flow
S/W Structure and Descriptions 4.8 Initailize Flow Service Manual Samsung Electronics... - Page 65 S/W Structure and Descriptions Service Manual Samsung Electronics...
-
Page 66: Disassembly And Reassembly
3. Unplug the power cord. 4. Use a flat and clean surface. 5. Replace only with authorized components. 6. Do not force plastic-material components. 7. Make sure all components are in their proper position. Service Manual Samsung Electronics... -
Page 67: Cover Upper (Left, Right)
Upper Right and pull it in the direction of arrow, as shown below. ADF Ass'y Cover Upper Right 2. Apply light pressure to the left side of the Cover Upper Left and pull it in the direction of arrow, as shown below. Cover Upper Left Service Manual Samsung Electronics... -
Page 68: Front Cover
2. To remove the Front Cover, first pull the Rib below the right side of the Front Cover with a light pressure to the upside and then release the Front Cover in the direction of arrow, as shown below. Front Cover Service Manual Samsung Electronics... -
Page 69: Opc Dev Unit
Notice: 1) Do not touch the green surface on the OPC DEV Unit with your hands or any other material. Use the handle on it to avoid touching this area. 2) Be careful not to scratch the surface of the OPC DEV Unit. Service Manual Samsung Electronics... -
Page 70: Itb Unit
ITB Unit Notice: 1) Do not grab the ITB Belt of the ITB Unit, it may cause a malfunction due to a foreign object. 2) Be careful not to scratch the surface of the ITB Belt. Service Manual Samsung Electronics... -
Page 71: T2 Roller Unit
2. Open the Rear Cover(refer to 5.5.1) and then release and then release the Round Cover from the machine the Rear Cover in the direction of arrow, as shown completely, as shown below. below. Rear Cover Round Cover Service Manual Samsung Electronics... -
Page 72: Ope Unit
5. Remove the nine screws securing the OPE PBA to the OPE Cover. 3. Apply light pressure to the front of the OPE Unit and pull it in the direction of arrow, as shown below. OPE Cover OPE Unit Cover OPE PBA Service Manual Samsung Electronics... - Page 73 Mode Onetouch Menu Tel_Copy 9. For easy disassembly, release the Battery-NIH. 7. Remove the Lens and Keys from the OPE Cover. Battery-NIH Mode Onetouch Copy Menu LED Lens Stop Clear Start Color On Hook Start Black Service Manual Samsung Electronics...
-
Page 74: Side Cover (Left, Right)
Cover and pull it to the right side in the direction of arrows, as shown below. Left Side Cover Notice : Be careful not to damage the hooks when remove the Side Cover (Left, Right). Right Side Cover Service Manual Samsung Electronics... -
Page 75: Adf Ass'y
4. Remove the two screws securing the ADF Harness to the Cover Connector and then take care to thread the ADF Harness through the Cover Platen. ADF Engine part ADF Ass'y Connector Cover ADF Harness Service Manual 5-10 Samsung Electronics... - Page 76 Ferrite Core and the Motor Harness routing. When refitting the ADF Engine part ensure that the Harness and Ferrite are properly located and are clear of the Motor Fan and White Bar Clip. Service Manual 5-11 Samsung Electronics...
-
Page 77: Platen Ass'y
Harness Guide and then apply light pressure to the top of the Harness Guide and pull it to the right Platen Ass'y side in the direction of arrow, as shown below. Scan Harness Guide Service Manual 5-12 Samsung Electronics... - Page 78 Scan Lower and remove it, as shown below. Notice: You should connector remove the CCD Cable vertically to avoid the CCD Cable pin damage. Scan Upper 9. Pull up the CCD Shaft and take out the CCDM. CCDM CCD Shaft Scan Lower Service Manual 5-13 Samsung Electronics...
- Page 79 13. To remove the ADF Lower Harness, first unlatch the Ass'y and then unplug the connector from the Joint hooks in the direction of arrow and then Unplug the PBA. connector from the Joint PBA, as shown below. ADF Lower Harness Scan Motor Ass'y Service Manual 5-14 Samsung Electronics...
- Page 80 Joint PBA 15. Unlatch the Open Sensor and remove it, as shown 17. The connectors are located, as shown below. below. Drawer Main PBA Sensor Lever Open Sensor Motor In Full Cover Open (Joint PBA) Service Manual 5-15 Samsung Electronics...
- Page 81 CCDM as is possible, as shown below. 2) When refitting the Scan Upper Cover take care to ensure that the Cover Open Switch is not trapped. Service Manual 5-16 Samsung Electronics...
-
Page 82: Middle Cover Ass'y
5. Remove the one screw securing the Speaker and then release the Speaker, as shown below. Speaker 3. Remove the five screws securing the Middle Cover Ass'y and then lift the Middle Cover Ass'y, as shown Speaker below. Middle Cover Ass'y Service Manual 5-17 Samsung Electronics... - Page 83 6. If necessary, apply light pressure to the both side of 7. Pull the DC Fan from the Middle Cover Ass'y, as the Jam Cover and pull it in the direction of arrow, as shown below. shown below. DC Fan Jam Cover Service Manual 5-18 Samsung Electronics...
-
Page 84: Fuser Ass'y
5. Remove the one screw securing the Thermistor and release it, as shown below. 3. To remove the Fuser Ass'y, first pull the Holder in the direction of arrow and then take out the Fuser Ass'y, as shown below. Fuser Ass'y Thermistor Holder Service Manual 5-19 Samsung Electronics... - Page 85 8. Remove the two screws securing the Release Lever(L, R) below the both side of the Halogen Lamp and then remove the Release Lever(L,R) in the direction of arrow. Release Lever, L Release Lever, R Service Manual 5-20 Samsung Electronics...
-
Page 86: Hvps
Notice: Be aware of the Terminals(TR, S) to ensure they - Side Cover Left (Refer to 5.8) are not lost. 2. Remove the six screws securing the HVPS and then unplug the all connectors, as shown below. Terminal TR Terminal S HVPS Service Manual 5-21 Samsung Electronics... -
Page 87: Liu Unit
- Harness Guide (Refer to 5.11.3) Sheet LIU 2. Unplug the Film Cable from the LIU PBA. Supporter LIU PBA Film Cable 3. Remove the three screws securing the LIU Unit and remove it, as shown below. LIU Unit Service Manual 5-22 Samsung Electronics... -
Page 88: Shield Main Lower (With Main Pba)
2. Unplug the all connectors from the Main PBA. Shield Main Lower Main PBA 5. The connectors are located, as shown below. 3. Remove the five screws securing the Shield Main Lower(with Main PBA) and remove it. Shield Main Lower (with Main PBA) Service Manual 5-23 Samsung Electronics... -
Page 89: Main Drive Ass'y
Clamp, as shown below. Main Drive Ass'y Notice: The eight screws have numbers stamped into the Main Drive Ass'y base plate. Cable Clamp When refitting the Main Drive Ass'y tighten the screws the order they are numbered. Service Manual 5-24 Samsung Electronics... -
Page 90: Smps
2. Unplug the all connectors(Main PBA, Inlet, Fuser_AC) and remove it in the direction of arrow. from the SMPS, as shown below. Main Shield SMPS Inlet, Fuser_AC 3. Remove the four screws securing the SMPS and remove it. SMPS Service Manual 5-25 Samsung Electronics... -
Page 91: Regi Roller
3. Remove the E-ring below the both side of the Regi Roller, as shown below. Paper Guide E-ring E-ring Regi Roller Regi Roller Notice : Do not grab the rubber part of the Regi Roller, it may cause a malfunction due to a foreigen object. Service Manual 5-26 Samsung Electronics... - Page 92 Disassembly and Reassembly 6. Pull the Feed Idle Shaft. Feed Idle Shaft Service Manual 5-27 Samsung Electronics...
-
Page 93: Feed Roller
3. Remove the Feed Gear and then remove the E-ring may cause a malfunction due to a foreigen from the Feed Shaft, as shown below. object. Feed Gear Notice: Be aware of the E-ring and Spring to ensure they are not lost. Service Manual 5-28 Samsung Electronics... -
Page 94: Pick Up Roller
PicK Up Plate (with Pick Up Guide) Notice: 1) Be aware of the Springs to ensure they are not lost. 2) Clean the surface of the Rubber Pad with ethylalcohol.After wiping, be sure to dry it. Service Manual 5-29 Samsung Electronics... - Page 95 Pick Up Shaft, and then slide the Pick Up Roller Unit left side to right side and take out the left side, as shown below. Pick Up Solenoid Pick Up Roller Unit Service Manual 5-30 Samsung Electronics...
- Page 96 Disassembly and Reassembly 10. Remove the one screw securing the Cam Holder and remove it. Cam Holder Service Manual 5-31 Samsung Electronics...
-
Page 97: Exit Roller Unit
Exit Frame using a flat-blade screwdriver and then pull the Exit Roller Unit, as shown below. Exit Roller Unit 3. For easy disassembly, remove the one screw secur- ing the Exit Sensor and remove it. Exit Sensor Lock Device Service Manual 5-32 Samsung Electronics... - Page 98 6. Remove the Holder Bearing(with Roller Exit F/Down) from the both side of the Exit Frame, as shown below and then remove the Roller Exit Main and Holder Exit F/Down. Holder Bearing Exit Roller Exit Gear Roller Exit Main Holder Exit F/Down Service Manual 5-33 Samsung Electronics...
-
Page 99: Lsu
3. Apply light pressure to the both side of the MP Unit - Cassette Unit (Refer to 5.3.1) and pull it in the direction of arrow, as shown below. 2. Down the MP Unit, as shown below. MP Unit Service Manual 5-34 Samsung Electronics... -
Page 100: Alignment And Adjustmens
Using the Tech mode; Clearing paper jam and test patterns. Much of this chapter is also included in the user's guide. 6.1 Control Panel 6.1.1 CLX-3160FN Speed buttons: Allows you to store frequently- OK: Confirms the selection on the screen. - Page 101 Status: Shows the status of your machine. Black Start: Starts a job in Black and White Darkness: Adjusts the document brightness for mode. the current copy job. Original Type: Selects the document type for the current copy job. Service Manual Samsung Electronics...
-
Page 102: Led Function
A minor error occurs and the machine is waiting an error to be cleared. Check the display message. When the problem is cleared, the machine resumes. The toner cartridge is low. Order a new toner cartridge. You can temporarily improve print quality by redistributing the toner. Service Manual Samsung Electronics... -
Page 103: Jam Removal
1. Remove any remaining pages from the ADF. 4. Close the ADF cover. Then load the removed pages, if any, back into the ADF. 2. Open the ADF cover. 3. Pull the jammed paper gently out of the ADF. Service Manual Samsung Electronics... - Page 104 3. Close the scanner lid. Then load the removed 3. Close the scanner lid. Then load the removed pages back into the ADF. pages back into the ADF. Service Manual Samsung Electronics...
-
Page 105: Clearing Paper Jams
If the paper does not move when you pull, or if you do not see the paper in this area, check the paper exit area. 4. Insert the tray 1 into the machine until it snaps into place. Printing automatically resumes. Service Manual Samsung Electronics... - Page 106 2. Remove the jammed paper from the machine. 5. Close the jam cover. Printing automatically resumes. If the paper does not move when you pull, or if you do not see the paper in this area, go to the next step. Service Manual Samsung Electronics...
- Page 107 4. If you see the jammed paper, pull it straight up. Skip to step 8. 4. Insert the tray 1 into the machine until it snaps into place. Printing automatically resumes. If you still do not see the paper, go to the next step. Service Manual Samsung Electronics...
- Page 108 Alignment and Adjustmens 5. Open the fuser door. 6. Locate the jammed paper and pull it out. Service Manual Samsung Electronics...
-
Page 109: System Setup
2. Press OK when Machine Setup appears. 3. Press the Scroll buttons until Language appears and press OK. 4. Press the Scroll buttons until the language you want appears and press OK. 5. Press Stop/Clear to return to Standby mode. Service Manual 6-10 Samsung Electronics... -
Page 110: Setting The Date And Time
The current date and time are shown on the display when your machine is on and ready to work. For the CLX-3160FN, all of your faxes will have the date and time printed on them. Note : If power to the machine is cut off, you need to reset the correct time and date once the power has been restored. -
Page 111: Setting Sounds
Alarm Sound: Turns the alarm sound on or off. With this option set to On, an alarm tone sounds when an error occurs or fax communication ends. Speaker (CLX-3160FN only): Turns on or off the sounds from the telephone line through the speaker, such as a dial tone or a fax tone. -
Page 112: Entering Characters Using The Number Keypad
Keypad letters and numbers Correcting numbers or names If you make a mistake while entering a number or name, press the left Scroll button to delete the last digit or character. Then enter the correct number or character. Service Manual 6-13 Samsung Electronics... -
Page 113: Using The Save Modes
3. Press the Scroll buttons until Scan PWR Save appears and press OK. 4. Press the Scroll buttons until the time setting you want appears and press OK. 5. Press Stop/Clear to return to Standby mode. Service Manual 6-14 Samsung Electronics... -
Page 114: Setting Print Job Timeout
3. Press the Scroll buttons until Job Timeout appears and press OK. 4. Press the Scroll buttons until the time setting you want appears and press OK. 5. Press Stop/Clear to return to Standby mode. Service Manual 6-15 Samsung Electronics... -
Page 115: Network Setup
For further details, refer to the user's guide on the network utilities CD that came with your machine. Via the control panel You can set up the following basic network parameters through the machine's control panel: Configure TCP/IP Configure EtherTalk Service Manual 6-16 Samsung Electronics... -
Page 116: Supported Operating Systems
6. When you have finished, press OK. 7. Repeat steps 5 and 6 to configure the other TCP/IP parameters: subnet mask and gateway address. 8. Press the Scroll buttons until Primary DNS appears and press OK. Service Manual 6-17 Samsung Electronics... -
Page 117: Setting Ethernet Speed
1. Press Menu until Network appears on the bottom line of the display and press OK. 2. Press the Scroll buttons until Ethernet Speed appears and press OK. 3. Press the Scroll buttons until the speed you want appears and press OK. 4. Press Stop/Clear to return to Standby mode. Service Manual 6-18 Samsung Electronics... -
Page 118: Restoring The Network Configuration
1. Press Menu until Network appears on the bottom line of the display and press OK. 2. Press the Scroll buttons until Network Info appears and press OK. 3. Press OK when Yes appears. The Network Configuration page prints out. Service Manual 6-19 Samsung Electronics... -
Page 119: Sample Pattern
2. For Windows 98/Me/NT 4.0/2000, select Settings and then Printers. For Windows XP, select Printers and Faxes. 3. Select the Samsung MFP CLX-3160 Series printer. 4. Click the right mouse button on the printer icon and: For Windows 98/Me, select Properties. -
Page 120: Printing A Configuration Page
You can print a configuration page from the printer’s control panel. Use the configuration page to view the current settings, to help troubleshoot problems. To print a configuration page: In ready mode, press and hold the Stop button on the control panel for 5 seconds. A configuration page prints out. Service Manual 6-21 Samsung Electronics... -
Page 121: Periodic Defective Image
White Spot, Horizontal black band Transfer Roller 32.7mm Ghost, Damaged Image by abnormal tranfer Transfer Roller 57.5mm Ghost, Damaged Image by abnormal tranfer Heat Roller 86.6mm Black Spots or Vertical Black Band Pressure Roller 86.6mm Background Service Manual 6-22 Samsung Electronics... -
Page 122: Tech Mode
While in Tech mode, the machine still performs all normal operations. To enter the Tech mode To enter the Tech mode, press in sequence, and the LCD briefly displays ‘TECH’, the machine has entered service (tech) mode. Service Manual 6-23 Samsung Electronics... - Page 123 Alignment and Adjustmens 6.8.2 Setting-up System in Tech Mode Service Manual 6-24 Samsung Electronics...
-
Page 124: Data Setup
Brazil France Oman Italy Poland Spain Bangladesh Austria Kuwait Netherlands Moroco Belgium Algeria Country Portugal Pakistan Sweden Norway Bahrain Denmark Srilanka Finland Saudi Arabia Switzerland Chile Greece Peru Ireland Argentina Turkey Hungary Romania Bulgaria Czech Service Manual 6-25 Samsung Electronics... -
Page 125: Flash Upgrade
1. sending and receiving fax must be the same model. 2. A sending fax must be set up as ECM mode, and a receiving memory must be set up as 100%. If not, the function operates abnormally Service Manual 6-26 Samsung Electronics... - Page 126 4) Scroll to Shading Test and Enter. 5) Select Shading&Print appears on the bottom line and press Enter. 6) Your machine picks up the paper and adjusts the shading value. 7) After adjusting, shading value will be printed with graphic image. Service Manual 6-27 Samsung Electronics...
- Page 127 1. sending and receiving fax must be the same model. 2. A sending fax must be set up as ECM mode, and a receiving memory must be set up as 100%. If not, the function operates abnormally Service Manual 6-28 Samsung Electronics...
- Page 128 MFP before any RDS function can be re- attempted. If no activity is detected on a connected call for a maximum duration of 5 minutes (300 seconds), the call will be released / disconnected from the MFP-side. Service Manual 6-29 Samsung Electronics...
-
Page 129: Machine Test
3. After the scan, CCD SHADING PRO- FILE will be print out. 4. If the printed image is different to the image, the CCD is defect. NOTICE : When you test CCD, make sure that the cover is closed. Service Manual 6-30 Samsung Electronics... -
Page 130: Protocol List
Use this list to check for send and receive errors. If a communication error occurs while the machine is in TECH mode, the protocol list will print automatically. OTHER ITEM This list provides a list of the user system data settings and tech mode settings. Component Check Service Manual 6-31 Samsung Electronics... - Page 131 42.Dev Bias Test control for HVPS is normal or not. Dev Bias On(Off) 43.THV EN/NEG Test THV EN/NEG On(Off) 44.THV ON(1300V) THV On(Off) 45.THV ADC 1300V ADC value displayed. 46.THV ADC 600V~3500 ADC value displayed. Service Manual 6-32 Samsung Electronics...
-
Page 132: Identify Sale Date
Press 1( in the number keypad) : The LCD display shows "Updated date" Press 2( in the number keypad) : The LCD display shows "Product first use date" < Display > OS 1 . 00 . 86 . 07 11-31-2005 Service Data 2004-1-11 Service Manual 6-33 Samsung Electronics... -
Page 133: Error Message
Alignment and Adjustmens 6.9 Error Message Messages in the colored cells are available only with CLX-3160FN. Display Meaning Suggested solutions [Color] Toner Empty The color toner cartridge has run out. The Replace the color toner cartridge with a machine stops printing. - Page 134 Install the part into your machine. not installed. Invalid [Color] Toner The color toner cartridge you have Install the a Samsung-genuine color toner installed is not for your machine. cartridge designed for your machine. Invalid [Part] The color part of the machine is not for Install the a Samsung-genuine part your machine.
- Page 135 There is no paper in the tray 1. Load paper in the tray 1. Paper Empty Tray 2 There is no paper in the optional tray 2. Load paper in the optional tray 2. Paper Empty Service Manual 6-36 Samsung Electronics...
-
Page 136: Troubleshooting
- Power Module error OP Panel - Main PBA error - LCD Panel error Refer to Indicate Ready or Error Massage Error Massage Power save <Chapter 6.9> Test Print printing Refer to "Solution Quality is of Image Problem" Nomal? Service Manual Samsung Electronics... -
Page 137: Solving Other Problems
Use only transparencies specifically designed for laser printers. Remove each together in the paper transparency as it exits from the machine. exit. Envelopes skew or fail Ensure that the paper guides are against both sides of the envelopes. to feed correctly. Service Manual Samsung Electronics... -
Page 138: Printing Problems
Check the power cord connections. Check the machine power switch and the power source. does not The machine is not selected as the Select Samsung CLX-3160 Series as your print. default printer. default printer in your Windows. Check the machine for the following: The front cover is not closed. - Page 139 If you are using Windows 9x/Me, the From the Start menu, choose Settings and then Spool Setting may be set incorrectly. Printers. Right-click the Samsung CLX-3160 Series machine icon, choose Properties, click the Details tab, and then choose the Spool Settings button.
-
Page 140: Print Quality Problems
The drum inside the toner cartridge has probably been scratched. Remove the toner cartridge and install a new one. AaBbCc AaBbCc If white vertical streaks appear on the page: AaBbCc The surface of the LSU part inside the machine may be dirty. Clean the LSU. AaBbCc AaBbCc Service Manual Samsung Electronics... - Page 141 If characters are improperly formed and producing hollow images, the paper stock may characters be too slick. Try a different paper. If characters are improperly formed and producing a wavy effect, the scanner unit may need service. For service, contact a service representative. Service Manual Samsung Electronics...
- Page 142 The toner cartridge may not be installed properly. Black pages Remove the toner cartridge and reinsert. The toner cartridge may be defective and need replacing. Remove the toner cartridge and install a new one. The machine may require repair. Contact a service representative. Service Manual Samsung Electronics...
- Page 143 AaBbCc AaBbCc If the printed paper is curled or paper does not feed into the printer: Curl Turn the stack of paper over in the paper tray. Also try rotating the paper 180° in the tray. Service Manual Samsung Electronics...
-
Page 144: Copying Problems
The machine may be turned on and off frequently. The scanner lid may be left open while copies are being made. Service Manual Samsung Electronics... -
Page 145: Scanning Problems
Ensure that the machine is properly connected and the power is on, Then printing data. When the current restart your computer. job is completed, try again." The USB cable may be improperly connected or the power may be off. "Invalid handle." "Scanning has failed." Service Manual 7-10 Samsung Electronics... -
Page 146: Network Scan Problems
I cannot view the Help file. To view the Help file, you need to have Internet Explorer 4 service pack 2 or above. I cannot use the Samsung Network Check your operating system. Supporting operating systems are Windows Scan Manager. -
Page 147: Common Windows Problems
These messages may appear during printing. Just keep waiting until the error occurred." messages appear. machine finishes printing. If the message appears in standby mode or after printing has been completed, check the connection and/or whether an error has occurred. Service Manual 7-12 Samsung Electronics... -
Page 148: Common Linux Problems
If this is the case, you should wait for completion of the current job or should press Release port button, if you are sure that the present port's owner is not functioning properly. Service Manual 7-13 Samsung Electronics... - Page 149 If you don't want to uninstall MFP driver and install it again, you may make the necessary symbolic link yourself. Please, log in as root user and invoke the following command: ln -sf /usr/local/bin/samsung/slpr /usr/bin/lpr I cannot scan via Gimp Front-end. Check if Gimp Front-end has "Xsane:Device dialog." on the "Acquire"...
- Page 150 Troubleshooting 7.2.10 Common Macintosh problems (CLX-3160FN only) Condition Suggested solutions The printer does not print a docu- You should change the Print Method option to Print as Image when you print ment from Acrobat Reader. from Acrobat Reader. The document has printed, but the Update your Mac OS to OS 10.3.3.
-
Page 151: Exploded Views & Parts List
8. Exploded Views and Parts List 8.1 Main 8.2 Middle Cover 8.3 Front Cover 8.4 Right Cover 8.5 Round Cover 8.6 Rear Cover 8.7 Cover Platen 8.8 Platen Ass'y 8.9 OPE(CLX-3160FN) 8-10 OPE(CLX-3160N) 8-11 8.10 Scan Ass'y 8-12 8.11 ADF Ass'y 8-13 8.12 ADF Lower 8-14 8.13 ADF Motor... -
Page 152: Main
Exploded Views & Parts List 8.1 Main Service Manual Samsung Electronics... -
Page 153: Middle Cover
Exploded Views & Parts List 8.2 Middle Cover Service Manual Samsung Electronics... -
Page 154: Front Cover
Exploded Views & Parts List 8.3 Front Cover Service Manual Samsung Electronics... -
Page 155: Right Cover
Exploded Views & Parts List 8.4 Right Cover Service Manual Samsung Electronics... -
Page 156: Round Cover
Exploded Views & Parts List 8.5 Round Cover Service Manual Samsung Electronics... -
Page 157: Rear Cover
Exploded Views & Parts List 8.6 Rear Cover Service Manual Samsung Electronics... -
Page 158: Cover Platen
Exploded Views & Parts List 8.7 Cover Platen Service Manual Samsung Electronics... -
Page 159: Platen Ass'y
Exploded Views & Parts List 8.8 Platen Ass'y 1-1-2 1-1-4 1-1-3 1-1-1 1-1-4 1-1-6 1-1-5 2-2-5 2-2-6 2-2-4 2-2-3 2-2-2 2-19 2-2-1 2-2-7 2-17 2-23 2-10 2-22 2-12 2-11 2-24 2-13 2-13 2-15 2-14 2-21 2-20 2-16-1 2-16 2-16-2 2-18 Service Manual Samsung Electronics... -
Page 160: Ope(Clx-3160Fn)
Exploded Views & Parts List 8.9 OPE(CLX-3160FN) Service Manual 8-10 Samsung Electronics... -
Page 161: Ope(Clx-3160N)
Exploded Views & Parts List 8.9 OPE(CLX-3160N) Service Manual 8-11 Samsung Electronics... -
Page 162: Scan Ass'y
Exploded Views & Parts List 8.10 Scan Ass'y Service Manual 8-12 Samsung Electronics... -
Page 163: Adf Ass'y
Exploded Views & Parts List 8.11 ADF Ass'y 3-2-4 3-2-3 3-2-5 4-18 3-2-1 3-2-2 4-11 4-10 4-12 4-8B 4-15 4-16B 4-8A 4-16A 4-15 4-17 4-14 4-13 Service Manual 8-13 Samsung Electronics... -
Page 164: Adf Lower
Exploded Views & Parts List 8.12 ADF Lower Service Manual 8-14 Samsung Electronics... -
Page 165: Adf Motor
Exploded Views & Parts List 8.13 ADF Motor Service Manual 8-15 Samsung Electronics... -
Page 166: Frame
Exploded Views & Parts List 8.14 Frame-1 Service Manual 8-16 Samsung Electronics... - Page 167 Exploded Views & Parts List Frame-2 Service Manual 8-17 Samsung Electronics...
-
Page 168: Main Driver
Exploded Views & Parts List 8.15 Main Driver-1 Service Manual 8-18 Samsung Electronics... -
Page 169: Main Driver
Exploded Views & Parts List Main Driver-2 Service Manual 8-19 Samsung Electronics... -
Page 170: Lsu Cover
Exploded Views & Parts List 8.16 LSU Cover Service Manual 8-20 Samsung Electronics... -
Page 171: Itb Unit
Exploded Views & Parts List 8.17 ITB Unit Service Manual 8-21 Samsung Electronics... -
Page 172: Opc Deve
Exploded Views & Parts List 8.18 OPC DEVE Service Manual 8-22 Samsung Electronics... - Page 173 Exploded Views & Parts List Service Manual 8-23 Samsung Electronics...
-
Page 174: Fuser Ass'y
Exploded Views & Parts List 8.19 Fuser Ass'y Service Manual 8-24 Samsung Electronics... -
Page 175: Cassette
Exploded Views & Parts List 8.20 Cassette Service Manual 8-25 Samsung Electronics... - Page 176 Parts List Service Parts List (Model code : CLX-3160FN/XAA) SA : SERVICE AVAILABLE SNA : SERVICE not AVAILABLE DNA : DELIVERY not AVAILABLE Drawer# SEC-Code Description & Specification Location Service 8.1-1 JC97-02683A MEA UNIT-FRAME;CLX-3160FN,SEC,WORLD,-,-, 8.1-2 JC96-03929A ELA HOU-SCAN_4IN1;CLX-3160FN/XAA,SEC,-,4 8.1-3 JC96-04089A ELA UNIT-COVER MIDDLE;CLX-3160FN,SEC,WOR...
- Page 177 JC68-01760A LABEL-INFORMATION;ML-4550,SEC,ART PAPER 8.2-14 JC39-00564A CBF HARNESS-BIN_FULL;CLX-3160,WIRE HARNE 8.3-1 JC63-01022A COVER-M-FRONT;CLX-3160FN,HIPS,T2.5,W461. 8.3-2 JC68-01732A LABEL-INSTRUCTION;CLX-3160FN,-,PP150G,15 8.3-2 JC68-01684A LABEL-INSTRUCTION;SCX-5530FN,SEC,YUPO PA 8.4-1 JC63-01024A COVER-M-RIGHT;CLX-3160FN,PC + ABS,T2.5,W 8.4-2 JC63-01174A COVER-M-RIGHT-GRILL;CLX-3160FN,PC+ABS,2. 8.5-1 JC63-01026A COVER-M-REAR_MFP;CLX-3160FN,HIPS,T2.5,W4 8.5-2 JC67-00160A CAP-NETWORK;CLP-300,EPDM,T4.5,20.5,20,G3 8.6-1 JC63-00844A COVER-M-REAR;CLP-300,ABS,T3.0,249.3,296. Z4514 8.6-2 JC64-00215A BUTTON-M-OPEN REAR;CLP-300,ABS FR V0,80.
- Page 178 LABEL-CAUTION;SCX-5530FN,-,WHITE PET,0.0 8.8-2-21 JC68-01825A LABEL-CAUTION;CLP-300,SEC,WHITE POLY,-,W 8.8-2-22 JC92-01798A PBA SUB-JOINT;CLX-3160,SEC,KOREA,IRIS,-, 8.8-2-23 JC39-00485A CBF HARNESS-HVPS;CLP-300,WIRE HARNESS,UL 8.8-2-24 JC39-00567A CBF HARNESS-SYS_GND;CLX-3160,WIRE HARNES 8.9-0 JC96-03913A ELA HOU-OPE 4IN1;CLX-3160FN/XAA,SEC,-,-, 8.9-1 JC63-01020A COVER-M-OPE 4IN1;CLX-3160FN,HIPS,T2.5,W4 8.9-2 JC63-00991A COVER-M_NEVI;SCX-5530FN,HIPS,2,82.6,87.8 8.9-3 JC63-00993A COVER-M_LCD;SCX-5530FN,PC,1,86.6,39,-,-, Z4391 8.9-4 JC63-00999A SHEET-ONETOUCH;SCX-5530FN,PC ,0.38T,66.5 8.9-5 JC68-01639A LABEL-ONETOUCH;SCX-5530FN,SEC,ART PAPER,...
- Page 179 Z4544 8.10-6 JC39-00568A CBF HARNESS-PANEL;CLX-3160,WIRE HARNESS, 8.10-7 6502-000121 CABLE CLAMP;DAMC-101,D7~8,L19,SCP-1,NTR Z4538 8.10-7 6502-000132 CABLE CLAMP;DAWS-1NE,ID11,L21.0,NTR,NYLO C0069 8.11-1 JC96-03916A ELA HOU-ADF LOWER;CLX-3160FN/XAA,SEC,-,- 8.11-2 JC96-03915A ELA HOU-ADF MOTOR;CLX-3160FN/XAA,SEC,-,- 8.11-3 JC97-02410A MEA-ADF UPPER;SCX-5530FN,SEC,-,-,-,-,- 8.11-3-1 JC63-00985A COVER-M_ADF UPPER;SCX-5530FN,HIPS,-,188. Z4370 8.11-3-2 JC97-01940B MEA UNIT-HOLDER ADF;SCX-5530FN,-,-,-,-,- Z4371 8.11-3-2-1...
- Page 180 Z6018 8.13-9 JB70-00070A IPR-WASHER WAVE;SF-4750C,SUS301,-,0.1T,- 8.13-10 JB72-00844A PMO-WHITE CLUTCH SUB 29;SCX-1110F,POM(F2 Z6019 8.13-11 JC31-00036A MOTOR STEP-ADF;M42SP-13NK,SCX-4920N,0.6A Z4364 8.13-13 JC61-01659A BRACKET-P-GEAR L;CLX-3160FN,SECC,T1.2,W1 8.13-14 JC66-00322A GEAR-CLUTCH 39;SCX-5150,POM,M0.6,Z39,-,W Z6061 8.13-15 JC66-00454A LINK-M-SWING ADF;SCX-4216F,DELIN 500CL,- 8.13-16 JC66-00455A GEAR-58/25 ADF;SCX-4216F,POM,M0.6,Z58/25 Z4368 8.13-17 JC66-00456A GEAR-40/21 ADF;SCX-4216F,POM,M0.6,Z40/21 8.13-18...
- Page 181 Z4572 8.14-73 JC72-00382B PMO-BUSHING FEED;ML-1710,POM(DERLIN 8903 O1102 8.14-74 JC66-00598A ROLLER-FEED;ML-1710,SUM24L+NI+EPDN,5/12. F6200 8.14-75 JC66-01213A SHAFT-M-FEED;CLX-3160FN,POM,L46.7,D10,WH 8.14-79-1 JC66-01212A GEAR-FEED;CLX-3160FN,POM,M0.8,Z16,-,-,-, 8.14-79-2 JC61-01667A BUSH-M CLUTCH;CLX-3160FN,POM,ID6.0,OD12. 8.14-80 JC97-02685A MEA UNIT-MP;CLX-3160FN,SEC,WORLD,-,-,-,- 8.14-81 JC63-01147A SHEET-MANUAL;CLX-3160FN,PET,T0.188,W217, 8.15-1 JC61-01450A BRACKET-P-DRIVE MOTOR;CLP-300,SECC,T1.2, Z4524 8.15-2 6031-001528 WASHER-PLAIN;POLYMIDE,-,ID6,OD13.5,T0.5, Z4422 8.15-3 JC66-01042A GEAR-IDLE DEVE Z19;CLP-300,POM,M0.8,Z19, Z4423 8.15-4...
- Page 182 Parts List SA : SERVICE AVAILABLE SNA : SERVICE not AVAILABLE DNA : DELIVERY not AVAILABLE Drawer# SEC-Code Description & Specification Location Service 8.15-12 JC66-01208A GEAR-RDCN FUSER CAM;CLP-300,POM,M0.8/Z0. Z4431 8.15-13 JC66-01045A GEAR-IDLE ITB Z43;CLP-300,POM,M0.5,Z43,- Z4432 8.15-14 JC66-01048A GEAR-ITB DRIVE;CLP-300,POM,M0.5/M0.5,Z10 Z4433 8.15-15 JC66-01054A GEAR-RDCN OPC;CLP-300,POM,M0.5/M0.6,Z79/...
- Page 183 Parts List SA : SERVICE AVAILABLE SNA : SERVICE not AVAILABLE DNA : DELIVERY not AVAILABLE Drawer# SEC-Code Description & Specification Location Service 8.17-15 JC61-01495A FRAME-M-WASTE ITB;CLP-300,ABS GF20%,GR-4 Z4637 8.17-16 JC61-01497A HOUSING-M-CLEANING ITB;CLP-300,ABS GF 20 Z4638 8.17-17 JC61-01498A HOLDER-M-BUSH CHARGE;CLP-300,POM(M90-44) Z4639 8.17-18 JC61-01499A...
- Page 184 8.19-12 JC61-01534A BUSH-M-2PR L;CLP-300,PPS(RBA313N),-,-,5. Z4592 8.19-13 JC61-01535A BUSH-M-2PR R;CLP-300,PPS(RBA313N),-,5.3, Z4593 8.19-14 JC61-01522A GUIDE-M-INPUT FUSER;CLP-300,PET+GF30%,5V Z4594 8.19-15 JC66-01222A LEVER-M ACTUATOR EXIT;CLX-3160FN,PET+GF3 8.19-16 JC61-01476A PLATE-P-GROUND FUSER;CLP-300,SUS 304 CSP Z4596 8.19-17 JC70-00518A ELECTRODE-P-AC R;CLP-300,C5210P T0.8,D3. Z4597 8.19-18 JC70-00519A ELECTRODE-P-AC L;CLP-300,C5210P T0.8,D3. Z4598 8.19-19 JC68-00408A LABEL(R)-LV FUSER;COMMON,PVC,-,110V,-,,,...
- Page 185 #N/A JC96-03614A ELA UNIT-TONER TANK M;CLP-300,SEC,EXPORT Z4498 #N/A JC96-03615A ELA UNIT-TONER TANK C;CLP-300,SEC,EXPORT Z4497 #N/A JC96-03616A ELA UNIT-TONER TANK K;CLP-300,SEC,EXPORT Z4500 #N/A JC96-04086A ELA UNIT-ENGINE;CLX-3160FN,SEC,WORLD,-,- #N/A JC99-01962A INA-ACCESSORY;CLX-3160FN,SEC,XAA,IRIS,FA #N/A JC99-01964A PAA-LABEL;CLX-3160FN,XAA,-,-,-,- #N/A JC99-01966A PAA WOOD-PACKING;CLX-3160FN,XAA,-,-,-,- #N/A 0202-001240 SOLDER-WIRE;HSE-01,-,D3,SN/0.5CU/0.03NI/ #N/A 0202-001492 SOLDER-WIRE FLUX;HSE-02 LFM48 SR-34 S,-,...
- Page 186 #N/A JC63-01046A SHEET-AGITATOR;CLP-300,PET,T0.125,W25.5, #N/A JC63-01047A SHEET-AGITATOR BK;CLP-300,PET,T0.125,W35 #N/A JC63-01049A SHEET-HOUSING ITB;CLP-300,PET FILM,T0.18 Z4529 #N/A JC63-01110A SHEET-BRACKET ITB;CLP-300,PET FILM,T0.18 #N/A JC63-01149A SHEET-REGI;CLX-3160FN,PC,T0.5,W39.2,L29. #N/A JC63-01166A SHEET-MP-SENSOR;CLX-3160FN,PET,T0.125,W3 #N/A JC63-01253A SHEET-BOTTLE AUGER;CLP-300,PET,T0.125,-, #N/A JC64-00218A SHUTTER-M-TONER BOTTLE;CLP-300,POM HB,-, #N/A JC64-00260A HANDLE-M-BOTTLE;CLP-300,ABS,T5.9,W32.3,L #N/A JC64-00260B HANDLE-BOTTLE Y;CLP-300,ABS,T5.4,-,L43.6...
- Page 187 SHAFT-SPRING;CLP-300,POM,L16.5,OD11.5,BL #N/A JC66-01146A SHAFT-AUGER K;CLP-300,POM,L70.3,OD10,WHI #N/A JC66-01216A PULLEY-M REGI;CLX-3160FN,POM,HB,WHITE,PI #N/A JC66-01217A PULLEY-M FEED;CLX-3160FN,POM,HB,-,PI6,PI #N/A JC66-01219A LEVER-M ACTUATOR MANUAL;CLX-3160FN,PC,T2 #N/A JC67-00131A TANK-M-TONER BOTTLE Y;CLP-300,ABS HB,-,P #N/A JC67-00134A TANK-M-TONER BOTTLE BK;CLP-300,ABS HB,-, #N/A JC67-00135A CAP-M-TONER BOTTLE;CLP-300,ABS HB,-,PI59 #N/A JC67-00135B CAP-TONER BOTTLE C;CLP-300,ABS HB,T10.87...
- Page 188 Parts List SA : SERVICE AVAILABLE SNA : SERVICE not AVAILABLE DNA : DELIVERY not AVAILABLE Drawer# SEC-Code Description & Specification Location Service #N/A JC97-02638A MEA UNIT-TERMINAL GND;CLP-300,SEC,EXPORT #N/A JC97-02640A MEA UNIT-REGIACTUATOR;CLP-300,SEC,EXPORT #N/A JC97-02641A MEA UNIT-EXIT ROLLER;CLP-300,SEC,EXPORT, #N/A JC97-02642A MEA UNIT-EMPTY ACT;CLP-300,SEC,EXPORT,-, #N/A JC97-02829A MEA UNIT-PLATE K_UP;CLP-300,SEC,WORLD,-,...
- Page 189 Parts List SA : SERVICE AVAILABLE SNA : SERVICE not AVAILABLE DNA : DELIVERY not AVAILABLE Drawer# SEC-Code Description & Specification Location Service #N/A 2007-000105 R-CHIP;200Kohm,5%,1/10W,TP,1608 #N/A 2007-000106 R-CHIP;220Kohm,5%,1/10W,TP,1608 #N/A 2007-000107 R-CHIP;470Kohm,5%,1/10W,TP,1608 #N/A 2007-000113 R-CHIP;33ohm,5%,1/10W,TP,1608 #N/A 2007-000123 R-CHIP;1.5Kohm,5%,1/10W,TP,1608 #N/A 2007-000132 R-CHIP;180Kohm,5%,1/10W,TP,1608 #N/A 2007-000133...
- Page 190 Parts List SA : SERVICE AVAILABLE SNA : SERVICE not AVAILABLE DNA : DELIVERY not AVAILABLE Drawer# SEC-Code Description & Specification Location Service #N/A 2602-000061 TRANS-PULSE;30UH,0.225/0.325OHM,1:1.5,9. #N/A 2602-000062 TRANS-PULSE;450UH,0.25/0.25OHM,1:1,12.8X #N/A 2703-000300 INDUCTOR-SMD;1uH,10%,1608 #N/A 2703-002055 INDUCTOR-SMD;2.2UH,20%,6363 #N/A 2801-000111 CRYSTAL-SMD;0.032768MHZ,20PPM,28-AAW,12. #N/A 2804-001520 OSCILLATOR-CLOCK;6MHz,25ppm,10TTL,15pF,T #N/A 2901-001178...
- Page 191 #N/A JC62-00342A SEAL-SIDE CLN OPC;CLP-300,POLYURETHANE F #N/A JC62-00343A SEAL-SENSOR TOP;CLP-300,EPDM,-,T2.5,W4,L #N/A JC63-00858A COVER-M-WASTE OPC;CLP-300,ABS,T2,W15.8,L #N/A JC63-00883A COVER-M-WASTE;CLP-300,PC(141R),T2.0,W77, #N/A JC63-00898A COVER-M-DEVE Y;CLP-300,ABS HF0660I,T1.5, #N/A JC63-00899A COVER-M-DEVE M;CLP-300,ABS HF0660I,T1.5, #N/A JC63-00900A COVER-M-DEVE C;CLP-300,ABS HF0660I,T1.5, #N/A JC63-00901A COVER-M-DEVE K;CLP-300,ABS HF0660I,T1.5, #N/A JC63-01037A TRAY-M-MP;CLX-3160FN,ABS,T2.0,W245.4,L17...
- Page 192 #N/A JC67-00144A TANK-M-WASTE;CLP-300,ABS(TR557A),T2.0,W1 #N/A JC67-00162A CAP-DUCT;CLP-300,NBR,T0.7,17.8,19.7,-,- #N/A JC69-01055A PAD-KNOCK UP;CLP-300,RUB-OTH,T1.0,W10,L3 #N/A JC70-00050A IPR-TERMINAL;SF-5100,SWRCH1018,-,-,-,-,8 Z4562 #N/A JC70-00521A ADJUST-M-MP_L;CLX-3160FN,ABS HB,T2.0,W11 #N/A JC70-00522A ADJUST-M-MP_R;CLX-3160FN,ABS HB,T2.0,W11 #N/A JC70-10232A IPR-PLATE SAW;ML-80,SUS304 CSP 1/2H,-,T0 O1099 #N/A JC70-10961A IPR-TERMINAL FU;ML-165,C5210P,-,T0.3,-,- K3422 #N/A JC70-40912A ICT-SHAFT HV LARGE;ML-5000A,SWCH18A,-,¥÷ O1100...
- Page 193 Parts List SA : SERVICE AVAILABLE SNA : SERVICE not AVAILABLE DNA : DELIVERY not AVAILABLE Drawer# SEC-Code Description & Specification Location Service #N/A JC72-00463A PMO-CAP CONNECTOR L;ML-6060A,POM,BLACK,- Z0013 #N/A JC72-00465A PMO-CAP CONNECTOR U;ML-6060A,POM,BLACK,- Z0014 #N/A JC72-01004A PMO-IDLE KNOCK UP MP;ML-2150,POM,BLK,-,M P0041 #N/A JC72-41010A...
- Page 194 JC66-01073A GEAR-T2 ROLLER;CLP-300,POM,M0.8,Z28,-,WH #N/A JC66-01098A GEAR-CHARGE;CLP-300,POM (M90-44),M0.8,Z1 #N/A JC66-01104A ROLLER-TRANSFER;CLP-300,SUM22+HYBRID FOA #N/A JC66-01224A GEAR-WORM CLUTCH;CLP-300,POM,M0.8,Z2,-,W #N/A JC66-01308A ROLLER-CHARGE;CLP-300,NBR+ECO,D12,L230,- #N/A JC68-01099A LABEL(P)-WARNING ADF;COMMON,SAMSUNG,ART1 #N/A JC70-00525A HUB-M-CLUTCH SPRING;CLP-300,POM,-,D13.4, #N/A JC71-10322B NPR-EARTH OPC;-,ML-80,C5210P-1/2H,T0.2,- #N/A JC94-01118A #N/A JC94-01127A #N/A JC94-01128A #N/A JC94-01136A REV 0.1...
- Page 195 Parts List SA : SERVICE AVAILABLE SNA : SERVICE not AVAILABLE DNA : DELIVERY not AVAILABLE Drawer# SEC-Code Description & Specification Location Service #N/A JC41-00202A PCB-TONER_RX;CLP-500,FR-1,1L,-,1.2,15*10 #N/A JC41-00295A PCB SUB-DEVE_JOINT;CLP-300,FR-1,1L,-,1.6 #N/A JC41-00315A PCB-OPE;SCX-5530FN,FR-1,1,-,1.6T,380*93. #N/A JC41-00326A PCB SUB-JOINT;CLX-3160,FR-4,2L,1.6T,110* #N/A JC61-00695A HINGE-M-CAM;SCX-4216F,POM,-,-,-,WHITE,-, H3011 #N/A JC61-00696A...
-
Page 196: Block Diagram
Block Diagram 9. Block Diagram Service Manual Samsung Electronics... -
Page 197: Connection Diagram
Connection Diagram 10. Connection Diagram Service Manual 10-1 Samsung Electronics... -
Page 198: Reference Information
• Tweezers Standard : For general home use, small type. • Spring Hook • Cotton Swab Standard : For general home use, for medical service. Standard : For general use • Software (Driver) installation CD ROM Service Manual 11-1 Samsung Electronics... -
Page 199: Acronyms And Abbreviations
Dot Per Inch Engineers. Inc DRAM Dynamic Random Access Memory Pound(s) Digital Voltmeter International Color Consortium Dot Per Inch Image Output Terminal (Color printer, Copier) DRAM Dynamic Random Access Memory Isopropy Alcohol Enhanced Capability Port Service Manual 11-2 Samsung Electronics... - Page 200 SCF/SCT Second Cassette Feeder/Second Megabyte Cassette Tray Multi-Functional Product SMPS Switching Mode Power Supply Megahertz SPGP Samsung Printer Graphic Processor MPBF Mean Prints Between Failure Samsung Printer Language MPF/MPT Multi Purpose Feeder/Multi Purpose Tray SPL-C Samsung Printer Language-Color NVRAM Nonvolatile random access memory...
-
Page 201: Select A Location For The Printer
• Provide the proper environment : - A firm, level surface - Away from the direct airflow of air conditioners, heaters, or ventilators - Free of extreme fluctuations of temperature, sunlight, or humidity - Clean, dry, and free of dust Service Manual 11-4 Samsung Electronics... -
Page 202: A4 Iso 19752 Standard Pattern
Reference Information 11.4 A4 ISO 19752 Standard Pattern This test page is reproduced at 70% of the normal A4 size Service Manual 11-5 Samsung Electronics... -
Page 203: Wireless Lan
The most of main wireless networking companies are attending and the main companies are Lucent technologies, Cisco, Intel/Symbol, 3Com, Enterasys (Cabletron), Compaq, IBM, Nokia, Dell, Philips, Samsung elec- tronic, Sony, Intersil, and so on. This mark certifies mutual compatibility among product has Wi-Fi (IEEE 802.1) and it is certified as a standard of... - Page 204 ELECTRONICS Samsung Electronics Co.,Ltd. September. 2006 * This service manual is a property of Samsung Electronics Co., Ltd. Printed in Korea. Any unauthorized use of Manual can be punished under applicable international and/or domestic law. VERSION NO. : 1.00 CODE : JC-0175C...