Chapters
Table of Contents
Troubleshooting

Related Manuals for Onkyo TX-NR686


Summary of Contents for Onkyo TX-NR686
- Page 1 AV RECEIVER ≫ Table of contents TX-NR686 ≫ Connections Instruction Manual ≫ - Connecting Speakers ≫ Playback ≫ Setup ≫ Troubleshooting ≫ Appendix ≫ Supplementary Information Front Panel≫ Rear Panel≫ Remote≫...
-
Page 2: Table Of Contents
Contents Connections Playback Setup ≫ ≫ ≫ ≫ What’s in the box Connecting a Pre-main Amplifier (ZONE 2) Part Names Connecting Antennas Front Panel Network Connection Connecting the Power Cord Display Playback Rear Panel Remote Controller AV Component Playback Connections Basic Operations Connecting speakers BLUETOOTH... - Page 3 Contents Connections Playback Setup ≫ ≫ ≫ ≫ Setup Playing back files on a PC and NAS (Music Server) Windows Media Player settings ® Setup Menu Playing Back Menu list Supported Audio Formats Menu operations Play Queue 1. Input/Output Assign Initial Setup 2.
-
Page 4: Troubleshooting
Contents Connections Playback Setup ≫ ≫ ≫ ≫ Troubleshooting When the unit is operating erratically Troubleshooting Appendix About HDMI General Specifications Front Panel≫ Rear Panel≫ Remote≫... -
Page 5: What's In The Box
Contents Connections Playback Setup ≫ ≫ ≫ ≫ What’s in the box 1. Main unit (1) 2. Remote controller (RC-911R) (1), Batteries (AAA/R03) (2) 3. Speaker setup microphone (1) • Used during Initial Setup. 4. Indoor FM antenna (1) 5. AM loop antenna (1) 6. -
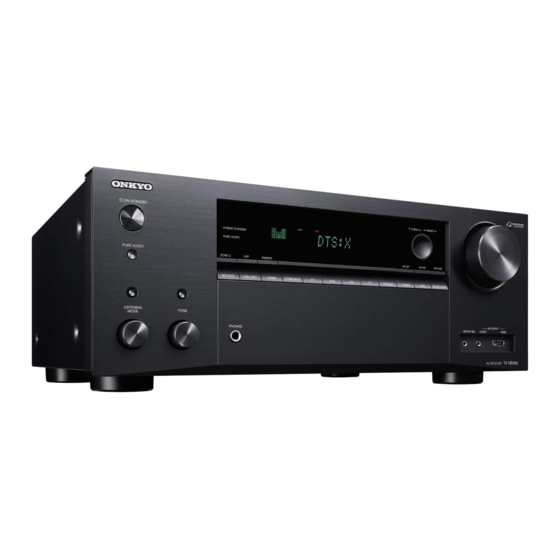
Page 6: Part Names
Contents Connections Playback Setup ≫ ≫ ≫ ≫ Part Names Front Panel 34567 ❏ For details, see ( Front Panel≫ Rear Panel≫ Remote≫... - Page 7 Contents Connections Playback Setup ≫ ≫ ≫ ≫ ON/STANDBY button 2. MUSIC OPTIMIZER button/indicator (North American models): Turns on/off the MUSIC OPTIMIZER function that improves the quality of the compressed audio. PURE AUDIO button/indicator (European, Australian, Taiwanese and Asian models): Switches to the Pure Audio mode. ( p72) 3.
-
Page 8: Display
Contents Connections Playback Setup ≫ ≫ ≫ ≫ Display 1. Speaker/Channel display: Displays the output channel that corresponds to the 5. Blinks when muting is on. selected listening mode. 6. Displays various information of the input signals. 2. Lights in the following conditions. •... -
Page 9: Rear Panel
Contents Connections Playback Setup ≫ ≫ ≫ ≫ Rear Panel 90° 180° (Taiwanese models) bn bo bp ❏ For details, see ( p10) Front Panel≫ Rear Panel≫ Remote≫... -
Page 10: Main
Contents Connections Playback Setup ≫ ≫ ≫ ≫ 1. DIGITAL IN OPTICAL/COAXIAL jacks: Input TV or AV component digital audio signals with a digital optical cable or digital coaxial cable. 2. TUNER AM/FM terminal: Connect the supplied antennas. 3. VIDEO IN jacks: Input AV component video signals with an analog video cable. 4. -
Page 11: Remote Controller
Contents Connections Playback Setup ≫ ≫ ≫ ≫ Remote Controller ON/STANDBY button 2. Input selector buttons: Switches the input to be played. 3. Q (QUICK MENU) button: Pressing this button during playback can make settings such as "Tone" and "Level” quickly on the TV screen while playing. p108) 4. -
Page 12: Connections
Contents Connections Playback Setup ≫ ≫ ≫ ≫ Connections Connecting speakers Connecting the TV Connecting Playback Devices Connecting an AV Component in a Separate Room (Multi-zone Connection) Connecting Antennas Network Connection Connecting the Power Cord Front Panel≫ Rear Panel≫ Remote≫... -
Page 13: Connecting Speakers
Contents Connections Playback Setup ≫ ≫ ≫ ≫ Connecting speakers You can select the layout of speakers to be installed from various patterns when using this unit. Use the following flow chart to select the speaker layout that suits your speakers and usage environment. -
Page 14: Speaker Installation
Contents Connections Playback Setup ≫ ≫ ≫ ≫ Speaker Installation „ 5.1 Channel System This is a basic 5.1 Channel System. Front speakers output the front stereo sound, and a center speaker outputs the sound of the center of the screen, such as dialogs and vocals. - Page 15 Contents Connections Playback Setup ≫ ≫ ≫ ≫ „ 7.1 Channel System This is a 7.1 Channel System that consists of the basic 5.1 Channel System p14) and added surround back speakers. Front speakers output the front stereo sound, and a center speaker outputs the sound of the center of the screen, such as dialogs and vocals.
- Page 16 Contents Connections Playback Setup ≫ ≫ ≫ ≫ „ 5.1.2 Channel System A 5.1.2 Channel System is a speaker layout consisting of the basic 5.1 Channel System ( p14) and added height speakers. Select the height speakers that suit your speakers and usage environment from the following three types. ❏...
- Page 17 Contents Connections Playback Setup ≫ ≫ ≫ ≫ ❏ Front High Speakers/Rear High Speakers This is a system with the basic 5.1 channel system ( p14) consisting of front speakers, a center speaker, surround speakers and a powered subwoofer, and Installation Example added front high speakers or rear high speakers combined.
- Page 18 Contents Connections Playback Setup ≫ ≫ ≫ ≫ ❏ Ceiling Speakers Installation Example This is a system with the basic 5.1 channel system ( p14) consisting of front speakers, a center speaker, surround speakers and a powered subwoofer, and added top front speakers or top middle speakers or top rear speakers combined. By installing such height speakers, when the input format is Dolby Atmos, you can select the Dolby Atmos listening mode which realizes the most up-to-date 3D sound including overhead sound.
- Page 19 Contents Connections Playback Setup ≫ ≫ ≫ ≫ ❏ Dolby Enabled Speakers (Dolby Speakers) This is a system with the basic 5.1 channel system ( p14) consisting of front speakers, a center speaker, surround speakers and a powered subwoofer, and Installation Example added Dolby enabled speakers (front) or Dolby enabled speakers (surround) combined.
-
Page 20: Speaker Connections And "Speaker Setup" Settings
Contents Connections Playback Setup ≫ ≫ ≫ ≫ Speaker Connections and “Speaker Setup” Settings Connections Make correct connection between the unit's jacks and speaker's jacks (+ side to + side, and - side to - side) for each channel. If the connection is wrong, a bass „... - Page 21 Contents Connections Playback Setup ≫ ≫ ≫ ≫ „ Connect the Subwoofer a Subwoofer cable Connect a powered subwoofer with this unit using a subwoofer cable. Up to two powered subwoofers can be connected. The same signal is output from each SUBWOOFER PRE OUT jack.
- Page 22 Contents Connections Playback Setup ≫ ≫ ≫ ≫ „ 5.1 Channel System “Speaker Setup” settings during „ Initial Setup ( p117) Speaker Setup Speaker Channels 5.1 ch < > Subwoofer Height Speaker Zone Speaker Bi-Amp Select how many speakers you have. Next •...
- Page 23 Contents Connections Playback Setup ≫ ≫ ≫ ≫ „ 5.1 Channel System + ZONE SPEAKER MAIN ROOM “Speaker Setup” settings during „ Initial Setup ( p117) Speaker Setup Speaker Channels 5.1 ch < > Subwoofer Height Speaker Zone Speaker Zone 2 Bi-Amp Select how many speakers you have.
- Page 24 Contents Connections Playback Setup ≫ ≫ ≫ ≫ „ 5.1 Channel System (Bi-Amping the Speakers) “Speaker Setup” settings during „ Initial Setup ( p117) Speaker Setup Speaker Channels 5.1 ch < > Subwoofer Height Speaker Zone Speaker Bi-Amp Select how many speakers you have. Next •...
- Page 25 Contents Connections Playback Setup ≫ ≫ ≫ ≫ „ 7.1 Channel System “Speaker Setup” settings during „ Initial Setup ( p117) Speaker Setup Speaker Channels 7.1 ch < > Subwoofer Height Speaker Zone Speaker Bi-Amp Select how many speakers you have. Next •...
- Page 26 Contents Connections Playback Setup ≫ ≫ ≫ ≫ „ 7.1 Channel System + ZONE SPEAKER MAIN ROOM “Speaker Setup” settings during „ Initial Setup ( p117) Speaker Setup Speaker Channels 7.1 ch < > Subwoofer Height Speaker Zone Speaker Zone 2 Bi-Amp Select how many speakers you have.
- Page 27 Contents Connections Playback Setup ≫ ≫ ≫ ≫ „ 5.1.2 Channel System “Speaker Setup” settings during „ Initial Setup ( p117) Speaker Setup Speaker Channels 5.1.2 ch < > Subwoofer Height Speaker Front High Zone Speaker Bi-Amp Select how many speakers you have. Next •...
- Page 28 Contents Connections Playback Setup ≫ ≫ ≫ ≫ „ 5.1.2 Channel System + ZONE SPEAKER MAIN ROOM “Speaker Setup” settings during „ Initial Setup ( p117) Speaker Setup Speaker Channels 5.1.2 ch < > Subwoofer Height Speaker Front High Zone Speaker Zone 2 Bi-Amp Select how many speakers you have.
-
Page 29: Speaker Combinations
Contents Connections Playback Setup ≫ ≫ ≫ ≫ Speaker combinations • Up to two powered subwoofers can be connected in either combination. SURROUND ZONE 2 Speaker Channels FRONT CENTER SURROUND HEIGHT Bi-AMP BACK (ZONE SPEAKER) 2.1 ch (*1) (*1) 3.1 ch (*1) (*1) 4.1 ch... -
Page 30: Connecting The Tv
Contents Connections Playback Setup ≫ ≫ ≫ ≫ Connecting the TV Connect this unit between a TV and AV component. Connecting this unit with the TV can output the video and audio signals of the AV component to the TV, or play the audio of the TV on this unit. -
Page 31: To Arc Tv
Contents Connections Playback Setup ≫ ≫ ≫ ≫ To ARC TV If the TV supports the ARC (Audio Return Channel) function (*), use only the HDMI cable to connect with the TV. Use the ARC-compatible HDMI IN jack of the TV for connection. -
Page 32: To Non-Arc Tv
Contents Connections Playback Setup ≫ ≫ ≫ ≫ To Non-ARC TV If the TV does not support the ARC (Audio Return Channel) function (*), connect an HDMI cable and digital optical cable. If the TV does not have a DIGITAL OPTICAL OUT jack, you can use an analog audio cable to connect with the AUDIO IN TV jack. -
Page 33: Connecting Playback Devices
Contents Connections Playback Setup ≫ ≫ ≫ ≫ Connecting Playback Devices Connecting an AV Component with HDMI Jack Mounted This is a connection example of an AV component equipped with an HDMI jack. When connecting with an AV component that conforms to the CEC (Consumer Electronics Control) standard, you can use the HDMI CEC function (*) that enables linking with input selectors, etc. -
Page 34: Connecting An Av Component Without Hdmi Jack Mounted
Contents Connections Playback Setup ≫ ≫ ≫ ≫ Connecting an AV Component without HDMI Jack Mounted This is a connection example of an AV component unequipped with an HDMI jack. Select cables that match the jacks of the AV component for connection. For example, when video input is connected to the BD/DVD jack, connect the audio input to BD/DVD jack, too. -
Page 35: Connecting An Audio Component
Contents Connections Playback Setup ≫ ≫ ≫ ≫ Connecting an Audio Component This is a connection example of an audio component. Connect a CD player using a digital optical cable or analog audio cable. You can also connect a turntable that has an MM-type cartridge to the PHONO jack. -
Page 36: Connecting A Video Camera, Etc
Contents Connections Playback Setup ≫ ≫ ≫ ≫ Connecting a Video Camera, etc. Connect a video camera, etc. to the AUX INPUT AUDIO/HDMI jack on the front panel using an HDMI cable or stereo mini plug cable (φ1/8″/3.5 mm). Video camera a HDMI cable Front Panel≫... -
Page 37: Connecting An Av Component In A Separate Room (Multi-Zone Connection)
Contents Connections Playback Setup ≫ ≫ ≫ ≫ Connecting an AV Component in a Separate Room (Multi-zone Connection) Connecting a Pre-main Amplifier (ZONE 2) You can enjoy 2-ch audio in the separate room (ZONE 2) while performing 7.1- ch playback in the main room (where this unit is located). Use an analog cable to connect the ZONE 2 LINE OUT jack of this unit and the LINE IN jack of the pre-main amplifier in the separate room. -
Page 38: Connecting Antennas
Contents Connections Playback Setup ≫ ≫ ≫ ≫ Connecting Antennas Connect the antenna to this unit, and set up the antenna at the best position for listening while receiving radio signals. Attach the indoor FM antenna to the wall using push pins or adhesive tape. (North (European, American and... -
Page 39: Network Connection
Contents Connections Playback Setup ≫ ≫ ≫ ≫ Network Connection This unit can be connected to the network using a wired LAN or Wi-Fi (wireless LAN). You can enjoy network functions such as Internet radio by network connection. If connection is made by the wired LAN, connect the router and the ETHERNET jack with the LAN cable as shown in the illustration. -
Page 40: Connecting The Power Cord
Contents Connections Playback Setup ≫ ≫ ≫ ≫ Connecting the Power Cord Connect the power cord after all the connections are completed. • Taiwanese models include removable power cords. Be sure to connect the power cord to the AC INLET of the unit first, and then connect it to the outlet. Always disconnect the outlet side first when disconnecting the power cord. -
Page 41: Playback
Contents Connections Playback Setup ≫ ≫ ≫ ≫ Playback AV Component Playback BLUETOOTH Playback ® Internet Radio Spotify AirPlay ® DTS Play-Fi ® FlareConnect USB Storage Device Playing back files on a PC and NAS (Music Server) Play Queue Listening To the AM/FM Radio Multi-zone Convenience functions Listening Mode... -
Page 42: Av Component Playback
Contents Connections Playback Setup ≫ ≫ ≫ ≫ AV Component Playback You can play the audio from AV components, such as Blu-ray disc players through this unit. • When a TV is connected to the HDMI OUT SUB jack, press Q, and select "Other” - "HDMI Out" to switch between MAIN and SUB. Basic Operations Perform the following procedure when this unit is on. -
Page 43: Bluetooth Playback
If a password is requested, enter "0000". • This unit is displayed as "Onkyo TX-NR686 XXXXXX". • To connect another BLUETOOTH-enabled device, press and hold the button until "Now Pairing..." is displayed, and then perform step 2. This unit can store the pairing information of up to 8 paired devices. -
Page 44: Internet Radio
Contents Connections Playback Setup ≫ ≫ ≫ ≫ Internet Radio By connecting this unit to an Internet-connected network, you can enjoy Internet radio services, such as TuneIn Radio, etc. • To play Internet radio services, the network needs to be connected to the Internet. •... - Page 45 Contents Connections Playback Setup ≫ ≫ ≫ ≫ Internet Radio Service Menu You can bookmark specific stations, or delete stations that have been bookmarked. The displayed menu varies according to the service being selected. The menu icon is displayed while a station is being played. When only this icon is displayed, pressing ENTER will display the menu on the screen.
-
Page 46: Spotify
ZONE speaker terminals or when the volume of the audio device in a separate room is configured so that its volume can be adjusted on Onkyo TX-NR686 XXX Devices Available this unit. In any other cases, adjust the volume on the audio device placed in a separate room. -
Page 47: Airplay
Confirm that this unit and the PC are connected to the same network beforehand. Then, press NET on this unit. Next, click the AirPlay icon iTunes, select this unit from the displayed devices, and start play of a music file. iPhone Onkyo TX-NR686 XXXXXX e.g., iOS 10 Front Panel≫ Rear Panel≫ Remote≫... -
Page 48: Dts Play-Fi
“Group playback” that plays the same music in separate • To use a music streaming distribution service, user registration may be rooms at home. To enjoy this function, download Onkyo Music Control App required. (available on iOS or Android™). -
Page 49: Flareconnect Tm
≫ ≫ FlareConnect When downloading Onkyo Controller App (available on iOS or Android™) to mobile devices, such as a smartphone and tablet, you can enjoy the group playback that plays the same music on multiple audio products supporting the FlareConnect function. You can play audio from external playback devices... -
Page 50: Usb Storage Device
Contents Connections Playback Setup ≫ ≫ ≫ ≫ USB Storage Device You can play music files stored on a USB storage device. Basic Operations Perform the following procedure when this unit is on. 1. Switch the input on the TV to the input connected to the unit. TV’s REMOTE 2. - Page 51 Contents Connections Playback Setup ≫ ≫ ≫ ≫ • To return to the previous screen, press • To display an album title, artist name and album art of a file in WAV format, make the folder structure and file names as shown below when saving music files.
-
Page 52: Device And Supported Format
192 kHz • In use of a USB storage device, Onkyo accepts no responsibility whatsoever • Quantization bit: 8 bit, 16 bit, 24 bit for the loss or modification of data stored on a USB storage device, or Apple Lossless (.m4a/.mp4/.M4A/.MP4):... -
Page 53: Playing Back Files On A Pc And Nas (Music Server)
Contents Connections Playback Setup ≫ ≫ ≫ ≫ Playing back files on a PC and NAS (Music Server) Streaming play of music files stored on PCs or NAS devices connected to the same network as this unit is supported. • The network servers supported by this unit are PCs that incorporate players equipped with the server functions such as Windows Media Player 11 or 12, or NASes ®... -
Page 54: Playing Back
Contents Connections Playback Setup ≫ ≫ ≫ ≫ Playing Back Perform the following procedure when this unit is on. 1. Switch the input on the TV to the input connected to the unit. TV’s REMOTE 2. Start the server (Windows Media Player 11, Windows Media Player 12, or ®... - Page 55 Contents Connections Playback Setup ≫ ≫ ≫ ≫ 6. Select the target server with the cursors, and press ENTER to display the Player 12, it must be configured beforehand. items list screen. Setting PC • This unit cannot access pictures and videos stored on servers. 1.
- Page 56 Contents Connections Playback Setup ≫ ≫ ≫ ≫ – It is playing a music file on a USB storage device. • Depending on the version of Windows Media Player, the names of items to ® select may differ from the above description. ❏...
-
Page 57: Supported Audio Formats
Contents Connections Playback Setup ≫ ≫ ≫ ≫ Supported Audio Formats This unit supports the following music file formats. Remote play of FLAC and Apple Lossless (.m4a/.mp4/.M4A/.MP4): DSD is not supported. • Supported sampling rates: 44.1 kHz, 48 kHz, 88.2 kHz, 96 kHz •... -
Page 58: Initial Setup
Or, select the “NET” input, and tap the “USB” icon or ”Music Server” icon. (Depending on the model, the icon names may be different.) When downloading Onkyo Controller App (available on iOS or Android™) to mobile devices, such as a smartphone and tablet, you can save your favorite... -
Page 59: Sort And Delete
Contents Connections Playback Setup ≫ ≫ ≫ ≫ 3. To delete a track, tap the track, and slide the trash icon to the left until the icon • If there are no tracks on the Play Queue list, only “Play Now “... -
Page 60: Tuning Into A Radio Station
Contents Connections Playback Setup ≫ ≫ ≫ ≫ Listening To the AM/FM Radio You can receive AM and FM radio stations on this unit with the built-in tuner. Tuning into a Radio Station Perform the following procedure when this unit is on. Tuning Automatically 1. -
Page 61: Frequency Step Setting
Contents Connections Playback Setup ≫ ≫ ≫ ≫ When FM broadcasts reception is poor: Perform the procedure for "Tuning Manually” ( p61). Note that if you tune manually, the reception for FM broadcasts will be monaural rather than stereo, irrespective of the sensitivity of the reception. -
Page 62: Presetting A Radio Station
Contents Connections Playback Setup ≫ ≫ ≫ ≫ Presetting a Radio Station Registration Procedure You can preset up to 40 of your favorite AM/FM radio stations. After tuning in to the AM/FM radio station you want to register, perform the following procedure. - Page 63 Contents Connections Playback Setup ≫ ≫ ≫ ≫ Selecting a Preset Radio Station 1. Press TUNER. 2. Press the cursors to select a preset number. Deleting a Preset Radio Station 1. Press TUNER. 2. Press the cursors to select the preset number to delete. 3.
-
Page 64: Using Rds (European, Australian And Asian Models)
Contents Connections Playback Setup ≫ ≫ ≫ ≫ Using RDS (European, Australian and Asian models) RDS stands for Radio Data System, and is a method of transmitting data in FM characters. This is not a malfunction. Also, if the signal from a station is weak, radio signals. -
Page 65: Multi-Zone
Contents Connections Playback Setup ≫ ≫ ≫ ≫ Multi-zone You can enjoy 2-ch audio in the separate room (ZONE 2) while performing 7.1 ch playback in the main room (where this unit is located). The same source can be played back in the main room and ZONE 2 simultaneously. Also, different sources can be played back in both rooms. For the "NET" or "BLUETOOTH" input selector, you can select only the same source for the main room and separate room. -
Page 66: Playing Back
Contents Connections Playback Setup ≫ ≫ ≫ ≫ Playing Back Set the remote controller to the ZONE control mode ( p65), and then perform the following operations. 1. Point the remote controller at the unit, and press . • “Z2” on the display of the main unit lights up. 2. -
Page 67: Adjusting The Tone
Contents Connections Playback Setup ≫ ≫ ≫ ≫ Convenience functions Adjusting the tone You can adjust the sound quality of the front speakers. 1. Press the TONE button on the main unit to select the setting to adjust from "Bass” and "Treble". Bass: Enhances or moderates the low-tone range of the front speakers. -
Page 68: Selecting A Listening Mode
Contents Connections Playback Setup ≫ ≫ ≫ ≫ Listening Mode This unit is equipped with a variety of listening modes, and you can select the optimum listening mode for movies, TV, music, and games by pressing MOVIE/TV, MUSIC, and GAME. Selecting a Listening mode 1. - Page 69 Contents Connections Playback Setup ≫ ≫ ≫ ≫ Checking the input format and listening mode Pressing repeatedly will switch the display of the main unit in the following order. Input source and volume Listening mode Input format The display is switched in a few seconds.
-
Page 70: Listening Mode Effects
Contents Connections Playback Setup ≫ ≫ ≫ ≫ Listening Mode Effects In alphabetical order region (sound elements for the subwoofer). • To enable transfer of this audio format, connect via a digital cable and set „ AllCh Stereo audio output on the player to Bitstream output. This mode is ideal for background music. - Page 71 Contents Connections Playback Setup ≫ ≫ ≫ ≫ „ DSD possible to record a maximum of 7.1 channels with additional channels such as the surround back channel. It also supports low bit rates. This mode is suitable for playing sources recorded in DSD. •...
- Page 72 Contents Connections Playback Setup ≫ ≫ ≫ ≫ „ Game-Sports audio mixing, and it is characterized by the precise positioning of sounds and the ability to express sound movement. This mode is suitable for sports games. • To enable transfer of this audio format, connect via an HDMI cable and set audio output on the player to Bitstream output.
- Page 73 Contents Connections Playback Setup ≫ ≫ ≫ ≫ „ T-D (Theater-Dimensional) • Timbre Matching The perception of human ears differs depending on the sound direction. Movie In this mode, you can enjoy a virtual playback of multichannel surround sound theaters have many surround speakers installed, so they are excellent at even with only two or three speakers.
- Page 74 Contents Connections Playback Setup ≫ ≫ ≫ ≫ THX Loudness Plus is set to a level suited to the playback of music, and Timbre Matching is enabled. – THX Sel Cin (THX Select Cinema): The THX Select Cinema mode provides a high-quality surround sound experience by expanding movie sources recorded in 5.1ch for 7.1ch playback.
-
Page 75: Selectable Listening Modes
Contents Connections Playback Setup ≫ ≫ ≫ ≫ Selectable listening modes „ MOVIE/TV button You can select a variety of listening modes Input Format Listening Mode according to the audio format of the signal to be Multich PCM Direct input. Input Format Listening Mode Multich... - Page 76 Contents Connections Playback Setup ≫ ≫ ≫ ≫ Input Format Listening Mode Input Format Listening Mode Input Format Listening Mode Direct Direct Direct DTHD DTHD *1 *2 *1 *2 *1 *2 DSur DSur DSur DTS Neural:X DTS Neural:X DTS Neural:X THX Cinema THX Cinema THX Cinema...
- Page 77 Contents Connections Playback Setup ≫ ≫ ≫ ≫ Input Format Listening Mode Input Format Listening Mode Input Format Listening Mode DTS 96/24 Direct DTS-HD HR Direct DTS-ES Direct DTS 96/24 DTS-HD HR *1 *2 *1 *2 DSur DSur ES Matrix DTS Neural:X DTS Neural:X ES Discrete...
- Page 78 Contents Connections Playback Setup ≫ ≫ ≫ ≫ „ MUSIC button Input Format Listening Mode Input Format Listening Mode Multich PCM Pure Audio Pure Audio Input Format Listening Mode Direct Direct Analog Pure Audio Stereo Stereo Direct Multich *1 *2 Stereo DSur DSur...
- Page 79 Contents Connections Playback Setup ≫ ≫ ≫ ≫ Input Format Listening Mode Input Format Listening Mode Input Format Listening Mode Pure Audio Pure Audio Pure Audio DTHD Direct Direct Direct Stereo Stereo Stereo DTHD *1 *2 *1 *2 *1 *2 DSur DSur DSur...
- Page 80 Contents Connections Playback Setup ≫ ≫ ≫ ≫ Input Format Listening Mode Input Format Listening Mode Input Format Listening Mode Pure Audio DTS 96/24 Pure Audio DTS Express Pure Audio Direct Direct Direct Stereo Stereo Stereo DTS 96/24 DTS Express *1 *2 *1 *2 *1 *2...
- Page 81 Contents Connections Playback Setup ≫ ≫ ≫ ≫ Input Format Listening Mode Input Format Listening Mode Input Format Listening Mode DTS-HD HR Pure Audio DTS-HD MSTR Pure Audio DTS-ES Pure Audio Direct Direct Direct Stereo Stereo Stereo DTS-HD HR DTS-HD MSTR *1 *2 *1 *2 ES Matrix...
- Page 82 Contents Connections Playback Setup ≫ ≫ ≫ ≫ „ GAME button Input Format Listening Mode Input Format Listening Mode Multich PCM Direct Direct Input Format Listening Mode Multich *1 *2 Analog Direct DSur DSur DSur DTS Neural:X DTS Neural:X DTS Neural:X THX Games THX Games THX Games...
- Page 83 Contents Connections Playback Setup ≫ ≫ ≫ ≫ Input Format Listening Mode Input Format Listening Mode Input Format Listening Mode Direct Direct Direct DTHD DTHD *1 *2 *1 *2 *1 *2 DSur DSur DSur DTS Neural:X DTS Neural:X DTS Neural:X THX Games THX Games THX Games...
- Page 84 Contents Connections Playback Setup ≫ ≫ ≫ ≫ Input Format Listening Mode Input Format Listening Mode Input Format Listening Mode Direct DTS 96/24 Direct DTS Express Direct DTS 96/24 DTS Express *1 *2 *1 *2 *1 *2 DSur DSur DSur DTS Neural:X DTS Neural:X DTS Neural:X...
- Page 85 Contents Connections Playback Setup ≫ ≫ ≫ ≫ Input Format Listening Mode Input Format Listening Mode Input Format Listening Mode DTS-HD HR Direct DTS-HD MSTR Direct DTS-ES Direct DTS-HD HR DTS-HD MSTR *1 *2 *1 *2 DSur DSur ES Matrix DTS Neural:X DTS Neural:X ES Discrete...
-
Page 86: Setup Menu
Contents Connections Playback Setup ≫ ≫ ≫ ≫ Setup Menu Menu list You can configure advanced settings to have a more enjoyable experience with this unit. For operation details, refer to “Menu operations”. ( p88) 1. Input/Output 1. TV Out / OSD Make settings for TV output and On-Screen Displays (OSD) that appear on the TV. - Page 87 Contents Connections Playback Setup ≫ ≫ ≫ ≫ 4. Source 1. IntelliVolume Adjust the volume level when there are differences in volume level among multiple devices connected to this unit. 2. Name Edit Set an easy name for each input. Audio Select Select the priority for input selection when multiple audio sources are connected to one input p100...
-
Page 88: Menu Operations
Contents Connections Playback Setup ≫ ≫ ≫ ≫ Menu operations Use the on-screen displays (OSD) that appear on the TV to make the settings. Press on the remote controller to display the Setup menu. Setup 1. Input/Output Assign 1. TV Out / OSD 2. -
Page 89: Input/Output Assign
Contents Connections Playback Setup ≫ ≫ ≫ ≫ 1. Input/Output Assign Setting Item Default Value Setting Details Impose OSD Set whether or not to display information such as „ 1. TV Out / OSD volume adjustment or switching of input on the TV screen. - Page 90 Contents Connections Playback Setup ≫ ≫ ≫ ≫ „ 2. HDMI Input Setting Item Default Value Setting Details "HDMI 1 (HDCP 2.2)" to "HDMI 6 (HDCP 2.2)": Change input assignment between the input selectors and HDMI IN jacks. Assign a desired HDMI IN jack to the TV button. If you do not assign a jack, select "---".
- Page 91 Contents Connections Playback Setup ≫ ≫ ≫ ≫ „ 3. Video Input Setting Item Default Value Setting Details PHONO "COMPONENT 1", "COMPONENT 2": Assign the Change input assignment between the input selectors and COMPONENT VIDEO COMPONENT VIDEO IN jacks to the PHONO IN jacks and the VIDEO IN jacks.
- Page 92 Contents Connections Playback Setup ≫ ≫ ≫ ≫ „ 4. Digital Audio Input „ 5. Analog Audio Input Change input assignment between the input selectors and DIGITAL IN COAXIAL/ Change input assignment between the input selectors and AUDIO IN jacks. If you OPTICAL jacks.
-
Page 93: Speaker
Contents Connections Playback Setup ≫ ≫ ≫ ≫ 2. Speaker Setting Item Default Value Setting Details Bi-Amp Set whether the front speakers are bi-amp „ 1. Configuration connected. "No": When front speakers are not bi-amp Change the settings of connection environment of the speakers. connected "Yes": When front speakers are bi-amp connected Setting Item... - Page 94 Contents Connections Playback Setup ≫ ≫ ≫ ≫ „ 2. Crossover Setting Item Default Value Setting Details Surround 80Hz(THX) Select the crossover frequency from "40Hz" to Change the settings of crossover frequencies. "200Hz" to start outputting frequencies for each • As for the THX-certified speakers, the following settings are recommended. channel.
- Page 95 Contents Connections Playback Setup ≫ ≫ ≫ ≫ „ 3. Distance • The unit of distance can be changed by pressing the MODE button on the remote controller. When using the unit “feet”, the setting is available in increments of 0.1 ft from Set the distance from each speaker to the listening position.
- Page 96 Contents Connections Playback Setup ≫ ≫ ≫ ≫ „ 6. Equalizer Settings Setting Item Default Value Setting Details Surr Back Left 0 dB Select a value between “-12 dB” and “+12 dB” You can adjust the output volume of the range for each connected speaker. (in 1 dB increments).
- Page 97 Contents Connections Playback Setup ≫ ≫ ≫ ≫ Setting Item Default Value Setting Details Setting Item Default Value Setting Details Subwoofer 0.0 dB After selecting the speaker frequency between Correct an emphasized bass sound when listening "25 Hz" and "160 Hz" with the cursors / , adjust to music near the wall or boundary of the room due the volume of that frequency between "-6.0 dB"...
-
Page 98: Audio Adjust
Contents Connections Playback Setup ≫ ≫ ≫ ≫ 3. Audio Adjust „ 2. Dolby Change the setting of when Dolby signals are input. „ 1. Multiplex/Mono Setting Item Default Value Setting Details Change the settings of multiplex audio playback. Loudness When playing Dolby TrueHD, enable the dialog Management normalization function which keeps the volume of... -
Page 99: Source
Contents Connections Playback Setup ≫ ≫ ≫ ≫ 4. Source „ 5. Volume Change the Volume settings. „ 1. IntelliVolume Setting Item Default Value Setting Details Adjust the volume level when there are differences in volume level among Volume Display Absolute Switch the volume display between the absolute multiple devices connected to this unit. - Page 100 Contents Connections Playback Setup ≫ ≫ ≫ ≫ • This cannot be set if the "NET" or “BLUETOOTH" input is selected. Setting Item Default Value Setting Details „ Audio Select PCM Fixed Mode Select whether to fix input signals to PCM (except multi-channel PCM) when you select "HDMI", Select the priority for input selection when multiple audio sources are connected "COAXIAL", or "OPTICAL"...
-
Page 101: Hardware
• Setting this to "On" and closing the operation can switch the input of the unit using the remote screen will display the name of the connected controller or the Onkyo Remote app even in the CEC-compatible device and "CEC On" on the standby mode. - Page 102 Contents Connections Playback Setup ≫ ≫ ≫ ≫ „ 2. Network Setting Item Default Value Setting Details Audio TV Out You can enjoy audio through the speakers of the Change the settings of the Network function. TV while this unit is on. •...
- Page 103 1. Press ENTER to display the Edit screen. Friendly Name Onkyo Change the model name of this unit which is 2. Select a character or symbol with the cursors, TX-NR686 displayed on the device connected to the network and press ENTER. XXXXXX to an easily recognized name.
- Page 104 Contents Connections Playback Setup ≫ ≫ ≫ ≫ „ 3. Bluetooth Setting Item Default Value Setting Details Pairing You can initialize the pairing information stored on Change the settings for the Bluetooth function. Information this unit. Pressing ENTER when "Clear" is displayed Setting Item Default Value Setting Details...
- Page 105 20 minutes of inactivity without on the power of the unit via network using an any video or audio input. (When "USB Power Out application such as Onkyo Remote that can control at Standby" or "Network Standby" is enabled, the this unit.
-
Page 106: Multi Zone
2. Remote Play Zone Change the settings for remote play. Setting Item Default Value Setting Details Remote ID If multiple ONKYO products are installed in the Setting Item Default Value Setting Details same room, select the ID for the remote control Remote Play... - Page 107 Contents Connections Playback Setup ≫ ≫ ≫ ≫ „ 3. Firmware Update Change the settings for Firmware Update. Setting Item Default Value Setting Details Update Notice Enable Availability of a firmware update is notified via network. "Enable": Notify updates "Disable": Do not notify updates Version The current firmware version is displayed.
-
Page 108: Quick Menu
Contents Connections Playback Setup ≫ ≫ ≫ ≫ Quick Menu Menu operations You can quickly adjust the settings you frequently use, such as tone adjustments, etc. You can make the settings on the TV screen during playback. Press Q on the remote controller to display the Quick Menu. - Page 109 Contents Connections Playback Setup ≫ ≫ ≫ ≫ „ AccuEQ – When playing Dolby Digital Plus or Dolby TrueHD with "Loudness Management" set to "Off" AccuEQ Room Calibration: Enable or disable the equalizer function that – When the input signal is DTS:X, and "Dialog Control” is not 0 dB corrects for sound distortion caused by the acoustic environment of the room.
-
Page 110: Web Setup
Contents Connections Playback Setup ≫ ≫ ≫ ≫ Web Setup Menu operations You can make the settings for the network function of this unit using an Internet Network Connection: You can select a network connection method. If you select browser on a PC, smartphone, etc. "Wireless", select an access point from "Wi-Fi Setup"... -
Page 111: Firmware Update
In no event will Onkyo be liable to you or any third party for any special, indirect, incidental, or consequential damages of any kind, including, but not limited to, compensation, reimbursement or damages on account of the loss of present or prospective profits, loss of data, or for any other reason whatsoever. -
Page 112: Updating The Firmware Via Network
Contents Connections Playback Setup ≫ ≫ ≫ ≫ Updating the Firmware via Network • Check that the unit is turned on, and the connection to the Internet is secured. • If "Firmware Update" is grayed out and cannot be selected, wait for a while •... - Page 113 Contents Connections Playback Setup ≫ ≫ ≫ ≫ • Others: After removing the power plug once, insert it to the outlet, and then start the operation from the beginning. ❏ Updating via USB ( p114) Front Panel≫ Rear Panel≫ Remote≫...
-
Page 114: Updating Via Usb
ENTER. correctly. * Onkyo will not be liable whatsoever for any loss or damage of data, or storage failure Setup arising from the use of the USB storage device. Please note this in advance. - Page 115 Contents Connections Playback Setup ≫ ≫ ≫ ≫ • When "Completed!" is displayed, the update is complete. 8. Disconnect the USB storage device from the unit. 9. Press ON/STANDBY on the main unit to turn the unit into standby mode. The process is completed, and your firmware is updated to the latest version.
-
Page 116: Initial Setup With Auto Start-Up Wizard
Contents Connections Playback Setup ≫ ≫ ≫ ≫ Initial Setup with Auto Start-up Wizard Operations When you turn the unit on for the first time after purchase, the Initial Setup screen is automatically displayed on the TV to allow you to make settings required for TV’s REMOTE startup using simple operations following on-screen guidance. - Page 117 Contents Connections Playback Setup ≫ ≫ ≫ ≫ • If you have terminated the Initial Setup halfway, turn this unit to standby mode. have touched the rear panel or other wires, and the protection circuit is Then turning the power on again can display the Initial Setup again. working.
- Page 118 Contents Connections Playback Setup ≫ ≫ ≫ ≫ „ 4. Network Connection Make the network connection settings. There are two methods for network connection. “Wired”: Use a wired LAN to connect to a network. “Wireless”: Wi-Fi connection using an access point such as a wireless LAN router.
- Page 119 5 seconds, and then plug it back in. • Onkyo is not responsible for damages (such as CD rental fees) due to unsuccessful recordings caused by the unit’s malfunction. Before you record important data, make sure that the material will be recorded correctly.
-
Page 120: When The Unit Is Operating Erratically
Contents Connections Playback Setup ≫ ≫ ≫ ≫ When the unit is operating erratically ❏ Try restarting the unit Restarting this unit may solve the problem. After turning the unit to standby mode, press and hold the ON/STANDBY button of the main unit for at least 5 seconds, and then restart the unit. -
Page 121: Troubleshooting
Then, turn the power on again. WARNING: If smoke, smell or abnormal noise is produced by the unit, unplug the power cord from the outlet immediately, and contact the dealer or Onkyo Support. „ Audio • Make sure that the speaker setup microphone is no longer connected. - Page 122 Contents Connections Playback Setup ≫ ≫ ≫ ≫ ❏ No sound from a connected player • Change the input selector on this unit to the position of the terminal to which the player is connected. • Check the digital audio output setting on the connected device. On some game consoles, such as those supporting DVD, the default setting may be off.
-
Page 123: X84; Listening Modes
Contents Connections Playback Setup ≫ ≫ ≫ ≫ ❏ Sound suddenly reduces • When using the unit for extended periods with the temperature inside the unit exceeding a certain temperature, the volume may be reduced automatically to protect the circuits. „... -
Page 124: X84; Video
Contents Connections Playback Setup ≫ ≫ ≫ ≫ „ Video • Confirm that the connection between the output jack on the connected device and the input jack on this unit is correct. • Make sure that none of the connecting cables are bent, twisted, or damaged. •... -
Page 125: X84; Tuner
Contents Connections Playback Setup ≫ ≫ ≫ ≫ „ Tuner ❏ Poor reception or much noise • Recheck the antenna connection. p38) • Move the antenna away from the speaker cord or power cord. • Move the unit away from your TV or PC. •... -
Page 126: X84; Network Function
• If the PC is downloading or copying large files, the playback sound may be interrupted. ❏ The initial setup of Chromecast built-in cannot be performed on Onkyo Controller App • If you have agreed to the privacy policy that requires agreement to use the Chromecast built-in function during the Initial Setup of this unit, you do not have to agree to the privacy policy on Onkyo Controller App. -
Page 127: X84; Usb Storage Device
Contents Connections Playback Setup ≫ ≫ ≫ ≫ „ USB storage device ❏ USB storage device is not displayed • Check if the USB storage device or USB cable is securely inserted to the USB port of the unit. p50) •... -
Page 128: X84; Multi-Zone Function (For Compatible Models Only)
Contents Connections Playback Setup ≫ ≫ ≫ ≫ ❏ Playback sound is interrupted, or communication is not possible • You may not receive radio waves due to poor radio wave conditions. Shorten the distance from the wireless LAN router, or remove obstacles to improve visibility, and connect again. -
Page 129: X84; Others
Contents Connections Playback Setup ≫ ≫ ≫ ≫ „ Others ❏ Strange noise can be heard from the unit • If you have connected another device to the same outlet as this unit, strange noise may occur under the influence of the device. If the symptom is remedied by removing the power plug of the other device from the outlet, use different outlets for this unit and the device. -
Page 130: About Hdmi
HDCP standards. Operation has been confirmed on the following devices: (As of January 2018) Toshiba brand televisions; Sharp brand televisions; Onkyo and Integra brand RIHD-compatible players; Toshiba brand players and recorders; Sharp brand players and recorders (when used with a Sharp brand television) -
Page 131: Supported Resolutions
Contents Connections Playback Setup ≫ ≫ ≫ ≫ Supported Audio Formats – 4K (3840×2160p) 24/25/30Hz, 4K SMPTE (4096×2160p) 24/25/30Hz : RGB/YCbCr4:4:4 (8 bit), YCbCr4:2:2 (12 bit) 2 ch linear PCM: – 4K (3840×2160p) 50/60Hz, 4K SMPTE (4096×2160p) 50/60Hz : 32 kHz, 44.1 kHz, 48 kHz, 88.2 kHz, 96 kHz, 176.4 kHz, 192 kHz, 16/20/24 bit YCbCr4:2:0 (8 bit) Multi-channel linear PCM: Maximum 7.1 channels, 32 kHz, 44.1 kHz, 48 kHz, 88.2 kHz, 96 kHz, 176.4 kHz,... -
Page 132: General Specifications
Contents Connections Playback Setup ≫ ≫ ≫ ≫ General Specifications „ Amplifier Section Signal to Noise Ratio 106 dB (IHF-A, LINE IN, SP OUT) Rated Output Power (FTC) (North American) 80 dB (IHF-A, PHONO IN, SP OUT) With 8 ohm loads, both channels driven, from 20-20,000 Hz; rated 100 Speaker Impedance watts per channel minimum RMS power, with no more than 0.08% total 4 Ω... - Page 133 Contents Connections Playback Setup ≫ ≫ ≫ ≫ „ Network Section „ General Ethernet LAN Power Supply 10BASE-T/100BASE-TX 120 V AC, 60 Hz (North American and Taiwanese) Wireless LAN 220 - 240 V AC, 50/60 Hz (Others) IEEE 802.11 a/b/g/n standard Power Consumption (Wi-Fi standard)
- Page 134 Contents Connections Playback Setup ≫ ≫ ≫ ≫ „ Audio Outputs Supported Deep Color, x.v.Color™, Lip Sync, Audio Return Channel, 3D, 4K 60 Hz, Analog CEC, Extended Colorimetry (sYCC601, Adobe RGB, Adobe YCC601), ZONE2 LINE OUT Content Type, HDR 2 SUBWOOFER PRE OUT Audio Format Speaker Outputs Dolby Atmos, Dolby TrueHD, Dolby Digital, Dolby Digital Plus, DTS, DTS:X,...
- Page 135 SN 29403370_EN (C) Copyright 2018 Onkyo & Pioneer Corporation Japan. All rights reserved. http://www.onkyo.com/privacy/ H1802-0...
Need help?
Do you have a question about the TX-NR686 and is the answer not in the manual?
Questions and answers