
Related Manuals for Synthes Delta Xtend


Summary of Contents for Synthes Delta Xtend
- Page 1 This publication is not intended for distribution in the uSa. Surgical Technique Powered by Xperience...
- Page 2 DELTA XTEND REvERsE shouLDER sysTEm ™ KEy suRgicAL sTEps Humeral Surgical Steps Superior-lateral Modular Implant Approach Cementless Technique 1. Approach 2. humeral head resection 3. proximal reaming guide positioning Delto-pectoral Monobloc Implant Approach Cemented Technique 1. Approach 2. humeral head resection Glenoid Surgical Steps 1.
- Page 3 standard option Eccentric option 4. Determination of the epiphysis size and 5. proximal humeral 6. Diaphyseal broaching 7. Epiphysis/diaphysis 8. Final implant insertion 9. cup impaction eccentricity reaming and angulation assembly measurements 4. Determination of the epiphysis size 5. proximal humeral 6.
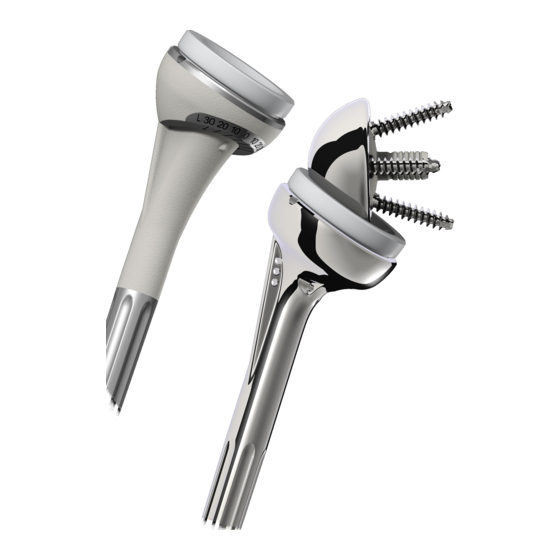
- Page 5 • Modular eccentric epiphysis options for press-fit application. • Thinner monobloc humeral stem for cemented application. Based on the success of the DELTA cTA Reverse shoulder, the DELTA XTEND Reverse shoulder system is the next step forward for appropriate management of patients with a grossly deficient rotator cuff joint with severe arthropathy. its clinical outcomes have been reported in the Australian Orthopaedic Association National Joint Replacement Registry.
-
Page 6: Table Of Contents
Design Rationale ..................8 DELTA XTEND Reverse shoulder system Features ............8 Surgical Technique ...................10 pre-operative Templating and patient positioning .............10 surgical Approach ....................11 intramedullary canal preparation ................13 humeral head Resection ..................14 Exposing the glenoid ....................18 positioning the metaglene ..................19 Reaming the glenoid ....................22 Drilling the central hole ..................23... - Page 7 Joint Tensioning and Stability Assessment ..............40 Definitive glenosphere Fixation ................41 Cementless Modular Humeral Implants Definitive humeral implant insertion ..............44 Cemented Monobloc Humeral Implants Definitive humeral implant insertion ..............46 cases of proximal humeral Bone Loss ..............48 Revision to hemi-Arthroplasty ..................50 closure........................51 post-operative management ..................51 Ordering Information ................52 implants ........................52 instrumentation .......................54...
-
Page 8: Design Rationale
DELTA XTEND REvERsE shouLDER sysTEm FEATuREs The DELTA XTEND Reverse shoulder system is a total semi-constrained shoulder arthroplasty that reverses the normal biomechanics between the scapular and humeral components. it moves the gleno-humeral joint centre of rotation medially and inferiorly, increasing the deltoid lever arm and the deltoid tension. This allows the muscles of the deltoid group to compensate for rotator cuff deficiency. - Page 9 Three cup thicknesses to balance soft tissue on the glenoid to reduce risk of scapular for optimal deltoid tension based on clinical bone erosion 15,16 heritage DELTA XTEND CTA Heads • Hemi-heads available in 2 diameters and 2 thicknesses, for easy revision from reverse to hemi-arthroplasty if required • Extended articular surface for articulation against acromion...
-
Page 10: Surgical Technique
pRE-opERATivE TEmpLATiNg & pATiENT posiTioNiNg Figure 2 Figure 1 Figure 3 Pre-operative Templating Patient Positioning An initial assessment of the glenoid should be carried out The patient should be in the beach chair position, with the using radiographic and cT imaging to determine whether affected arm completely free (Figures 2 and 3). -
Page 11: Surgical Approach
Figure 4 Figure 5 extend more than 4 cm from the external aspect of the The DELTA XTEND Reverse shoulder system prosthesis acromion in order to preserve the axillary nerve which is can be implanted using a superior-lateral deltoid split located below the turning fold of the subacromial bursa. - Page 12 suRgicAL AppRoAch: DELTo-pEcToRAL Figure 6 Figure 7 Figure 8 Figure 9 Figure 10 Figure 11 Delto-pectoral Approach place a tag suture in the tendon of the subscapularis The skin incision follows a line from the midpoint (Figure 11), 2 cm medial to its point of insertion, in the of the clavicle to the midpoint of the arm (Figure 6).
-
Page 13: Intramedullary Canal Preparation
iNTRAmEDuLLARy cANAL pREpARATioN proximal Entry point Figure 12 Figure 13 using the 6 mm medullary canal reamer, make a pilot hole Sequentially ream, increasing the diameter until there is in the humeral head, so that the reamer passes directly contact with cortical bone of the intramedullary canal of down the axis of the intramedullary canal (Figure 12). -
Page 14: Humeral Head Resection
humERAL hEAD REsEcTioN cutting guide cutting guide cutting plate cutting plate superior-lateral cutting guide Delto-pectoral cutting guide Assembly Assembly Figure 14 Assemble the cutting plate on the cutting guide first select the appropriately sized cutting guide handle. Taking and then fix the cutting guide onto the cutting guide the previous example, if reaming stopped at 12 mm, handle (Figure 14). - Page 15 humERAL hEAD REsEcTioN cutting plate level adjustment superior-lateral cutting plate Delto-pectoral cutting plate Figure 15 Figure 16 Drive the cutting assembly down the intramedullary slide the cutting plate to adjust the cutting level. The canal until full contact with the superior humeral head is cutting plate colour code indicates the appropriate obtained.
- Page 16 humERAL hEAD REsEcTioN superior-lateral approach Delto-pectoral approach Figure 17 Following the colour code guidance, the surgeon should pre-drill the cortical bone through the cutting plate using resect 1 - 2 mm of the proximal area of the greater a 3.2 mm drill bit, and insert the two fixation pins to fix tuberosity (at the level of the supraspinatus insertion in an the cutting plate to the humerus (Figure 17).
- Page 17 humERAL hEAD REsEcTioN option 1 option 2 superior-lateral approach Delto-pectoral approach Figure 18 Figure 19 Remove the cutting guide assembly, add a third place the humeral resection protecting plate onto the (divergent) fixation pin through the middle hole of the resected surface to protect the bone from damage during cutting plate to secure the assembly.
-
Page 18: Exposing The Glenoid
EXposiNg ThE gLENoiD Figure 20 The forked retractor should be placed under the it is essential to palpate the following bony scapular inferior glenoid labrum to move the humerus distally or orientation points: the base of the coracoid process, posteriorly, depending on the approach taken (Figure 20). the inferior part of the glenoid neck and when possible, When exposing the glenoid, it is critical to note the infraglenoid tubercle and lateral border of the scapula. -
Page 19: Positioning The Metaglene
posiTioNiNg ThE mETAgLENE Figure 21 particular attention should be given to metaglene To obtain good bone seating, the metaglene should positioning to achieve optimal glenoid fixation, range of ideally be positioned on the inferior circular area of the motion and limit potential bone impingement. glenoid. - Page 20 posiTioNiNg ThE mETAgLENE 20˚ Figure 22 Figure 23 Figure 24 The metaglene positioner is used to determine the optimal Then insert the hex head tip of the handle into the metaglene position. The positioner plate is the same corresponding plate hole (right or left depending on the diameter as the metaglene.
- Page 21 posiTioNiNg ThE mETAgLENE Figure 25 Figure 26 position the plate as inferiorly as possible so that its border place the 2.5 mm metaglene central guide pin in the plate follows the inferior edge of the glenoid. Note that inferior central hole and drive it 3 - 4 cm through the glenoid osteophytes may result in mal-positioning.
-
Page 22: Reaming The Glenoid
REAmiNg ThE gLENoiD Figure 27 Figure 28 Figure 29 slide the 27 mm glenoid resurfacing reamer onto the Ream the upper area of the glenoid by hand, using the manual 42 mm glenoid reamer (Figure 28). This step is central guide pin and carry out the reaming using a power tool. -
Page 23: Drilling The Central Hole
DRiLLiNg ThE cENTRAL hoLE Figure 31 Figure 30 Figure 32 use the same manual glenoid reamer to also ream the Remove the resurfacing reamer, leaving the metaglene glenoid anteriorly, posteriorly and inferiorly if necessary. A central guide pin in place (Figure 31). smooth surface without any remaining cartilage should be obtained. -
Page 24: Metaglene Implantation
mETAgLENE impLANTATioN Figure 33 Figure 34 Assemble the internal rod of the metaglene holder in the place the metaglene on the glenoid and ensure that the metaglene holder main body. insert the metaglene holder metaglene is fully seated on bone. Apply bone graft if hex tip in the final metaglene implant central hole. -
Page 25: Inferior And Superior Metaglene Screw Placement
iNFERioR AND supERioR mETAgLENE scREW pLAcEmENT 17˚ ±10˚ metaglene superior-inferior cross section polyaxial Locking screws Figure 35 Figure 36 Locking metaglene screws allow an angulation of ±10° hold the 2.5 mm drill guide against the inferior metaglene around the optimal 17° screw positioning (Figure 35). hole. The drill guide can be angled to ±10° but should Locking screws must be used for the inferior and superior always be seated fully on the metaglene hole. - Page 26 iNFERioR AND supERioR mETAgLENE scREW pLAcEmENT Figure 37 Figure 38 Figure 39 The goal is to have a sufficiently long screw inferiorly, slide the locking screw of the appropriate length onto the usually 36 mm or more. The length for the screw is guide pin, having previously checked that it is unlocked indicated on the drill bit by laser markings (Figure 37).
- Page 27 iNFERioR AND supERioR mETAgLENE scREW pLAcEmENT Figure 40 Figure 42 Figure 41 Figure 43 slide the locking screwdriver main body down the guide Drill the hole for the superior locking screw anticipating pin and insert the screwdriver tip into the 4 slots of the exit through the cortex.
-
Page 28: Anterior And Posterior Metaglene Screw Placement
ANTERioR AND posTERioR mETAgLENE scREW pLAcEmENT 17˚ ±10˚ metaglene Anterior-posterior cross section polyaxial Locking or Non-locking screws Figure 44 Figure 45 The surgeon may use locking or non-locking screws in use the 2.5 drill bit with the drill guide to set the most the anterior or posterior holes. - Page 29 ANTERioR AND posTERioR mETAgLENE scREW pLAcEmENT Figure 47 Figure 46 Figure 48 screw length is determined from the laser marks on the Then proceed with locking the polyaxial screws. place the drill bits or using the depth gauge. place the guide pin in locking screwdriver main body in place on the inferior the drilled hole.
-
Page 30: Placement Of The Proximal Humeral Reaming Guide
pLAcEmENT oF ThE pRoXimAL humERAL REAmiNg guiDE cEmENTLEss & cEmENTED humERAL impLANTs Figure 49 Figure 50 Figure 51 Figure 52 Figure 53 Figure 54 select the appropriate proximal reaming guide size slide the proximal reaming guide down into the (Figure 49). For example, if a 12 mm intramedullary intramedullary canal, rotating it if necessary to ensure that reamer and a 12 mm cutting handle were previously used, the horseshoe plate sits flat on the bone resection surface... -
Page 31: Cementless Modular Humeral Implants
pRoXimAL humERAL REAmiNg cEmENTLEss moDuLAR humERAL impLANTs Eccentric Adaptor size 1 centred Adaptor size 1 & 2 Eccentric Adaptor s1 Disk size 1 Disk size 1 Disk size 2 Eccentric Adaptor s2 Disk size 2 Figure 56 Figure 55 The size and type (centred or eccentric) of modular if this does not provide a good fit with the bone resection epiphysis should be chosen to ensure that the best surface, switch the centred proximal modular reamer... - Page 32 pRoXimAL humERAL REAmiNg cEmENTLEss moDuLAR humERAL impLANTs Figure 57 Figure 58 Remove the sizer disk, leaving the proximal modular complete reaming has been achieved when the external reamer adaptor in place (Figure 57). reamer flange is in full and complete contact with the bone resection surface (Figure 58).
-
Page 33: Distal Humeral Broaching
DisTAL humERAL BRoAchiNg cEmENTLEss moDuLAR humERAL impLANTs goniometer contact Rocking Bar contact Figure 59 Figure 60 Drive the broach down carefully, (to avoid any cortical The correct stem size will have been determined already bone damage) until the rocking bar of the broach from the previous intramedullary reaming. -
Page 34: Humeral Trial Stem And Epiphysis Insertion
humERAL TRiAL sTEm AND Epiphysis iNsERTioN cEmENTLEss moDuLAR humERAL impLANTs Figure 61 Figure 62 Figure 63 The trial modular epiphysis (centred or eccentric, size 1 No calculation is required: the instrumentation has been or 2, depending on the proximal reaming choices made) designed to provide direct feedback of this position on the is placed on the trial modular stem (diameter chosen goniometer. - Page 35 humERAL TRiAL sTEm AND Epiphysis iNsERTioN cEmENTLEss moDuLAR humERAL impLANTs Figure 64 Figure 65 The trial component is then driven down the impact the trial implant by gently hammering the intramedullary canal, aligning the anterior fin of the stem implant driver handle and remove the driver, leaving the with the anterior aspect of the bicipital groove.
-
Page 36: Cemented Monobloc Humeral Implants
pRoXimAL humERAL REAmiNg cEmENTED moNoBLoc humERAL impLANTs Disk size 1 Disk size 2 Figure 66 Figure 67 Continued from page 28. Remember the final decision taken, epiphysis size 1 or 2. This will determine reamer and final implant sizes. Remove The monobloc implant size should be chosen to suit the the sizer disk. -
Page 37: Humeral Trial Implant Insertion
humERAL TRiAL impLANT iNsERTioN cEmENTED moNoBLoc humERAL impLANTs Figure 68 Figure 69 select the appropriate trial humeral implant. For example, impact the trial implant by gently hammering the if the initial distal reaming was carried out using the 12 implant driver handle and remove the driver, leaving the mm reamer and proximal reaming was carried out using trial implant in place (Figure 69). -
Page 38: Glenosphere Trial Placement
gLENosphERE TRiAL pLAcEmENT Figure 70 The glenosphere implants are available in two diameters, An overlap of 3 to 5 mm below the glenoid inferior limit is 38 mm and 42 mm, and are either standard or eccentric recommended to avoid scapular pillar conflict (Figure 70). spheres. -
Page 39: Cup Trials And Trial Reduction
cup TRiALs AND TRiAL REDucTioN Figure 71 Figure 72 Fit the appropriate trial glenosphere (38 mm or 42 First place the high mobility humeral trial cup (38 or mm, centred or eccentric) to the metaglene using the 42 mm depending on the glenosphere size), which is 3 metaglene holder (Figure 71). -
Page 40: Joint Tensioning And Stability Assessment
JOINT TENSIONING AND STABILITy ASSESSMENT Figure 73 Joint tensioning and stability assessment should be if instability can be demonstrated, it is critical to attempt performed with particular care, using the following to identify the cause and rectify. make sure that the trial guidelines: implants have been positioned correctly with respect to the bone and to each other. -
Page 41: Definitive Glenosphere Fixation
DEFiNiTivE gLENosphERE FiXATioN sTANDARD gLENosphERE Figure 74 Figure 75 Standard Glenosphere Tighten until the scapula begins to rotate slightly in a clockwise direction in response, meaning that the glenoid bearing is closing on the taper of the metaglene. Engage the 3.5 mm cannulated hex screwdriver in the implant glenosphere. - Page 42 DEFiNiTivE gLENosphERE FiXATioN EccENTRic gLENosphERE Figure 76 Figure 77 Figure 78 Eccentric Glenosphere obtain further impaction of the junction by gently hammering the glenosphere with the glenosphere impactor a minimum of three times, using at least a 700 g slide the eccentric glenosphere on the 1.5 mm guide hammer (Figure 78).
- Page 43 gLENosphERE REmovAL Figure 79 if it is necessary to remove the glenosphere (revision or intra-operative size modification), the glenosphere/metaglene junction can be disassembled by unscrewing the glenosphere central screw using the 3.5 hex head screwdriver (yellow handle) (Figure 79). This option is possible due to the design of a specific internal screw system inside the glenosphere component.
-
Page 44: Cementless Modular Humeral Implants
DEFiNiTivE humERAL impLANTs iNsERTioN cEmENTLEss moDuLAR humERAL impLANTs Figure 80 Figure 81 Figure 82 Remove the trial cup and trial humeral implant using the Both components should then be mounted on humeral implant driver. the humeral implant driver and driven down the intramedullary canal, aligning the lateral fin of the stem select the appropriate final modular humeral implants with the bicipital groove (Figure 82). - Page 45 DEFiNiTivE humERAL impLANTs iNsERTioN cEmENTLEss moDuLAR humERAL impLANTs Figure 84 Figure 83 Figure 85 implant orientation can also be checked using the impact the final press-fit humeral implant by hammering orientation pin placed in the implant driver handle. The gently on the implant driver handle (Figure 84). pin should be placed in the same retroversion position Note: the final modular humeral implants are larger by used to position the cutting guide, i.e. close to 0°...
-
Page 46: Cemented Monobloc Humeral Implants
DEFiNiTivE humERAL impLANTs iNsERTioN cEmENTED moNoBLoc humERAL impLANTs Figure 86 Figure 87 Remove the trial cup and humeral implant using the inch gauze pre-soaked in an epinephrine (1:1,000,000 humeral implant driver. select the appropriate final solution) or hydrogen peroxide solution to aid haemostasis monobloc humeral implant corresponding to the trial and the drying of the humeral canal (Figure 87). - Page 47 DEFiNiTivE humERAL impLANTs iNsERTioN cEmENTED moNoBLoc humERAL impLANTs Figure 88 Figure 89 Implant Insertion Final cup fixation introduce the final implant in the chosen version in line After thorough cleaning impact the final humeral cup with the long axis of the humerus, using the humeral using the cup impactor (Figure 89).
-
Page 48: Cases Of Proximal Humeral Bone Loss
cAsEs oF pRoXimAL humERAL BoNE Loss 20˚ Figure 90 Figure 91 Figure 92 cases of proximal bone loss should be treated using that aligning the retroversion guide pin with the forearm monobloc cemented humeral implants to avoid any risk places the implant in 30° retroversion. Re-adjust the of component dissociation. - Page 49 cAsEs oF pRoXimAL humERAL BoNE Loss Trial implant Definitive implant Figure 93 Lines are also present on the trial long stems to enable sutures can be placed through the stem fin holes (smooth better marking of the appropriate prosthesis height. select edges) to reconstruct the proximal humerus.
-
Page 50: Revision To Hemi-Arthroplasty
Figure 96 Figure 97 When revision of a reverse shoulder is required due place the DELTA XTEND cTA head reamer guide in the to glenoid loosening, or when glenoid bone stock is epiphysis (Figure 95). Align the anterior and posterior slot insufficient to fix a metaglene securely, the reverse shoulder... -
Page 51: Closure
Assemble the DELTA XTEND cTA head reamer with the T-handle. Ream the area around the epiphysis using a power tool (Figure 96). if the DELTA XTEND cTA head trial does not obtain perfect seating on the epiphysis, finish the preparation using appropriate rongers. -
Page 52: Ordering Information
oRDERiNg iNFoRmATioN impLANTs Standard Implant Codes Cemented Monobloc Humeral Implant 1307-08-100 cemented monobloc humeral implant - Epiphysis size 1, Diameter 8 mm, standard Length cemented monobloc humeral implant - Epiphysis size 1, Diameter 10 mm, standard Length 1307-10-100 1307-12-100 cemented monobloc humeral implant - Epiphysis size 1, Diameter 12 mm, standard Length 1307-14-100 cemented monobloc humeral implant - Epiphysis size 1, Diameter 14 mm, standard Length 1307-10-200... - Page 53 Epiphysis size 2, Diameter 12 mm, Long Length 1307-14-210 cemented monobloc humeral implant, Epiphysis size 2, Diameter 14 mm, Long Length DELTA XTEND CTA Heads DELTA XTEND cTA head Diameter 48 x 21 mm 1307-48-021 DELTA XTEND cTA head Diameter 48 x 26 mm 1307-48-026...
-
Page 54: Instrumentation
oRDERiNg iNFoRmATioN humERAL iNsTRumENTs 2307-99-901 humeral case 1 Base 2307-99-922 humeral case 1 Lid Humeral Case 1 Top Tray 2307-99-905 2128-61-070 standard hudson T-handle 1524-00-000 hudson Ao converter 2128-01-006 medulary canal Reamer 6 mm 2128-01-008 medulary canal Reamer 8 mm 2128-01-010 medulary canal Reamer 10 mm 2128-01-012... - Page 55 oRDERiNg iNFoRmATioN humERAL iNsTRumENTs 2307-99-906 humeral case 2 Base 2307-99-927 humeral case 2 Lid Humeral Case 2 Top Left Tray 2307-99-931 2307-08-100 monobloc humeral Trial, Epiphysis size 1, ø 8 mm, std Monobloc Only Monobloc Only 2307-10-100 monobloc humeral Trial, Epiphysis size 1, ø 10 mm, std 2307-12-100 monobloc humeral Trial, Epiphysis size 1, ø...
- Page 56 oRDERiNg iNFoRmATioN humERAL iNsTRumENTs Humeral Case 2 Bottom Tray 2307-99-928 2307-01-030 Broach handle Modular Only 2307-01-031 goniometer 2307-79-010 humeral Broach ø 10 mm 2307-79-012 humeral Broach ø 12 mm 2307-79-014 humeral Broach ø 14 mm 2307-79-016 humeral Broach ø 16 mm 2307-01-032 Broach handle plate 2307-76-002...
- Page 57 Trial, Epiphysis size 2, 12 mm, Long 2307-14-210 monobloc humeral Trial, Epiphysis size 2, 14 mm, Long 2307-48-121 DELTA XTEND cTA Trial head ø 48 mm x 21 mm 2307-48-126 DELTA XTEND cTA Trial head ø 48 mm x 26 mm 2307-52-121 DELTA XTEND cTA Trial head ø...
- Page 60 20. Demographics and outcomes of shoulder arthroplasty, Australian Orthopaedic Association National Joint Replacement Registry. Available from URL: http://aoanjrr.dmac.adelaide.edu.au/ Legal Manufacturer Implants DePuy France S.A.S DELTA XTEND DePuy Orthopaedics EMEA is a trading division of DePuy International Limited. Registered Office: St Anthony’s Road, Leeds LS11 8DT, England Registered in England No. 3319712 DePuy Orthopaedics, Inc.
Need help?
Do you have a question about the Delta Xtend and is the answer not in the manual?
Questions and answers