Table of Contents

Related Manuals for EdgeStar AP12000HS


Summary of Contents for EdgeStar AP12000HS
- Page 1 Portable Air Conditioner AP12000HS Owner’s Manual For more information on other great EdgeStar products on the web, go to https://www.edgestar.com To use the EdgeStar self-diagnostic tool, go to https://support.edgestar.com V2.4-12012017...
-
Page 2: Important Safety Information
Important Safety Information Improper handling can cause serious damage to the appliance and / or to the user. This portable air conditioner is not intended for use by children. Children should be supervised to ensure that they do not play with this product. Improper handling can cause serious damage to the appliance and/or to the user. -
Page 3: Operation Of Safety Plug
2. Press the TEST button on the LCDI plug. This should trip the plug and cut the power to the air conditioner. If the plug does not trip and you are able to turn on the unit, please contact EdgeStar support. DO NOT USE YOUR PORTABLE AIR CONDITIONER IF THE TEST FAILS. -
Page 4: Table Of Contents
MAINTENANCE ................................14 Cleaning the Unit ............................... 14 Cleaning the Pre-filter ..............................14 Preparation for Storage ............................. 14 TROUBLESHOOTING..............................15 SPECIFICATIONS ................................ 17 NEW PORTABLE AIR CONDITIONER BTU’S ......................18 What is SACC? ................................18 EDGESTAR LIMITED WARRANTY ..........................19... -
Page 5: Introduction
Introduction Thank you for purchasing this EdgeStar portable air conditioner. We hope that this purchase will be the beginning of a lasting and rewarding relationship between you and EdgeStar. We will provide the customer support and exemplary products necessary to nurture that relationship. -
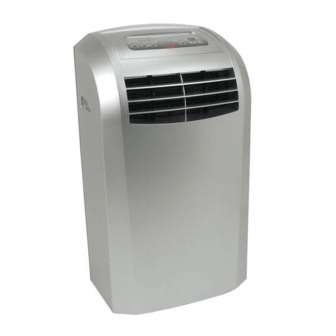
Page 6: Parts Identification
Parts Identification Caution: Make sure the rubber drain plug is firmly installed to the Drain Port to prevent leaking. Side View Back View... -
Page 7: Installing The Carbon Filter
Installing the Carbon Filter Caution: Never operate the air conditioner without the pre-filter attached. Your portable air conditioner ships with a pre-filter and an activated carbon filter. The carbon filter will help remove contaminates and odors from the air. It is recommended you replace the carbon filter every three to six months, or as needed. -
Page 8: Window Kit Installation Instructions
Window Kit Installation Instructions Preparations for Installing the Window Kit You must vent your portable air conditioner when running it in cooling mode. Your unit includes a window exhaust kit that can be used to vent the unit out of a window. Before you begin, make sure you have all the parts necessary for installation. -
Page 9: Installing The Grated Adapter
Installing the Grated Adapter 1. Insert the round grated adapter through the back grooved side of the window kit plate into the hole. 2. Secure the grated adapter by fastening the screws from the flat side of the window kit plate to the holes on the grated adapter. -
Page 10: Installing The Window Plates
Installing the Window Plates 3. Open your window and place the window kit on the window sill with the grooved side facing outward. Then slide the window kit plate out to fit the width of the window. You can use screws to secure the window kit plate and keep it from sliding. -
Page 11: Attaching The Duct Connectors To The Exhaust Hose
Attaching the Duct Connectors to the Exhaust Hose 5. Attach the connectors to the hose: A. Extend the ends of the exhaust hose B. Thread the duct connector on by turning it clockwise until it stops. 6. Roll the unit towards the window kit. Leave at least 20 inches between the unit and the wall. Connecting the Duct Connector to the Unit 7. -
Page 12: Connecting The Duct Connector To The Grated Adapter
Connecting the Duct Connector to the Grated Adapter 8. Align the slots on the duct connector to the tabs on the grated adapter and snap the duct connector into place. After you have installed the exhaust hose and the window kit, you can plug in your portable air conditioner and start using it. -
Page 13: Using The Control Panel
Button Function Power This button powers the unit on or off. Mode This button changes between cool, dehumidify, heat, and fan modes. The indicator light will turn on next to the mode you set. Heating mode will display a red indicator light. Speed This button sets the fan speed. - Page 14 Dehumidifying Mode: During the Dehumidifying mode, the unit will condense water out of the air and exhaust it through the exhaust hose. The ambient temperature in the room will probably drop by a few degrees while using the Dehumidifying mode. To operate the unit in dehumidifying mode: 1.
- Page 15 Timer The timer can be used to either turn the unit on or off after a number of elapsed hours. The timer is adjustable between 1-24 hours in one hour increments. How to set the unit to automatically turn on: 1.
-
Page 16: Using The Remote Control
Using the Remote Control Note: Be careful not to drop the remote control. Do not place the remote control in a location where it is exposed to direct sunlight. The remote control can be used instead of the control panel to remotely operate your portable air conditioner. -
Page 17: Installing The Batteries
Installing the Batteries 1. Remove the cover on the back of the remote control. 2. Insert the batteries with the (+) and (-) ends pointing in the correct direction, as indicated in the image above. 3. Slide the cover back on. Caution: Use only AAA batteries. -
Page 18: Maintenance
Cleaning the Pre-filter Note: The activated carbon filter is not washable. You should replace it every 3 – 6 months or as needed. Contact EdgeStar or visit www.EdgeStar.com for replacement filters. To clean the pre-filter, follow the steps below: 1. Power off the unit and remove the pre-filter. -
Page 19: Troubleshooting
Troubleshooting Follow the troubleshooting guide below to resolve common issues. Issue Possible Cause Solution My air conditioner is not The unit is not receiving Make sure the unit is plugged functioning at all. power. in to a grounded outlet. The LCDI power cord is Press the Reset button on the tripped. - Page 20 Issue Possible Cause Solution My air conditioner is not cooling The unit is not operating in Set the unit to be in cooling at all. cooling mode. mode, and lower the set temperature (pg. 9). The compressor is not on. The compressor may take up to 3 minutes to turn on, or longer if it is too warm.
-
Page 21: Specifications
Specifications Description of product Portable Air Conditioner Model AP12000HS Voltage / Frequency AC 115V ~ 60Hz Input Power 1000 W (Cooling) 1000 W (Heating) Current 9.5 A (Cooling) 9.5 A (Heating Cooling Capacity (SACC) 4900 BTU Cooling Capacity (ASHRAE) 12000 BTU... -
Page 22: New Portable Air Conditioner Btu's
New Portable Air Conditioner BTU’s You may notice that the cooling capacities (in British Thermal Units or BTU’s) labeled on portable air conditioners (PAC’s) are now lower than on models produced prior to October 1, 2017. This is because the labeling on new productions of PAC’s must follow a new federal test standard that was established by the Department of Energy: 10 CFR 430, subpart B, appendix CC. -
Page 23: Edgestar Limited Warranty
WHAT IS COVERED: LABOR: For a period of NINETY (90) DAYS from the date of original purchase, labor will be performed free of charge at an authorized EdgeStar repair facility. At its option, EdgeStar will repair the product with new or remanufactured parts, or exchange the defective product with a new, refurbished, or remanufactured product.
Need help?
Do you have a question about the AP12000HS and is the answer not in the manual?
Questions and answers