Table of Contents
Advertisement
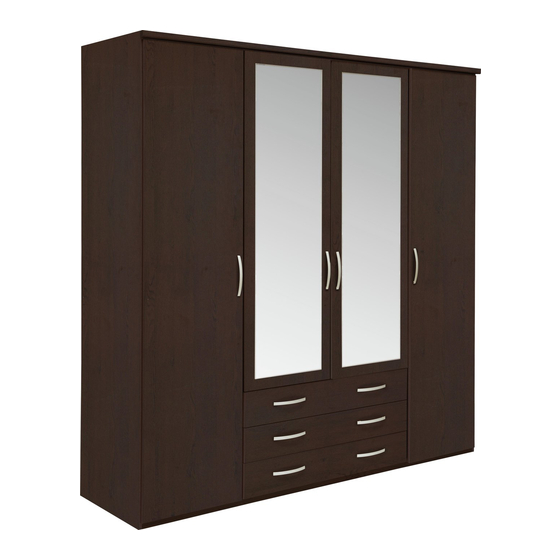
New Hallingford
4 Door 3 Drawer Wardrobe
Dimensions
Width - 197,9cm
Depth - 60,3cm
Height -205,7cm
Important
– Please read these instructions fully before starting assembly
If you need help or have damaged or missing parts, please visit: www.argos-support.co.uk
or email: Help@ClickSpares.co.uk (quoting your original order number)
Alternatively, call the Spares Helpline on: 0370 112 1928
For any other queries please contact the Customer Helpline on: 0345 640 2020
- Please keep for future reference
Tip : To prevent damage,
we recommend that you
build your unit on the
carton(s) it was packed in.
2478441
2497714
2574242
2377700
2588771
Issue 6 - 20-12-2016
Advertisement
Table of Contents

Related Manuals for Argos New Hallingford 4 Door 3 Drawer Wardrobe


Summary of Contents for Argos New Hallingford 4 Door 3 Drawer Wardrobe
- Page 1 Important – Please read these instructions fully before starting assembly If you need help or have damaged or missing parts, please visit: www.argos-support.co.uk or email: Help@ClickSpares.co.uk (quoting your original order number) Alternatively, call the Spares Helpline on: 0370 112 1928...
- Page 2 Safety and Care Advice Important – Please read these instructions fully before starting assembly • Check you have all the • Do not stand or put weight on •To reduce the components and tools listed on likelihood of the product, this could cause pages 2 and 3.
- Page 3 Components - Panels For damaged or missing parts, please visit: www.argos-support.co.uk or email: Help@ClickSpares.co.uk Please check you have all the panels listed below Left mirror door Right mirror door Left side Right side Upright x2 (151.2 x 48.8cm) (151.2 x 48.8cm) (205.6 x 58cm)
- Page 4 Components - Fittings For damaged or missing parts, please visit: www.argos-support.co.uk or email: Help@ClickSpares.co.uk Please check you have all the fittings listed below Note: The quantities below are the correct amount to complete the assembly. In some cases more fittings may be supplied than are required.
- Page 5 Assembly Instructions Step 1 Drawer assembly x 3 Insert two small locking nuts J into drawer wrap Make sure the ‘arrow’ on J is pointing towards the hole in the edge of 0. Screw 24mm locking screws H into holes shown on back of drawer front !.
- Page 6 Assembly Instructions Step 1 - continued Insert glue in drawer front ! groove. Turn the drawer wrap assembly over and push onto drawer front !. Use a philips or flatblade screwdriver, that is a good fit, to turn small locking nut J as far as it will go - more than 1/2 turn.
- Page 7 Assembly Instructions Step 2 - Step 2 - continued continued Slide top of runners R back. Fix through 3rd hole of runner R and pre-drilled holes of upright 3 using 10mm fixing screw drawer Fix through 1st and 9th hole of runners R using 15mm screw O.
- Page 8 Assembly Instructions Step 4 Attaching panels Unfinished back edge Position large horizontal 7 onto upright Insert two large locking nuts I into large horizontal 7 as shown. Use a screwdriver to turn locking nuts I clockwise to lock. Step 5 Attaching panels Position large horizontal 7 onto upright...
- Page 9 Assembly Instructions Step 7 Attaching plinths Align the sides of plinth front ^ with bottom 6 as shown and attach using 40mm screw A. Note: there are no predrilled holes for 40mm screw A. Note: top and bottom panels 6 are identical. Only prepare one of the Finished front edge...
- Page 10 Assembly Instructions Step 10 Attaching panels Position small horizontals 8 onto uprights 3. Insert three large locking nuts I into small horizontals 8 as shown. Use a screwdriver to turn locking nuts I clockwise to lock. Warning: Do not use an electric screwdriver to attach the Step 11 hinges as this can weaken the fixing.
- Page 11 Assembly Instructions Step 13 Fitting back panels Attach back # and foldy back $ to back of wardrobe with the coloured surface facing the inside of the unit using nails K and 15mm screws D. Use nail holder L to hold the nails K vertical and at correct distance as you secure the back # and...
- Page 12 Assembly Instructions Step 15 Inserting drawers Pull runners out. Slide drawers onto runners so they butt up against back of drawer front. Top drawer is the one with Warning-label Fix through drawer sides into runners using 9mm screws C. See page 1 for link to instruction video! 1st small threaded hole...
- Page 13 Assembly Instructions Step 17 Hanging doors & attaching L-bracket With help, slot hinge door Q onto hinge back Tighten screw shown to lock hinges in position. Repeat a and b for other doors. See ‘Hinge adjustment’in step 18 if the doors need adjusting.
- Page 14 Assembly Instructions Step 18 Warning: Do not use an electric screwdriver to adjust the Hinge adjustment hinges as this can weaken the fixing. To move doors up or down: loosen screws shown and move doors to suit. Once doors are aligned, re-tighten.
- Page 15 A Guide to - Wall Mounting & Fixings Important: When drilling into walls always Important note: check that there are no hidden wires or pipes etc. If plastic wall plugs Make sure that the screws and wall plugs being used are suitable for supporting your unit.
Need help?
Do you have a question about the New Hallingford 4 Door 3 Drawer Wardrobe and is the answer not in the manual?
Questions and answers