
Related Manuals for Stoneridge digifobpro


Summary of Contents for Stoneridge digifobpro
- Page 1 USER GUIDE CONTENT OVERVIEW Initial setup digifobpro functions Reading and analysing driver cards Downloading vehicle unit data Managing the device ...
-
Page 2: Eu Driver's Hours Rules Covered By Digifobpro
EU Driver’s Hours Rules covered by Digifobpro digifobpro provides full analysis of Driver Cards. There follows a list of the information provided by the digifobpro in relation to Driver’s Hours. Each of these pictorial representations has a full explanation beneath them when you drill down. -
Page 3: Table Of Contents
Table of contents EU Driver’s Hours Rules covered by digifobpro Charging your digifobpro and digifobpro Controls Driver Card - Quick View Driver Card - Download Driver Card - File Viewer Connecting to a Vehicle Unit Vehicle Unit – Download Setting Vehicle Unit Download Options... -
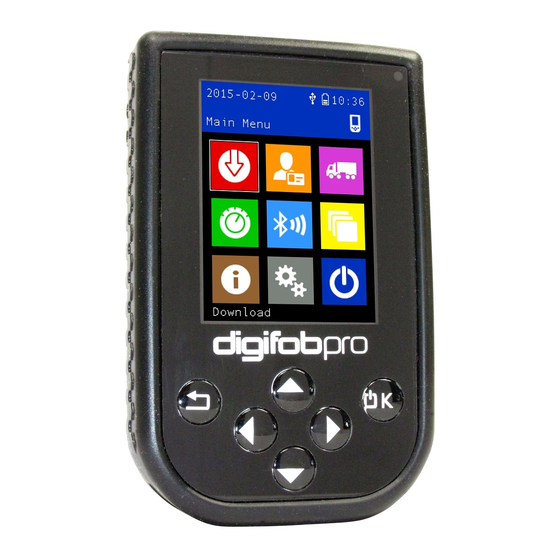
Page 4: Charging Your Digifobpro And Digifobpro Controls
USB Cable Charging your digifobpro: digifobpro can be charged by a 5 volt USB adapter commonly used with many phones however we would strongly recommend charging your digifobpro via a PC or Laptop USB socket. A red LED is displayed when the unit is charging correctly. When the unit is fully charged the charging light will change to green. -
Page 5: Driver Card - Quick View
With digifobpro downloading is automatic. Simply insert a Driver Card in the card slot at the top of the digifobpro with the gold chip facing you. To download a Vehicle insert a valid Company Card in the Tachograph and then attach the supplied cable to the Tachograph as indicated below. - Page 6 - Device Instructions Filtering: The data is split into categories; Information, Infringement, Summary and Latest . Turn ON or OFF options by highlighting using the UP and DOWN arrows and turning an option ON or OFF with the Left or Right buttons.
- Page 7 Events and Faults graphical form. Vehicles Used Delete File - use this cautiously! Events and Faults Icons applicable to Driver Cards and Vehicles General events Faults (Recording Equipment) Security breach event Sensor Security Breach Overspeeds digifobpro User Instructions Page - 7...
-
Page 8: Vehicle Unit - Download
Events and Faults: Speed Data: Technical Data: Using the digifobpro menu you can download ‘ALL data’, a set number of days or ’Since last’ which will download from the last time recorded by your digifobpro. Since Last (VU) downloads from the date recorded by the Vehicle Unit based on any device that downloaded it (not including Control or Workshop cards). - Page 9 Your digifobpro has a unique and extremely useful new feature. By connecting your digifobpro to any Digital Tachograph and placing the digifobpro in this mode you can view your current driving totals in real time. Please note that whilst Digital Tachographs have been around since 2006, more comprehensive real time data provided by the Tachograph was not available until around 2012.
- Page 10 - Device Instructions Bluetooth / Phone Link digifobpro has Bluetooth functionality which allows it to be used as an interface to the Tachograph by an Android phone or tablet. Third parties can develop applications using the digifobpro as their connection to the Tachograph.
-
Page 11: Setting Vehicle Unit Download Options
As above, plus in the case of VDO Tachograph you can access additional data relating to enhanced speed recording and extended period recording. Driver Download - Settings Set “POA as Break” Yes or No depending on how this applies in your region. digifobpro User Instructions Page - 11... -
Page 12: Maintenance Of Your Digifobpro System
You can set the digifobpro to overwrite archived files so that it is less likely to fill up, this is the default setting. You can enable the digifobpro stored files to be seen by Windows explorer. Hiding Archived files will ensure you do not see files that are already downloaded. - Page 13 Settings - Continued In order to use Bluetooth devices with your digifobpro you must first pair them using this function. This option scans for Bluetooth devices and allows you to add them using the appropriate PIN number for the device you are attaching to.
-
Page 14: Installing Digiconnect Windows® Software
Operating Systems: Windows 7 / Windows 8 / Windows 10 digiconnect is pre loaded onto the digifobpro. Simply connect the digifobpro to a free USB socket and use Windows Explorer to navigate to the software directory. Installing the digiConnect Windows® Software Please browse to the USB flash drive of your digifobpro using Windows®... -
Page 15: Connecting The Digifobpro To Your Pc
Connecting the digifobpro to your PC Connect the supplied USB cable, to a free USB socket on your PC. Connect the other end to the USB port on the bottom of the digifobpro. Ensure that the digiConnect software is started by selecting Programs –... -
Page 16: Opening Archive Folder
- Device Instructions Global Options for digiconnect There are settings in digiconnect that will apply to all Tachosys devices that connect to your PC. Fig 4. Select options in this part of the screen shown in full in Fig 3. - Page 17 Fig 5. Choose whether you want ‘Automatic’ download of files from your digifobpro or whether you wish to be notified of new files when the unit is connected to your PC. By selecting Automatic each time your digifobpro is connected to your PC any files that are not already on your PC which exist on the unit will be downloaded automatically.
-
Page 18: Viewing Files On The Digifobpro With Digiconnect
Allows you to upload files from your PC’s hard drive to the digifobpro’s internal memory. Please bear in mind that the digifobpro is not designed to be the only storage medium for Driver Card and Vehicle Unit files. You should regularly archive files to your Download: You can highlight any file in the file window and click ‘Download’. -
Page 19: Digiconnect Software Options
Download, Delete and Properties. These options are exactly as defined above. Device - digifobpro: This option allows you to configure all attributes of the digifobpro (see Fig 7.). Under ‘Device - digifobpro’ you can view the units; Firmware Version, Serial and Build Date. - Page 20 Windows® Software Configure Device: Mass Storage Device: digifobpro has 3GB of storage that can be used for a customers own files. If you do not want Windows to reference this every time you attach the digifobpro to the PC you can disable this feature.
-
Page 21: Upgrading Firmware
Internet or been supplied by your retailer. Once you select a file it will be automatically uploaded to the digifobpro and a progress window will indicate the various stages of the update. The process will take several minutes. -
Page 22: Resetting Your Digifobpro
If for some reason a firmware upgrade is unsuccessful it is possible to return to the previous firmware stored on the device. First turn the digifobpro OFF. With the unit now off, hold down the UP arrow and keep it held down, now press the OK button at the same time. -
Page 23: Disclaimer
Whilst infringement checking on digifobpro can provide a quick check it cannot replace a comprehensive review carried out by the national supervisory authorities. There are various interpretations and deviating applications of the above regulations which are beyond the sphere of influence of the manufacturer. - Page 24 Stoneridge Electronics Ltd. Charles Bowman Avenue, Claverhouse Industrial Park, Dundee DD4 9UB, Scotland Tel: +44 (0) 1382 866 400 Email: amsales@stoneridge.com www.stoneridge-electronics.com...
Need help?
Do you have a question about the digifobpro and is the answer not in the manual?
Questions and answers