Table of Contents
Advertisement
Quick Links
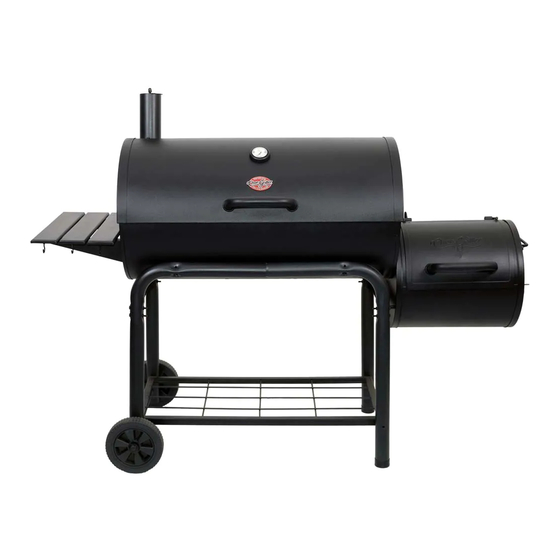
OWNER'S MANUAL
Smokin' Outlaw™
Model #3724
Keep your receipt with this manual for
Warranty.
CUSTOMER SERVICE
1-912-638-4724
Service@CharGriller.com
Contents of this manual are Trademarked and Copyrighted by Char-Griller | A&J Manufacturing.
Using the information contained in this manual without consent of Char-Griller and/or A&J
Manufacturing is strictly prohibited.
OM_3724_ED_ A.1
Advertisement
Table of Contents

Related Manuals for Char-Griller Smokin’ Outlaw 3724


Summary of Contents for Char-Griller Smokin’ Outlaw 3724
- Page 1 Keep your receipt with this manual for Warranty. CUSTOMER SERVICE 1-912-638-4724 Service@CharGriller.com Contents of this manual are Trademarked and Copyrighted by Char-Griller | A&J Manufacturing. Using the information contained in this manual without consent of Char-Griller and/or A&J Manufacturing is strictly prohibited. OM_3724_ED_ A.1...
- Page 2 TABLE OF CONTENTS Safety Warnings & Warranty....... A-1 Assembly Instructions ........B-1 Product Usage ..........C-1 Recipes .............. D-1 Accessories ............E-1...
- Page 3 IMPORTANT SAFETY WARNINGS READ ALL SAFETY WARNINGS AND INSTRUCTIONS CAREFULLY BEFORE ASSEMBLING AND OPERATING YOUR GRILL Read the following instructions carefully and be sure your appliance is properly assembled, installed, and maintained. Failure to follow these instructions may result in serious bodily injury and/or property damage.
-
Page 4: Register Your Grill
Customer Service at 1-912-638-4724. Registration provides important protections: 1. In the extremely unlikely event of a product recall Char-Griller can easily contact you and rectify the issue. 2. If a warrantied part is broken or missing we can send you the needed parts promptly. - Page 5 This grill has been made according to the highest of quality standards. If you have any questions that are not addressed in this manual or if you need parts please call our Customer Service Department at 1-912-638-4724 (USA) or email Char-Griller at: Service@CharGriller.com and have your serial number handy.
-
Page 6: Warranty Information
SURFACE RUST IS NOT CONSIDERED A MANUFACTURING OR MATERIALS DEFECT Char-Griller grills are made of steel and if exposed to the elements rust will occur naturally. Please refer to the section entitled, “Usage” to review how to care for your grill properly. -
Page 7: Parts List
PARTS LIST... - Page 8 PARTS LIST Item Part Description GRILL HOOD COOKING GRATE ASH PAN ASH PAN HANGER HOOD HANDLE HANDLE BEZEL SFB COOKING GRATE SFB CHARCOAL GRATE DRAWER DRAWER HANDLE DAMPER CIRCLE SFB BODY SIDE HANDLE SFB LATCH GRILL BODY LEG BRACE LONG LEG LEG CAP BOTTOM SHELF AXLE...
-
Page 9: Table Of Contents
HARDWARE AND TOOLS NEEDED Assembly: Requires 2 people. Get another person to help. Tools Needed: Pliers, Phillips Head Screwdriver and a 7/16” Nut Driver. NOTE: Do Not tighten any bolts unless instructed to do so. Tightening too soon may prohibit parts from fitting together. All Hex Nuts should be on the inside of the grill unless stated otherwise. - Page 10 ASSEMBLY Step 1 Assemble LONG LEGS, SHORT LEGS, and LEG BRACES as show below then secure the LEG BRACES to one set of LONG LEG and SHORT LEG with four (4) 2 1/4” HEX BOLTS and four HEX NUTS. Leg Brace 2 1/4”...
- Page 11 Step 2 Install BOTTOM SHELF by placing the four corner hooks inside the hole on each legs then rotate the leg assemblies up and secure the LEG BRACES to the other side of the LONG LEG and SHORT LEG set with four (4) 2 1/4” HEX BOLTS and four (4) HEX NUTS. Bottom Shelf 2 1/4”...
-
Page 12: Flat Washer
Step 3 Install one (1) 2/5” FLAT WASHER, one (1) LARGE COTTER PIN, and one (1) HUB CAP onto the AXLE then slide the AXLE through WHEELS, LEGS as shown. Finish by attaching the 2nd FLAT WASHER, LARGE COTTER PIN, and HUP CAP. Hub Cap Large Cotter Pin Flat Washer... - Page 13 Step 4 Attach the GRILL BODY to the previous assembly cart using four (4) 2 1/4” HEX BOLTS and four (4)HEX NUTS. The HEX BOLTS must go through the LEG then the GRILL BODY and then tighten with the HEX NUTS inside the GRILL BODY. Grill Body Hex Nut 2 1/4”...
- Page 14 Step 5 Attach SFB to the GRILL BODY using six (6) 1/2” HEX BOLTS and six (6) HEX NUTS. Then secure SFB to cart using two 2” HEX BOLTS, two (2) HEX NUTS, and two (2) SPACER TUBES. (The SPACER TUBES go between the SFB and the LEG BRACE). BOLTS should go through the holes from the inside of the SFB BODY.
- Page 15 Step 6 Attach SIDE SHELF to GRILL BODY using four (4)1/2” HEX BOLTS and four (4) HEX NUTS. Grill Body Side Shelf Hex Nut 1/2” Hex Bolt...
- Page 16 Step 7 Attach the GRILL HOOD to the GRILL BODY using the two (2) HINGE PINS and two (2) SMALL COTTER PINS. First screw the HINGE PINS onto the hinge holes on the side of the GRILL BODY. Then secure the HINGE PINS with the SMALL COTTER PINS. Grill Hood Small Cotter Pin Hinge Pin...
- Page 17 Step 8 Attach SMOKESTACK onto GRILL HOOD. Insert SMOKESTACK through the opening hole on the GRILL HOOD from the inside of the GRILL HOOD then secure it with two (2) 1/2” HEX BOLTS and two (2) HEX NUTS. Smokestack 1/2” Hex Bolt Grill Hood Hex Nut B-11...
- Page 18 Step 9 Insert the Thermometer through the Thermometer Bezel then through the hole in Grill Hood (from outside) Flat Washer and secure with Wing Nut. Insert the Hood Handle through the Han- dle Bezel and Grill Hood (from outside) and then through Lock Washers and secure with Wing Nuts as shown below.
- Page 19 Step 10 Attach HOOD HANDLE and SIDE HANDLE to SFB. Insert the HOOD HANDLE through the HANDLE BEZEL and SIDE FIRE BOX LID (from outside) and then through LOCK WASHERS and secure with WING NUTS as shown below. Install SIDE HANDLE on the SIDE FIRE BOX using two (2) 1/2”...
- Page 20 Step 11 Attach the DAMPER CIRCLE to the inside of the ASH DRAWER using a 3/4” HEX BOLT, two (2) 1/4” FLAT WASHERS, a LOCK WASHER, and a HEX NUT. Attach the DRAWER HANDLE to the ASH DRAWER using two (2) HEX NUTS. Then slide the ASH DRAWER into the SFB. Place CHARCOAL GRATE onto ASH DRAWER then slide ASH DRAWER into SFB from the side.
- Page 21 Step 12 Place ASH PAN and ASH PAN HANGERS into GRILL BODY. Then install the GREASE CUP HOLDER underneath GRILL BODY. Ash Pan Hanger Ash Pan Grill Body Grease Cup Holder B-15...
-
Page 22: Utensil Hook
Step 13 Screw UNTENSIL HOOKS in place underneath each slab at front of SIDE SHELF. Then place cooking grates into GRILL BODY. Side Shelf Cooking Grate Grill Body Utensil Hook B-16... -
Page 23: Operating Instructions
OPERATING INSTRUCTIONS Setting Up Set grill up on solid, flat surface with adequate wind shelter. Do not move grill while hot, and do not leave unattended during operation. This appliance is designed for use outdoors, away from any flammable materials. It is important that there are no overhead obstructions and that there is a minimum distance of 3 feet (90cm) from the side or rear of the appliance. -
Page 24: Lighting Instructions
Lighting Instructions 1. To start a charcoal fire, stack 50-60 briquettes in a pyramid and saturate with lighter fluid. NOTE: Do not use gasoline, kerosene or alcohol for lighting charcoal. Use of any of these or similar products could cause an explosion possibly leading to severe bodily injury. 2. - Page 25 Finishing Up When your are finished grilling you can shut down your grill by closing both dampers and allowing the fire to suffocate. Be patient. This may take an hour or more. Emptying the Ashes & Ash Pan: ** ONLY EMPTY ASHES WHILE GRILL IS NOT IS USE ** After the fire is completely extinguished you should wait several hours before emptying the ashes to ensure they are not still hot and a burn hazard.
- Page 26 This Page Intentionally Left Blank...
-
Page 27: Recipes
GRILLING RECIPES Know Your Cuts of Meat... - Page 28 Direct Heat • Direct Heat is a high heat method used to cook foods that take less than 25 minutes to cook. Typically, this means foods that are relatively small or thin such as steaks, chops, boneless chicken breasts, fish fillets, hamburgers, etc. •...
- Page 29 • Grill for 20 minutes. Sear with lid open and fire grate in high (hot) position for 1 minute on each side before lowering grate and closing lid. • To SMOKE, place birds in center of GRID with fire in both ends of FIRE BOX. KABOBS: •...
- Page 30 SHRIMP (Peeled) & CRAYFISH: • Place on skewers. • Coat with melted butter and garlic salt. • Grill 4 minutes on each side or until pink. Cocktail sauce optional. BAKED POTATOES: • Rub with butter and wrap in foil and cook on grill with lid down for 50 minutes. •...
- Page 31 Pan not included. Disposable bread pan is recommended. SMOKE BY COOKING SLOWLY (See chart above). 1. Place water/drip pan on left side of fire grate. 2. Place hot coals on right side (damper end) of fire grate. The charcoal basket accessory helps confine coals to one side.
- Page 32 • Baste with ham glaze 3 or 4 times during last 30 minutes of cooking time. • Garnish with pineapple rings about 15 minutes before end of cooking time. SMOKED HOT DOGS STUFFED: • Slit hot dogs lengthwise, within 1/4 inch of each end. •...
- Page 33 • Add shrimp and/ or crayfish and smoke 45 minutes. SMOKED VEGETABLES: • Turnips, potatoes, carrots, okra, mushrooms, peeled onions, zucchini, squash, etc. • Put in pan and cover with water and cook for several hours while cooking the meat. Or place vegetables on grill and smoke for 50 minutes, either wrapped in foil or not.
- Page 34 mixture is very smooth. • Stir in 1/4 cup bottle gravy coloring (Kitchen Bouquet and Gravy Master) and 2 teaspoons Beau Monde seasoning (or substitute 1 teaspoon MSG and 1 teaspoon seasoned salt). • Allow meat to stand in marinade at room temperature for 2 hours or refrigerate up to 24 hours in a covered dish.
-
Page 35: Accessories
ACCESSORIES Warming Rack Increase Grill Area Keeps Food Warm Cover Custom Fit Weather Resistant Protects Grill Finish Cover Accommodates Side Shelf or Side Fire Box Charcoal Basket Confines Coals to One Rotisserie Side for Smoking Excellent for Effortless Grilling Indirect Cooking Universal Fit for Any Grill Quick Release Chimney Starter... - Page 36 For pricing or to order accessories visit: www.CharGriller.com CALL: 912-638-4724 P.O. Box 30864 Sea Island, GA 31561 912-638-4724 www.CharGriller.com Service@CharGriller.com...
Need help?
Do you have a question about the Smokin’ Outlaw 3724 and is the answer not in the manual?
Questions and answers