Table of Contents
Advertisement
Advertisement
Table of Contents

Related Manuals for Vivint V-SH1


Summary of Contents for Vivint V-SH1
- Page 1 SETUP GUIDE Smart Hub Panel ...
- Page 2 © 2016 Vivint, Inc. All rights reserved. Vivint and its respective logos are registered trademarks or trademarks of Vivint, Inc. in the United States and other countries. All other trademarks are the property of their respective owners. DISCLAIMER: No part of this material may be excerpted, reproduced, redistributed, published, broadcast, transmitted, translated, or utilized in any form or by any means, electronic, mechanical, photocopying, recording, or otherwise, without prior written permission of Vivint, Inc.. Vivint does not warrant that this document is error free and retains the right to make changes to this document or related product specifications, drawings, and descriptions at any time without notice. Vivint does not assume any obligation to update the information contained herein. This document is provided "AS IS" and without any guaranty, warranty, or license, express or implied, including but not limited to: fitness for a particular purpose, merchantability, non-infringement of intellectual property, or other rights of any third party. Any Vivint products referenced in this document are not intended for use in medical, lifesaving, or life sustaining applications. Third parties may have intellectual property rights relevant to this document and the technologies discussed herein. ...
-
Page 3: Table Of Contents
Contents Contents Introduction About this Guide System Overview About the System System Configuration Diagram Control Panel Features Control Panel Display Screens System Setup System Setup Outline and Summary Configure System Settings System Settings Configuration Outline System Settings Complete List Security Sensor Numbers and Types Wireless Zones Configuration Wired Zones Configuration Key Fobs Configuration... - Page 4 Update Settings Regulatory Information Where To Find Regulatory Compliance Declarations FCC and IC Regulatory Compliance Declarations Wireless Product Notice Operating Temperature and Humidity Range Notice Important Power Supply Notice Internal Backup Battery Notice Regulatory Notes Applicable Warnings for Technicians Default Settings for SIA CP-01-2014 Compliance FCC and IC ID Numbers for System Devices Fire Protection and Safety Information Service and Warranty Information...
-
Page 5: Introduction
Introduction: About this Guide Introduction About this Guide The Vivint Smart Hub™ panel is the hub of the Vivint Smart Home™ system, a fully-supervised, integrated, and intelligent home security and automation system. The system — which includes the control panel and various security sensors and peripheral devices — incorporates the most advanced and sophisticated features and technology available today. The system can be expanded and customized to fit every individual home environment and customer need. This guide provides an overview of the entire Vivint Smart Home system, information about how the different components of the system work together, important safety standards and regulatory compliance declarations, and an outline of the installation, setup, and settings configuration tasks. The following topics are covered in this guide: Learn about the control panel and overall system functionality. Set up the control panel including plugging in the power supply, waiting for the panel to boot up, and then following the onscreen instructions on the panel's touchscreen display that steps you through the process of adding devices (i.e., sensors, cameras, etc.) and verifying successful device and panel connection. Configure system settings for the panel, security sensors, and other smart home devices. NOTE: Some cities and municipalities may require an alarm system permit. Check with the local ... -
Page 6: System Overview
Smart Hub Setup Guide System Overview About the System This section provides a brief summary of the main components and features of the Vivint Smart Hub system. Control Panel The Smart Hub panel features a capacitive, color touchscreen display that allows control of all system functions and configuration. The touchscreen display shows the Vivint Smart Home Pro technician (and the customer) important information such as system and device status. The control panel offers touch navigation that makes system installation, configuration, and operation quick and easy. The control panel has system software installed that can be updated with the latest release version that can include feature enhancements, fixes, and new functionality. Security Sensors The system can support up to 100 wireless sensors of various types (door and window sensors, glass break detectors, motion detectors, etc.), as well as 20 key fobs, 30 keypads, and 15 sensor response types. The control panel reports system alarms and trouble alerts to the Vivint Central Station (i.e., Monitoring Station) via either cellular or broadband IP network communication. Two-way voice communication between the panel and the Central Station (Vivint Live) is also enabled through cellular communications. A 345 MHz narrow-band radio receiver inside the panel detects signals transmitted from the wireless sensors. Z-Wave Devices The panel has a built-in Z-Wave radio module that provides secure, encrypted communication between the panel and other security-enabled Z-Wave devices. The panel's Z-Wave technology allows the controlling and monitoring of various home automation devices such as door locks, thermostats, and lighting control outlet modules. The control panel will work with any compatible Z-Wave device regardless of the manufacturer. User Accounts The Vivint system supports 50 user accounts including a single Duress User and one or more Admin users. The Admin users can add, delete, or modify the other users. Note that all user PIN codes must be unique. The Installer PIN code is associated with the only user account that has access to the Installer Toolbox screens (used for configuring panel, device, and system settings). The default Installer PIN code is 2203. -
Page 7: System Configuration Diagram
System Overview: System Configuration Diagram System Configuration Diagram The diagram below shows the configuration of an overall system — for the Vivint Smart Hub™ panel — and how its various components communicate and interact, including the control panel, user input and interaction features, internal modules, wireless security sensors, NFC-ready sensors (for DIY setup), Z-Wave devices, wireless cameras, remote access and control devices (smartphone, tablet, laptop, etc.) via mobile and web apps, power supply, Wi-Fi cellular and broadband IP networks, and the Vivint Platform. Vi v i nt Smar t Hub Panel System - 5 -... -
Page 8: Control Panel Features
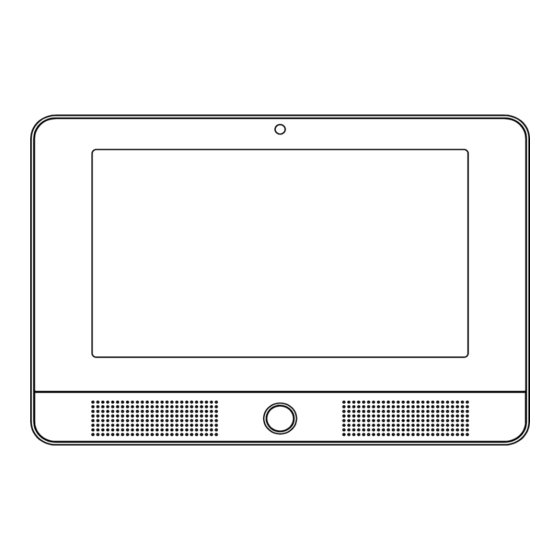
Smart Hub Setup Guide Control Panel Features The following drawings show two views of the Smart Hub control panel, with some of the main features called out. First, an external front view; and second, an external back view of the panel. Panel Front View - 6 -... - Page 9 System Overview: Control Panel Features Panel Back View - 7 -...
- Page 10 Smart Hub Setup Guide System Status as Indicated by the Home Button Display The Home button LED can indicate the status of system functions and conditions, as described below. Secur i ty Sensor Status Glows Green when all of the sensors are closed and the system is ready to arm. Not lit when any sensor is open and the system is not ready to arm. Ar mi ng Status Glows Red while the system is armed (in either Stay or Away mode). Flashes Red during the Entry Delay time period. Al ar m Status Flashes Red during an alarm. ...
- Page 11 System Overview: Control Panel Features Installer Toolbox Screens IMPORTANT: The complete set of Installer Toolbox screens is accessible only to a Vivint Smart Home Pros technician who enters the required Installer PIN code. Use the Installer Toolbox screens to configure system settings. The Vivint Smart Home Pro technician must enter a valid Installer PIN code to access this toolbox. The main screen displays a set of system configuration and testing tools. Use these tools to configure all of the system settings, test system functionality, and reset system options to default values (for details, see "Configure System Settings" on page 12). From the Home screen, press the Menu button > Settings > enter the Installer PIN code (the default code is 2203) > and then press Installer Toolbox. - 9 -...
-
Page 12: Control Panel Display Screens
Smart Hub Setup Guide Control Panel Display Screens The Vivint Smart Hub panel is configured and operated using the touchscreen display. The display shows critical system information and provides access to the numerous features used to configure, monitor, and control the home security and automation system by both the Vivint Smart Home Pro technician and the homeowner. The status bar at the top of the touchscreen provides Menu access, and shows system information such as the date and time and weather information, as well as status icons for alerts, messages, power (AC / battery), and sound. The navigation bar at the bottom of the touchscreen shows the security mode, and provides access to the connected devices such as door locks, thermostats, cameras, lighting controls, and more. The Menu button in the upper left corner of the touchscreen lets you access the following screens: Emergency, Settings (including the Installer Toolbox), and Support. Home Screen At any time, press the Home button on the touchscreen to return to the Home screen. - 10 -... -
Page 13: System Setup
System Setup: System Setup Outline and Summary System Setup System Setup Outline and Summary The following outline provides a high-level summary of all the tasks that comprise the setup of a Vivint Smart Hub panel and system. 1. Unpack the box. Unpack the Smart Hub panel box and identify the contents. The package should contain the control panel, power supply, quick setup card, (NOTE: You can unpack the other devices, such as sensors and cameras, at this time but do not install them yet.) 2. Locate an unswitched outlet for the power supply. Identify an unswitched wall outlet where you can plug in the power supply for the control panel. 3. Plug the power supply into the wall outlet. ... -
Page 14: Configure System Settings
Smart Hub Setup Guide Configure System Settings System Settings Configuration Outline IMPORTANT: The complete set of Installer Toolbox screens is accessible only to a VivintSmart Home Pros technician who enters the required Installer PIN code. This section describes the complete set of system settings (which may not be available to the customer via the User Settings interface). As the Vivint technician, you configure system settings at the control panel via the Installer Toolbox screens. Every system you install requires that you configure settings for certain installed modules in the panel, security sensors and other peripheral devices, in addition to specific system features services. This section describes how to configure these system settings, and provides detailed information about each of the settings including default values, functionality, and compliance requirements for the American National Standards Institute / Security Industry Association, ANSI/SIA CP-01-2014 standard, hereafter referred to in its abbreviated form as SIA CP-01-2014. Some system settings are common across all installations (for example, all control panels report to the same Central Station). Other settings, such as account number and sensor and device configuration, are unique to each installation. Follow the procedure below to guide you through the system settings configuration. To configure system settings 1. ... -
Page 15: System Settings Complete List
Configure System Settings: System Settings Complete List System Settings Complete List Use the list below as a quick reference to detailed information about all of the system settings. To access the security sensor and remote control device settings from the control panel, go to: Menu > Settings > Installer Toolbox > Zones, Key Fobs, Keypads And then select from the following: "Wireless Zones Configuration" on page 17 "Wired Zones Configuration" on page 24 "Key Fobs Configuration" on page 28 "Keypads Configuration" on page 33 For more information about configuring sensors, see "Security Sensor Numbers and Types" on the next page. To access all other system settings, go to: Menu > Settings > Installer Toolbox And then select from the following: ... -
Page 16: Security Sensor Numbers And Types
Smart Hub Setup Guide Security Sensor Numbers and Types Each security sensor installed as part of the system — whether wireless or wired — is configured to correspond to a specific sensor number and sensor type (i.e., zone). Sensor Numbers The sensor number identifies the specific sensor, and is used when the sensor is: displayed on the control panel recorded in the event log reported to the Central Station This provides precise information about every security sensor in the system. Sensor Types The sensor type (sometimes referred to as a sensor zone) determines how and when the control panel responds to signals from the sensor. Some sensors are armed all the time, others are armed only in certain arming levels, and some sensors cause Central Station reports anytime they are activated. The sensor type, along with other configuration options, determine this behavior. The following list describes each of the sensor types/zones. (00) Unused This is the setting for unused sensor numbers that do not have a sensor configured into them. No system action occurs at any time from this sensor type. (01) Exi t/Entr y 1 This sensor type is reserved for doors that are used for exit and entry. When the system is armed in the Away ... - Page 17 Configure System Settings: Security Sensor Numbers and Types (04) Inter i or F ol l ower This sensor type is for interior sensors such as motion detector, interior doors, and other sensors that detect human presence inside the protected area. This type of sensor is called a "follower" due to its action when the system is armed in the Away Mode. After the Exit Delay expires and the system is armed, if an interior follower sensor is triggered, an instant alarm will occur. Interior follower sensors are always bypassed and not active when the system is armed in Stay Mode. This allows the protected area to be occupied while still protecting the perimeter. (05) Day Zone This sensor type is the same as a perimeter zone, except when the system is disarmed, opening the sensor displays a trouble alert on the control panel display. Common uses for this sensor type are protection of sensitive areas that require notification and possibly a Central Station trouble report, but not an alarm when the system is disarmed. (06) 24-hour Si l ent Al ar m This sensor type is active independent of the system arming status. The code for silent panic is sent to the Central Station, but for safety, there are no visual or audible indications locally that this sensor type has been triggered. (07) 24-hour Audi bl e Al ar m This sensor type is continuously armed 24-hours a day. A sensor configured to this type will trigger a local alarm ...
- Page 18 Smart Hub Setup Guide (16) 24-hour F i r e wi th Ver i f i cati on ** This sensor type is continuously armed 24-hours a day. A sensor configured to this type can trigger the local alarm fire sounder and the external siren regardless of the mode the system is in. Typical use would be for wireless smoke detectors. This sensor type is always active and cannot be bypassed. For verification, this sensor type must be violated twice in two minutes, or remain violated for 30 seconds. If any other fire sensor (verified sensor type or not) violates within two minutes, both sensors will cause a fire alarm. (23) No Response Type This sensor type is a special zone that can be monitored for activity or inactivity by the Central Station. It does not affect security system status. (24) Si l ent Bur gl ar y This sensor type is for silent triggering the burglary alarm with perimeter doors and windows that will not be used to enter or exit the protected area while the system is armed. The control panel’s alarm sounder and the external siren will not activate.
-
Page 19: Wireless Zones Configuration
Configure System Settings: Wireless Zones Configuration Wireless Zones Configuration This section contains descriptions, default values, and notes about the Wireless Zones settings. To access these settings from the control panel, go to: Menu > Settings > Installer Toolbox > Zones, Key Fobs, Keypads > Wireless Zones List of Settings The options that can be set for each wireless sensor include the following (see below this list for detailed descriptions): Equipment Code: Sensor model (door/window sensor, PIR motion sensor, smoke detector, etc.). Other Equipment Code: Enter special equipment code (only shown for sensors set as "Other"). Sensor Type: Exit/entry, perimeter, interior, etc. - Page 20 Wireless Sensor Equipment Code The equipment code is a 4-digit code that is assigned to the model of sensor being used. The control panel displays a list of sensor models and their associated 4-digit equipment code. 1. Select the model of wireless sensor being configured for this sensor number by selecting the equipment code from the list or by entering the equipment code number directly on the keypad. NOTE: When you select the sensor's equipment code, default values for some of the sensor's other options are automatically set. Make sure to confirm that the default settings match the desired configuration. 2. If the sensor model is not in the list, select (0000) Other. The equipment code for this sensor can be entered using the resulting sub-option, called the Other equipment code. Wireless Sensor Equipment Codes (0000) Other (2081) RPTR1-345 Vivint Repeater (1251) DW11 Door/Window (NGP device) (1144) RE220T 2GIG Repeater (1252) DW21R Recessed Door Contact (NGP device) (0655) Existing Door/Window Contact (1249) PIR2 Motion Detector (NGP device) (0609) Existing Motion Detector (1248) GB2 Glass Break Detector (NGP device) (0475) Existing Glass Break Detector (1253) PANIC2 Panic Pendant (NGP device) (0616) Existing Smoke Detector (1058) SMTK3 Smoke Detector (0708) Existing Heat Sensor (1026) 2GIG CO Detector...
- Page 21 Configure System Settings: Wireless Zones Configuration Wireless Sensor Equipment Codes (1269) Firefighter Audio Detector (0863) DW20R Recessed Door Contact (1128) RE219 Flood Sensor (0869) PIR1 PIR w/ Pet Immunity (0873) TAKE Takeover Module (0864) GB1 Glass Break Detector (0941) RE224 GT GE Translator (0868) PANIC1 Panic Button Remote (1208) RE224 DT DSC Translator Wireless Sensor Type Each wireless sensor needs to be assigned to a sensor type. The sensor type determines how and when the control panel responds to signals from the sensor. The sensor type may automatically be set, for convenience, to a commonly used default sensor type when the equipment code is selected. Select the sensor type that matches the sensor’s function by entering the sensor type number directly on the keypad. Wireless Sensor Types (00) Unused (08) 24-hour Auxiliary Alarm (01) Exit/Entry 1 (09) 24-hour Fire (02) Exit/Entry 2 (10) Interior with Delay (03) Perimeter (14) 24-hour Carbon Monoxide (04) Interior Follower (16) 24-hour Fire With Verification (05) Day Zone...
- Page 22 Smart Hub Setup Guide Sensor Type Equipment Types Available (04) Interior Follower (1) = Motion, (2) = Contact (06) 24-hour Silent Alarm (1) = Contact, (11) = Emergency (07) 24-hour Audible Alarm (1) = Contact, (11) = Emergency (08) 24-hour Auxiliary (1) = Contact, (6) = Freeze, (8) = Water, (10) = Temperature,(11) = Emergency (10) Interior with Delay (1) = Motion, (2) = Contact (23) No Response Type (1) = Contact, (2) = Motion TXID Wireless zone TXID numbers can be manually entered or learned from the sensor to the panel. For manual entry, select TXID and enter the sensor's TXID number by using the keypad that is presented. For automatic entry, select TXID and then select the Learn button under the keypad. The control panel will then wait for a sensor signal transmission. Trigger the sensor being configured (e.g., press the WPS button), and the control panel will beep four times and display the sensor's TXID number. If the sensor being learned has already been configured on the control panel, an error displays indicating that another sensor currently configured is already using that TXID number and loop. Loop Some sensors have more than one input and can be programmed as multiple wireless zones on the control panel, one for each loop. For example, door/window sensors have two inputs: an internal magnetic contact and an external normally closed hardwire input. Either or both sensor inputs can be used. When using both the internal magnetic contact and the external input, the magnet contact and the external contact need to be assigned a different wireless sensor number. Both sensor numbers will share the same sensor TXID number. For example, when configuring a door/window sensor: ...
- Page 23 Configure System Settings: Wireless Zones Configuration Name The sensor name is used to represent the sensor in all user interfaces. The wireless sensor name is automatically set to match the voice descriptor but can be changed to a more descriptive name if desired. Chime DEF AULT: Di sabl ed Each wireless sensor can be set to sound a chime when the sensor is triggered. The Installer will configure the initial setting for the sensor. The user can change the chime setting for sensors in Panel Settings. Chime Tone DEF AULT: Chi me 1 Select the desired chime tone from the list of 11 available unique tones. When selected, the chime plays allowing you to hear the tone before selecting the one you want. Voice DEF AULT: Di sabl ed Each wireless sensor can be set to sound a voice annunciation (with the descriptor words) when the sensor is triggered. The Installer will configure the initial setting for the sensor. The user can change the voice option (enabled or disabled) and the voice descriptor setting for sensors in Panel Settings. Dialer Delay DEF AULT: Enabl ed (NOTE: Def aul t Setti ng Requi r ed f or SIA C P-01 C ompl i ance) Wireless sensors can trigger communication to the Central Station immediately or after a delay. The delay time is ...
- Page 24 Smart Hub Setup Guide Reports DEF AULT: Enabl ed The control panel can be configured to report or not report a triggered sensor to the Central Station. The default enables reporting for this wireless sensor number. To prevent reporting for this wireless sensor number, select disabled. Supervised DEF AULT: Enabl ed When a sensor is set to be supervised, the control panel will expect regular timed signals from this sensor. If the signals are not received for a period of 12 hours, a supervisory trouble alert will occur. The default allows supervision for this wireless sensor. To turn off supervision for this wireless sensor, select disabled. NOTE: Portable sensors such as panic buttons should not be set as supervised if the sensor may be removed from the area temporarily. Equipment Age DEF AULT: Vari es by i nstal l ti me (New or Exi sti ng) When a sensor is initially installed in the system it is identified as being new. Sensors that have previously been ...
- Page 25 Configure System Settings: Wireless Zones Configuration 32 Bit ID Automatically assigned identification number for sensors that are encrypted for anti-theft security. Cold Climate The cold climate option lets you account for a colder environment and prevent false (i.e., inaccurate) reports of a low battery signal sent by the sensor to the panel. For example, if you install the sensor in a cold climate, or anywhere in the home where it is typically colder than normal, the sensor might transmit signals indicating the battery level is lower than it actually is. This option lets you prevent those false reports by enabling a different formula for measuring the battery level. Cold Climate Season (in days) Fine tune the cold climate season by specifying its length in number of days. You can set the value between 0 and 365 days. Single RF Quiet Chatter DEF AULT: Use overal l qui et chatter When the system has a repeater device installed, sometimes wireless sensor signal chatter is generated when an individual sensor (i.e., a single RF) signal and the repeater signal are both being received by the control panel at the same time. If RF chatter occurs, you can use this option to eliminate or quiet the chatter. Possible states are: ...
-
Page 26: Wired Zones Configuration
Smart Hub Setup Guide Wired Zones Configuration The control panel can be configured with up to two wired sensors. The wired sensors are hardwire contact loops connected to the loop input terminals on the control panel terminal block Configuring the wired sensors into the control panel involves selecting wired sensor type, wired zone number, normal state (open, closed, or end-of-line resistor), and selecting the other options for the sensor.. To access these settings from the control panel, go to: Menu > Settings > Installer Toolbox > Zones, Key Fobs, Keypads > Wired Zones Wi r ed Sensor Repor ti ng C odes Wired Sensor #1 = Reports as Sensor #135 Wired Sensor #2 = Reports as Sensor #136 List of Settings The options that can be set for each wired sensor include the following (see below this list for detailed ... - Page 27 Configure System Settings: Wired Zones Configuration Wired Sensor Types (01) Exit/Entry 1 (07) 24-hour Audible Alarm (02) Exit/Entry 2 (08) 24-hour Auxiliary Alarm (03) Perimeter (10) Interior with Delay (04) Interior Follower (23) No Response Type (05) Day Zone (24) Silent Burglary Wired Zone Two hardwire loops can be used as sensors with each control panel. The options for each wired sensor are configured with sub-options. Select the wired sensor number that corresponds to the terminal block input used for the wired sensors. Voice Descriptor The voice descriptors are the words the control panel will announce for this wired sensor if this wired sensor is configured for voice annunciation. Up to five words are allowed. Select the voice descriptor button, and then select the words by entering them on the keyboard and selecting the desired words from the list at the top of the screen to construct the voice descriptor. Name The wired sensor name is used to represent the sensor in all user interfaces. The wired sensor name is automatically set to match the voice descriptor, but can be changed to a more descriptive name if desired. Chime DEF AULT: Di sabl ed Each wireless sensor can be set to sound a chime when the sensor is triggered.
- Page 28 Smart Hub Setup Guide Voice DEF AULT: Di sabl ed Each wireless sensor can be set to sound a voice annunciation (with the descriptor words) when the sensor is triggered. The Installer will configure the initial setting for the sensor. The user can change the voice option (enabled or disabled) and the voice descriptor setting for sensors in Panel Settings. Dialer Delay (0-1) (NOTE: Def aul t Setti ng Requi r ed f or SIA C P-01 C ompl i ance) Wired sensors can trigger communication to the Central Station immediately or after a delay. The delay time is specified by the abort window dialer delay setting (the default delay is 30 seconds). The default causes delayed dialing for this wired sensor number. For immediate dialing for this wired sensor number, select disabled.
- Page 29 Configure System Settings: Wired Zones Configuration Equipment Age DEF AULT: Vari es by i nstal l ti me (New or Exi sti ng) When a sensor is initially installed in the system it is identified as being new. Sensors that have previously been installed (e.g., with a different panel) are identified as being existing. This information is tracked as part of the installed system inventory. - 27 -...
-
Page 30: Key Fobs Configuration
Smart Hub Setup Guide Key Fobs Configuration The control panel can be configured with up to 20 wireless remote control key fobs. IMPORTANT: A total of 20 key fobs can be added to a system with a maximum of 4 in Secure Mode (see below). Configuring the key fobs into the control panel involves manually entering or learning the key fob’s TXID number, and specifying the other options for the key fob. To access these settings from the control panel, go to: Menu > Settings > Installer Toolbox > Zones, Key Fobs, Keypads > Key Fobs List of Settings The options that can be set for each key fob include the following (see below this list for detailed descriptions): Key Fob Enabled/Disabled: Select whether the key fob is enabled on the control panel. Equipment Code: Key fob model. Other Equipment Code: Enter special equipment code (only shown for key fobs set as "Other"). - Page 31 Configure System Settings: Key Fobs Configuration Equipment Code The key fob equipment code defines the sensor’s manufacturer and type. The default is (0000) Other. Select (0866) KEY2-345 4-button key fob remote for a key fob remote. Select (0577) Existing key fob remote for an existing key fob remote. Other Equipment Code DEF AULT: 0 NOTE: This option is only displayed if "(0000) Other" is selected for a key fob’s equipment code. The equipment code is a 4-digit code that is assigned to the model of key fob being used. TXID Key fob TXID numbers can be manually entered or learned from the key fob to the panel. For manual entry, select TXID and enter the key fob's TXID number by using the keypad that is presented. For automatic entry, press the Learn button. Trigger the key fob and its TXID number will be learned. (NOTE: Refer to the key fob's Quick Reference for details about how to trigger the key fob's signal.) Voice Descriptor The voice descriptor is the words the control panel will use for this fob for low battery announcements and log entries. Up to five words are allowed. The voice descriptors are the words the control panel will announce for this wired sensor if this wired sensor is configured for voice annunciation. Up to five words are allowed. Select the voice descriptor button, and then select the words by entering them on the keyboard and selecting the desired words from the list at the top of the screen to construct the voice descriptor. Name The key fob name is automatically set to match the voice descriptor. It can be changed if desired. Emergency Key DEF AULT: Di sabl ed Pressing the top two buttons on a key fob at the same time for 5 seconds can trigger an emergency alarm.
- Page 32 Smart Hub Setup Guide Disabled Auxiliary alarm Audible alarm Silent panic Fire Disarm Key Defaul t: Enabl ed As an installer, consult the user as to whether to set the key fob to allow disarming the control panel with the key fob’s Disarm button. If the user wants the key fob used as a stationary wall fob, it can also be set to prevent from using the key fob to disarm the system. Arm With No Entry Delay DEF AULT: Di sabl ed Key fobs can be set to arm the control panel with or without an Entry Delay. The default setting allows this fob to arm the system with an Entry Delay. To set this fob to arm the system without an Entry Delay, select enabled. Auxiliary Key DEF AULT: Di sabl ed The key fob’s ...
- Page 33 Configure System Settings: Key Fobs Configuration Zone Number Up to 20 wireless 4-button key fobs can be used with each control panel. Key fob zone number is automatically assigned when the key fob is configured. The zone number can be reconfigured by selecting from the available numbers. Secure Mode DEF AULT: Vari es by i nstal l ti me (New or Exi sti ng) New (next generation) peripheral sensors are configured by default with anti-theft security encryption, which prevents them from being taken over by another security system. Older/existing sensors are configured by default in legacy mode (i.e., Unsupported mode). At the panel, on the Key Fobs screen, each fob in the list has an indicator showing whether it is configured in secure mode (closed lock icon) or non-secure mode (open lock icon). Possible states are: Not Secure; Secure Encryption Pending; Secure Encrypted; Unsupported. 32 Bit ID Automatically assigned identification number for key fobs that are encrypted for anti-theft security. Single RF Quiet Chatter DEF AULT: On and qui et When the system has a repeater device installed, sometimes signal chatter is generated when an individual key ...
- Page 34 Smart Hub Setup Guide Can be set between 0 and 600 seconds. - 32 -...
-
Page 35: Keypads Configuration
Configure System Settings: Keypads Configuration Keypads Configuration The control panel can be configured with up to 30 wireless remote control keypads. Configuring wireless keypads into the control panel involves manually entering or learning the keypad’s TXID number, and specifying the other options for the keypad. To access these settings from the control panel, go to: Menu > Settings > Installer Toolbox > Zones, Key Fobs, Keypads > Keypads List of Settings The options that can be set for each RF remote control keypad include the following (see below this list for detailed descriptions) Keypad Enabled/Disabled: Keypad used or not. Equipment Code: Sensor model. Other Equipment Code: Enter special equipment code (only shown for keypads set as "Other"). ... - Page 36 Smart Hub Setup Guide The default is (0000) Other. Select (867) PAD1-345 wireless keypad for a RF keypad. Other Equipment Code NOTE: This option is only displayed if "(0000) Other" is selected for an RF keypad’s equipment code. The equipment code is a 4-digit code that is assigned to the model of keypad being used. TXID RF keypad TXID numbers for standard keypads can be manually entered or learned from the RF keypad. For manual entry, select TXID and enter the keypad's TXID number. For automatic entry, press the Learn button. Trigger the RF keypad and its TXID number is learned by the panel. Voice Descriptor DEF AULT: Keypad One The voice descriptor is the words the control panel will announce for this RF keypad. Up to five words are allowed. Select the voice descriptor button, and then select the words by entering them on the keyboard and by selecting the desired words from the list. Name The keypad name is automatically set to match the voice descriptor, but it can be changed if desired. Emergency Keys DEF AULT: Enabl ed NOTE: This step is not displayed for Model keypads. Standard RF keypads have 24-hour emergency buttons labeled Fire and Police. The default setting enables this RF keypad’s emergency keys.
- Page 37 Configure System Settings: Keypads Configuration Equipment Age DEF AULT: Vari es by i nstal l ti me (New or Exi sti ng) When a sensor is initially installed in the system it is identified as being new. Sensors that have previously been installed (e.g., with a different panel) are identified as being existing. This information is tracked as part of the installed system inventory. Zone Number Up to 30 wireless keypads can be used with each control panel. The zone number is automatically assigned when the keypad is configured. The zone number can be changed by selecting a number from the list. Single RF Quiet Chatter DEF AULT: On and qui et When the system has a repeater device installed, sometimes signal chatter is generated when an individual ...
-
Page 38: Entry And Exit Settings
Smart Hub Setup Guide Entry and Exit Settings This section contains descriptions, default values, and notes about the Entry and Exit settings. To access these settings from the control panel, go to: Menu > Settings > Installer Toolbox > Entry and Exit From the Entry and Exit screen, you can view and configure the following settings. Exit Delay (in seconds 45-120) DEF AULT: 60 seconds (NOTE: Def aul t Setti ng Requi r ed f or SIA C P-01 C ompl i ance) The Exit Delay can be set from 45 to 120 seconds. - Page 39 Configure System Settings: Entry and Exit Settings Quick Arming DEF AULT: Enabl ed Quick arming allows the customer to arm the system without having to enter their User Code. (Quick arming reports as User 0 if open/close reports are sent.) The default setting allows quick arming. To turn off quick arming, select disabled. Auto Stay DEF AULT: Enabl ed (NOTE: Def aul t Setti ng Requi r ed f or SIA C P-01 C ompl i ance) When auto stay is enabled and the system is armed in the Away Mode, if an exit/ entry sensor is not violated ...
- Page 40 Smart Hub Setup Guide The default setting enables the quick exit feature. To turn off the quick exit feature, select disabled. - 38 -...
-
Page 41: Installer Settings
IMPORTANT: BE SURE TO WRITE DOWN THE NEW CODE! Lock Installer Programming After 48 Hours DEF AULT: Enabl ed This setting is provided to prevent takeovers. The control panel can be set to limit an installer’s access to system settings after a period of 48 hours. The 48 hour lockout timer starts when the installer registers the system. When disabled, this allows for unlimited full access to system configuration (no lockout). To deny access to system configuration after 48 hours, set this option to enabled. After the 48 hour lockout timer has locked out the system, the timer can be reset through the Vivint Platform Admin Tool. Panel Debug Mode DEF AULT: Off This option is dimmed or grayed out in a customer installation, which is expected and proper behavior, as it is used for internal testing purposes only. Reset To Factory Defaults Button DEF AULT: Enabl ed Use this setting to enable and disable the Reset to Factory Defaults button that is located inside the control panel. ... - Page 42 Smart Hub Setup Guide Reset All To Factory Defaults This button resets all of the control panel settings to their original factory defaults. Using the soft button in the panel interface not only restores panel settings to factory defaults, but also provisions the control panel (when you use the RESET button inside the control panel, the settings are restored to factory defaults but the control panel is not provisioned). Resetting to factory defaults does the following actions on the control panel: Removes all database files Removes all persistent configuration files Removes all video clips Removes all DVR videos Removes all log files Resets the Z-Wave network Resets the network module Reset Clips Removes all saved video clips from the control panel's memory. Reset DVR Removes all continuously recorded video from a configured media storage device. Reset Z-Wave Network This button resets the Z-Wave mesh to factory defaults, and all configured Z-Wave devices are removed from the panel. Reset IP Network This button resets the networking module to factory defaults.
- Page 43 Configure System Settings: Installer Settings Calibrate Screen Causes the panel's touchscreen display to recalibrate when the panel is restarted. - 41 -...
-
Page 44: Key Fob Behavior Settings
Smart Hub Setup Guide Key Fob Behavior Settings This section contains descriptions, default values, and notes about the Key Fob Behavior settings. To access these settings from the control panel, go to: Menu > Settings > Installer Toolbox > Key Fob Behavior From the Key Fob Behavior screen, you can view and configure the following settings. Disarming Key Fob After Alarm (alert) DEF AULT: Di sabl ed The system can produce a unique sound when it’s disarmed with a key fob after an alarm has occurred. Four beeps will sound from the control panel’s speaker, four chirps will sound from the external sounder (if installed). This feature serves as a safety alert to the user so they can enter the protected area with caution. The default setting will not cause a unique sound when disarming after an alarm. To cause unique sound when disarming after an alarm, select enabled. Key Fob Arm/Disarm Confirmation DEF AULT: Di sabl ed The system can produce a unique sound when it’s armed or disarmed with a key fob. The control panel’s speaker ... -
Page 45: Central Station Settings
Configure System Settings: Central Station Settings Central Station Settings This section contains descriptions, default values, and notes about the Central Station settings. To access these settings from the control panel, go to: Menu > Settings > Installer Toolbox > Central Station From the Central Station screen, you can view and configure the following settings. Primary CS IP Address Displays the primary IP address of the Central Station server. Secondary CS IP Address Displays the secondary IP address of the Central Station server. CS Account Number The Central Station account number is always eight digits and can include some alpha characters. The Central Station account number is assigned to the control panel when the panel is registered. Enter eight digits for the Central Station account number. Enable Two-way Voice DEF AULT: Stay onl i ne for CO and fi re The control panel supports two-way voice communications between the customer and the Central Station ... - Page 46 Smart Hub Setup Guide Pressing 2 enables VOX Mode two-way communications from the Central Station. Pressing 3 enables Listen Mode one-way communication to the Central Station. Pressing 4 extends the session five minutes without changing the mode of operation. Pressing 5 causes the audio session to end and terminates the call. Resume Siren After Two-way Call for Burglary and Emergency Alarms DEF AULT: Enabl ed This setting enhances system operation in personal emergency applications and also provides the installer with the option of the siren sounding until the cut off or to the end of a two-way-voice session specifically for burglary and emergency alarms. The default setting will cause the siren to shut off after a two-way audio session (if the cut off timer has not expired). Enable will cause the siren to resume after a two-way audio session. Resume Siren After Two-way Call for Fire and CO Alarms DEF AULT: Enabl ed This setting enhances system operation in personal emergency applications and also provides the installer with ...
-
Page 47: Reporting And Troubles Settings
Configure System Settings: Reporting and Troubles Settings Reporting and Troubles Settings This section contains descriptions, default values, and notes about the Reporting and Troubles settings. To access these settings from the control panel, go to: Menu > Settings > Installer Toolbox > Reporting and Troubles From the Networking screen, you can view and configure the following settings. Programming Mode Entry Reports to CS DEF AULT: Di sabl ed A report can be sent to the Central Station any time programming (i.e., system settings configuration in the Installer Toolbox) mode is entered and exited. The default setting prevents reporting programming mode entry and exit. To report programming mode entry and exit, select enabled. - Page 48 Smart Hub Setup Guide The default setting prevents sending manual bypass reports. To allow sending manual bypass reports, select enabled. Bypass Restore Reports to CS DEF AULT: Di sabl ed Bypass restore reports can be sent to the Central Station when any sensor that was force bypassed or manually bypassed gets restored. The default setting prevents bypass restore reports. To allow bypass restore reports, select enabled. AC Loss Reports to CS DEF AULT: Enabl ed AC power loss reports can be sent to the Central Station if the control panel loses AC power. The default setting allows AC power loss reports. To turn off AC power loss reports, select disabled. NOTE: The AC power will have to be absent from the control panel for the time set by the "Time to detect AC loss in minutes" setting before the AC power loss trouble alert is displayed (the default is 10 minutes). If the "Random AC loss report time" setting is enabled, the actual AC power loss report will occur at a random time of up to four ...
- Page 49 Configure System Settings: Reporting and Troubles Settings System Low Battery Reports to CS DEF AULT: Enabl ed Low battery reports can be sent to the Central Station if the control panel’s battery tests low. The default setting allows control panel low battery reports. To turn off control panel low battery reports, select disabled. System Low Battery Restore Reports to CS DEF AULT: Enabl ed Low battery restore reports can be sent to the Central Station if the control panel battery had tested low and is now The default setting allows control panel low battery restore reports. To turn off control panel low battery restore reports, select disabled. RF Sensor Low Battery Reports to CS DEF AULT: Enabl ed Sensor low battery reports can be sent to the Central Station if a sensor battery tests low and sends a low battery ...
- Page 50 Smart Hub Setup Guide The default setting prevents opening reports. To allow opening reports, select enabled. Closing Reports to CS DEF AULT: Enabl ed Closing reports can be sent to the Central Station each time the system is armed. The user or key fob number is indicated in the closing report. If Quick Arming is enabled, User #0 is indicated for the closing report. The default setting prevents closing reports. To allow closing reports, select enabled. Alarm Restore Reports to CS DEF AULT: Di sabl ed Alarm restore reports can be sent to the Central Station after an alarm when either the timeout has been reached or the system is disarmed. If alarm restores are enabled and swinger shutdown is set to two, a restore will be reported if the sensor is closed (normal state) at cutoff or becomes closed after cutoff. If swinger shutdown is set to one, a restore will only be sent if the sensor is closed at the time of disarm. Restores are not sent if a sensor is in swinger shutdown until the time of disarm and the sensor is closed. The default setting prevents alarm restore reports. To allow alarm restore reports, select enabled.
- Page 51 Configure System Settings: Reporting and Troubles Settings Cancel Display DEF AULT: Enabl ed (NOTE: Def aul t Setti ng Requi r ed f or SIA C P-01 C ompl i ance) A cancel report will be sent to the Central Station after an alarm, if the system is disarmed within the configured time. The control panel can also display that a cancel report was sent. The default setting enables the cancel display feature. To turn off the cancel display feature, select disabled. NOTE: See the Cancel time in minutes setting (above) for information on setting the cancel report trigger time. NOTE: This default can be changed without affecting SIA CP-01 compliance. CS Lack of Usage Notification Time in Days DEF AULT: 7 days Inactivity reports can be sent to the Central Station if the system has not been armed for a period of days.
- Page 52 Smart Hub Setup Guide Abort Window Dialer Delay DEF AULT: 30 seconds (NOTE: Def aul t Setti ng Requi r ed f or SIA C P-01 C ompl i ance) The dialer (digital communicator) delays calling the Central Station to allow the user enough time to cancel a false alarm before it is reported. The default setting sets the dialer delay at 30 seconds. To change the dialer delay, select 15, 30, or 45 seconds. IMPORTANT: In accordance with SIA CP-01, the sum of the Abort Window Dialer Delay and the Entry Delay cannot exceed one minute. NOTE: The dialer delay can be disabled per sensor without affecting SIA CP-01 compliance. Time to Detect AC Loss in Minutes DEF AULT: 10 mi nutes AC power loss will cause an AC power loss alert to be displayed, and the length of time before it’s displayed can ...
- Page 53 Configure System Settings: Reporting and Troubles Settings Cellular Network Failure Time in Minutes (0 to disable) DEF AULT: 120 mi nutes NOTE: Cellular Radio Module must be installed to use this function. Sets the amount of time required for triggering a trouble condition if the system detects that the optional cellular radio module has lost its cellular connection. (After cellular service has been restored for 5 minutes, the trouble condition clears.) The default setting sets the failure detection time at 120 minutes. To disable radio module failure detection, select disabled. To choose a different failure detection time, select (1-255) minutes. Failure to Connect to Services Time in Minutes (0 to disable) DEF AULT: 240 mi nutes NOTE: Cell Radio Module must be installed to use this function.
- Page 54 Smart Hub Setup Guide The default setting disables RF jam detection. To turn on RF jam detection, select enabled. Trouble Quiet Time DEF AULT: Enabl ed The control panel will sound trouble beeps caused by AC loss, system low battery, sensor low battery or RF supervision, failure to communicate, control panel tamper while disarmed, and cell radio faults. To prevent annoying the customer, the system can be set to suppress trouble beeps from sounding during a specified time period. The trouble alerts are still displayed and immediately reported to the Central Station, and can be acknowledged, but they won’t sound the trouble beeps. This time period can be configured by the Vivint Technician (see the "Do not sound between" option below). With this option you can enable and disable the trouble quite time feature. Use the next option to configure the time period. The default setting suppresses trouble beeps from 10 pm to 9 am To allow trouble beeps at any time, select disabled. NOTE: If the trouble condition(s) self-clear or are acknowledged before 9 am, no trouble beeps sound after 9 am (the conditions are still recorded in the event log). WARNING: For UL 985 compliant installations, this feature MUST BE disabled. Do Not Sound Between DEF AULT: 10 pm to 9 am (next day) Use this option to configure a time period during which the trouble alerts will not cause the panel to beep. See ...
- Page 55 Configure System Settings: Reporting and Troubles Settings Siren Supervision Time DEF AULT: Di sabl ed The wiring connection to the external sounder can be supervised. If the wiring to the sounder is cut for 15, 30, or 45 seconds, a trouble report can be sent to the Central Station. The default setting disables external sounder supervision. To supervise the external sounder wiring, select: 15 seconds 30 seconds 45 seconds Configure Event Logging DEF AULT: Log al l To control the amount of event log entries, the events that get recorded into the system’s event log can be selected by type. This setting filters the events that populate the event log. The default setting records all events in the event log. For different event log filtering options, select from the options below.
- Page 56 Smart Hub Setup Guide On and quiet: The panel listens for signals, both from the device and the repeater, and processes the last signal received regardless of whether it is an event defining signal or not. Off: Disables the quiet chatter option. Overall RF Quiet Time (in seconds) DEF AULT: 2 seconds This quiet time setting is a universal setting and as such applies to any key fob or keypad that has the Single RF Quiet Time option set to Use Overall Quiet Chatter. It can be set between 0 and 600 seconds. Reset RF Quiet Chatter Press this button to reset all Overall and Sensor RF quiet chatter parameters. - 54 -...
-
Page 57: Emergency Buttons Settings
Configure System Settings: Emergency Buttons Settings Emergency Buttons Settings This section contains descriptions, default values, and notes about the Emergency Buttons settings. To access these settings from the control panel, go to: Menu > Settings > Installer Toolbox > Emergency Buttons From the Emergency Buttons screen, you can view and configure the following settings. Panic DEF AULT: Audi bl e The control panel’s panic emergency button action can be configured. The panic emergency button is displayed by pressing the Emergency button. Audible: The default setting allows the panic emergency button to sound an audible alarm. Silent Panic: Use this option for silent activation. Disabled: Use this option to disable and not display the panic emergency button. NOTE: Configuring this setting for silent panic makes the panic button on all wireless keypads silent also. Fire DEF AULT: Enabl ed The control panel’s fire emergency button can be enabled or disabled. The fire emergency button is displayed by ... -
Page 58: System Options Settings
Smart Hub Setup Guide System Options Settings This section contains descriptions, default values, and notes about the System Options settings. To access these settings from the control panel, go to: Menu > Settings > Installer Toolbox > System Options From the System Options screen, you can view and configure the following settings. Swinger Shutdown Count DEF AULT: 2 tri ps (NOTE: Def aul t Setti ng Requi r ed f or SIA C P-01 C ompl i ance) An unwanted series of multiple faults (usually caused by a bad contact or sensor) is called a "swinger." The ... - Page 59 Configure System Settings: System Options Settings Enabled on burglary alarm Enabled on fire alarm Enabled on any alarm Enabled on any system trouble Enabled follows sounder alarm and status Enabled follows exit and entry beeps Cross Sensor 1, Cross Sensor 2, and Configure Cross Sensors DEF AULT: Di sabl ed The control panel can be configured so sensors 1 and 2 must both be violated during a set time to trigger an alarm. This is called "cross sensor" verification. When enabled, if only one sensor is violated, the alarm will not trigger, but a trouble report will be sent for the sensor that triggered. NOTE: CO and fire zone cannot be used for cross sensors. The default setting disables the cross sensor feature. To use the cross sensor feature, select enabled.
- Page 60 Smart Hub Setup Guide Locks Require Admin Code DEF AULT: Di sabl ed Limits access to only Admin users. If this option is enabled, users will be prompted to enter a valid Admin PIN code in order to view the device. Garage Doors Require Admin Code DEF AULT: Di sabl ed Limits access to only Admin users. If this option is enabled, users will be prompted to enter a valid Admin PIN code in order to view the device. Thermostats Require Admin Code DEF AULT: Di sabl ed Limits access to only Admin users. If this option is enabled, users will be prompted to enter a valid Admin PIN code in order to view the device. Lights Require Admin Code DEF AULT: Di sabl ed Limits access to only Admin users. If this option is enabled, users will be prompted to enter a valid Admin PIN ...
-
Page 61: System Registration Settings
Configure System Settings: System Registration Settings System Registration Settings This section contains descriptions, default values, and notes about the System Registration settings. To access these settings from the control panel, go to: Menu > Settings > Installer Toolbox > System Registration From the System Registration screen, you can view and configure the following settings. Panel ID Shows the unique hardware identification number for the control panel. NOTE: The panel ID also displays on the User's Panel Settings screen. Service Number Shows the unique account registration (AR) number for the registered Vivint Smart Home security and automation system and services. Registered To After the system has been registered, this field shows the name of the customer to whom the system is registered. Registered At After the system has been registered, this field shows the address of the customer to whom the system is registered. Register Panel Use this button to register the control panel and its networked devices with the Vivint Admin Tool (that monitors ... -
Page 62: Z-Wave Settings
Menu > Settings > Installer Toolbox > Z-Wave From the Z-Wave Toolbox screens, you can view and configure the following settings. Add Node Use this option to add Z-Wave devices to the panel network. You can add the following Z-Wave devices: Door locks Thermostats Lighting control / outlet modules Garage door controllers NOTE: You can also add other types of Z-Wave devices (e.g., pool controllers) to the panel network. When you add other types of Z-Wave devices (not listed above), the end user will be able to see a list of those devices and control them (turn on/off) via the control panel by pressing Devices > Other Devices. The status field indicates whether the Z-Wave radio module on the control panel is ready to receive Z-Wave signals from a device and add it to the system. The instruction field provides relevant information to the Vivint Technician as they add devices to the system. When prompted, press the Learn button on the Z-Wave device to send a signal to the panel, and enter a unique name for the device by which it will be identified in node (device) lists and on the network. Remove Node Use this option to remove Z-Wave devices that have been installed on the panel network. The status field indicates whether the Z-Wave module on the control panel is ready to receive Z-Wave signal from a device and remove it from the system. The instruction field provides relevant information to the Vivint Technician so that they can remove the device. When prompted, press the Learn button on the Z-Wave device to send a signal to the control panel that will remove the device's Z-Wave network settings. Remove Failed Nodes Use this option to remove a Z-Wave device when it's no longer able to communicate with the Z-Wave module on the control panel. - 60 -... - Page 63 Configure System Settings: Z-Wave Settings Diagnostics The Z-Wave Diagnostics feature lets you test all of the Z-Wave devices on the network and view the test results. Use this tool to troubleshoot the Z-Wave network when you encounter problems with Z-Wave devices sending and receiving transmissions with the control panel. You can select each Z-Wave device (node) to view its configuration details. The device page shows information specific to that device such as node health, neighbor nodes, repeating neighbor nodes, route changes, and errors. Press Topology to view a graphical representation of the Z-Wave network with all nodes and their routing relationships. View All Nodes Shows a list of the Z-Wave devices that have been added to the control panel. The list includes all of the Z-Wave devices and details about each device, such as the type of device, manufacturer, version number, and more. Use this feature to quickly see all of the Z-Wave devices on the local network and their current status. Anti-theft Anti-theft protection adds an extra layer of security to Z-Wave devices in the Vivint system by placing an encryption code on the device so that it cannot be used by another home security system or Z-Wave controller. To add anti-theft protection to a Z-Wave device, select the device from the list, and then press Enable. NOTE: The selected Z-Wave device must support anti-theft protection in order for this feature to be enabled. Rediscover Network Use this option to configure the Z-Wave network (i.e., mesh) for optimized network reliability and performance after all of the Z-Wave devices have been installed and added to the system. IMPORTANT: After you install all of the Z-Wave devices for the installation, and any time you install a new Z- Wave device or move a Z-Wave device, you must run the Rediscover Network tool. When you rediscover the Z- Wave network, all of the Z-Wave devices are able to find their most efficient route to the control panel by communicating with each other and the panel. Once the Z-Wave network has been successfully rediscovered, all of the Z-Wave devices are listed with a description of their alignment relative to the other Z-Wave nodes nearest to them. Reset Controller Use this option to clear the panel's Z-Wave network (i.e., mesh) of all devices so that the network devices can be reinstalled. Shift Controller Use the Shift Controller option when you want to replace one control panel (i.e., controller) with another control ...
- Page 64 Smart Hub Setup Guide To replace (or switch) controllers, follow these steps: 1. Add the new control panel as a node to the old panel's network. To do this, press Add Node at the old panel, and then press Learn Controller at the new panel and press OK. 2. Shift primary controller responsibility from the old panel to the new panel. To do this, press Shift Controller at the old panel, and then press Learn Controller at the new panel and press OK. NOTE: The old panel is now considered a secondary controller on the new panel's network. 3. Remove the old panel from the network. To do this, press Learn Controller at the old panel, and then press Remove Node at the new panel. This removes the old panel from the new panel's Z-Wave network. Learn Controller Use this option to send a signal from the panel so that it can be added or removed from a Z-Wave network. When you press Learn Controller and then OK, the panel is identified (i.e., learned) by the Z-Wave module on another control panel. - 62 -...
-
Page 65: Networking Settings
Configure System Settings: Networking Settings Networking Settings This section contains descriptions, default values, and notes about the Networking settings. To access these settings from the control panel, go to: Menu > Settings > Installer Toolbox > Networking From the Networking screen, you can view and configure the following settings. Panel Connection to Local Network Indicates whether the connection to the local network is wireless or wired. Peripherals Connect To Indicates how the peripheral network devices are connected to the system. Local Network SSID If the network connection is wireless, this field shows the SSID (Service Set Identification, or network name) of the local wireless network. If the network connection is wired, this field shows whether network addressing is configured via DHCP or is static. Local Network Settings Displays detailed information about the local network, such as the IP addresses for the various network components, panel ID information, and wireless signal strength from the local network's access point (i.e., router). - Page 66 Smart Hub Setup Guide You can also add a Wi-Fi repeater device. VPN Connection Settings Displays the VPN address, and lets you reset the virtual network connections. NOTE: The VPN is used for secure IP communications between the panel and Vivint services. System Settings Use the Reboot Network Module option to quickly reboot the panel's network module. Use the Reset to Factory Defaults option to perform a hard reset of the panel's network module. IMPORTANT: When you reset the panel's network module to factory defaults, all of the connected peripheral devices are deleted from the panel network. - 64 -...
-
Page 67: Cameras Settings
Configure System Settings: Cameras Settings Cameras Settings This section contains descriptions, default values, and notes about the Cameras settings. To access these settings from the control panel, go to: Menu > Settings > Installer Toolbox > Cameras From the Cameras screen, you can view and configure the following settings. Add Camera To add a camera to the panel network, press the Add Camera button and follow the instructions on the panel to add the camera to the network using WPS. As with all other sensors and peripheral devices, follow the instructions in the Quick Reference guide that is included with that specific device for details on enabling WPS. NOTE: If the control panel network settings are configured to connect peripheral devices to the local network, selecting Add Camera shows a list of all of the cameras currently connected to the network. Select a camera from the list to add the camera to the panel network and then configure its settings. Once a camera has been added, you can configure its settings with the options on the following screens. To delete a camera from the system, select the camera from the list, and then press Delete. Privacy Mode DEF AULT: Di sabl ed Privacy mode allows you to temporarily turn off a camera so that it will not capture images or live video. When a camera is in privacy mode, the status light on the camera is blue and the camera's view screen is blank. Camera Status Shows whether the camera is currently online or offline. If a camera firmware update is available, it will appear in ... - Page 68 Smart Hub Setup Guide Motion Detection The motion detection option lets you configure precise areas in the view of the camera in which you want to monitor and detect motion. If the Record on motion option is enabled, whenever motion is detected in the camera's view a video clip is recorded. You can create three motion detection areas per camera. For each area you can specify the physical area itself, as well as the motion detection sensitivity and target size values. The sensitivity setting can be between 1 and 10. The target size setting can be between 1 and 10. To configure a motion detection area, press Edit > Add New Area, use the camera view window to size and move the area in which you want to detect motion, and then specify the sensitivity and target size settings for that area. To delete a motion detection area, select the area and then press Remove Area. Record on Motion DEF AULT: Di sabl ed Turns on or off the camera's ability to record video clips (based on the configured motion detection settings). Auto Night Vision DEF AULT: Enabl ed Turn the camera's night vision capability on or off. Night Vision Light DEF AULT: Enabl ed Turns on or off the light on the camera that indicates that night vision is working.
- Page 69 Configure System Settings: Cameras Settings Restore Camera Defaults Use this option if you need to restore the camera to its factory default settings. Reboot Camera Use this option to reboot the camera for any reason. - 67 -...
-
Page 70: System Testing Settings
Menu > Settings > Installer Toolbox > System Testing From the System Testing screen, you can view and configure the following settings. Sounder Use this option to turn off the sounder during system testing. The disabled sounder automatically times out after 30 minutes (or until the Installer Toolbox is exited), after which time the sounder becomes active again. NOTE: While the sounder is disabled, a Sounder Disabled message appears on the panel display. Test Mode Use this option to enable or disable the Test Mode feature. When enabled, the panel is put in test mode for two hours, allowing you to go in and out of the Installer Test while maintaining the panel in test mode for two hours. If the Test Mode option is disabled, when you perform the Installer Test the panel is put in test mode only for the duration of the test, and is automatically taken out of test mode as soon as you exit the Installer Test. Installer Test The Installer Test lets you perform all of the system tests in sequence. Press Test, and then advance through each test by pressing Next once each specific test has passed. Each test section must be completed successfully before advancing to the next section. If a problem is encountered at any point during the Installer Test, the test can be exited by selecting the Exit button in the bottom left corner of the screen. When starting the test again, the user is prompted to start the test over or to resume the test. Broadband Test Use this option to test the broadband network connection to Vivint services. The Broadband Test screen displays the current connection status, VPN address, and test status. NOTE: A VPN address is required in order for this test to succeed. Cellular Test Use this option to test the cellular connection to Vivint services The cellular module must be installed to use this feature. The cellular test screen displays data for the cellular module, such as: connection status, PPP address, signal strength, etc. NOTE: A PPP address is required in order for this test to succeed. IMPORTANT: The Cellular Test must be passed in order to continue with the Installer Test. - 68 -... - Page 71 Configure System Settings: System Testing Settings Two-way Voice Test Use this option to verify two-way voice functionality between the control panel and the Central Station. Sensor Test Use this option to perform only the sensors (wireless and wired) test for sensors connected to the panel. To verify that the Central Station correctly receives reports from each zone (sensor type): 1. Enter the Sensor Test. 2. A list of available sensors displays. 3. Trigger the test for each sensor. As each sensor is triggered, its signal strength is shown next to the sensor's name, and then the sensor moves to the bottom of the list. (NOTE: All sensors that have not yet been triggered will remain at the top of the list to help identify sensors that still need to be tested.) 4. If a problem occurs, the Sensor Test can be exited and then resumed where it left off when the Installer Test is restarted. Si gnal str ength i ndi cator s An important feature of sensor testing are the signal strength indicators displayed by the control panel for each of the sensors. Even though the control panel’s RF receiver is high-sensitivity, reception quality of sensors at the control panel can vary over time, depending on the amount of background RF noise on the receiver’s operating frequency. The signal strength indicators are an important aid for determining the best location to install the sensors and control panel. During the test, the control panel displays the signal strength of the RF transmissions received from each of the sensors. This helps to identify any sensors with a weak signal at the control panel. Move sensors with low signal strength to a location that produces stronger reception at the control panel. The ...
- Page 72 Smart Hub Setup Guide Network Diagnostics Use this option to test the signal strength and speed of the local network (this may take a few minutes). When you run the Network Diagnostics test it will display results for the network status (showing known issues that you can troubleshoot) as well as the network performance (showing information such as ping time, download speed, and upload speed). Press Run Test to initiate the diagnostic test process. After the test is complete, you can press the indicator button next to Network Status and Network Performance to view specific results. - 70 -...
-
Page 73: Cellular Settings
Cellular Settings This section contains descriptions, default values, and notes about the Cellular settings. To access these settings from the control panel, go to: Menu > Settings > Installer Toolbox > Cellular From the Cellular Module Status screen, you can view and configure the following settings. Signal Strength Shows the strength of the cellular signal. Registration Status (voice, data) Indicates whether or not the cellular radio module is registered on the local network or on a roaming network. PPP Address Shows the PPP address for the cellular module. The PPP address must be preset in order for the cellular module to communicate with Vivint services. Cellular Module Type Indicates the manufacturer and model of the cellular module. PPP Communication Transport Indicates the method or device used for PPP (Point-to-Point Protocol) communication by the cellular module. Advanced Status Press this button to view the advanced options and status for the cellular module. Most of the information on the Advanced Status screen is read-only data. However, from this screen you can perform the following tasks: Test a cellular two-way voice call ... -
Page 74: Sensor Bypass Settings
Smart Hub Setup Guide Sensor Bypass Settings This section contains descriptions, default values, and notes about the Sensor Bypass settings. To access these settings from the control panel, go to: Menu > Settings > Installer Toolbox > Sensor Bypass From the Sensor Bypass screen, you can view and configure the following settings. Quick Bypass DEF AULT: Di sabl ed Normally, sensors that are violated (open) at the time the system is armed will require the user to enter their PIN code to force bypass them. The control panel can be configured so that when the system is armed with open sensors, a PIN code is not required to bypass the open sensor(s) and complete the arming. The default setting requires the user to enter their PIN code to bypass sensors. To allow bypassing sensors without requiring the user to enter their PIN code, select enabled. Auto Unbypass for Manual Bypass DEF AULT: Enabl ed Violated (open) sensors can be manually bypassed by the user at the panel or force bypassed at the time of ... -
Page 75: Bell Cutoff Settings
Configure System Settings: Bell Cutoff Settings Bell Cutoff Settings This section contains descriptions, default values, and notes about the Bell Cutoff settings. To access these settings from the control panel, go to: Menu > Settings > Installer Toolbox > Bell Cutoff From the Bell Cutoff screen, you can view and configure the following settings. Burglary Bell Cutoff DEF AULT: 4 mi nutes When a burglary alarm is triggered, the bell will sound until the burglary bell cutoff time expires. To change the burglary bell cutoff time, select from the time options. Burglary Bell Cutoff Time Options: 4 minutes 8 minutes ... -
Page 76: Update Settings
Smart Hub Setup Guide Update Settings This section contains information about the current firmware version, updates that are available, and settings related to firmware updates. descriptions, default values, and notes about the Update settings. To access these settings from the control panel, go to: Menu > Settings > Installer Toolbox > Update From the Update screen, you can view and configure the following settings. Current Version Shows the version number of the firmware currently installed on the control panel's hard drive. Broadband Update Indicates whether an update to the panel firmware is available. If an update is available, press Update to initiate the firmware update process. NOTE: Use the Settings button to enter or modify the URL path to where the update resides and from where it will be downloaded and installed. IMPORTANT: The power supply and backup battery should be connected to the panel when you perform a firmware update. Do NOT attempt to power cycle the panel when an update is running. - 74 -... -
Page 77: Regulatory Information
Regulatory Information: Where To Find Regulatory Compliance Declarations Regulatory Information Where To Find Regulatory Compliance Declarations The complete FCC and Industry Canada (IC) Regulatory Compliance Declarations, for the Vivint Smart Hub panel, are posted online at the Vivint Support website. For complete regulatory compliance information, go to support.vivint.com/fcc. IMPORTANT: About Industry Standards and Regulatory Notes Additionally, in order to meet industry standards requirements, several regulatory notes, warnings, and cautions are included in this guide. Some of these statements are located in "Regulatory Notes" on page 79, while other statements are embedded in the corresponding sections of this guide that describe specific product functionality and/or technologies pertaining to that particular standard. These embedded statements are easily identified by their NOTE heading and format that includes the standard's official number and title. - 75 -... -
Page 78: Fcc And Ic Regulatory Compliance Declarations
Smart Hub Setup Guide FCC and IC Regulatory Compliance Declarations The complete FCC and Industry Canada (IC) Regulatory Compliance Declarations are posted online at the Vivint Support website. The full text of those individual notices is also provided below, as a convenient reference for those who install, set up, and configure the system. NOTE: For FCC and IC ID numbers for the various supported system devices, including the control panels, see "FCC and IC ID Numbers for System Devices" on page 83. FCC Notice CAUTION: Unauthorized changes or modifications could void the user’s authority to operate the equipment. This device has been tested and found to comply with the limits for a Class B digital device, pursuant to Part 15 of FCC Rules and Industry Canada (IC) license-exempt RSS standard(s). Operation is subject to the following two conditions: (1) This device may not cause harmful interference, and (2) This device must accept any interference received, including interference that may cause undesired operation of the device. NOTE: Connection of protective wiring, conductors, and attachments are to be made in accordance with UL 681 (Standard for Safety of Installation and Classification of Burglar and Holdup Alarm Systems) and UL 827 (Standard for Central Station Alarm Services). -
Page 79: Wireless Product Notice
Regulatory Information: Wireless Product Notice Conformément à la réglementation d'Industrie Canada, le présent émetteur radio peut fonctionner avec une antenne d'un type et d'un gain maximal (ou inférieur) approuvé pour l'émetteur par Industrie Canada. Dans le but de réduire les risques de brouillage radioélectrique à l'intention des autres utilisateurs, il faut choisir le type d'antenne et son gain de sorte que la puissance isotrope rayonnée équivalente (p.i.r.e.) ne dépasse pas l'intensité nécessaire à l'établissement d'une communication satisfaisante. Le présent appareil est conforme aux CNR d’Industrie Canada applicables aux appareils radio exempts de licence. L’exploitation est autorisée aux deux conditions suivantes: (1) l’appareil ne doit pas produire de brouillage, et (2) l’utilisateur de l’appareil doit accepter tout brouillage radioélectrique subi, même si le brouillage est susceptible d’en compromettre le fonctionnement. Ces limites sont conçues pour fournir une protection raisonnable contre les interférences nuisibles dans une installation résidentielle. Cet équipement génère, utilise et peut émettre une énergie de radiofréquence et, s'il n'est pas installé et utilisé conformément aux instructions, il peut causer des interférences nuisibles aux communications radio. Cependant, il n'existe aucune garantie que des interférences no se produiront pas dans une installation particulière. Si cet équipement provoque des interférences nuisibles à la réception radio ou télévision, ce qui peut être déterminé en mettant l'équipement hors et sous tension, l'utilisateur est encouragé à essayer de corriger l'interférence par une ou plusieurs des mesures suivantes: Réorienter ou déplacer l'antenne de réception. Augmentez la distance entre l'équipement et le récepteur. Connecter l'équipement à une sortie sur un circuit différent de celui sur lequel le récepteur est branché. Consulter le revendeur ou un technicien radio / télévision expérimenté pour de l'aide. Ce produit est conforme aux limites FCC d'exposition aux radiations pour un environnement non contrôlé. Évitez d'utiliser ce produit à une distance inférieure à 7,9 in (20 cm) de l'utilisateur. Wireless Product Notice Wireless communications hardware provides reliable communication; however, there are some limitations which must be observed. The transmitters are required to comply with all applicable wireless rules and regulations. As such, they have limited transmitter power and limited range. -
Page 80: Important Power Supply Notice
Smart Hub Setup Guide Important Power Supply Notice The control panel is powered by a plug-in power supply. In case the power supply becomes unplugged, be sure to plug it back into an unswitched outlet. To be clear: Do NOT connect the power supply to a receptacle controlled by a switch. Use only the Class 2 power supply provided with the panel. For power supply replacement information and instructions, contact Vivint Customer Care. Internal Backup Battery Notice The internal backup battery will keep the panel operating for a minimum of 24 hours. For battery replacement, contact Vivint Customer Care or your local Vivint Smart Home Pro technician. - 78 -... -
Page 81: Regulatory Notes
Regulatory Information: Regulatory Notes Regulatory Notes The Vivint control panel is designed to meet or exceed the regulatory requirements for Listed residential home security equipment. In addition, the Vivint panel-based system conforms to the ANSI/SIA CP-01-2014 standard. The notes included below describe different aspects of the system related to that particular feature or functionality, and are applicable to a specific regulatory standard when cited. NOTES NOTE: Some cities and municipalities may require an alarm system permit. The Vivint Smart Home Pro who installs the system is responsible to know these requirements OR to check with the local authorities before installing the system. NOTE: Many insurance companies offer discounts on homeowners and renters policies when a security system is installed. Discounts vary with different companies and generally increase in savings with an increase in the level of protection. Inform the user to ask their insurance agent about savings available. NOTE: This security system is also Listed for use as a household fire warning system, there must be at least one smoke detector configured into the control panel. Many insurance companies require meeting these requirements to qualify for a discount. Use only approved smoke detectors with this control panel. NOTE: Fire warning systems (including smoke and/or CO alarms) installed in the United States must be installed in accordance with Chapter 29 of the National Fire Alarm and Signaling Code ANSI/NFPA 72 (National Fire Protection Association, Batterymarch Park, Quincy, MA 02269), and the National Electrical Code ... -
Page 82: Applicable Warnings For Technicians
Smart Hub Setup Guide Applicable Warnings for Technicians This section provides a summary of applicable WARNING notes intended for any Vivint Smart Home Pro technician (i.e., Vivint Installer) who is handling Vivint products such as the control panel and peripheral devices. WARNINGS WARNING: Electrostatic discharge (ESD) can damage the exposed circuit board, components, and modules in the control panel. These devices are ESD sensitive, therefore you need to make sure to discharge any static buildup before removing the back mounting plate from the control panel, and whenever handling components and modules. WARNING: Do not connect or disconnect the cellular module, network module, or hard drive while the control panel is powered by either the external power supply or the internal backup battery. - 80 -... -
Page 83: Default Settings For Sia Cp-01-2014 Compliance
National Standards Institute / Security Industry Association ANSI/SIA CP-01-2014 (Control Panel Standard - Features for False Alarm Reduction). IMPORTANT: Note that all of the other system settings and functions that are required in order to comply with SIA CP-01-2014 are permanently set on the panel (hard coded) and cannot be changed. The following table provides a quick reference for all of the configurable system settings whose default values ensure SIA CP-01-2014 compliance. Vivint Setting Name (SIA Name, if different) SIA CP-01-2014 Default Value Value Range Exit Delay (Exit Time) 60 Seconds 45-120 Seconds Progress Annunciation / Disable for Silent Exit Enabled Enabled or Disabled... - Page 84 Smart Hub Setup Guide NOTES: Programming at installation may be subordinate to other UL requirements for the intended application. Combined Entry Delay and Abort Window time should not exceed 1 minute. For UL 1023, the Entry Delay setting should not exceed 4 5 seconds. - 82 -...
-
Page 85: Fcc And Ic Id Numbers For System Devices
Regulatory Information: FCC and IC ID Numbers for System Devices FCC and IC ID Numbers for System Devices The below table lists the FCC and Industry Canada (IC) identification numbers for various Vivint Smart Home™ system devices, including the touchscreen control panels. Device Name Vivint Model # Regulatory M/N FCC ID # IC ID # SkyControl Panel MP1 V-MP1-345 CP01 2AAAS-CP01 10941A-CP01 SkyControl Panel MP2... -
Page 86: Fire Protection And Safety Information
Smart Hub Setup Guide Fire Protection and Safety Information Fire Alarm System Your system may be installed with smoke detectors and carbon monoxide (CO) detectors as part of an overall fire and gas protection system. The fire protection part of the security system is active 24 hours a day, offering continuous protection. In the event of a fire or poisonous CO gas emergency, the installed smoke or CO detector will automatically activate your security system. A loud, intermittent horn will sound from the panel, and the external sounder will produce an intermittent siren (if an external sounder has been installed). The fire sounder will continue until the fire horn timer expires or until a valid User PIN code is entered. Manual Fire Alarm If you become aware of a fire emergency before your detectors sense the problem, follow these steps: 1. Yell FIRE! to alert anyone else around. 2. Go to your control panel and press the Emergency button, then press and hold the Fire button for at least two seconds. THE FIRE ALARM WILL SOUND. 3. Evacuate all occupants from your home, and then call your local fire department from a safe location. Automatic Fire Alarm If your detectors trigger a fire emergency alarm before you sense a problem AND the fire alarm is already sounding, follow these steps: 1. If flames and/or smoke are present, yell FIRE! to alert anyone else around. 2. Evacuate all occupants from your home, and then call your local fire department from a safe location. 1. If no flames or smoke are apparent, investigate the possible causes of the alarm. 2. ... - Page 87 Regulatory Information: Fire Protection and Safety Information 3. If the alarm restarts, there may still be smoke in the detector’s sensor. Enter your User PIN code again to stop the alarm. Fan the detector for 30 seconds to clear the detector’s sensor chamber. 4. After the problem has been corrected, clear the alarm history. (Fire & CO sensors that are still violated cannot be cleared from alarm history until the device returns to normal operation. Carefully inspect the premises for danger if fire or CO sensors remain in alarm.) Installing Smoke Detectors Follow the guidelines below when installing smoke alarms/detectors (from the National Fire Protection Association website: nfpa.org). Choose smoke alarms that have the label of a recognized testing laboratory. Install smoke alarms inside each bedroom, outside each sleeping area and on every level of the home, including the basement. On levels without bedrooms, install alarms in the living room (or den or family room) or near the stairway to the upper level, or in both locations. Smoke alarms installed in the basement should be installed on the ceiling at the bottom of the stairs leading to the next level. Smoke alarms should be installed at least 10 feet (3 meters) from a cooking appliance to minimize false alarms when cooking. Mount smoke alarms high on walls or ceilings (remember, smoke rises). Wall-mounted alarms should be installed not more than 12 inches away from the ceiling (to the top of the alarm). If you have ceilings that are pitched, install the alarm within 3 feet of the peak but not within the apex of the peak (four inches down from the peak) Don't install smoke alarms near windows, doors, or ducts where drafts might interfere with their operation.
- Page 88 Smart Hub Setup Guide Recommended Smoke Detector Locations The National Fire Protection Association’s (NFPA) Standard 72 recommends the following placement for smoke detectors: ► Early warning fire detection is best achieved by the installation of fire detection equipment in all rooms and areas of the household. The equipment should be installed as follows: A smoke detector installed outside each separate sleeping area, in the immediate vicinity of the bedrooms and on each additional story of the family living unit, including basements and excluding crawl spaces and unfinished attics. In addition, the NFPA recommends that you install smoke detectors in the living room, dining room, bedroom(s), kitchen, hallway(s), finished attics, furnace room, utility and storage rooms, and attached garages. See the images below for examples of smoke detector location. --------------- Example of 30 ft (9 m) spacing criterion for Example of spacing criterion of one or more smoke dwellings with interior floor areas greater than alarms for every 500 ft²...
- Page 89 Regulatory Information: Fire Protection and Safety Information Emergency Evacuation Plan To establish and regularly practice a plan of escape in the event of fire, the following steps are recommended by the National Fire Protection Association: 1. Position your detector or your interior and/or exterior sounders so that they can be heard by all occupants in your home. 2. Determine two means of escape from each room. One path of escape should lead to the door that permits normal exit from the building. The other should be an alternate escape, such as a window, should your path to that door be impassable. Station an escape ladder at such windows if there is a long drop to the ground. 3. Sketch a floor plan of the building. Show windows, doors, stairs, and rooftops that can be used to escape. Indicate escape routes for each room. Keep these route free from obstructions and post copies of the escape routes in every room. 4. Assure that all bedroom doors are shut while you are asleep. This will prevent deadly smoke from entering while you escape. 5. Try the door. If the door is hot, check your alternate escape route. If the door is cool, open it cautiously. Be prepared to slam the door shut if smoke or heat rushes in. 6. When smoke is present, crawl on the ground. Do NOT walk upright, since smoke rises and may overcome you. Clearer air is near the floor. 7. Escape quickly; don’t panic. 8. Establish a place outdoors, away from your house, where everyone can meet and then take steps to contact the authorities and account for those missing. Choose someone to assure that nobody returns to the house — many die going back. - 87 -...
-
Page 90: Service And Warranty Information
Smart Hub Setup Guide Service and Warranty Information The following information is provided to the customer, verbatim, in the Getting Started Guide that should have been given to them by the technician who installed the system. Service Information Your local VivintSmart Home Pros™ technician is the person best qualified to service your system. Should your system require service due to ordinary wear and tear while under contract, we will repair or replace the equipment for free. Note that trip fees may apply. IMPORTANT: THE SYSTEM MUST BE CHECKED BY A QUALIFIED VIVINT TECHNICIAN AT LEAST ONCE EVERY THREE (3) YEARS. There are no user-servicable parts inside the control panel. For service, repair, or product upgrades, contact Customer Care. For all inquiries about the warranty and related service, call Vivint Customer Care at 1.800.216.5232. Warranty Information For the complete warranty and service plan, including details about terms and conditions, go to: support.vivint.com/product/policies. Last Updated:10/17/2016 - 88 -... -
Page 91: Specifications
Specifications: Service and Warranty Information Specifications Below are the hardware specifications and standards certifications for the Vivint Smart Hub™ panel. Vi v i nt Par t Number (P/N) V-SH1 C ompl i ance M odel Number (M /N) CP02 Sy stem Par ameter s 100 wireless zones 50 users 20 key fobs ... - Page 92 Smart Hub Setup Guide Microphone Camera: Front facing, 640 x 480 resolution, landscape orientation Broadband module: 802.11 b/g/n client and AP mode Cellular module (optional): CDMA (1xRTT) GSM (HSPA) Env i r onmental (Oper ati ng Temper atur e and Humi di ty Range) The panel will operate normally at temperatures between 0°C to 49°C (32°F to 120°F). For optimal battery operation, the recommended temperature range is 0°C to 35°C (32°F to 95°F). The panel will operate normally at humidity levels of 0 – 90% non-condensing. Standar ds C er ti f i cati ons Standards certifications for the panel: ...
Need help?
Do you have a question about the V-SH1 and is the answer not in the manual?
Questions and answers