Table of Contents
Advertisement
Advertisement
Table of Contents

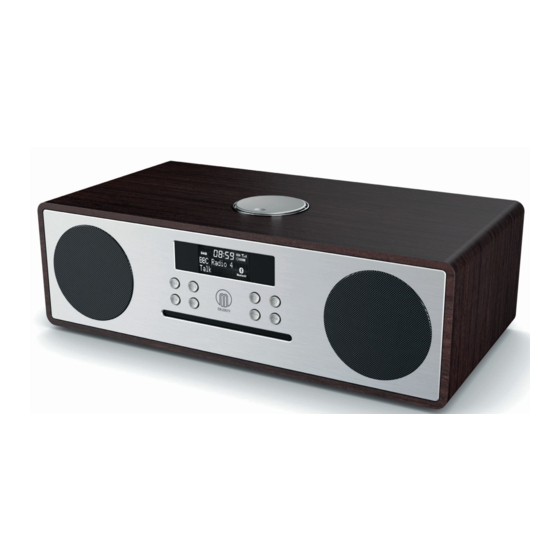
Summary of Contents for MAJORITY OAK-CDAB-WAL
- Page 1 Majority Oakington DAB/FM Radio OAK-CDAB-WAL User Guide...
-
Page 2: Table Of Contents
Contents Controls and Functions……………………………………………………....What’s in the Box?…………………………………………………………….... Instructions Guide………………………………………………………………..Basic Operation………………………………………………………………..… DAB Radio....................Other Functions DAB Radio………………………………………………………... Set Up of the DAB Radio Preset Stations……………………………………….. -
Page 3: Controls And Functions
Controls and Functi ons Side View 1. Remote Sensor 7. Play/Pause/Menu 2. Display Screen 8. Equaliser 3. Standby Indicator 9. Mode 4. Disc Port 10. Power/Standby 5. Next 11. Info 6. Previous 12. Pair Bluetooth/Eject... -
Page 4: Back View
Controls and Functi ons Back View 13. Navigate - Rotate to move up or down the menu 14. 5V 1A Port for Charging Mobile Device screen when in DAB or FM. 15. Audio Input 16. USB - Ok - Press to skip to subsequent menu in DAB or FM. 17. -
Page 5: Remote Control
Controls and Functions Remote Control ON/STANDBY INTRO/AMS (Automatic Music Scan) – Press to scan all tracks in CD or USB – Press to automatically search for a channel in FM. – Press again to stop search REPEAT for CD and USB EQUALISER –... -
Page 6: What's In The Box
AUX (L/R) input socket from the sound connect an external device such as an MP3 Player, iPod board. or iPhone. What’s in the Box? Majority Histon DAB / DAB+ / FM Clock Radio UK Standard Plug DC 5V,1A Power Supply Instructions Guide... -
Page 7: Instructions Guide
Instructions Guide Please note all (Ref.) refer to Page 1 Controls and Functions mapping guide. Basic Operation Standby Plug the connector into the back of the system labelled AC- (Ref.19) and the power supply into the mains. To put the music system in standby, press the ‘Power/ Standby’... -
Page 8: Dab Radio
Instructions Guide DAB / DAB+ Radio Prune Press the ‘Mode’ button (Ref.9) multiple times on the unit to switch to DAB Radio. On first use it will To remove stations that are listed but are unavailable. automatically scan all stations and save them. To select the mode from the remote press the ‘FM/DAB’... -
Page 9: Set Up Of The Dab Radio Preset Stations
Instructions Guide Manual Tuning How to play a preset radio station As well as an auto tune function, you can manually Up to 40 stations can be set. To store a station that you tune the receiver. This can help you when aligning your are currently Press the ‘Program’... -
Page 10: Fm Radio
Instructions Guide FM Radio Press the ‘Mode’ button (Ref.9) multiple times on the Audio Settings Mono or Stereo unit and choose “FM” or press the ‘FM/DAB’ button All stereo stations are reproduced in stereo. For weak (Ref.16) on the remote. The first time you do this, the stations this can result in poor audio quality. -
Page 11: Cd Player
Instructions Guide Please note all (Ref.) refer to Page 1 Controls and Functions mapping guide. CD Player Playing Repeatedly To choose CD Mode, press through your choices using the ‘Mode’ button (Ref.9). The choices will be displayed For CDs, press the ‘REPEAT’ button (Ref.3) on the on the front screen (Ref.2) –... -
Page 12: Set Up Of The Cd Player Preset Stations
Instructions Guide Program tracks into a preselected order Programme tracks into a preselected order Press the ‘Stop’ button (Ref.23) on the remote, then Press the ‘Stop’ button (Ref.23) on the remote, then press the ‘Program’ button (Ref.19) . press the ‘Program’ button (Ref.19) . The track number will then flash on the front display (Ref.2). -
Page 13: Usb Connection
(Ref.2) – press the ‘Mode’ button (Ref.9) on the unit until you are on your required option “Audio”, or Turn on Bluetooth on your phone and “Majority select the ‘Audio’ button on the remote (Ref.16). Oakington” will appear. Click on this to connect. -
Page 14: Station Information For Dab And Fm Radio
Instructions Guide DAB / DAB+ Radio FM Radio Press the ‘Info’ button (Ref.11) repeatedly to show the Press the ‘Info/Menu’ button (Ref.11) repeatedly to different programme information. show the different programme information. Bit Rate: The data rate which the signal is being Signal Strength: Displays a signal bar with the transmitted. -
Page 15: Clock And Date Setting
Instructions Guide Manually Setting the Time Alarm or Timer Setting The time will automatically update after the fist use of In Standby, The Setting Timer can be set to DAB Radio. automatically turn on and off at certain times and can However, you can still set the time manually as follows. -
Page 16: Other Functions
Instructions Guide Other Functions Sleep Setting System Reset This enables you to programme the radio to switch off Press the ‘Menu’ button (Ref.7) on the remote control. at a specific time, up to 120 minutes from activation. Use the ‘Previous’ or ‘Next’ buttons (Ref.9/22) to scroll In working mode, Press and the ‘’Sleep’... -
Page 17: Technical Specifications
Instructions Guide Technical Specification Power supply: AC 200-240V 50/60Hz Power Supply and Batteries Mode: FM(87.5MHz – 108MHz The unit is powered and charged by UK Standard Plug. DAB/DAB+ 174-240MHz Earphone jack Output Connector: Aerial: Integral telescopic aerial Warranty All products come with a standard 12 month warranty. All You will also be given the chance to extend your items must be registered on warranty for an additional 24 months, free of charge. -
Page 18: Important Safety Information
ffiAJORITY www.majorityradios.co.u k...


Need help?
Do you have a question about the OAK-CDAB-WAL and is the answer not in the manual?
Questions and answers