Table of Contents
Advertisement
Advertisement
Table of Contents

Related Manuals for MAJORITY PEG-NET-BLK


Summary of Contents for MAJORITY PEG-NET-BLK
- Page 1 MAJORITY PETERHOUSE GRADUATE Internet Radio PEG-NET-BLK Instructions Guide...
-
Page 2: Table Of Contents
Contents What’s In The Box? ���������������������������������������������������� Controls And Functions ���������������������������������������������� Navigation Controls �������������������������������������������������� Basic Operation �������������������������������������������������������� Internet Radio ����������������������������������������������������������� Pre-setting your favourite internet stations ������������� Media Centre ������������������������������������������������������������ Spotify Connect ������������������������������������������������������� Information Centre �������������������������������������������������� Connections ������������������������������������������������������������� Bluetooth ����������������������������������������������������������������� Local Radio �������������������������������������������������������������� Configuration Settings ���������������������������������������������... -
Page 3: What's In The Box
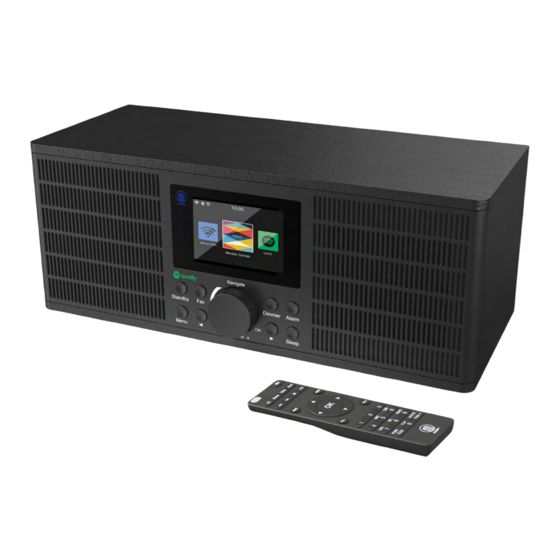
What’s In The Box? Box Contents 1. Majority Peterhouse Graduate 2. Remote Control 3. DC-In Power cable 4. Instructions Manual... -
Page 4: Dimmer Button
Controls And Functions Radio Front View Navigate Dimmer Standby Alarm Menu Sleep Display screen Dimmer button Standby button Next button ( ) Menu button Alarm button Favourites button 10. Sleep button Previous ( ) button Select Dial Vol+/Vol- dial Rotate = Scroll, Press = Select... -
Page 5: Controls And Functions
Controls And Functions Radio Back View AUX IN DC 12V LINE OUT 12 13 14 11. ON/OFF Switch 12. DC 12V Power In 13. Line Out 14. Aux In 15. USB Port... -
Page 6: Remote Control
Controls And Functions Remote Control Dimmer Sleep Alarm MODE HOME VOL+ VOL- PQRS WXYZ FAV+... -
Page 7: Mode Button
Controls And Functions Power On/Off 12. Sleep button Switch the unit between on and Select repeatedly until desired Standby mode sleep timer set on top right of display Dimmer 13. Alarm button Switch between two dimmer settings Select to view and create alarm options Equaliser 14. -
Page 8: Navigation Controls
Controls and Functions Navigation Controls Standby button: This should be used to turn your radio on and off. The Standby screen will display the time, date and any settings set such as alarms. To turn your radio on, press the Standby button to be taken to the home screen or last station being used before standby. -
Page 9: Basic Operation
Controls and Functions Basic Operation Please note that the instructions within this manual will refer to the radio button number e.g (Ref.*number*) in accordance to the diagrams on pages 2-3. The remote control can also be used with the relevant buttons as per the diagram on pages 4-5. Starting up your internet radio Plug the adaptor connector into the back of the system labelled ‘DC in’... - Page 10 Controls and Functions Manual WiFi Set-up If you select YES, you will be able to select your chosen WiFi network and enter WiFi password in the next display screen. Type letters/numbers by scrolling with the Select dial (Ref.6) until the correct digit is displayed and click ‘>’ to go to the next digit.
-
Page 11: Internet Radio
Main Menu Screen Internet Radio Go to the main menu screen by selecting ‘Menu’ (Ref.3) followed by selecting ‘Internet Radio’ Select ‘Internet Radio’ on the display screen by turning and pressing the Select dial (Ref.6) When in the ‘Internet Radio’ screen there will be multiple options: My Favourite: Your favourite stations will be saved here for... -
Page 12: Pre-Setting Your Favourite Internet Stations
Main Menu Screen Service: Search for an internet radio station or add a new station. To search a new station, select ‘Search Radio Station’ to go to the search tool. Turn the Select dial to highlight the chosen character and click ‘>’ (Ref.8) to move to the next character. To go back to the previous character, press ‘<’... -
Page 13: Media Centre
Main Menu Screen Media Centre Select ‘Media Centre’ on the main display screen by turning the dial and pressing the Select dial (Ref.6) USB: Plug in a USB stick (Ref.15) with files. Highlight the desired folder/song with the Select dial (Ref.6) and select for your chosen song to play. - Page 14 Main Menu Screen My Playlist: You can create a playlist of favourite music or media from UPnP. When you are playing the media, press and hold the Select dial from unit or remote control to save it into My Playlist. Access ‘My Playlist’...
-
Page 15: Spotify Connect
Main Menu Screen Spotify Connect Listen out loud with Spotify Connect Connect your Peterhouse Graduate to your wifi network Open up the Spotify app on your phone, tablet or laptop using the same wifi network Play a song and select Devices Available. Select your Peterhouse Graduate and start listing. -
Page 16: Information Centre
Main Menu Screen Information Centre Go to the main menu screen by selecting ‘Menu’ (Ref.3) followed by selecting ‘Information Centre’ . Weather Information: To select the weather information for a desired place, first select the continent by using the Select dial (Ref.6) to scroll and select. -
Page 17: Connections
Main Menu Screen Connections AUX-In Select ‘AUX’ on the main display screen by turning the dial and pressing the Select dial (Ref.6) Plug an AUX cable into your device and connect cable via AUX-in port (Ref.14) at the back of the radio. Begin playing audio from your device and this should play on the radio when in AUX mode. -
Page 18: Bluetooth
Go to your device settings to connect your device to the radio via Bluetooth. The internet radio’s device will display as ‘Majority Peterhouse Graduate’ . Select this radio to connect and your radio should sound “Connected”. Select your chosen audio on your device and play. -
Page 19: Local Radio
Main Menu Screen Local Radio Select the option of ‘Local Radio’ on the main display screen with the Select dial (Ref.6). Browse through a range of radio stations in your region including top DAB stations in your area, Top 10 stations and a range of genres put into categories. -
Page 20: Configuration Settings
Settings Configuration Settings Go to the main menu screen by selecting ‘Menu’ (Ref.3) and select ‘Configuration’ to browse through a range of settings. Network: Select this for Wi-Fi and network options Wireless Network Configuration On the Network settings, you can set up a Wi-Fi connection by selecting Wireless Network Configuration (Ref.6). - Page 21 Settings Manual WiFi Set-up If you select YES, you will be able to select your chosen WiFi network and enter WiFi password in the next display screen. Type letters/numbers by scrolling with the Select dial (Ref.6) until the correct digit is displayed and click ‘>’ to go to the next digit.
- Page 22 Settings WiFi Connection Complete! Once your WiFi is connected by manually entering your WiFi password or via WPS, you will be taken to the main menu screen and the WiFi signal will appear in white at the top left. Your internet radio is now set up!
-
Page 23: Date&Time: For Manual Date And Time Setup
Settings Date&Time: For manual date and time setup Manually setting date and time There is the option to manually set the time and date instead of using auto-detect to set this up. Go to ‘Configuration’ settings and select ‘Date&Time’ by scrolling and selecting with the Select dial (Ref.6). -
Page 24: Alarm Settings
Alarm Settings Alarm Settings Setting Alarm 1/Alarm 2 To set an alarm on your radio, go to ‘Configuration’ settings and scroll through to select ‘Alarm’ or click the ‘Alarm’ button on the front of the radio (Ref.9). After this, select Alarm 1 or Alarm 2 and highlight ‘Turn On’ and select this option (Ref.6). -
Page 25: Setting The Alarm
Alarm Settings Now select the ‘Alarm Volume’ setting. Set the volume that you wish to have your alarm sound. Please note that the alarm volume cannot be altered when the alarm is sounding. 00:00 Everyday Once 00:00 00:00 00:00 00:00 Alarm 1 (Turn O ) Turn On Repeat: Everyday... - Page 26 Alarm Settings How to cancel your alarm To cancel your alarm, select ‘Alarm’ in ‘Configuration’ settings or with the Alarm button (Ref.9) and select the alarm you wish to turn off. Once the alarm is selected, you will have the option to ‘Turn Off’ or ‘Turn On’...
- Page 27 Alarm Settings Nap alarm After selecting ‘Alarm’ on ‘Configuration’ settings, or the ‘Alarm’ button (Ref.9) on the front of the radio, select ‘NAP alarm’ . Choose how many minutes you would like to have the nap alarm on with the options of: 5, 10, 20, 30, 60, 90, 120 minutes. Cancel the alarm by going to Nap alarm settings and switching to ‘OFF’...
-
Page 28: Other Functions
Functions Other Functions The following options are available in Configuration settings: Timer In ‘Configuration’ settings, select the option for ‘Timer’ and a screen with 00:00 will display. To go up in seconds, click the ‘>’ button (Ref.8). To go down in seconds, click the ‘<’ button (Ref.5). Hold down the ‘<’... -
Page 29: Software Update
Functions Software Update Will show here if a software update is available for the radio. If one is available, please select for the update to initiate. Reset to default Select this option to reset your radio and revert all of the settings and presets made. - Page 30 Functions Additional Setting Options Time display - Select Analog or Digital Language - Select your chosen language within the list Display - Choose the display to be Colour or Monochrome Power management - Select this to configure the radio to go into standby mode automatically after a set time of inactivity or if there is no WiFi signal.
-
Page 31: Troubleshooting
Troubleshooting Troubleshooting If the radio does not work properly as desired, please use the following checklist: Malfunction Possible causes/measures Check whether the power is switched on or off at the wall. No power / function Check whether the power adaptor is properly connected to power outlet or not. -
Page 32: Specifications
Specifications Specifications DC 12V/2A Power Supply UPnP, DLNA Streaming Connections 3.5mm AUX-In 3.5mm Line-Out 100-240V~50/60Hz, 500mA Input Dimension (WxHxD) 30.5 x 13.8 x 12.6 cm Net Weight Warranty All products come with a standard 12 month warranty. All items www.majorityradios.co.uk must be registered on for the warranty to be valid. -
Page 33: Safety Information
Safety Information ADDITIONAL WARNINGS 1. Read these instructions. 2. Keep these instructions. Instructions are also The apparatus shall not be exposed to dripping or available for download at www.majorityradios.co.uk splashing and no objects filled with liquid, such as 3. Heed all Warnings vases, shall be places on the apparatus. - Page 35 www.majorityradios.co.uk...
Need help?
Do you have a question about the PEG-NET-BLK and is the answer not in the manual?
Questions and answers