Table of Contents
Advertisement
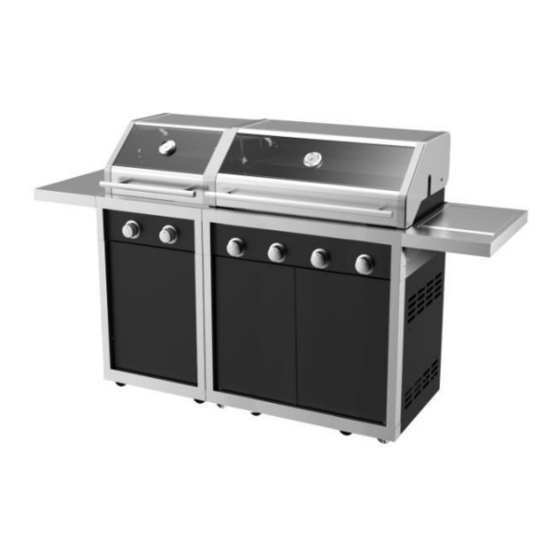
WELCOME TO THE WORLD OF BARBEQUES GALORE OUTDOOR COOKING
INSTRUCTIONS FOR ASSEMBLY AND USE OF
CORDON BLEU L2-SERIES BARBEQUES
These instructions contain important information that needs to be followed for the safe assembly
and use of your new barbeque. Please read through carefully and completely prior to assembly.
Take care to remove all packaging materials & protective coatings from the bbq before first use.
Page 1
For the safe use and enjoyment of your new barbeque.
For Barbeque Models: G2CBL, G4CBL, G4CDXL
Tools required:
2 x adjustable spanners
1 x Phillips head screwdriver
1 x Regular screwdriver
Advertisement
Table of Contents

Related Manuals for Barbeques Galore G2CBL


Summary of Contents for Barbeques Galore G2CBL
- Page 1 WELCOME TO THE WORLD OF BARBEQUES GALORE OUTDOOR COOKING INSTRUCTIONS FOR ASSEMBLY AND USE OF CORDON BLEU L2-SERIES BARBEQUES For the safe use and enjoyment of your new barbeque. These instructions contain important information that needs to be followed for the safe assembly and use of your new barbeque.
- Page 2 Congratulations on your purchase Australia has an excellent safety record when it comes to gas appliances. This reflects both the high quality of appliances sold, as well as growing consumer awareness about safety. We urge you to follow the guidelines below together with these instructions for safe use, to prevent overheating and to produce great cooking results.
- Page 3 Where to put your barbeque This barbeque is an outdoor appliance only. Under no circumstances should it be used indoors. You must observe the clearances listed on the data sticker on your barbeque. These tell you how close you can put the barbeque to combustible surfaces (wood, gyprock, trees, wooden fences etc.).
- Page 4 Note that all these conditions are met by using prefabricated island (code: PBIM4L) available from your local Barbeques Galore store. Page 4...
- Page 5 Where to put your barbeque (continued) This appliance must only be used in an above ground, open air situation with natural ventilation, without stagnant areas, where gas leakage and products of combustion are rapidly dispersed by wind and natural convection. Any enclosure in which the appliance is used must comply with one of the following: (1) Any enclosure with walls on all sides, but at least one permanent opening at ground level,...
- Page 6 Checking the gas type and supply Before assembling your barbeque, you should ensure your barbeque is suited to the type of gas which you are going to use: LPG, also known as Propane or Universal LPG: Barbeques suited to LPG should have an orange sticker on the side saying “UNIVERSAL LPG”. This is most commonly supplied as a portable 4 kg or 9 kg gas cylinder, which can be refilled or swapped at petrol stations or your place of purchase when empty.
- Page 7 If connecting to a standard bayonet outlet, the correct hose and governor assembly must be used (code: NGCK250VJ) available at your nearest Barbeques Galore store). If connecting direct to the gas supply, the gasfitter will need to use governor (code: RCV250) and appropriate fittings.
- Page 8 Contents list. Carefully unpack the carton and check all the parts: 1 x Firebox & Hood 1 x Hood Handle with 2 x M6 Hex Nuts 1 x Cart / Cabinet Assembly screws, washers & bezels separator panel 1 x Hotplate 2 x Grease Channelling 4 x "S"...
- Page 9 Assembly instructions If you are assembling a cart model or steel island, make sure you have the separately supplied steel cart (code MC2CBL for 2B, code MC4CBL for 4B).Assemble the cart(s) before you start on the firebox / hood assembly. If you are assembling multiple units together (e.g.
- Page 10 Assembly instructions (continued) STEP 1 ALL MODELS: Attach the hood handle to the hood. WHAT YOU NEED: 2 x Washers 15 / 6.5*mm 2 x M6*12mm Round Head Screws 2 x Handle Bezels (Above components are factory pre-assembled onto the hood handle not in the bolt pack) CAREFULLY OPEN THE BBQ HOOD TO ACCESS THE HANDLE HOLES FROM INSIDE From inside the hood, with the hood open, fit the screw first through the washer, then through the hood, then through the bezel and into the hood handle as shown.
- Page 11 Assembly instructions (continued) (These next two steps assume that you have already assembled the cart using the instructions included with the cart) STEP 3 CART MODELS ONLY: Fix the cart / cabinet separator panel into place. WHAT YOU NEED 9 x M6*12mm Flat Head Screws (4B) 8 x M6*12mm Flat Head Screws (2B) Locate the separator panel in place and start the screws (two each side, three on the back 4B has...
- Page 12 Assembly instructions (continued) STEP 4 CART MODELS ONLY: Fix the firebox and hood assembly onto the cart. WHAT YOU NEED 4 x "S" shaped brackets 8 x M6*12mm Flat Head Screws 4 x Metal Washers Insert four “S” shaped brackets into the cart slots, oriented as shown, and fix with 4 x M6*12mm Flat Head Screws to lock the bracket to the cart side panel.
- Page 13 Assembly instructions (continued) STEP 5 ONLY IF JOINING ADJACENT BBQS: If you are joining two carts together, e.g. a 2B and 4B to make a 6B, then first assemble each unit onto its respective cart as above. Adjust the cart heights to match each other, and join the adjacent carts and fireboxes as detailed below.
- Page 14 Assembly instructions (continued) (b) If the two adjacent modules are both barbeques, then bolt the adjacent fireboxes together WHAT YOU NEED TO JOIN THE BBQ FIREBOXES: 2 x M6 Hex Nuts 2 x Washers φ 6.4 /14.5mm 2 x M6*60mm screws Join the 4B and 2B firebox using two M6*60mm screws, washers and hex nuts as shown.
- Page 15 Assembly instructions (continued) STEP 6 IF ATTACHING SIDE SHELVES: Unscrew the 12 existing M6 x 15mm flat head screws as indicated on the side panels. Keep the screws safely aside. Page 15...
- Page 16 Assembly instructions (continued) STEP 7 CART MODELS ONLY: Attach the folding side shelf brackets WHAT YOU NEED 4 x M6*40 mm long screws Screw the side table bracket set to the left side of the bbq using 4 pieces M6*40mm long screws and the two screws already pre-fitted to the bracket set.
- Page 17 Assembly instructions (continued) STEP 9 CART MODELS ONLY: If the folding feature is not required, the shelf can be bolted firmly in place. WHAT YOU NEED 2 x M6*12mm Locking nuts and bolts for each shelf . If folding is not required, lock the shelves into place with 1 x nut and bolt front and back as below.
- Page 18 Assembly instructions (continued) STEP 10 CART MODELS ONLY: Attach the side burner (if purchased) WHAT YOU NEED 5 x M6*15mm short screws Screw 4 pieces M6*15mm short screws into the right side of the bbq as shown. Do not screw in all the way. Leave a 5mm gap to allow the side burner to hang over these screws in the next step.
- Page 19 Use 1 piece M6*15mm short screw which was removed from the bbq previously and thread it through the side shelf and back into the bbq control panel front corner hole as shown. Tighten all screws. Assembly instructions (continued) STEP 11 CART MODELS ONLY: Connect the side burner corrugated gas pipe The side burner corrugated gas pipe will already be connected to the side burner.
- Page 20 (d) Adjust the corrugated gas pipe so that it is neat and out of the way. It is safe to bend this pipe gently by hand. A leak test as outlined later must be done when connecting to the gas and before lighting the bbq. Once you have assembled both side shelves, proceed to Step 13 Assembly instructions (continued) Only if you have purchased a build-in or an island:...
- Page 21 Attach the build-in brackets Assembly instructions (continued) Attach the separator panel, taking care to thread the bbq hose and regulator (and for the deluxe model only, the electric cabling) through the access hole in the separator panel. Fit the grease channelling tray front dress piece / handle as shown below. The 4 burner has a grease cup that fits later into the separator panel and is accessed with the grease channelling tray removed.
- Page 22 Assembly instructions (continued) With help, carefully fit the bracket / bbq assembly into place. If it is fitting into an island, lock down with the screws provided with the island. STEP 13 FOUR BURNER MODELS ONLY: Fit the grease cup into the separator panel.
- Page 23 Assembly instructions (continued) STEP 14 CART MODELS ONLY: Attach the grease channelling tray handle. WHAT YOU NEED 2 x M4*10mm screws 1 x Grease Channelling Tray Handle STEP 15 ALL MODELS: Locate the grease channelling tray into position Slide the grease channelling tray into the support brackets on the separator panel, so that it is under the bbq, all the way back.
- Page 24 Assembly instructions (continued) STEP 16 STANDARD MODELS ONLY: Position the cooking grill(s) and the hotplate. (FOR DELUXE MODELS SKIP STRAIGHT TO STEP 17). Place the Hotplate and Cooking Grills into position on the upper ledge as shown below. You can position the grills and hotplate either side as required. On the 4 burner model, the hotplate can also be positioned centrally, with a grill each side.
- Page 25 Assembly instructions (continued) STEP 17 DELUXE 4BURNER MODELS ONLY: Position the ceramic tiles, hotplate and grills. WHAT YOU NEED 4 x Ceramic Tiles 1 x Ceramic Tile Rack First place the ceramic tiles in the bbq. Either side is OK. The tiles will be underneath the cooking grills.
- Page 26 Then place the Hotplate and Cooking Grills into position on the upper ledge as shown below. The grills go above the ceramic tiles. There is no need for ceramic tiles under the hotplate. It is OK to purchase extra grills, ceramic tiles and support rack to replace your hotplate, but NEVER add more hotplate than the bbq originally came with.
- Page 27 Assembly instructions (continued) STEP 18 ALL MODELS: Fit the warming rack. The warming rack hooks onto the side windshield and into the locating holes in the windshield back panel. If you have a cart, the warming rack can hook onto the back of the cart when not required.
- Page 28 Assembly instructions (continued) b) Attach the motor c) The motor can be powered with 2 x D-Cell batteries, otherwise, connect the 240V / DC adaptor wire to the motor. d) Assemble the Rotisserie as shown. The handle should be removed during cooking. The support collar fits into the right windshield as shown and should be tightened to the shaft to prevent the shaft from dislodging from the motor.
- Page 29 Assembly instructions (continued) STEP 20 DELUXE FOUR BURNER MODELS ONLY: Attach the transformer WHAT YOU NEED 1 x Transformer Including Bracket. a) Hang the transformer onto the vent slots in the cart right side panel. (For Build-in models, attach the transformer firmly in an appropriate location using screws appropriate for the construction).
- Page 30 Assembly instructions (continued) STEP 21 DELUXE 4B MODELS ONLY: Attach the Ignition Box WHAT YOU NEED 1 x Electronic Ignitor 1 x Ignitor Cover Box 1 x Battery a) Remove the cap and nylon locking nut from the Electric Ignitor, put the Ignitor into the Cover box and lock in place with the nylon locking nut.
- Page 31 Assembly instructions (continued) d) The box has two flat tabs. Slide the tab into the flat bracket on the underside of the separator panel until firmly in place. Note: The ignition wires should come out through the side hole of the ignitor box. e) Connect the ignition wires as below and screw up the plastic fitting.
- Page 32 Assembly instructions (continued) STEP 22: SHARING GAS SUPPLY BETWEEN ADJACENT MODULES: All Cordon Bleu gas modules have independent gas supply, but it is possible if required for only these combinations of maximum two adjacent joined modules from the same gas supply: 2B and adjacent 4B can run from the same gas supply.
-
Page 33: Connecting The Gas Cylinder
NEVER use a flame to test for leaks. You can also check for leaks using a gas safety gauge, available at your Barbeques Galore store. This provides an easier and more convenient way to check for leaks. Page 33... - Page 34 Lighting the bbq Lighting the barbeque is easy, but must be done with due care. Ensure to start with that all the control knobs are in the OFF position. Make sure that the gas is turned on at the supply. Also, if your barbeque has a roasting hood or side burner, ensure that the hoods and lids are up.
- Page 35 Lighting the bbq (continued) Checking the Flames: Look underneath the barbeque so that you can see the flames. They should be a soft blue colour with yellow tips. If the flames are too yellow, there is too much gas and not enough air. The flame will be inefficient and will give off too much smoke. If the flame is too pale, there is too much air and not enough gas.
- Page 36 Ensure there is a hole in the foil to allow fats and oils to drip through into the grease cup below. Also, placing fat absorbent material into the grease cup will avoid splashing and overflowing when the container starts to fill. Suitable fat absorbent material is available from your Barbeques Galore store.
-
Page 37: Cooking Hints
Cooking hints It’s easy to keep your food moist and succulent on a barbeque by following these guidelines: Use tongs instead of a fork when turning meat and poultry. A fork pierces the flesh and causes the juice to seep out. ... - Page 38 NEVER let the temperature exceed 250ºC or the barbeque can dangerously overheat and burn your food. A separate probe thermometer is available as an accessory from all Barbeques Galore stores. This takes the guesswork out of knowing when your food is cooked.
- Page 39 Covered cooking (continued) (B) Indirect Cooking Method: This is when you place the food only above burners that are OFF. The other burners are adjusted in combinations of LO and OFF to maintain constant lower roasting temperatures. This method is ideal for thicker cuts of meat, legs of lamb, pork, shoulders of beef, whole chickens and whole fish.
- Page 40 NEVER let the temperature exceed 250ºC or the barbeque can dangerously overheat and burn your food. A separate probe thermometer is available as an accessory from all Barbeques Galore stores. This takes the guesswork out of knowing when your food is cooked.
- Page 41 If you are cooking more than a few kg at once, it may be easier to use an optional counterbalance available from your local Barbeques Galore store. Once the shaft is balanced, lock it into place into the motor by adjusting the locking screw on the support collar.
- Page 42 Cooking times Page 42...
-
Page 43: Care And Maintenance
Use 3M stainless steel cleaner available for your local Barbeques Galore store to polish and protect all stainless steel surfaces. Follow the manufacturer's instructions on the can. Do not use while the barbeque is on or still hot! ... - Page 44 Ensure you replace only with the correct hose and regulator purchased from Barbeques Galore to ensure proper gas connection compatibility. Connect the nut of the hose to the same gas inlet of the barbeque that the old one was connected.
-
Page 45: Troubleshooting Guide
Baked on grease build up Clean regularly to avoid. Clean paint. has carbonised and is thoroughly to resolve. flaking. If a service is required for your barbeque, contact your local Barbeques Galore store Phone 1 300 301 392 Page 45... - Page 46 Technical Refer also to the data sticker on your barbeque for jet sizes, gas pressures etc. The dimensions of your barbeque will differ depending on the exact frame design and how many burners you have, according to the following chart. Please note that we are continually updating our barbeques, so these specifications may change over time.
- Page 47 Technical (continued) Page 47...
- Page 48 Technical (continued) Page 48...
- Page 49 Technical (continued) Page 49...
- Page 50 Technical (continued) Page 50...
- Page 51 Technical (continued) Page 51...
- Page 52 Technical (continued) Page 52...
- Page 53 Technical (continued) Spare parts 2 burner Page 53...
- Page 54 Spare parts 2 burner (continued) Code Description Code Description CP9095500 Hood back panel CP9095530 Trolley side panel trim CP9095501 Hood back inner panel CP9095267 Castor with lock CP9095502 Hood right panel CP9095531 Base panel assembly CP9095268 Hood glass CP9095532 Base trim panel CP9095269 Thermometer CP9095533...
- Page 55 Spare parts 4 burner (including deluxe version) Page 55...
- Page 56 Spare parts 4 burner including deluxe version (continued) Code Description Code Description CP9095558 Hood back panel CP9095279 Valve assembly CP9095559 Hood back inner panel CP9095575 Fascia CP9095502 Hood right panel CP9095576 Storage rack bracket CP9095278 Hood glass CP9095577 Storage rack CP9095269 Thermometer Electronic Ignitor...
- Page 57 The racks are stackable for increased storage. Need More Information? You can call your local Barbeques Galore store where barbeque experts will be happy to help you. Phone 1 300 301 392 Or visit us online at: www.barbequesgalore.com.au Barbeques Galore G.L.G.
Need help?
Do you have a question about the G2CBL and is the answer not in the manual?
Questions and answers