Table of Contents
Advertisement
Advertisement
Table of Contents

Related Manuals for Barbeques Galore DISCOVERER G4DISL


Summary of Contents for Barbeques Galore DISCOVERER G4DISL
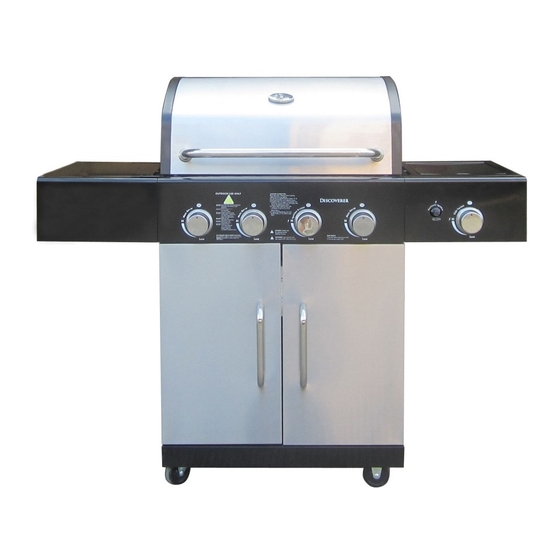
- Page 1 WELCOME TO THE WORLD OF BARBEQUES GALORE OUTDOOR COOKING INSTRUCTIONS- DISCOVERER G4DISL For The Safe Use And Enjoyment Of Your New Barbeque PRODUCT CODE:G4DISL DISCOVERER 4 ON CART WITH SIDE BURNER Tools required: 1 adjustable spanner 1 phillips head screwdriver...
- Page 2 Thank you and congratulations for choosing a quality barbeque as part of your outdoor entertaining world. By following these instructions for safe and easy operation, you will enjoy years of satisfying, trouble-free outdoor cooking. And when you’re fully up and running, you can visit your retailer for some great accessories and cooking tips to make your experience even more rewarding.
- Page 3 Most importantly, you must observe the clearances listed below and on the data sticker on your barbeque. It will tell you how close you can put the barbeque to combustible surfaces (wood, gyprock, trees, wooden fences etc). If you don’t follow these clearances, there is a chance that nearby surfaces will heat up and catch fire. If you purchased your barbeque in a cart, you don’t need to be concerned with side clearances.
- Page 4 Both ends open (c) Within a partial enclosure that includes an overhead cover and more than two walls, the following shall apply— ) at least 25% of the total wall area is completely open; and ⅰ ) at least 30% of the remaining wall area is open and unrestricted. ⅱ...
- Page 5 STEP 1 OPEN THE CARTON, UNPACK AND CHECK THE PARTS. Start by opening the carton and preparing a flat clean surface for all the parts and to do the assembly. Once you open the top of the shipping box, slice down its four edges with a box cutter. Take out the BOLT PACK(M), TOP PANEL(D),BASE(E) and DOORS(B)&(C).Next remove LEFT AND RIGHT PANELS(F)&(G), WARMING RACK(H),FRONT RAIL(I), BACK RAIL(J) AND BACK PANEL(K).Remove all parts from plastic bags.
- Page 6 STEP 2 UNPACK AND CHECK THE OTHER PARTS Remove the styrofoam end caps from the BARBEQUE HEAD(A) and place it upright on the flat surface. Open the hood, and take out the small boxes packed inside. Remove all packing materials, and remove all parts from boxes as shown in the figures below.
- Page 7 STEP 3 OPEN THE BOLT PACK READY FOR ASSEMBLY The following hardware is provided in a blister pack for convenient use. M4X10 bolt M4X10 countersunk head bolt AAA Battery Qty: 34 pcs Qty: 8 pcs Qty: 1 pc M5X10 bolt M5 washer M4X19 shoulder bolt Qty: 4 pcs...
- Page 8 STEP 5 ATTACH THE SIDE AND BACK PANELS To attach the SIDE PANELS (F) &(G), align the side panel bottom holes with the corresponding holes on each side of base as shown below. Note that the LEFT PANEL(F) has the match holder attachment. Fix the side panels to base with four M6x13 bolts.
- Page 9 STEP 6 ATTACH THE FRONT RAIL AND TOP PANEL Attach FRONT RAIL(I) to the side panels as shown below with four M4x10 bolts. Attach the CART BRACKETS (AA) as shown below to the base and side panels with eight M4x10 bolts. Align the TOP PANEL(D) into place as shown below and secure with six M4x19 shoulder bolts.
- Page 10 STEP 7 ATTACH THE DOORS Remove the four M5x15 bolts already pre-assembled to the DOOR HANDLES (Q), and use them to attach the door handles to DOORS (B) & (C). Place either door on either side of the cart, align the door hinges holes with the corresponding holes on the door, secure with eight M4x10 countersunk head bolts.
- Page 11 STEP 8 ATTACH THE FIREBOX This step requires two people to lift and position BARBEQUE HEAD (A) onto cart. Remove the ties securing the hose to assembly underside of the firebox. Carefully uncoil the hose assembly and igniter wires out to the side of the firebox as shown below. Carefully lower the barbeque head onto the cart.
- Page 12 STEP 9 ATTACH THE LEFT SHELF Attach the LEFT FASCIA (V) to LEFT SHELF(P) with two M5x10 bolts and two M5 washers. Attach the SHELF ANGLE BRACKET(Z) to left fascia and left shelf with four M4x10 bolts. Attach left shelf to the firebox as follows and as shown below: From inside to outside of firebox with two M6x13 bolts and two M6 red fibre washers.
- Page 13 STEP 10 ATTACH THE RIGHT SHELF Remove the trivet (N) from side burner. Attach RIGHT FASCIA (AB) to RIGHT SHELF(O) with two M5x10 bolts and two M5 washers. Attach the SHELF ANGLE BRACKET(Z) to right fascia and right shelf with four M4x10 bolts. Attach right shelf to the firebox as follows and as shown below: From inside to outside of firebox with two M6x13 bolts and two M6 red fibre washers.
- Page 14 STEP 11A FIT THE SIDE BURNER AND HOSE ASSEMBLY (It’s best to do this with another person to help) (a) Unscrew and remove two front screws and washers holding side burner in place. Note: Do not loosen electrode screw. (b) Loosen side burner in side shelf. (c) Remove knob and bezel from side burner control valve.
- Page 15 STEP 11B FINISH THE SIDE BURNER (g) Push control knob onto side burner valve stem. (h) Reattach side burner to side burner shelf with the 2 previously removed screws and washers. Fit the side burner TRIVET (N). ( i ) Insert the small tip of the main burner wire and side burner wire into the two module sockets. ( j ) Unscrew igniter cap from control panel.
- Page 16 STEP 12 FIT THE FLAME TAMERS, GRILL AND HOT PLATE Place two FLAME TAMERS(AC) over the two right hand side burners by inserting tabs into slots in front and back of firebox. Place the COOKING GRILL(T) onto the shoulders in the firebox, in place above the flame tamers. Place the HOT PLATE(S) onto the shoulders in the firebox on the left hand side as shown below.
- Page 17 STEP 13 FIT THE FAT CHANELLING TRAY AND FAT CUP Slide the FAT CHANELLING TRAY(U) into the bottom of the firebox from the rear. Place the GREASE CUP(W) into place as figure show. Feed the regulator and hose through the hole in the right side panel. When the barbeque is in the desired location, lock the rear castors;...
-
Page 18: Natural Gas
Checking The Gas Type Before assembling your barbeque, you should ensure your barbeque is suited to the type of gas which you are going to use. LPG, Also Known As Propane: Barbeques suited to LPG should have an orange sticker on the side saying “PROPANE ONLY”. This is most commonly supplied as a portable 4 kg or 9 kg gas cylinder, which can be refilled or swapped at petrol stations or your place of purchase when empty. - Page 19 Fixed LPG Supply Barbeques which are connected to twin 45 kg LPG cylinders must be installed by a licensed gasfitter, in accordance with the requirements of AS 5601, and local gas authority requirements. There are two approaches to installation: Permanent Piped Connection: Your barbeque may be permanently connected to the main gas lines or LPG cylinders via copper pipe.
-
Page 20: Leak Testing
OFF and disconnect and consult your retailer. You can also check for leaks using a Gas Safety Gauge, available at your Barbeques Galore store. This provides an easier, quick way to check for leaks anytime. - Page 21 Lighting The Barbeque Lighting the barbeque is easy, but must be done with due care. Make sure that the gas is turned on at the cylinder, or that gas is available to the barbeque. Also, ensure that the roosting hood and side burner lid are open. Electronic Ignition: Follow below steps for lighting: 1.
- Page 22 Wait for the burners to cool down, then remove them (details in Maintenance section). You will see a screw on the right side of each burner. Screw it in to increase the yellow tipping, and screw it out to reduce the yellowness of the flame.
- Page 23 Placing absorbent material into the grease cup will avoid splashing and overflowing when the cup starts to fill. Suitable absorbent material is available from your Barbeques Galore store. Preparing To Cook Lightly coat the cooking surfaces with oil.
- Page 24 Keeping Your Food Moist It’s easy to keep your food moist and succulent on a barbeque by following these guidelines: Use tongs instead of a fork when turning meat and poultry. A fork pierces the flesh and causes the juice to seep out.
- Page 25 Cooking with the Hood Closed Using the roasting hood traps heat, moisture and flavor that is normally lost on an open top barbeque. With the hood closed and the barbeque pre-heated, its important to then turn some burners to Low and others to OFF in order to not overheat the barbeque which could result in increased temperature hazards and burning your food.
- Page 26 200ºC to avoid burning. Never let the temperature reach into past 250º Celsius or the barbeque will overheat and burn your food. A separate probe thermometer is available as an accessory from all Barbeques Galore stores. This takes the guesswork out of knowing when your food is cooked.
- Page 27 Don’t ever let the temperature reach above 250º Celsius or the barbeque may dangerously overheat and burn your food. A separate probe thermometer is available as an accessory from all Barbeques Galore stores. This takes the guesswork out of knowing when your food is cooked.
- Page 28 To obtain correct temperature use an instant-read meat thermometer in the thickest part of the flesh, careful not to touch any bone. Beef Veal Pork Lamb Poultry...
- Page 29 Poultry Thermometer Temperature: Rare = 60 , Medium = 66 , Well = 77 ℃ ℃ ℃ Poultry Seafood Fish is done when flakes easily when prodded with a fork or knife in the thickest part. Frozen fillets should not be thawed before barbequing.
- Page 30 Use 3M stainless steel cleaner available for your local Barbeques Galore store to polish and protect all stainless steel surfaces. Follow the manufacturer's instructions on the can. Do not use while the barbeque is on or still hot! Between uses, it is a good idea to leave the barbeque covered to prevent dust and air borne salts settling on the stainless steel surfaces.
- Page 31 If there are any signs of wear or cracking in the barbeque, you will need to replace it immediately. Ensure you replace it with a hose and regulator purchased from Barbeques Galore to ensure proper gas connection compatibility. Connect the nut of the hose to the gas inlet on the right side of the barbeque. You MUST use a spanner to tighten it properly. Do not use sealing tape.
- Page 32 Refer to the data sticker on your barbeque for jet sizes, gas pressures etc. Please note that we are continually updating our barbeques, so these specifications may change over time. Gas connection: 5/8”-18 UNF, projects through right side of control panel. Below exploded diagram and parts list for your after service reference.
- Page 33 B 1 1 B 1 0 D 1 0 F 1 7 F 1 8 F 1 6 F 1 9 F 1 5 F 1 4 F 1 1 F 1 3 F 1 2 F 1 1 F 1 0...
- Page 34 Qty per Qty Per Part PART DESCRIPTION CODE Code SIDE BURNER HINGE & LID DISK400012 1 set SIDE BURNER TRIVET DISK40003 IGNITION COMPLETE DISL41051 1 set SIDE BURNER DISK40006 SIDE BNR LOCATING PINS & BOWL DISK400045 1 set RIGHT SIDE SHELF DISL40008 FASCIA, RIGHT SIDE SHELF DISL90009...
- Page 35 Qty per PART DESCRIPTION CODE Qty Per Part Code LEFT SIDE SHELF FASCIA DISL90032 SHELF ANGLE BRACKET DISL90030 LEFT SIDE SHELF DISL40053 FAT CUP DISK40046 FAT CHANNELLING TRAY DISL90035 HOT PLATE DISK90036 COOKING GRILL DISK90037 WARMING RACK DISK90038 HOOD FRONT RUBBER DISK90039 STOPPER Hood Hinge &...
- Page 36 And there are many more. Ultimately, anything you can cook in the kitchen, you can cook on your barbeque. Need more information or assistance in any way? You can call your Barbeques Galore store where barbeque experts will be happy to help you.
Need help?
Do you have a question about the DISCOVERER G4DISL and is the answer not in the manual?
Questions and answers