Table of Contents
Advertisement
America's Largest Chain of Barbecue Stores
Note: We highly recommend you always cover this barbecue when it is not in use which will prolong the life of
the barbecue and protect it from the elements.
1. Shut off gas to the appliance.
2. Extinguish any open flame.
3. Open lid.
4. If odor continues, immediately call your gas
supplier.
WARNING:
All barbecues and carts are designed for outdoor use only!
All barbecues are not intended for commercial use.
Read this Owner's Manual carefully and
be sure your gas grill is properly assem-
bled, installed and maintained. Failure to
follow these instructions could result in
serious bodily injury and/or property dam-
age. This gas grill is intended for outdoor
use only and is not intended to be installed
in or on recreational vehicles or boats.
Customer Service Helpline: If you have questions about assembly or grill operation, or if there are damaged or missing
parts when you unpack this unit from the shipping box, call us Monday through Friday at 1-800-752-3085
REV 030306
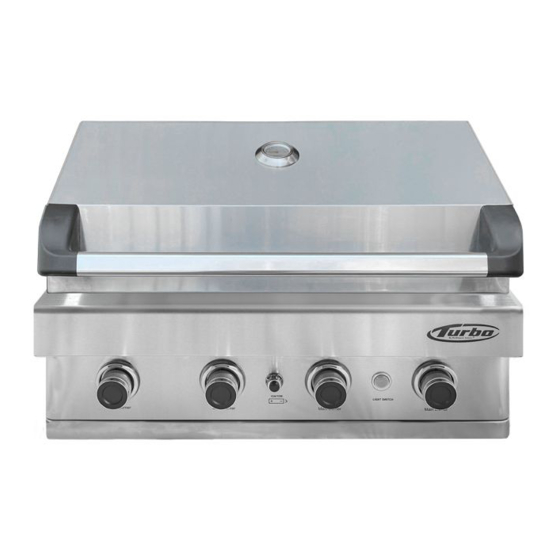
Turbo STS Instruction Manual
3 Burner Standard
4 Burner Standard
4 Burner (2Mn+2SR)+RB
3 Burner Cart
4 Burner Cart
FOR YOUR SAFETY, IF YOU SMELL GAS :
Note to Installer: Leave this Owner's
Manual with the consumer after delivery
and/or installation.
Note to Consumer: Leave this Owner's
Manual in a convenient place for future
reference.
®
720-0057-3B
720-0057-4B
750-0057-4BRB
780-0222
780-0228
5. Do not store or use gasoline or other flammable
vapors and liquids in the vicinity of this or any
other appliance.
6. An LP cylinder not connected for use should not
be stored in the vicinity of this or any other
appliance.
ANSI Z21-58b-2002/CGA 1.6b-2002
Design Certified
Unit approved by
CSA Laboratories under standard
Advertisement
Table of Contents

Related Manuals for Barbeques Galore Turbo STS


Summary of Contents for Barbeques Galore Turbo STS
- Page 1 ® America's Largest Chain of Barbecue Stores Turbo STS Instruction Manual 3 Burner Standard 720-0057-3B 4 Burner Standard 720-0057-4B 4 Burner (2Mn+2SR)+RB 750-0057-4BRB 3 Burner Cart 780-0222 4 Burner Cart 780-0228 Note: We highly recommend you always cover this barbecue when it is not in use which will prolong the life of the barbecue and protect it from the elements.
-
Page 3: Safety Information
The LP gas tank must be constructed and marked in Barbeques Galore cannot be held responsible for any accordance with specifications of the U.S. Dpt. of damages to persons or property resulting from improper Transportation (DOT). - Page 4 If this or property damage. assembly needs to be replaced, use only the type specified by Barbeques Galore for this appliance. Shut off gas supply to the grill. Turn the Control Knobs to the OFF position.
- Page 5 The phone number is on the warning decal which is permanently attached to the tank. If the tank manufacturer has not resolved the issue to your satisfaction, then call the Barbeques Galore store near- est you.
- Page 6 Gas Orifices #62. 3. Check that proper orifices are installed in the valves. Rotis Burner IMPORTANT: The Turbo STS Barbecue is supplied from the factory setup for Natural Gas and fitted with Natural Gas This Gas Grill must be connected to an Orifices (see Figure 2).
- Page 7 5. Your barbecue has been supplied with a pair of Side Trims (Figure 4) which are used for built-in installations. If you plan to install your barbecue on a Turbo STS Cart, the Side Trims are not required. Install Stainless Flame Tamer Assemblies into the barbe-...
- Page 8 Turbo Stainless Rotisserie Assembly Safety Information: When using electrical appliances, 26” - SKU# 287904 basic safety precautions should This appliance is for outdoor use on grill only. 31” - SKU# 287912 always be followed, including the following: Figure 8 READ ALL INSTRUCTIONS! Do not touch hot surfaces.
- Page 9 Rotisserie Assembly to Barbecue: Getting To Know Your Gas Grill & Smoker Lid 1. Assemble Motor Support Bracket (11) and Motor Shield Figure 11 (12) using four screws (15) as shown in Figure 9. 2. Attach Motor Bracket Assembly to side of barbecue frame (can be mounted on either the left or right side of the frame) using two screws (13), and two nuts (14) (Fig.
- Page 10 11. Stainless Steel Cooking Grills: These stainless steel Figure 13 Grills provide a uniform heated cooking surface to sear your steak to perfection. It may be necessary to remove grills if the rotisserie is used to gain greater depth Notch in front of (Figure 11).
-
Page 11: Lighting Instructions
LIGHTING INSTRUCTIONS Lighting Your Grill by Match Figure 15 To light your gas grill by match, Important: Do not bend directly over grill when lighting the open the lid and light a match. burner. Lid must be in open position before lighting. Turn Place lit match on Match Holder all knobs to “OFF”. -
Page 12: Rotisserie Cooking
Closed Lid Saves Money: Rear Infrared Burner Figure 17 When the smoker lid is closed you have a more constant temperature. Your food will cook faster, with fewer flare-ups and you will use less energy. Always use a drip tray when cooking roasts, whole fish, chickens and ALL rotisserie cook- ing. -
Page 13: Cooking Tips
If the rear burner does not light, turn the control knob Smoke Cooking: OFF, wait 5 minutes for the gas to clear, then retry. Smoke cooking is an exceptionally slow method of cooking in which a flavoring source is added to the Ceramic Briquettes in Once lit, the Rotisserie Burner will reach cooking tem- order to impart its own delectable flavor to the meal for a deep perature quickly. - Page 14 Replacement parts for this barbecue unit are available vidual burner out of the barbecue and brush it down very thor- from your Barbeques Galore retailer. oughly using a stiff wire brush. Make sure every port hole is open. If the holes are obstructed, they may be cleaned using...
- Page 15 DO’S & DON’TS DO.. DON’T.. Have propane cylinder (LP units) filled by Install grill closer than 14" on the sides or 16" on authorized LP supplier. the back to any combustible construction. Record your grill model number on your Attempt any adjustment of the regulator, it has been preset and tested.
- Page 16 Deluxe Stainless Steel Turbo Overall Dimensions & Specs 27 3/4” Figure 23 BARBECUE SIDE FRAME DIMS AND LID CLEARANCE 21 3/4” 1/2” NPT Female 33 5/16” Gas Inlet 24 3/16” 3 Burner Standard Figure 20 8 3/4” 33 3/4” 2-3/4” 19 3/4”...
- Page 17 MUST BE 9 ” M I N PROVIDED for combustion air on both sides of built-in con- struction. Please ask a Barbeques Galore associate D I M for full details. " A " DIM. "A" MODEL 24 1/2"...
- Page 18 Outdoor Natural Gas Barbecue Built-in Installation Specifications NOTE : Upper & lower ground-level vents (20 sq. in. minimum each) MUST BE PROVIDED for combustion air on both sides of built-in con- struction. Please ask a Barbeques Galore associate for full details. Figure 27 Non-combustible...
- Page 19 TURBO STS BARBECUE 720-0057-3B 720-0057-4B 750-0057-4BRB ITEM DESCRIPTION SKU# SKU# SKU# 313783 315465 315465 Lid Handle 313791 315473 315473 Temp Gauge 313270 313270 313270 Warming Rack 313809 315481 315481 Lid Support Assembly 313841 315499 315507 Barbecue Chassis 313858 315515 315515...
- Page 20 Exploded Parts Diagram 3 Burner Standard C3BSST Figure 28 - 18 -...
- Page 21 Exploded Parts Diagram 4 Burner Standard C4BSST Figure 29 - 19 -...
- Page 22 Exploded Parts Diagram 4 Burner w/ Rear Rotisserie Burner C4BSSTRP/N Figure 30 Rotisserie Burner Control Valve Main Burner Sear Burner Control Valve Control Valve - 20 -...
- Page 23 Exploded Parts Diagram 3 Burner Cart C3BSSTC 4 Burner Cart C4BSSTC Figure 31 - 21 -...
- Page 24 Barbeques Galore (949) 597-2400 10 Orchard Road, Suite 200 Lake Forest, CA. 92630...
Need help?
Do you have a question about the Turbo STS and is the answer not in the manual?
Questions and answers