Table of Contents
Advertisement
Quick Links
Advertisement
Table of Contents

Related Manuals for Zanussi ZCK68200X


Summary of Contents for Zanussi ZCK68200X
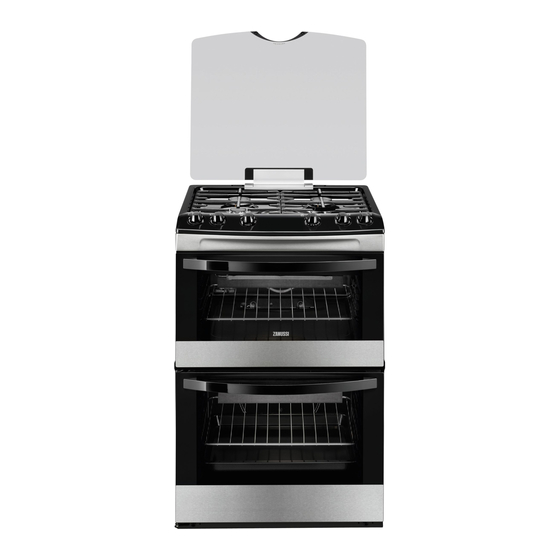
- Page 1 User Manual GETTING STARTED? EASY. ZCK68200X EN User Manual Cooker...
-
Page 2: Safety Information
SAFETY INFORMATION Before the installation and use of the appliance, carefully read the supplied instructions. The manufacturer is not responsible for any injuries or damages that are the result of incorrect installation or usage. Always keep the instructions in a safe and accessible location for future reference. -
Page 3: Safety Instructions
Do not use a steam cleaner to clean the appliance. • Do not use harsh abrasive cleaners or sharp metal scrapers to • clean the glass door or the glass of hinged lids of the hob since they can scratch the surface, which may result in shattering of the glass. -
Page 4: Gas Connection
• Do not install or use a damaged appliance. removed from the holder), earth leakage trips • Follow the installation instruction supplied with and contactors. the appliance. • The electrical installation must have an isolation • Always take care when moving the appliance as device which lets you disconnect the appliance it is heavy. -
Page 5: Care And Cleaning
• Used oil, that can contain food remnants, can CARE AND CLEANING cause fire at a lower temperature than oil used WARNING! Risk of injury, fire, or for the first time. damage to the appliance. • Do not put flammable products or items that are wet with flammable products in, near or on the •... -
Page 6: Internal Light
INTERNAL LIGHT • Contact your municipal authority for information on how to discard the appliance correctly. • The type of light bulb or halogen lamp used for • Disconnect the appliance from the mains this appliance is only for household appliances. supply. -
Page 7: Before First Use
COOKING SURFACE LAYOUT Steam outlet - number and position depend on the model Semi-rapid burner Auxiliary burner Rapid burner Semi-rapid burner COOKER CONTROL PANEL Knobs for the hob Knob for the main oven functions Electronic programmer Knob for the top oven functions Temperature indicator / symbol for the top oven Temperature indicator / symbol for the main oven... -
Page 8: Hob - Daily Use
4. Let the appliance operate for 15 minutes. Preheat the two ovens. Heat up one Accessories can become hotter than usual. The oven at a time. appliance can emit an odour and smoke. This is normal. Make sure that the airflow is sufficient. 1. -
Page 9: Hob - Hints And Tips
Make sure that the hole in the crown is above WARNING! Always turn the flame the ignition candle. down or switch it off before you Make sure that the location pegs are in the remove the pans from the burner. slots in the burner body. -
Page 10: Oven - Daily Use
PAN SUPPORTS CLEANING THE HOB The pan supports are not resistant to • Remove immediately: melted plastic, plastic washing in a dishwasher. They must foil, and food with sugar. If not, the dirt can be washed by hand. cause damage to the hob. •... -
Page 11: Main Oven Functions
MAIN OVEN FUNCTIONS Symbol Oven function Application Off position The appliance is off. Oven Lamp To activate the lamp without a cooking function. Defrost This function can be used for defrosting frozen foods, such as vegetables and fruits. The defrosting time de- pends on the amount and size of the frozen food. -
Page 12: Oven - Clock Functions
2. Put the deep pan into the oven on the necessary shelf position. • All accessories have small You can use the trivet to grill flat dishes in large indentations at the top of the right quantities and to toast. and left side to increase safety. -
Page 13: Oven - Hints And Tips
SETTING THE MINUTE MINDER 4. Turn the knob for the oven functions to the off position. Use this function to set a countdown time. The maximum time you can set is 2 hours 30 minutes. CANCELLING THE CLOCK FUNCTIONS This function has no effect on the operation of the oven. -
Page 14: Conventional Baking - Top Oven
Baking results Possible cause Remedy The cake sinks and becomes The oven temperature is too The next time you bake, set a soggy, lumpy or streaky. high. slightly lower oven tempera- ture. The cake sinks and becomes The baking time is too short. Set a longer baking time. -
Page 15: Thermaflow® Baking - Main Oven
Food Temperature (°C) Time (min) Shelf position Cakes: Apple Pie 170 - 180 50 - 60 Casseroles: Beef / Lamb 160 - 170 150 - 180 Casseroles: Chicken 160 - 180 80 - 90 Convenience Foods Follow manufacturer`s instructions. Fish 170 - 190 20 - 30 Fish Pie (Potato Topped) - Page 16 Food Temperature (°C) Time (min) Shelf position Bread 190 - 210 30 - 35 Cakes: Small & Queen 150 - 170 18 - 25 1 – 3 Cakes: Sponges 160 - 170 20 - 25 Cakes: Madeira 140 - 160 60 - 80 Cakes: Rich Fruit 130 - 140...
-
Page 17: Thermaflow® - Main Oven
THERMAFLOW® - MAIN OVEN Roasting Food Temperature (°C) Time (min) Beef / Beef boned 170 - 190 20 - 35 minutes per 0.5 kg (1 lb) and 20 - 30 mi- nutes over Mutton / Lamb 170 - 190 20 - 35 minutes per 0.5 kg (1 lb) and 25 - 35 mi- nutes over Pork / Veal / Ham 170 - 190... -
Page 18: Oven - Care And Cleaning
Food Time (min) Shelf position Fish - Whole / Trout / Makarel 10 - 12 Fillets - Plaice / Cod 4 - 6 Kebabs 12 - 18 2 - 3 Kidneys - Lamb / Pig 6 - 10 2 - 3 Sausages 20 - 30 Steaks: Rare... -
Page 19: Removing The Shelf Supports
CAUTION! Always turn the oven light on while using the catalytic cleaning (if applicable). Before activating the catalytic cleaning remove all the accessories from the oven. The walls with a catalytic coating are self-cleaning. They absorb fat which collects on the walls while the appliance operates. -
Page 20: Replacing The Lamp
2. Pull up the trim. 3. Remove the glass panels. To replace the glass panels, do the same steps in reverse. Before you lower the trim, attach the A trim part to the door. Refer to the image. REPLACING THE LAMP Put a cloth on the bottom of the interior of the appliance. -
Page 21: Troubleshooting
TROUBLESHOOTING WARNING! Refer to Safety chapters. WHAT TO DO IF... Problem Possible cause Remedy You cannot activate the appli- The appliance is not connec- Check if the appliance is cor- ance. ted to an electrical supply or it rectly connected to the electri- is connected incorrectly. -
Page 22: Installation
We recommend that you write the data here: Model (MOD.) ......... Product number (PNC) ......... Serial number (S.N.) ......... INSTALLATION Minimum distances WARNING! Refer to Safety chapters. Dimension TECHNICAL DATA Dimensions LEVELLING OF THE APPLIANCE Height 894 - 912 mm Width 595 mm Depth... -
Page 23: Other Technical Data
50 mm 77 mm 4. Check that the anti-tilt protection (A) fits minimum 20 mm into the hole in the rear wall of the appliance (B) when you push the appliance. 1. Install the anti-tilt protection (A) on the wall. Make sure that the wall is made of a solid OTHER TECHNICAL DATA material. -
Page 24: Checking The Hob Burners
2. Examine the supply pressure by turning the WARNING! Only liquid sealants can Rapid burner and one other burner fully on, and be used when the inlet gas pipe is lighting them. The pressure must be: fitted i.e.: do not use the P.T.F.E. a) 20 mbar for Natural Gas sealant tape. -
Page 25: Terminal Board
TERMINAL BOARD Do not remove blanking plates. ENERGY EFFICIENCY PRODUCT INFORMATION FOR HOB ACCORDING TO EU 66/2014 Model identification ZCK68200X Type of hob Hob inside Freestanding Cooker Number of gas burners Energy efficiency per gas burner Left Front - Rapid 52.9 %... -
Page 26: Environmental Concerns
Energy consumption with a standard load, conventional Top oven: 0.75 kWh/cycle mode Main oven: not applicable Top oven: not applicable Energy consumption with a standard load, fan-forced mode Main oven: 0.89 kWh/cycle Number of cavities Heat source Electricity Top oven: 37 l Volume Main oven: 72 l Type of oven... - Page 28 WWW.ZANUSSI.COM/SHOP...