
Related Manuals for Leica ST5020


Summary of Contents for Leica ST5020
- Page 1 Instructions for Use Leica ST5020 Multistainer Leica ST5020, V 2.0 RevG, English – 07/2016 Order No.: 14 0475 80101 RevG Always keep these instructions near the instrument! Read carefully before working with the instrument.
- Page 3 Leica reserves the right to change technical stand it following thorough investigation in this specifications as well as manufacturing pro- field.
-
Page 4: Table Of Contents
Table of Contents Important information ....................... 6 Symbols used in this manual and their meaning ................6 Designated use ............................. 7 Qualification of personnel ........................7 Instrument type ............................. 7 Safety ............................8 Safety instructions ..........................8 Warnings ..............................8 Instrument components and specifications ............... - Page 5 Preventative maintenance schedule ....................78 Troubleshooting ........................79 General ..............................79 Correcting errors ..........................79 Power failure ............................82 Replacing the secondary fuses ......................83 Warranty and service ......................85 Appendix ........................... 86 Container Map ............................ 86 Optional accessories ......................... 88 Leica ST5020...
-
Page 6: Important Information
Important information 1.1 Symbols used in this manual and their In vitro diagnostics (IVD) medical de- meaning vice. Warnings Observe the Instructions for Use! appear in a grey box and are marked by a warning triangle Environmental protection symbol of the Notes, China RoHS directive. -
Page 7: Designated Use
• The instrument may be operated only ac- 1.2 Designated use cording to the instructions contained in this manual. The Stainer Leica ST5020 is an automated stain- er for the preparation of histological and cyto- 1.4 Instrument type logical routine stainings. It is designed for use in pathology laboratories,... -
Page 8: Safety
Make sure to comply with the safety instructions and warnings in this chapter. Make sure to read these instructions, even if you are already familiar with the operation and use of other Leica products. 2.1 Safety instructions This instrument has been built and tested in ac-... - Page 9 The instrument must be set up in a well ventilated area, free from any ignition sources. The chemicals to be used in the Leica ST5020 are both flammable and noxious. Do not operate the instrument in rooms with explosion hazard.
- Page 10 Safety Warnings - Operating the instrument The Leica ST5020 may only be operated by trained laboratory personnel, according to its desig- nated use and per the present Instructions for Use. In case of emergency switch off mains and unplug the power chord.
-
Page 11: Instrument Components And Specifications
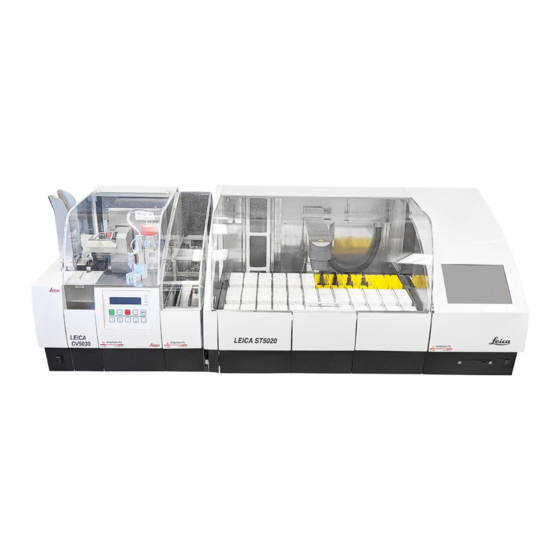
3.1 Overview - Instrument components Activated Single (Double) Oven Wash Reagent Transfer arm modules stations container carbon filter carrier Color touch screen Mains switch Transfer to Load Coverslipper drawer Leica CV5030 Exit Slot for (optional) drawer PCMCIA card Fig. 1 Leica ST5020... - Page 12 Instrument components and specifications Rear of instrument electronic Data connections Power supply inlet (electronic) Power supply outlet Mains Transfer to Power supply Coverslipper inlet (optional) Secondary fuses adjustable Cover for Drain Exhaust Drain DI-Water inlet Water inlet foot Oven-Modules hose air duct outlet Station 7...
-
Page 13: Instrument Specifications
(modified container with reduced reagent volume and racks). • System upgrade for Coverslipper integration. (automated staining and coverslipping without operator interaction). • Air evacuation hose. • Slide rack (plastic). • Adapter for racks from other manufacturers. To prevent damage to the instrument or the specimen, only accessories authorized by Leica may be used. Leica ST5020... -
Page 14: Standard Delivery - Packing List
Instrument components and specifications 3.3 Standard delivery - packing list The Leica ST5020 standard delivery consists of the following items: 1 Leica ST5020 basic instrument 31 Reagent vessels, assy. (with handles and lids) 14 0475 33659 5 Wash vessels, assy. -
Page 15: Technical Data
Secondary fuses: Melting fuse, Ø 6.3 x 32 mm Type: Schurter FST F1: T 2.0 A F2: T 2.0 A F3: T 2.5 A F4: T 4.0 A Operating temperature range: 15 °C to 40 °C Relative humidity: 10 % to 80 %, non-condensing Leica ST5020... - Page 16 0 sec. up to 23 hours, 59 min., 59 sec. Load/unload stations: max. each 4, min. each 1 Permanent memory capacity: max. 50 Programs, up to 40 program steps each Integration: connection to Leica CV5030 Coverslipper (optional) Instructions for Use, V2.0, RevG - 07/2016...
-
Page 17: Container System
Lubricate the O-ring seal before fitting a wash station. To use the wash system, slowly turn the laboratory tap on fully. The flow control valve in the Leica ST5020 will limit the total water flow in the wash stations to 1.6 liters/minute/station. -
Page 18: Setting Up The Instrument
The chemicals to be used in the • If the instrument is to be operated with air Leica ST5020 are both flammable and evacuation hose, a fume cupboard at a dis- noxious. The instrument must be set tance of maximum 3.50 m from the instru- up in a well ventilated area, free from ment is required. -
Page 19: Tap Water Supply Connection
In addition to the filter sieve supplied (item 3 in Fig. 6) Leica recom- mends installing a sediment filter between the water extraction outlet and ST5020, to guarantee that the instrument is only operated with clean water. This sediment filter should have the following properties: Filter fineness: 25 µm... - Page 20 Setting up the instrument • Screw tap water inlet hose (7 in Fig. 8) for tap water stations 8 - 12 onto water tap and insert the other end into inlet (8 in Fig. Instrument rear panel - tap water inlets • If station no. 7 (Fig. 3) will also be used as a tap water station, connect a second tap water inlet hose (optional accessory) to in- let (9).
- Page 21 When installing the drain hose al- hose clamp (12). ways make sure there is a sufficient descending gradient from the outlet • Insert waste water hose (13) into drain pipe (connection piece (10)) on the instru- and secure in position. ment to the drain pipe! Leica ST5020...
-
Page 22: Installing The Oven (Optional)
Setting up the instrument 4.4 Installing the oven (optional) • Take the oven kit out of the box and verify whether it is complete. The following parts must be in- cluded: 15 - Oven module 16 - Paraffin collecting tray 17 - Cover 18 - Screws 19 - Washers 20 - Screwdriver 21 - Allen key, size 2.5 22 - Allen key, size 4.0... - Page 23 Do not loosen the two screws (30)! • Once the oven is installed, attach cover panel (part of oven kit delivery) (17 in Fig. with four screws (29) in such a way that the voltage selected is visible from the outside. Fig. 13 Leica ST5020...
- Page 24 Setting up the instrument Installing the oven (continued) Important! If only one oven is installed, it must be located on the right side (seen from the rear of the instrument). • Place oven on rails (32) and insert. • Keep pushing until the connection pieces of the oven (positioning pin (24), connector strip (25), see Fig.
-
Page 25: Connecting The Air Evacuation Hose (Optional)
• Turn clamping screw (67) to the left (use to the right) to secure the hose. screw driver (60) until hose clamp (62) is loosened far enough so that it can be slipped over the air evacuation hose. Leica ST5020... -
Page 26: Inserting The Activated Carbon Filter
Setting up the instrument 4.6 Inserting the activated carbon filter Important for trouble-free op- eration: The sealing profiles (33) must fit against the rear wall of the filter housing (34). Filter - inserted Fig. 18 Make sure to insert the filter Once the activated carbon Fig. - Page 27 (A to D) where the box level ment is in fact in a horizontal must be positioned for leveling the instrument. For leveling, the box level must be placed onto vessel position. holder frame (39). - Do not place the box level elsewhere. Leica ST5020...
-
Page 28: Electrical Connection
(44) to the electronics module input (45). Data connections • Printer port (47) A suitable printer (and cable) can be recom- mended by your Leica distributor. If conform- ance to electromagnetic interference stand- ards is essential, a specially shielded printer cable will be required. • Serial port (48) Access for technical service. -
Page 29: Alarm Functions
Remote alarm strument must be rated at less than 2 amp. A maximum voltage of 24 V AC/DC may be pre- This alarm is external to the Leica ST 5020. sent. Any alarm generated in the instrument, no mat- The remote alarm device is connected to the ter of which alarm type, is passed on to the printer via a 6.3 mm -diameter jack connector... -
Page 30: Operation
Caution! The instrument MUST be connected to an earthed mains power outlet socket. It is recommended that the Leica ST5020 be plugged into a wall socket that has Ground Fault Circuit Interruption (GFCI) protection - as an additional electrical safeguard. -
Page 31: Setup Checklist
Existing programs can be copied and modified. In MOVE, select the number of dips and the speed of → → the transfer arm. → → Allocate a CLIP COLOR to each clip. Select time, quantity and paper format of the daily → → printouts. Leica ST5020... -
Page 32: Touch Screen Functions
Operation 5.3 Touch screen functions 5.3.1 User interface - overview The Leica ST5020 Multistainer is programmed and op- erated via a colored TFT- touch screen. Basic screen layout Only those control elements that can actually be ac- cessed by the user are displayed on the screen. - Page 33 If there is a choice of more than two parameters, the range of avail- able parameters is shown on the button in square brackets. Each time the button is pressed, the next parameter is accessed, start- ing again with the first after the last one in the row has been selected. Leica ST5020...
- Page 34 Operation Tables/lists The program contains numerous tables. The first row of a table contains the headers of the individual columns. The rows below contain the actual content. Selected rows appear in blue color (1). When a tabled is accessed, the blue bar is al- ways located in the first content row.
-
Page 35: Data Entry
Press this button to display special characters, above all vowels carrying accents. These can also be displayed in capitals by pressing SHIFT/SHIFT LOCK. After a special character has been selected, the keyboard auto- matically reverts to standard indication. Leica ST5020... - Page 36 Operation Navigation buttons The navigation buttons have the same function in both keyboard types (numerical, alphanumeric): • Cursor jumps to the left / right border of the entry field. • Cursor is moved one character to the left / right. • Character on the left of the cursor is deleted. Numerical keyboard • Entry field located above the numeric keypad (left aligned). Instructions on which parameter to be en- tered (6) are displayed above the entry field. Entry position is marked by cursor, default parameters will be stored.
-
Page 37: Access Levels
Operation 5.3.3 Access levels The Leica ST5020 may be configured to allow two level of user access. User access level Administrator symbol User symbol • Users may run programs and view results. On this level, the USER symbol is displayed in the upper right corner of the touch screen. -
Page 38: The Main Menu
Operation 5.3.4 The main menu After switching the instrument on, the main menu will be displayed only if the language is changed. INSTRUMENT STATUS is actually the standard screen. In all functional descriptions below, INSTRUMENT STATUS is assumed to be the standard screen, all buttons shown start from INSTRUMENT STATUS. -
Page 39: System Setup
Set and control stations Calibrate screen Define screen Allocate and displays and control reagents printouts Detect color of Backup and read in unknown clip and all user data allocate Set / control date and time Fig. 33 Leica ST5020... -
Page 40: User Interface
Operation 5.4.1 User interface → → In this screen you can select: • BRIGHTNESS OF SCREEN • TEMPERATURE MEASURING UNIT • BUTTON CLICK Two measuring units can be chosen from: • The parameter selected is displayed on the button, next to the "=" sign. ←→ • Press the button to switch to the alternative Fig. -
Page 41: Alarm
Alarm type 3: A serious error has occurred. Follow the instructions provided by the error message. If the same error occurs repeatedly, call Leica Fig. 36 Technical Service. Different sound signals, in several intensity levels, can be allocated to each alarm type. - Page 42 Operation The table below shows the specific events each individual alarm type is allocated to. Time/Location Alarm type Event Alarm ceases / switched off Instrument Alarm 1 All unload containers occupied when instrument is - When all racks have been re- being switched on.
-
Page 43: Password Allocation
Each time, press ENTER. After the new password has been entered twice, a confirmation message will be displayed. • Fig. 37 shows all three command prompts displayed when changing the password. Fig. 37 Leica ST5020... -
Page 44: Set Date/Time
Operation 5.4.4 Set date/time → → Many of the instrument functions are time-controlled. - therefore it is very important to set date and time correctly. Date The DATE / TIME window displays the current calendar month. • To set the DAY press the corre- sponding button. -
Page 45: Movement
No dips are performed if the setting numbers selected, the slower the speed. At "Number of Dips = '0'" is used, even if 'Yes' is entered in the DIP column in slower speeds, less reagent is carried over. the program. Leica ST5020... -
Page 46: View And Print
Operation 5.4.6 View and print → → To view all stored protocols. The button bar of each protocol con- tains a PRINT button for individual printouts of each protocol. • Printing is possible only when a printer is connected. • Pressing the PRINT button starts printing the selected list immediately. If printing is not possible, the button is disabled. -
Page 47: Reagent List
Up to 20 characters per reagent can be entered. • The new reagent will be added to the table where it alphabeti- cally belongs and highlighted with the blue bar. The alphabetical sorting function distinguishes between ↓ small and capital letters as per the ASCII code. Capital letters precede lower case letters. Leica ST5020... - Page 48 Operation If the Reagent Management System Setting RMS data (RMS) is switched on, the table head- ers are displayed as buttons. The following limit parameters can be defined for the RMS: • M aximum number of days the reagent may be used. • M aximum number of racks that can be pro- cessed until the next reagent change.
- Page 49 The RMS log → → → → The Leica ST5020 is equipped with a Reagent Management System (RMS) graphically repre- senting processing history of reagents in 'Instrument Status' (see chapter 5.5.1). These reagent data are stored in the RMS log table.
-
Page 50: Station Options
Operation 5.4.8 Station options → → This screen provides an overview of all stations. Detailed information on individual stations can be retrieved. Rack movements, however, are not shown. • Screen indication and func- tionality of stations are iden- tical to the INSTRUMENT STATUS screen (see Fig. -
Page 51: Calibration Dialog
- if the screen has been successfully calibrated, the button may not appear as pressed (wider border) before you actually touch it. Standard appearance Button pressed Fig. 48 Leica ST5020... -
Page 52: Data Backup
Operation 5.4.10 Data backup → → This menu allows all instrument data to be written to a PCMCIA card. It is even possible to load saved data from such a card into the multistainer memory. The data can only be backed up in supervisor mode (9, Fig. - Page 53 NOT insert the card into the slot and press the BACKUP button to leave the data backup screen. No data will be written and the text "Backup inprogress..." does not ap- pear. However, if you press RESTORE, the instrument will restart as de- scribed above. Leica ST5020...
-
Page 54: Instrument Status
Operation 5.5 Instrument status → INSTRUMENT STATUS is the standard screen of the instrument, displayed automatically when the instrument is switched on (unless a different language is selected - s. chapter 4.1). • INSTRUMENT STATUS may also be accessed from the main menu, in which case a BACK button will be dis- played in the menu bar. -
Page 55: Station Buttons
(color and code) has been recognized and will be carried out. The rhombus (#) indicates that the rack has been detected by the soft- ware and will be processed as soon as possible. Leica ST5020... - Page 56 Operation Unload station • There is a maximum of four unload stations (E25 - E28) - E25 being non- changeable. Unload stations do not have a bar on the left border. • Completed racks are placed into the unload stations by the transfer arm, always starting with station E25. Line 2 shows which program has been completed, line 3 shows the rack number. The colored program indication blinks in two-second intervals.
-
Page 57: Select Station Type
Fig. 53 Caution! The Leica ST5020 is not capable of verifying the actual content of a station. Therefore the user MUST make sure that the information entered into the STATION DETAILS menu is consistent with the reagent the station has actually been filled with. - Page 58 Operation Indications and buttons corresponding to the different station types Reagent station Additional buttons To open the reagent list (chapter 5.4.7) for allocating reagents to stations. Press UPDATE REAGENT after a reagent has been changed, in order to • set the date of "Last change" to the current date; • set the date in the "Use by date" row according to the RMS;...
-
Page 59: Change Station Type
• Follow the same procedure as described above. In addition, however, the yellow tap water containers must exchanged for reagent contain- ers to prevent reagents from spilling. If the RMS is on, all reagent stations will be registered, including those that have been converted into reagent stations later. Leica ST5020... -
Page 60: Staining Programs
Operation 5.6 Staining programs → The PROGRAMS menu includes a table listing all staining programs stored. In supervisor mode (Fig. 54) the column headers CLIP COLOR, ABBR. and PROGRAM NAME are displayed as buttons. In addition, the buttons DETAILS, COPY, DELETE and NEW are displayed, i.e. -
Page 61: Creating Programs
• Press CONFIRM in the screen prompt: the selected color is allocated to the selected (H&E) program. The program to which that color had been allocated up to that point (PAP) will be defined as white (in the CLIP COLOR column). Leica ST5020... -
Page 62: Defining The Program Steps
Operation 5.6.2 Defining the program steps • Press DETAILS (Fig. 54) to access the PROGRAMMING menu (Fig. 56). If a program is created from scratch, the list of the individual program steps is completely empty. • The number in the STEP column indicates the order in which the sta- tions will be used. - Page 63 AGENT column is highlighted in red, and the program cannot be started. Fig. 59 • If a reagent has already been assigned to the selected station (recommended), it will be displayed in the REAGENT column. In this case, the row for the step is highlight- ed in blue. Fig. 60 Leica ST5020...
- Page 64 Operation Assigning reagents ↓ • If no reagent is assigned to a program step, press REAGENT in the header row to switch to the reagent list (see chapter 5.4.7). Highlight one of the reagents in the list and press CONFIRM to assign it to the program step. • The reagent is now assigned to the step but not yet to the station in which the step must be executed.
- Page 65 For exact steps the following applies: If the immersion time of an exact step is shorter than the time to do the set number of dips, only the number of dips that fit into the im- mersion time will be done. Leica ST5020...
- Page 66 Operation Completing the program • Once the parameters EXACT and DIP have been selected, the defini- tion of your step is complete. • Press INSERT ROW to create a new row for the next program step and once again define all step parameters as described above. • Keep creating program steps until your program is complete.
-
Page 67: Assigning A Clip Color
5.6.1). Otherwise, three question marks "???" will be displayed in- stead of a program code. If the clip color 'white' is selected, the instrument will switch to MANUAL PROGRAM START, where any program can be selected and started (see chapter 5.8.2). Leica ST5020... - Page 68 Operation Manual color allocation → → Go to OPTIONS to assign a new ↓ color to a clip already linked to a different color. Example: A purple clip currently not needed needs to be defined as 'white', as a white clip is need- ed but currently not available.
-
Page 69: Programs In Process
All times are based on defined program step times and do not include any delays caused by non-exact steps. Times displayed are updated Increasing rack Total remaining each sec. as well as each time a new racks number processing time starts being processed. Leica ST5020... -
Page 70: Staining
Operation 5.8 Staining Caution with sequences which involve Prior to starting a staining program, thefollow- an oven at the initial step. In this case the loading unit, out of ing preparatory steps must be taken: which the specimen holder is removed • Optimize all USER INTERFACE parameters. -
Page 71: Starting Programs
- In user mode, an error message will be displayed, specifying why that particular rack cannot be processed. At the same time, the corresponding alarm sound is triggered. Remove the rack to acknowledge the error message and stop the alarm; close the drawer. Leica ST5020... - Page 72 Operation Loading an unknown clip • If a rack carrying an unknown clip is placed into the load drawer, the CLIP COLOR menu opens up automatically. If any staining processes are already in progress, a screen prompt will open up inquiring whether the user wishes to access supervisor mode. - CONTINUE stops the selection procedure and continues the stain- ing processes in progress.
-
Page 73: Interrupting A Staining Program
If PAUSE buttun has been pressd druring an exact step is in process, a warnig message will be appear in the dialog box. Programs cannot be modified neither while staining is in progress nor in pause mode. Leica ST5020... -
Page 74: Finishing Programs
Operation 5.8.4 Finishing programs Unloading racks from the unload drawer If a rack is located in the unload drawer, the alarm type 1 sounds. • The code of the completed program and (in the bottom row) the basket number are displayed in the unload station symbol. The colored pro- gram indication blinks in two-second intervals. ↓... - Page 75 Staining will be resumed starting with the next rack. If the program highlighted by the blue bar has already been comple- ted (rack already located in unload station or just being transferred to unload station), the CANCEL RACK button is disabled. Leica ST5020...
-
Page 76: Cleaning And Maintenance
Cleaning and maintenance 6.1 Cleaning the instrument Prior to cleaning the instrument, always switch off mains and un- plug the power cord! When handling cleaning detergents, follow the instructions of the manufacturer and make sure all laboratory regulations in force in your country are complied with. -
Page 77: General Maintenance
The instrument is virtually maintenance-free in operation. To ensure smooth operation of the instrument over many years we do, however, recommend the following: • Have the instrument inspected once per year by a qualified service en- gineer authorized by Leica. • At the end of the warranty period, enter into a service contract. For more information, please contact your local Leica technical service center. Leica ST5020... -
Page 78: Preventative Maintenance Schedule
Cleaning and maintenance 6.3 Preventative maintenance schedule Maintenance activity daily weekly monthly Clean the TFT screen with a lint-free cloth. √ Follow the manufacturer's instructions when using screen cleaner. Clean outside surfaces of instrument and lid with soft √ cloth. Use cleaning detergent, if necessary. -
Page 79: Troubleshooting
Troubleshooting 7.1 General The Leica ST5020 is equipped with a troubleshooting system. If an error is detected, detailed error messages and corresponding user instructions on what to do are displayed on the touch screen. For all correctable error conditions the instrument will take corrective ac- tions to protect the specimens. - Page 80 Troubleshooting 1. Read the error message, acknowledge the alarm and, immediately afterward, press the "PAUSE" knob. The transport arm moves into a se- cure position. The instrument is now in pause mode and the instrument cover can be opened. Caution! As long as the level sensor is covered with water, the water flow cuvettes' (7-12) water valves are closed.
- Page 81 If it is not possible to ensure a lasting and sufficient drainage of water from the instrument by cleaning the water drain and the drain tube, the instrument must be switched off and the responsi- ble Leica service department must be contacted. Leica ST5020...
-
Page 82: Power Failure
Troubleshooting 7.3 Power failure • Check whether there is a general power failure (no mains power). • Check whether the mains plug is inserted correctly into the wall outlet and whether the wall outlet is switched on, if applicable. • Check whether jumper cable (or UPS cable) is inserted correctly into the corresponding sockets. • Check whether the mains switch is switched on correctly. • Check whether one of the four secondary fuses is defective. Some instrument malfunctions / failures are caused by defective fuses. Power failure Malfunction / failure Fuse to be checked • Instrument not working - no response. -
Page 83: Replacing The Secondary Fuses
Amperage (A) is the parameter that is important sure the amp rating on the fuse corresponds to for allocating fuses correctly to the correspond- the amp rating indicated above the fuse holder. ing fuse holder (in the example above: F1/T2A) Leica ST5020... - Page 84 Troubleshooting Replacing the fuses Fig. 75 Fig. 76 • Insert a screwdriver (1) into the slot on fuse • Remove the defective fuse (3) from the fuse holder (2) and push slightly inwards rotat- holder (2) and insert the correct type re- ing the screwdriver 1/4 turn to the left at the placement fuse.
-
Page 85: Warranty And Service
Decommissioning and disposal The instrument or parts of the instrument must be disposed of in compli- ance with the local laws. To prevent damage to the instrument or the specimen, only accessories authorized by Leica may be used. Leica ST5020... -
Page 86: Appendix
Appendix Instructions for Use, V2.0, RevG - 07/2016... - Page 87 Appendix Leica ST5020...
-
Page 88: Optional Accessories
Appendix 9.2 Optional accessories To prevent damage to the instrument or the specimen, only accessories authorized by Leica may be used. Order No. Reagent vessels, assy. (with handles and lids) 14 0475 33659 Wash vessels, assy. with connection piece 14 0475 33660... - Page 89 Remote alarm jack - 6.3 mm 14 6844 01005 Oven - Leica ST5020, assy. 14 0475 34611 Leica TS5025 - Transfer station, assy. ST5020 --> CV5030 14 0478 36703 Demo - Box Leica ST5020 14 0475 36230 Activated carbon filter...
- Page 90 Notes Instructions for Use, V2.0, RevG - 07/2016...
- Page 92 Leica Biosystems Nussloch GmbH Heidelberger Straße 17-19 D- 69226 Nussloch Phone: +49 6224 - 143 0 Fax: +49 6224 - 143 268 Internet: www.LeicaBiosystems.com...
Need help?
Do you have a question about the ST5020 and is the answer not in the manual?
Questions and answers