Leica CV5030 Operating Manual
Robotic coverslipper
Hide thumbs
Also See for CV5030:
- Instructions for use manual (116 pages) ,
- Instruction manual (44 pages) ,
- Supplemental sheet for instructions for use (6 pages)

Related Manuals for Leica CV5030


Summary of Contents for Leica CV5030
- Page 1 Leica CV5030 Robotic Coverslipper Operating Manual Leica CV5030 V2.1 English - 08/2008 Always keep this manual near the instrument. Read it carefully prior to operating the instrument!
- Page 3 Leica reserves the right to change technical following thorough investigation in this field. specifications as well as manufacturing process- We are under no obligation to update the present es without prior notice.
-
Page 4: Table Of Contents
Table of contents Important information ............................. 6 Safety ................................. 7 Safety notes .................................. 7 Caution notes ................................7 Instrument Components and Specifications ..................... 10 Overview — instrument components ........................10 Technical data ................................11 Standard delivery—packing list ..........................12 Initial Commissioning ........................... 13 Location requirements .............................. - Page 5 Table of contents CV5030 with transfer station ............................ 51 5.7.1 Operation as ST5010 – CV5030 workstation ......................51 5.7.2 Operation as ST5020 – CV5030 workstation ......................52 5.7.2 Operation as ST5020 – CV5030 workstation ......................53 5.7.3 Important instructions for operation as workstation ................... 54 5.7.4 Interrupting workstation operation .........................
-
Page 6: Important Information
START capital letters. Qualification of personnel • The Leica CV5030 may be operated by trained laboratory personnel only. • All laboratory personnel designated to oper- ate the Leica CV5030 must read this Operat- ing Manual carefully and must be familiar with all technical features of the instrument before attempting to operate the Leica CV5030. -
Page 7: Safety
To ensure perfect operation of the instrument, the following notes and cautions must be observed. Leica CV5030 – Robotic Coverslipper... - Page 8 • The installation location must be well ventilated, and must contain no sources of ignition of any kind. The chemicals to be used in the Leica CV 5030 are easily inflammable and hazard- ous to health.
- Page 9 • Prevent liquids from entering the interior of the instrument while the instrument is being cleaned or during operation. Material safety data sheets for reagents can be requested from the respective manufacturer of the chemical. Alternatively, they can be downloaded from the following website: http://www.msdsonline.com Leica CV5030 – Robotic Coverslipper...
-
Page 10: Instrument Components And Specifications
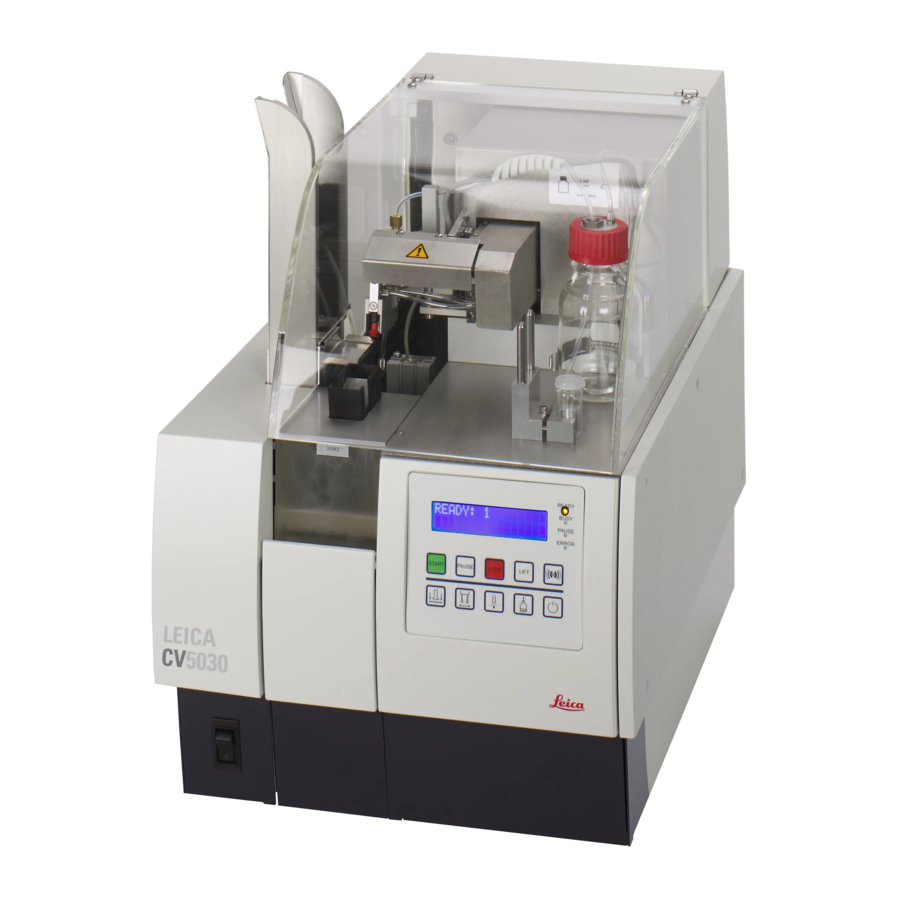
Instrument Components and Specifications Overview — instrument components Unit cover Output magazine guide Output magazines Maintenance door bottle for cover slip mountant Cover slip magazine Dispenser Park position Control panel On/Off switch Loading bath Height-adjustable instrument feet Input door Fig. 2 Operating Manual V 2.1 –... -
Page 11: Technical Data
Mountant bottle capacity: 250 ml Max. fill quantity: 200 ml Application quantity: individually adjustable Mountant types: all commercial mountants** * Contact your supplier for additional information! ** Recommendation: Leica CV Ultra Leica CV5030 – Robotic Coverslipper... -
Page 12: Standard Delivery-Packing List
Instrument Components and Specifications Standard delivery—packing list The standard equipment of the Leica CV5030 consists of the following parts: Cat. No. 1 Basic instrument 14 0478 39700 1 Dispensing group consisting of: 14 0478 39402 3 Nozzles (21 G, 20 G, 18 G) -
Page 13: Initial Commissioning
Initial Commissioning Location requirements The location for the Leica CV5030 Robotic Coverslipper must meet the following requirements: • Stable, vibration-free laboratory bench with horizontal and level tabletop and largely vibration-free floor. Avoid vibrations, bright direct light and strong temperature fluctuations. -
Page 14: Unpacking And Installation
Initial Commissioning Unpacking and installation • Grab hold of the bottom of the instrument on each side (have at least 2 persons do this) and place it on a stable laboratory table. • When doing so, ensure that the instrument is standing on all four feet. -
Page 15: Leveling The Instrument
6, detail 1. • By screwing or unscrewing the instrument Detail 2 feet (27) (detail 2 in Fig. 6), make sure the in- strument is level in both directions. Check this using the spirit level. Fig. 6 Leica CV5030 – Robotic Coverslipper... -
Page 16: Vent System
Initial Commissioning 4.3.3 Vent system Either operate the instrument in a fume hood or Enlarged detail: insert the active carbon filter and connect the Installing the exhaust exhaust hose correctly. hose (70). The filter cover (30) and filter (32) IMPORTANT! have been re- For dry coverslipping, the active car- moved to show... -
Page 17: Installing The Dispensing Group/Dispenser
Fig. 10) and plug the mountant bottle into the holder (45) (Fig. 10). When screwing on the lid, make sure that the sealing ring in the lid of the mountant bottle fits correctly! Fig. 9 Leica CV5030 – Robotic Coverslipper... - Page 18 Initial Commissioning Installing the dispensing group/dispenser (continued) Fig. 10 Fig. 11 • Finally, insert the cable and the air hose into Inserting the nozzle (Fig.11) the holder (45) provided (Fig. • Select the nozzle to be used for coverslipping from the scope of delivery (Fig.
-
Page 19: Aligning The Nozzle Relative To The Specimen Slide
Fig. 13 Do not tilt the coverslip transfer module manually! • Now check the vertical clearance from the specimen slide outfeed to the nozzle (Fig. 14). It should be approx. 0.5 - 0.8 mm. Fig. 14 Leica CV5030 – Robotic Coverslipper... - Page 20 Initial Commissioning Aligning the nozzle to the specimen slide (continued) To set the distance accurately, for example when nozzles have been replaced, follow this proce- dure: • Remove the dispenser (35) from the holder (57, Fig. 16) and place it in the park position (= prime position) (39) as shown in Fig.
-
Page 21: Nozzle Cleaner
• Now, attach the lid (10) and push it down until • Insert the brush (2) into the container so that it clicks into place. the lateral guides (15) (2 each on the left and right) fit into the notches (16) provided. Leica CV5030 – Robotic Coverslipper... - Page 22 Initial Commissioning Assembly To install the holder for the nozzle cleaner, you must first remove the transport an- chors for the coverslip trans- fer module and the gripper (see Chapter. 4.3.1, Fig. For installation, use the threaded holes (11) of the transport anchor.
- Page 23 19/2). To do so, use the available play in the bores. • Fill the container with xylene or correspond- ing xylene substitute. For filling, use the pipette provided (item 5 in Fig. 17). Fig. 22 Leica CV5030 – Robotic Coverslipper...
-
Page 24: Connecting To The Power Supply
• Insert the correct power cable into the power input socket (58). • The serial port (59) is designed to enable con- nection to the Leica ST5020 (Multistainer) when the two devices are operated together Fig. 23 as a workstation. (for more information, see Chapter 5.7.2). - Page 25 Loading bath • Pull out the loading door (65) by pulling for- wards and pull out the extension (66). • Insert the loading bath (68) into the extension and insert the removable "Leica" slide holder insert (67, Fig. 27). • When specimen slide holders from other man-...
-
Page 26: Refilling Consumables
Initial Commissioning 4.3.9 Refilling consumables Fig. 28 • Fill the loading bath (68 in Fig. 27) with xylene* • For best results, leave the mountant bottle up to the top edge so that the specimen slides uncovered in the fume hood for several hours are covered well. -
Page 27: Operation
LED is illuminated in red and an alarm signal is output that can be acknowl- edged using the RESPOND button. PAUSED appears in the display. Is illuminated in red after an error has occurred. The associated error message appears in the display. Leica CV5030 – Robotic Coverslipper... -
Page 28: Key Designations And Their Functions
Operation Key designations and their functions The START button starts the coverslipping operation. This is possible in READY and PAUSE mode only. After STOP is pressed (display: "STOPPED"), pressing the button reinitializes the instrument (see Chap. 5.3 "Switching on the instrument"). In the configuration menu, the values of the parameters are increased by pressing START;... - Page 29 The function is disabled while the BUSY LED is illuminated in green. STANDBY This button is used to exit the configuration menu once parameters have been configured. If the user is in a submenu, pressing STANDBY exits the submenu WITHOUT saving values. Leica CV5030 – Robotic Coverslipper...
-
Page 30: Switching On The Instrument
Operation Switching on the instrument Move the power switch on the front side to the ON = I posi- tion. This is followed by a beep. The initialization described below is also carried out in its en- tirety after pressing START, if the instrument was previously stopped using the STOP button (display reads STOPPED). -
Page 31: The Configuration Menu
CSP - Cover slip placement position STP - Start position of the coverslipping mountant stroke SPK - Volume of the audible warning signals and the alarm LIM - Adjustment of the limit value for cover slips Fig. 31 Leica CV5030 – Robotic Coverslipper... -
Page 32: Configuring Parameter Sets
Operation The configuration menu 5.4.1 Configuring parameter SETs (continued) There are a total of four parameter sets (SET 1 to SET 4) that can be stored in the instrument. Pressing the START button calls up the respec- tive next (higher) parameter set. Pressing the Pause button calls up the respec- tive next (lower) parameter set (Fig. - Page 33 Adjustment options for the opening time: In increments of 1 from 1 (short) —> 9 (long). The quantity of the coverslipping mountant applied also depends on the composition of the mountant (e.g. viscosity) and the ambient conditions. Leica CV5030 – Robotic Coverslipper...
- Page 34 Operation Mountant Type — dispensing pressure of the coverslipping mountant This adjusts the pressure in the dispensing unit for the coverslipping mountant. Adjustment options for the pressure: In increments of 1 from 1 = 100 mbar 10 = 1000 mbar An increase of "1"...
-
Page 35: Setting Menu B Parameters
Adjusts the volume of the audible signals (button sounds and alarms). Adjustment options for the volume: The alarm sounds and audible signals of the buttons cannot be disabled In increments of 1 from 1 (quiet) —> 3 (loud). completely. Leica CV5030 – Robotic Coverslipper... - Page 36 Operation Stroke Position Corr — start position correction of the coverslipping mountant Here, you can configure a correction for the position at which the application stroke of the coverslipping mountant on the specimen slide is to begin. -100 = -10 mm -90 = -9 mm Label field -80 = -8 mm...
-
Page 37: Parameter Settings For Various Cover Slip Mountants
“Mountant Stroke” setting: As a result of different location and working conditions, such as higher room temperature, great height or extreme humidity, the values specified here may not provide the desired results and have to be optimized. Leica CV5030 – Robotic Coverslipper... - Page 38 BDH Laboratory Supplies England Merck LEN: -40 STP: +40 Vitro-Clud R. Langenbrinck Permount Fisher Scientific Histofluid Marienfeld LEN: -50 CV Mount Leica LEN: -50 Quick-D Klinipath b.v. LEN: -100 STP: -50 Consul-Mount Shandon LEN: -50 Hico-Mic Hirtz Co. Cologne &...
- Page 39 Single-layer cytology less High temperature (> 28 °C) less Cover slip size 40 mm less or shorter stroke length Low temperature (< 2 °C) more Cover slip size 60 mm much more or longer stroke length Leica CV5030 – Robotic Coverslipper...
-
Page 40: Displays - Status Messages
Operation Displays – status messages The display of the Leica CV5030 is used to display status and error messages that provide information about the current status of the instrument. Status messages always appear in the bottom line of the display. The top line displays the operating status of the instrument. - Page 41 The instrument continues to magazine. Press START to con- work until the PAUSE button is tinue working. pressed or all cover slips have been used up. Leica CV5030 – Robotic Coverslipper...
- Page 42 If the message appears more than once even though the specimen slide has been inserted correctly, contact Leica service. The user has pressed the VENT Wait until the vacuum is MOUNTANT button. reached. You can continue working by pressing START.
- Page 43 The following status messages are displayed only if the instrument is connected to a staining machine (Leica ST5010 or Leica ST5020) via a transfer station. Indicates that a specimen slide Wait for the job to end. holder is being processed that has been transferred from the staining machine.
-
Page 44: Coverslipping
5. Operation Coverslipping 5.6.1 Preparation • The instrument must be started and initialized, Chap. 5.3. • Check the cover slip magazine and the bottle with coverslipping mountant to ensure ade- quate supply. • Check the solvent in the container (nozzle cleaner) and refill if necessary. -
Page 45: Starting The Coverslipping Process
(max. capacity = 60 specimen slides). CAUTION! If the output magazines are raised to the removal position by pressing LIFT, all specimen slides MUST be removed. Leica CV5030 – Robotic Coverslipper... -
Page 46: Interrupting The Coverslipping Process
Operation 5.6.3 Interrupting the coverslipping process Normal interruption using PAUSE Press PAUSE to interrupt the coverslipping operation. • The currently processed specimen slide is completely coverslipped and pushed into the output magazine. During this time, the message PAUSING appears in the display. •... - Page 47 The bath must be manually pulled from the bath channel if it needs to be removed. It is not necessary to remove the loading bath before an initialization. • To resume working, press START and carry out the initialization as outlined in Chapter 5, p. Leica CV5030 – Robotic Coverslipper...
-
Page 48: Process-Based Interruptions
Operation 5.6.4 Process-based interruptions Empty coverslip magazine If the number of cover slips falls below the configured cover slip limit, the instrument continues to work until the PAUSE button is pressed or all cover slips have been used up. The message COVERSLIPS LOW appears in the display. - Page 49 • If everything is OK, you can continue working as in normal PAUSE mode by pressing START. If the message appears more than once even though the specimen slide is correct, contact Leica service. Leica CV5030 – Robotic Coverslipper...
- Page 50 Operation Process-based interruptions (continued) Pressure or vacuum cannot be reached If the dispenser system cannot reach the intended pressure or vacuum after a certain time, the instrument automatically switches to PAUSE mode. • The READY LED is illuminated in red; the PAUSE LED is illuminated in green.
-
Page 51: Cv5030 With Transfer Station
TS5015 and depos- by a transfer arm (76) from the unload station (75) of ited on the chute (78). the autostainer into the CV5030. There, they are The display reads READY. coverslipped. • If intervention is required, the alarm... -
Page 52: Operation As St5020 - Cv5030 Workstation
In this case, both instruments are connected to each other by a TS5025 Transfer Station. In addition, a serial connection between the two devices must also be pro- vided, so that the coverslipper (CV5030) can respond to requests from the Multistainer (ST5020). • For this purpose, plug a... -
Page 53: Operation As St5020 - Cv5030 Workstation
5. Operation 5.7.2 Operation as ST5020 – CV5030 workstation • The ST5020, in turn, detects when the CV5030 Detail: is switched off. In this case, the racks are Transfer of the finished placed into the unload station (79) of the... -
Page 54: Important Instructions For Operation As Workstation
After coverslipping, the specimen slide hold- be displayed, as most third-party specimen er must be removed from the loading bath man- slide holders do not have a Leica suspension ually! by which a sensor can detect the presence of a rack. -
Page 55: Interrupting Workstation Operation
• If there is a power failure, the CV5030 is switched off or the power supply is interrupted, the remaining racks in the transfer station are not re- moved automatically (transport chute between TS5025/TS5015 and CV5030;... -
Page 56: Maintenance And Cleaning
Maintenance and Cleaning Daily start-up of the instrument • Switch on the Leica CV5030 via the power switch. The instrument initializes itself automatically (BUSY LED is illuminated). • After the "CHECK BATH" prompt, check to ensure that the loading bath is in the correct position and is filled. -
Page 57: Daily Cleaning And Maintenance
Make sure that no speci- men slide holder is in the loading bath before switching off the instrument (main switch!). • Before switching off the CV5030 via the main switch, carry out the following: - Remove the specimen slide holder from the loading bath. - Page 58 Maintenance and Cleaning • Clean the gripper using a lint-free cloth soaked in xylene. • If prelabeled specimen slides with labels are used, adhesive residue may remain on the transfer arm. Dip a wooden swab into xylene and carefully wipe the chucks of the transfer arm. •...
-
Page 59: Overview Of Cleaning Measures
Check the cover slip magazine and refill if necessary Clean glass shards and splinters from the transport belt/ cover slip catch tray loading chute, interior of the instrument (entire working area) Check coverslipping mountant for air bubbles (add degassed mountant if necessary!) Leica CV5030 – Robotic Coverslipper... -
Page 60: Cleaning And Replacing The Suction Cups
44) and replace it with a new one. Fig. 44 6.2.3 Cleaning and maintenance instructions for the nozzle cleaner To ensure that the Leica CV5030 works properly, carry out the following steps carefully and thoroughly: • The cleaning fluid in the container must be replaced daily (quantity: approx. -
Page 61: Procedure For Changing The Cover Slip Mountant
• Insert the mountant bottle with new substitute-compatible mountant (do not forget to prime, hoses must be filled completely). Likewise, all parts filled with xylene must be converted to the substitute (= loading bath, glass vial for parking the nozzle, nozzle cleaner)! Leica CV5030 – Robotic Coverslipper... -
Page 62: Malfunctions And Troubleshooting
Following is a list of the most common problems which can arise while working with the instru- ment, along with possible causes and troubleshooting procedures. If errors cannot be corrected using the measures in the table, notify Leica Service support imme- diately. -
Page 63: Optional Accessories
Leica CV Mount, 4 x 250 ml ....................14 0464 30011 Leica ST Ultra - intermedium, 1 10-liter canister............14 0709 36260 Leica CV Ultra - coverslipping mountant, 6 x 100 ml ........... 14 0709 36261 Leica CV Ultra coverslipping mountant, 1 x 250 ml ............14 0709 37891 Standard active carbon filter, xylene ................ - Page 64 Tray insert Medite 20/40 - for Medite/Hacker, for 20 and 40 specimen slides ..14 0478 39781 Leica TS5025 transfer station for integrating the ST5020 and CV5030 ..... 14 0478 39710 Leica TS5015 transfer station for integrating the Autostainer XL and CV5030 ..14 0506 38050 Baseplate ST5020/CV5030 ....................14 0475 37647...
- Page 65 For the specimen coverslipping application, ST Ultra can be used only in conjunction with Leica CV Ultra. 1 canister, 10 liters Order No. 14 0709 36260 Fig. 47 Leica CV Ultra 1 x 250 ml coverslipping mountant.
- Page 66 8. Optional Accessories Standard active carbon filter, for working with xylene Order No. 14 0422 30673 Fig. 49 Cover slips, of pure white glass of hydrolytic class 1, thick- ness No. 1 (0.13 - 0.17 mm) Supply quantity: 1000 pcs. - in plastic sleeves of 100 Size 24 x 40 mm Order No.
- Page 67 • 1 Pasteur pipette (7.7 ml) (1) • 1 Operating Manual, German/English Fig. 52 Order No. 14 0478 40941 Dispenser brush holder, Order No. 14 0478 40559 Fig. 53 Dispenser brush, set of 5, Order No. 14 0478 41115 Fig. 54 Leica CV5030 – Robotic Coverslipper...
- Page 68 8. Optional Accessories Cover slip catch tray Order No. 14 0478 39585 Fig. 55 Removal magazine 30 for 30 specimen slides, 4 pcs. Order No. 14 0478 39586 Fig. 56 Removal magazine 20 for 20 specimen slides, 6 pcs. Order No. 14 0478 40117 Fig.
- Page 69 8. Optional Accessories Loading bath for specimen slide holder loading bath, deep. Note: for use with CV5030 only, not in combina- tion with ST5020 and TS5025. Order No. 14 0478 39657 Fig. 59 Cover for loading bath Order No. 14 0478 39584 Fig.
- Page 70 8. Optional Accessories Cover slip magazine, cover slip magazine multi-size TM with inserts for holding various common cover slip sizes 40-60 x 22 mm Order No. 14 0478 39748 40-60 x 24 mm Order No. 14 0478 39749 Fig. 63 Exhaust hose, solvent resistant, flexible, 3 m length, diameter 32 mm...
- Page 71 14 0474 34965. Order No. 14 0474 32789 Fig. 68 Specimen slide holder 30, Plastic, pack of 5 Order No. 14 0475 33643 Plastic - 1 pc. Order No. 14 0475 33750 Fig. 69 Leica CV5030 – Robotic Coverslipper...
- Page 72 Order No. 14 0478 38029 Fig. 70 Varistain adapter, Adapter for Shandon Varistain 24-4, Note: For use with Leica specimen slide holder 30, modified, plastic 14 0478 38029, to combine Varistain 24-4 with CV5030. Order No. 14 0464 37659 Fig. 71...
- Page 73 Medite/Hacker, specimen slide holder for 20 specimen slides Order No. 14 0478 36710 Fig. 76 Bath insert Medite 30, for Medite/Hacker, specimen slide holder for 30 specimen slides Order No. 14 0478 37263 Fig. 77 Leica CV5030 – Robotic Coverslipper...
- Page 74 8. Optional Accessories Bath insert Medite 20/40, for Medite/Hacker, specimen slide holder for 20 and 40 specimen slides Order No. 14 0478 39781 Fig. 78 O-ring for mountant bottle, 28 x 3 mm, pack of 5 Order No. 14 0253 45452 Fig.
-
Page 75: Warranty And Service
Leica Biosystems Nussloch GmbH guarantees that the contractual product delivered has been subjected to a comprehensive quality control procedure based on the Leica in-house testing standards, and that the product is fault- less and complies with all technical specifications and/or agreed character- istics warranted. - Page 76 Notes Operating Manual V 2.1 – 08/2008...
Need help?
Do you have a question about the CV5030 and is the answer not in the manual?
Questions and answers