Table of Contents
Advertisement
Assembly Instructions
For the following collections:
Sonoma, Monterey, Montego,
Broadway, Chelsea, Winslow
CALL US FIRST
1-877-PREPAC1
1-877-773-7221
Mon - Fri
7am - 4pm PST
10am - 7pm EST
•
For help with assembly
•
If you have received a damaged or defective part or
are missing hardware.
We will process replacement parts
less. Parts are shipped via
Before you call please:
1) Record the following information from the shipping
label on the outside of the box. You will need it for
warranty purposes:
• Ship To Name
• Sales Order Number
2) Note the
product model number.
3) Review the contents of your shipment to determine
what you are missing. This unit is shipped in 2
cartons. Make sure you have received both.
Online Option:
Fill out the Parts Order Form on our website.
Go to www.prepacmfg.com and choose
Parts Order from the Support menu
Required Tools
Screwdrivers
in 2 business days or
UPS Ground or mail.
Phillips Head
Flat Head
Hammer
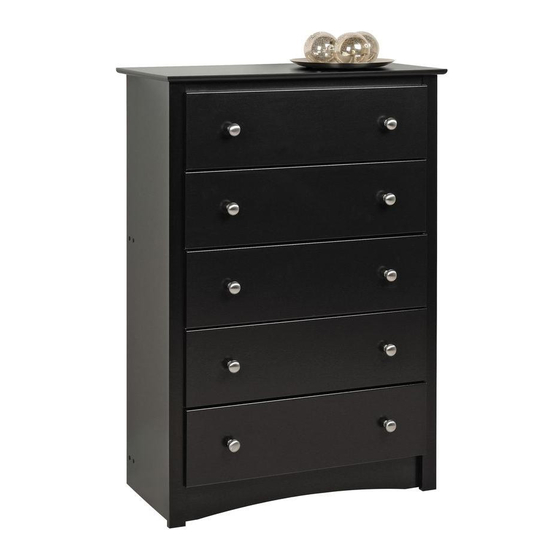
5-Drawer Chest
Model # DC-3345
This product is shipped in
1 of 2
Make sure you have both cartons.
Sometimes cartons shipped on the
same day get separated and are
delivered on different days.
Optional Tools
Using a power screwdriver
will speed up assembly.
Caution
Do not over tighten any screw.
The last few turns of each screw
should be done very slowly or by hand.
2 cartons
+
2 of 2
Depending on collection, the
style of your product may vary
from this picture.
Prepac Manufacturing Ltd.
6705 Dennett Place
Delta, BC V4G 1N4
LB-0594-R
2007-02-16
Advertisement
Table of Contents

Related Manuals for Prepac DC-3345


Summary of Contents for Prepac DC-3345
- Page 1 5-Drawer Chest Model # DC-3345 Assembly Instructions This product is shipped in For the following collections: 2 cartons Sonoma, Monterey, Montego, Broadway, Chelsea, Winslow 1 of 2 2 of 2 Make sure you have both cartons. Sometimes cartons shipped on the same day get separated and are delivered on different days.
- Page 2 Hardware Identification Cabinet Hardware 15mm Zinc Cam Green Twister Dowel Screw Cover Caps 2" Confirmat Screws (12) (12) RM-0103 RM-0501 RM-0226 black RM-0001 RM-0523 maple RM-0008 white RM-0620 cherry ¾” Nail Levelling Feet T Spacer Drawer Slide Screw Plastic Dowels (30)* (20) (60)
- Page 3 Cabinet Parts Left Side (1) Profiled Top (1) Right Side (1) Plain Stabilizer (1) Decorative Stabilizer A (1) SL-0472 maple TP-0472 maple SR-0472 maple ST-4712 maple KR-0472 maple SL-0412 black TP-0412 black SR-0412 black ST-4112 black KR-0412 black SL-0402 white TP-0402 white SR-0402 white ST-4012 white...
- Page 4 STEP 1 Estimated Time: 15 - 25 minutes Attach T-spacers to left and right cabinet sides using drawer slide screws Then, attach metal cabinet slides to T-spacers using drawer slide screws Front Drawer Slide Screw Left Right Cabinet Cabinet Side Side T-spacer &...
- Page 5 STEP 2 Estimated Time: 1 minute Insert cams into holes on the top of each side. Make sure arrow on cam faces top STEP 3 Estimated Time: 2 minutes Screw green twister dowels into the underside of the top Green Twister Dowel Page 5 of 16...
- Page 6 STEP 4 Estimated Time: 10 minutes Attach all 3 stabilizers to left and right sides using Confirmat screws. Insert screw cover caps to finish. Decorative stabilizers C5 & C6 are interchangeable. Please choose the style that you prefer and attach it to the front. FRONT Right Side Confirmat Screws &...
- Page 7 STEP 5 Estimated Time: 2 minutes Attach top to sides and lock cams using a flat head screwdriver Locked Unlocked Turn 210° STEP 6 Estimated Time: 3 minutes Hammer plastic dowels halfway into side and top moldings Page 7 of 16...
- Page 8 STEP 7 Estimated Time: 3 minutes Attach top & side moldings. Using your hands, apply even pressure to moldings and press firmly Do not use a hammer It may damage the molding Page 8 of 16...
- Page 9 STEP 8 Estimated Time: 4 minutes Carefully turn chest over and attach backer and levelling feet NOTE: Do not stand unit up without the backer Nail backer as indicated. You may have more nails than are necessary fastened Space evenly from edge Position nails in the center of the board...
- Page 10 Drawer Parts Identification Drawer Front (5) Left Drawer Side (5) Drawer Bottom (5) Drawer Back (5) Right Drawer Side (5) DF-0476 maple DS-0412-L DB-0415 DK-0415 DS-0412-R DF-0416 black Plywood unfinished unfinished Plywood DF-0406 white DF-0496 cherry Page 10 of 16...
- Page 11 STEP 9 Estimated Time: 5 minutes PER DRAWER Insert cams into drawer sides Left Drawer Side Right Drawer Side Make sure arrow faces toward hole for twister dowel Screw green twister dowels into drawer fronts Page 11 of 16...
- Page 12 Attach drawer sides to drawer back with 1½” Hi Lo screws 1½” Hi Lo Screws Attach drawer front and tighten cams using a flat head screwdriver Right Drawer Side Left Drawer Side Locked Locked Unlocked Unlocked Turn 210° Turn 210° Page 12 of 16...
- Page 13 Turn drawer upside down and slide drawer bottom into grooves Secure the drawer bottom to the drawer back with nails Use 4 nails per drawer Page 13 of 16...
- Page 14 Attach drawer slides to left and right drawer sides using drawer slide screws Right Drawer Side Drawer Slide Screws Left Drawer Side Attach knobs with machine screws Machine Screw Page 14 of 16...
- Page 15 STEP 10 Estimated Time: 2 minutes Insert drawers Cabinet Drawer Note: When drawers are installed correctly, you will not be able to remove them without first lifting up the drawer front. Page 15 of 16...
- Page 16 STEP 11 Attaching and Using the Safety Strap We strongly recommend using a safety strap on all furniture, especially if small children have access Wall Secure product to wall using the Safety Strap and a screw suitable for your wall (Not Use screw suitable for supplied)* your wall (not supplied)*...
Need help?
Do you have a question about the DC-3345 and is the answer not in the manual?
Questions and answers