Plustek ePhoto Z300 User Manual
Hide thumbs
Also See for ePhoto Z300:
- Quick start manual (2 pages) ,
- Quick installation manual (2 pages) ,
- Quick start manual (2 pages)
Table of Contents
Advertisement
Advertisement
Table of Contents

Related Manuals for Plustek ePhoto Z300


Summary of Contents for Plustek ePhoto Z300
- Page 1 Z300 Installation Usage & Maintenance...
- Page 2 Trademarks © 2016 Plustek Inc. All rights are reserved. No portion of this document may be reproduced without permission. All trademarks and brand names mentioned in this publication are property of their respective owners. Liability While all efforts have been made to ensure the accuracy of all contents in this...
-
Page 3: Table Of Contents
Table of Contents INTRODUCTION............................1 .........................1 OW TO UIDE ..........................1 OTE ABOUT CONS ..........................2 AFETY RECAUTIONS ..........................3 YSTEM EQUIREMENTS ............................4 ONTENTS ..........................5 CANNER VERVIEW LED I ............................6 NDICATOR ............................6 OWER CHAPTER I. INSTALLING THE SCANNER ..................7 ....................7 NSTALLING AND ETTING UP THE CANNER Windows Installation ..........................8 Mac OS X Installation ........................9... -
Page 4: Introduction
Introduction Welcome to the world of Plustek scanners – the ultimate in computer imaging. Your new scanner will improve the professionalism of your day-to-day computing tasks by allowing you to input images into your computer system. Like all of our products, your new scanner is thoroughly tested and backed by our reputation for unsurpassed dependability and customer satisfaction. -
Page 5: Safety Precautions
Information: Optional tips for your reference. Information Safety Precautions Before using this device, please read the following important information to eliminate or reduce any possibility of causing damage and personal injury. Usage, the product is for indoor use in dry locations. Moisture condensation may occur inside this device and cause malfunction at these conditions: •... -
Page 6: System Requirements
System Requirements Windows 2 GHz CPU or above 2 GB RAM (4 GB RAM recommended) 10 GB Free Hard Disk Space CD/DVD Drive or Internet Connection USB Port Microsoft Windows 7 / 8 / 10 (Specifications are subject to change without notification, for more information please check our official website.) Macintosh 2 GHz CPU or above (INTEL based CPU, NO PowerPC) -
Page 7: Box Contents
3. USB Cable 4. Power Adapter 5. Quick Guide 6. Plustek Setup / Application CD-ROM 7. Cleansing Cloth Save the box and packing materials in case you need to transport this scanner in the future. Box contents may change at any time without prior notice. -
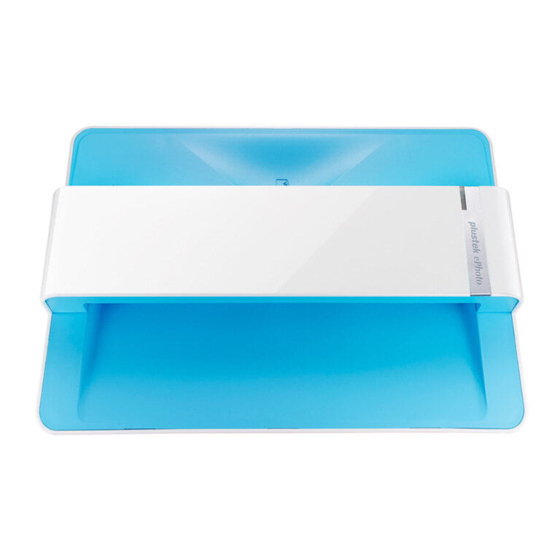
Page 8: Scanner Overview
Scanner Overview Calibration Alignment Mark Always align the edges of the calibration sheet to both calibration alignment marks. Maximum Scan Area Mark Please place the edges of your photo / document between both maximum scan area marks. Page Feed Slot Feed the photo / document into the scanner from this slot. -
Page 9: Led Indicator
The LED indicates different scanner status. Light Status Orange The scanner is turned on. The Plustek ePhoto is activated. The scanner is Blue ready to scan. Blinking Blue The scanner is scanning. The scanner is off, either because the power is not turned on, or because the AC adapter is not properly plugged into an AC power outlet. -
Page 10: Chapter I. Installing The Scanner
Chapter I. Installing the Scanner Before installing your scanner, please verify that you have all of the proper components. A list of the package contents is provided in the Box Contents section of this guide. Installing and Setting up the Scanner Please follow the step-by-step procedures described below to install the USB scanner. -
Page 11: Windows Installation
Windows Installation 1. Insert the Setup/Application CD-ROM, included with your scanner, into your CD-ROM drive. 2. Click [Run install.exe] in the [AutoPlay] window. If the installation does not start automatically, browse your CD-ROM drive and manually run the [install.exe] file. Click on the [Yes] button if the [User Account Control] dialog pops up. -
Page 12: Mac Os X Installation
Mac OS X Installation 1. Insert the Setup/Application CD-ROM, included with your scanner, into your CD-ROM drive and a [Plustek Scanner] CD icon will show on the desktop of your Mac OS X. Double-click on the CD icon, and a window will pop up displaying the file folder. - Page 13 For Windows 8 / 10, please follow the on-screen installation instructions after connecting the scanner. Attention For Windows OS: If you are facing difficulty in installing the scanner driver, please try manually installing the software. 1. Please open [Start] > [Control Panel] > [System] > [Hardware] > [Device Manager].
-
Page 14: Chapter Ii. Operating The Scanner
The LED will turn on to indicate that the device is powered on. Step 2. Launch Plustek ePhoto Launch Plustek ePhoto using the Plustek ePhoto shortcut on your Desktop. Adjust the scan settings. Please refer to the Plustek ePhoto on-line help for more information... -
Page 15: Step 3. Scan
. Please place the edges of your photo / document between both maximum scan area marks. The scanning starts immediately. The scanned images are displayed in Plustek ePhoto, and you may perform the image editing tasks. To scan more photos or documents, please wait until the blue light LED stop blinking, and then place another photo / document into the scanner to continue the scanning. -
Page 16: Chapter Iii. Care And Maintenance
Chapter III. Care and Maintenance Your scanner is designed to be maintenance-free. However, constant care and maintenance can keep your scanner working smoothly. Cleaning the Scanner Paper powder, dust, ink and toner from paper being scanned may make the inner scanner dirty, which leads to poor image quality or document-feeding errors. - Page 17 Clean Feed Roller: Wipe the Feed Roller from side to side and then rotate it. Repeat this until its entire surface is cleaned. Clean Scanner Glass: Do not spray cleaner directly onto the scanner glass. Excess liquid residue may fog or damage the scanner. Attention 3.
-
Page 18: Calibrating The Scanner
Calibrating the Scanner Calibrate the scanner if colors appear in areas that should be white, or colors of the scanned image and the original vary a lot. This allows you to adjust and compensate for variations that can occur in the optical component over time by its nature. The following describes how to calibrate the scanner: 1. -
Page 19: Usage & Maintenance Tips
Usage & Maintenance Tips To keep your scanner working smoothly, take a moment to review the following maintenance tips. Information Avoid using the scanner in a dusty environment. When it is not in use, keep the scanner covered. Dust particles and other foreign objects may damage the unit. Do not attempt to disassemble the scanner. -
Page 20: Appendix A: Specifications
Appendix A: Specifications ePhoto Z300 Image Sensor Color CCD Light Source Optical Resolution 300 dpi Color: Input 48-bit,Output 24-bit Scan Modes Grayscale: Input 16-bit,Output 8-bit 4" x 6" Photo: Approx. 2 sec. Scanning Speed Document (A4): Approx. 5 sec. Min.: 1" x 1"... -
Page 21: Appendix B: Customer Service And Warranty
If you encounter problems with your scanner, please review the installation instructions and troubleshooting suggestions contained in this guide. Visit our website www.plustek.com for more customer service information. For further assistance call our customer support phone number listed on the website. One of our... -
Page 22: Statement Of Limited Warranty
If you want to maintain and clearance the product, please ask local distributors and suppliers to get the right information of nearest stores. Statement of Limited Warranty This Statement of Limited Warranty applies only to the options you originally purchase for your use, and not for resale, from an authorized reseller. -
Page 23: Fcc Radio Frequency Statement
Loss of, or damage to, your records or data; or Economic consequential damages (including lost profits or savings) or incidental damages, even if we are informed of their possibility. Some jurisdictions do not allow the exclusion or limitations of incidental or consequential damages, so the above limitation or exclusion may not apply to you.
Need help?
Do you have a question about the ePhoto Z300 and is the answer not in the manual?
Questions and answers
why can i only load the Plustek z300 application when i do so "as administrator?"
How do i save photos that have been scanned
To save photos scanned with the Plustek ePhoto Z300, follow these steps:
1. Place Photo – Position your photo face down in the scanner, aligning it with the center mark.
2. Align Edges – Ensure the edges are within the maximum scan area to start scanning automatically.
3. Edit Images – After scanning, view and edit your images in the Plustek ePhoto software.
4. Select Images – Click on the images you want to save.
5. Save Images – Click the 'Save' button. The images will be saved in the folder set in Preferences.
By following these steps, you can easily save your scanned photos to your computer.
This answer is automatically generated
I created a "new" album upper left, which I did not want. How can I delete that album.
My ePhoto z300 was working properly last week, and now I only have an orange light, not blue. I have checked all connections, tried a different power outlet. The picture will not advance into the scanner.