Table of Contents
Advertisement
Advertisement
Table of Contents

Related Manuals for Plustek OpticBook 3600


Summary of Contents for Plustek OpticBook 3600
- Page 1 Installation Usage & Maintenance...
- Page 2 © 2009. All rights are reserved. No portion of this document may be reproduced without permission. All trademarks and brand names mentioned in this publication are property of their respective owners. While all efforts have been made to ensure the accuracy of all contents in this manual, we assume no liability for errors or omissions or by statements of any kind in this manual, whether such errors are omissions or statements resulting from negligence, accidents, or any other cause.
-
Page 3: Table Of Contents
Hardware Requirements ... 6 Installing and Setting up the Scanner ... 7 Step 1. Unlock your scanner ... 7 Step 2. Connecting the scanner to Your Computer ... 7 Step 3. Installing the software ... 8 Step 4. Testing the Scanner ... 10 Software Setup Troubleshooting ... -
Page 4: Introduction
Like all of our products, your new scanner is thoroughly tested and backed by our reputation for unsurpassed dependability and customer satisfaction. See the last page of this user’s guide for a complete list of Plustek offices worldwide. As a registered customer, you will receive customer support, new product information and software upgrades. -
Page 5: A Note About Icons
Seal this device in a plastic bag for it to adapt to room conditions. ii. Wait for 1-2 hours before removing this device from the bag. 2. Do use the power adapter and USB cable provided with the scanner. Use of other power adapter and cables may lead to malfunction. -
Page 6: Minimum System Requirements
6. Do not attempt to disassemble the scanner. There is danger of an electrical shock and opening your scanner will void your warranty. 7. Be sure not to bump or knock the scanner glass as it is fragile and could break. Minimum System Requirements PC with Intel Pentium®... -
Page 7: Box Contents
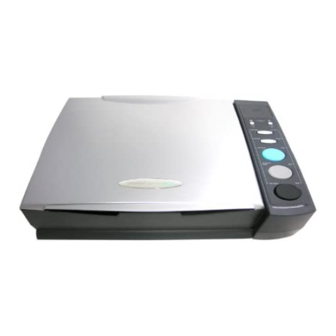
7. Reflective Document Mat The Scanner’s Features 1. USB Port: It connects the scanner to a USB port on your computer by the included USB cable. 2. Power Receptor: It connects the scanner to a standard AC power outlet by the included power adapter. - Page 8 LED indicates the current function. 6. Book function buttons: When you press Book function button, the triangle LED below is illuminated and the buttons on the scanner panel perform functions (Book Pilot, Preview, Color Scan, Grayscale Scan and Text Scan) on this side.
-
Page 9: Chapter I. Installing The Scanner
Chapter I. Installing the Scanner Before installing your scanner, please verify that you have all of the proper components. A list of the package contents is provided in the Box Contents section of this guide. Software Installation Requirements Your scanner comes with the image-editing software (NewSoft Presto! ImageFolio), OCR software (FineReader), document management software (Presto! PageManager), the scanner’s driver and the Action Express software. -
Page 10: Installing And Setting Up The Scanner
Installing and Setting up the Scanner Please follow the step-by-step procedures described below to install the Plustek scanner. Before you connect your scanner with the computer, ensure to unlock your scanner first. 1. Slide the locking switch on the scanner’s underside backwards and hold it unreleased. -
Page 11: Step 3. Installing The Software
4. Plug the rectangular end of the USB cable to an available USB port on the back of your computer. 5. If you plan to connect your scanner to a USB hub connected to the USB port in your computer. Next, connect the scanner to the USB hub. 1. Switch the scanner power on. - Page 12 6. When the system completes the installation, click on the Finish button. 7. Follow the on-screen instructions to install all software that your new USB scanner requires. 8. After the software is installed, close all open applications and click on the Finish button to restart your computer.
-
Page 13: Step 4. Testing The Scanner
The scanner is plugged in and has power. You are using the USB cable supplied with the scanner. The square end of the USB cable is plugged into the rear of the scanner. The rectangular end of the USB cable is plugged into the back of your... -
Page 14: Installing Additional Software
CD-ROM drive). Carefully follow all the installation instructions presented in the Setup Wizard. Reboot your computer when prompted, and plug the USB cable back into the scanner while your computer is still turned on. Installing Additional Software Your scanner is TWAIN compliant and functions with virtually all available TWAIN compatible software. -
Page 15: Chapter Ii. Usage And Maintenance
2. By using the Action Express program that is automatically installed as your scanner software. Your scanner needs to be driven by some type of software program. Since all documents or images (whether text or pictures) that are acquired from the scanner are treated by your computer as images, most scanning will probably be done from an image-editing program where you can view, edit, save and output the scanned images. - Page 16 1. Open the document cover and place your book on the scanner glass. Align the book with the Gently close the Cover. When you’re scanning a thick book, gently press the book binding to guarantee the minimum space between the to-be-scanned page and Information the scanner glass.
-
Page 17: Scanner Buttons (Paper Function)
2. Pointing to Program | (your scanner model name) from Windows Start menu, and selecting Action Express Help. The users may turn the Custom button on the scanner panel into a multifunctional assistant by defining it as other function that is included in the Action Express. Once... -
Page 18: Status Indicator
4. Choose a desired function from the drop-down list of Select the button function. 5. Click OK to apply the setting. 6. Once you press the [Custom] button on the scanner, the defined function will be launched. • The [Custom] button can function with the default setting “Scan”, even though you didn’t define the function by using Button... -
Page 19: Scanner Lock
Always unlock is for scanning on a surface that is not firm, unstable or too soft. Furthermore, if you place your scanner on a long-term position, you can also keep your scanner lock in this status. If you use this lock status, ensure to relock the scanner before any movement to prevent damage of your scanner. -
Page 20: Usage & Maintenance Tips
Then, wipe the glass thoroughly with the cloth. DO NOT SPRAY CLEANER DIRECTLY ONTO THE SCANNER GLASS. Excess liquid residue may fog or damage the scanner. Your scanner operates best in temperatures between 10° C and 40° C (50° F to 104° F). -
Page 21: Appendix A: Specifications
Specifications Plustek OpticBook 3600 Physical 453 x 285 x 105 mm (17.83” x 11.22” x 4.13”) dimensions Weight 3.96 Kg (8.7Lbs) Operating 10° C to 40° C (50° F to 104° F) Temperature Maximum 216 mm x 297 mm (8.5” x 11.69”) Scan Area Minimum 12.7 x 12.7 mm (0.5”... -
Page 22: Appendix B: Customer Service And Warranty
Customer Service and Warranty If you encounter problems with your scanner, please review the installation instructions and troubleshooting suggestions contained in this guide. For further assistance call our customer support phone number listed on the last page of this guide. One of our representatives will be happy to assist you from Monday... -
Page 23: Fcc Radio Frequency Statement
environment, program modification, another machine or non-vendor modification for this product. If this product is an optional feature, this Limited Warranty applies only when the feature is used in a machine for which it was designed. If you have any questions about your Limited Warranty, contact the approved retailer from whom you bought the product or the manufacturer. - Page 24 Connect the equipment to an outlet on a circuit different from that which the receiver is connected. Shielded interconnect cables and shielded power cord which are supplied with this equipment must be employed with this equipment to ensure compliance with the pertinent RF emission limits governing this device. Consult the dealer or an experienced radio/TV technician for help if the conditions persist.
-
Page 25: Contacting Plustek
Contacting Plustek Europe: Plustek Technology GmbH Gutenbergring 38 22848 Norderstedt Germany Tel.: +49 (0) 40 523 03 130 Fax: +49 (0) 40 523 03 500 E-mail: support@plustek.de Website: www.plustek.de North America: Plustek Technology Inc. 17517 Fabrica Way, Suit B Cerritos, CA 90703 U.S.A.
Need help?
Do you have a question about the OpticBook 3600 and is the answer not in the manual?
Questions and answers