Table of Contents
Advertisement
Quick Links
Advertisement
Table of Contents

Related Manuals for 909 909210TS


Summary of Contents for 909 909210TS
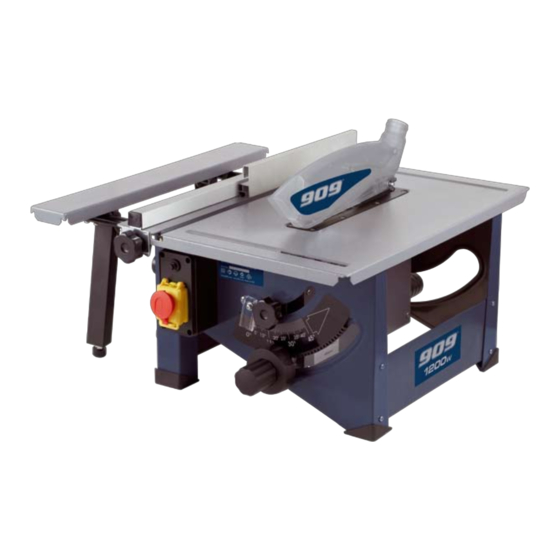
- Page 1 INSTRUCTION MANUAL 909210TS 1200W 210mm (8" ) Ta bl e saW...
-
Page 2: Table Of Contents
CONTeNTs Description of symbols Warranty Power Tools Specifications For full details please visit us at www.909.com General safety instructions Safety rules for laser lights Additional safety rules for mitre saws Accessories Know your product Unpacking Transportation Bench mounting Release knob... -
Page 3: Specifications
Conforms to relevant standards special care to heed the Cautions and Warnings. for electromagnetic compatibility. Your 909 power tool has many features that will make your job faster and easier. Safety, performance, and For safe operation read instruction manual. dependability have been given top priority in the... - Page 4 General safety rules f) To reduce the risk of electric shock, the manufacturer recommends the use of a residual current device WARNING. Read all safety warnings and all instructions. with a rated residual current of 30mA or less at Failure to follow the warnings and instructions may result in all times.
-
Page 5: Accessories
4) Power tool use and care i) Children should be supervised to ensure that they do not play with the appliance. a) Do not force the power tool. Use the correct power 5) Service tool for your application. The correct power tool will do the job better and safer at the rate for which it was a) Have your power tool serviced by a qualified repair designed. -
Page 6: Additional Safety Rules For Saws
• Do not stop the saw blade by using lateral pressure on • If the cordset is damaged take the saw to an authorised the side of the saw blade. service centre for repair or replacement • Do not lock the moveable guard in the open position and •... - Page 7 • Do not place your hands in awkward positions where one • The machine may be used in closed room only in or both may slip suddenly and touch the saw blade. conjunction with a suitable vacuum extraction system. • When working with a long work piece, use an additional •...
- Page 8 WARNING! For your own safety read instruction manual before operating mitre saw. Wear eye protection. Keep The 909210TS Table Saw is supplied with the following hands out of path of saw blade. Do not operate saw without accessories as standard: guards in place.
-
Page 9: Know Your Product
Know your product Before using the table saw, familiarise yourself with all the operating features and safety requirements. 1. Table top 11. Blade bevel adjustment knob 2. Switch 12. Blade bevel locking knob 3. Riving knife 13. Table extension legs 4. -
Page 10: Unpacking
Due to modern mass production techniques, it is unlikely Always pull out the mains power plug before that your 909 Power Tool is faulty or that a part is missing. carrying out any maintenance, conversion or assembly work If you find anything wrong, do not operate the tool until the on the table saw. -
Page 11: Adjusting The Fence
Note. A vacuum extraction system such as a household vacuum cleaner can be connected to the port at the rear of the blade guard (9). 6. To remove the saw blade guard, proceed in reverse order. CAUTION. The saw blade guard (8) must be in position at all times to prevent contact with the blade. -
Page 12: Using The Mitre Gauge
Using the mitre gauge Using the fence on the left side 1. You can use the scale on the table top to set the fence 1. Slide the mitre gauge (7) so that the work piece is sawn to the required size, this is into the slot of the table only a guide. -
Page 13: Adjusting The Riving Knife
Checking the correct 90° blade angle Adjusting the riving knife CAUTION. The blade should be set at 90°. Switch off the machine and remove the mains power plug before carrying out any adjustments, 1. Wind the blade to its maximum height. maintenance work or blade changes. -
Page 14: Switching On And Off
Switching on and off Adjusting the cutting depth 1. To Turn the unit ON, lift the 1. Set the saw blade to the red stop knob up, and lift required cutting depth by the yellow cover. turning the blade depth adjustment wheel (10) 2. -
Page 15: Bevel Cut
Making longitudinal cuts Cutting a narrow work piece IMPORTANT. After each new adjustment it is advisable to Longitudinal cuts in a work piece smaller than 125mm (5”) carry out a trial cut in order to check the set dimensions. in width must always be made with the help of the push stick. -
Page 16: Maintenance
3. Press the work piece firmly against the mitre gauge. 4. Use a small 8mm open-ended spanner to 4. Switch ON the saw. hold the spindle fast. 5. Push the mitre gauge and the work piece toward the 5. Use a second 19mm saw blade in order to make the cut. -
Page 17: Power Cord Maintenance
Cleaning CAUTION. Take note of the running direction. The cutting edge of the teeth has to point in the running direction, i.e. 1. Keep the tool’s air vents unclogged and clean at all times. forward (see the arrow on the saw blade and guard). 2.
Need help?
Do you have a question about the 909210TS and is the answer not in the manual?
Questions and answers