Advertisement
Quick Links
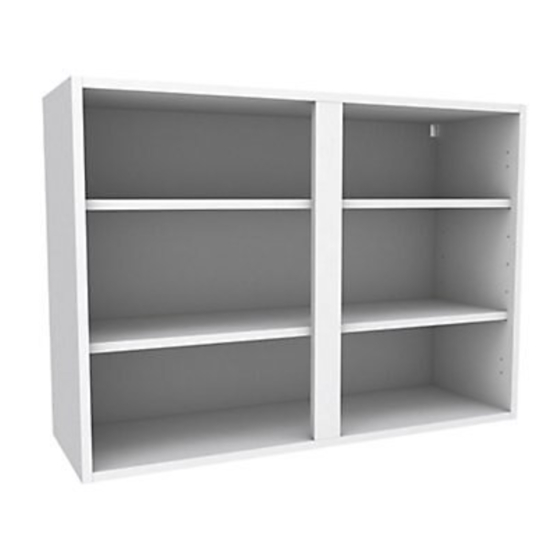
Assembly Guide
Panels
3
6
2
8
6
4
1 x
RH Side
1
1 x
LH Side
2
3
1 x
Top
1 x
Base
4
1 x
Back
5
2 x
6
Shelves for standard 3 x
7
1 x
Rail
1 x
8
Centre Muntin
Before you Start ...
WArninG: Installation should be performed by a competent person only. This product could
be dangerous if incorrectly installed. All assembly fittings except legs and shelf pegs have
been pre-inserted. If any are missing or there is a problem with the panels, please call the
Manufacturers' Helpline on 01769 575500, and their team will get things sorted.
Video assembly guides can be viewed at www.mycabinetguide.co.uk
Cleaning – Use mild soap and water only. Do not use abrasive cleaners.
Hardware
12 x
18 x
5
2 x
6 x
1
4 x
14 x
22 x
2 x
7
2 x
1 x
6
for Tall
2 x
Hinges supplied separately
Please use scissors to open the
bag of fittings and then empty
the contents into a bowl, so
that they do not get lost!
b
Standard
b
Tall
bC
20mm
H
50 mm
K
25mm
Standard
F
F
Tall
d
P
AA
bb
800 -1000mm
Standard and Tall
WALL
Cabinets
minimum Tools required
Cross Head Screwdriver
Hammer
Drill
3mm
Drill Bit
Level
5mm
Drill Bit
Advertisement

Related Manuals for B&Q WALL


Summary of Contents for B&Q WALL
- Page 1 800 -1000mm Standard and Tall WALL Assembly Guide Cabinets Panels Hardware minimum Tools required Cross Head Screwdriver 12 x Standard 18 x Tall 20mm Hammer 50 mm 25mm 14 x Standard 22 x Tall Drill RH Side LH Side Drill Bit...
- Page 2 (refer to table below), in order to achieve this. A (mm) b (mm) 800mm Wall 1000mm Wall Shelf Fitting Fully insert the shelf pegs , at required position, (the back of the plastic collar must finish flush with the face of the side panel).
- Page 3 Fitting to wall Snap here Snap here stage 1: Hold Wall plate between hands and snap at centre to produce one left hand and one right hand wall plate Approx 20mm stage 2: TOP OF WALL CABINET Position and secure wall plates to the wall with suitable fixings.
- Page 4 Carefully mark holes for fixing the holder, in the pushed onto the positions shown, and using a 3mm drill bit, drill magnetic catch, approximately 5mm to close it. Then, lH hung wall door shown adjustment deep. to open the door, screw simply push the...
Need help?
Do you have a question about the WALL and is the answer not in the manual?
Questions and answers