Advertisement
Quick Links
Fitted
bedroom
Range
Assembly Guide
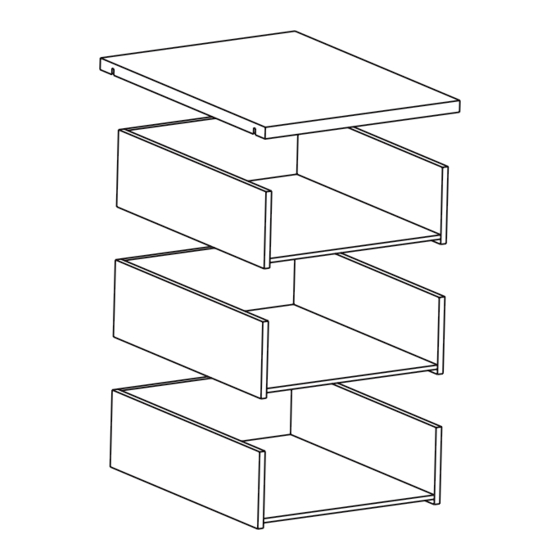
Panels
Please build your single
Wardrobe before following
this guide
1
4
2
5
4
2
5
4
2
5
1 x
1
Fixed Shelf
3 x
2
LH Drawer Side
3 x
3
RH Drawer Side
3 x
4
Drawer Back
3 x
5
Drawer Base
PleAse keep all fittings away from young children
Before you Start ...
Build the unit close to where it will be used. Handle all items carefully. Always lay panels
down on a flat smooth surface. Complete each stage before moving onto the next one.
Follow these guidelines and take your time.
If any parts are missing, please call the Helpline on 01769 575500 and our team will get
things sorted.
COmbi PACk
SINGLE
WARdRObe
Handles, Handle screws, drawers & doors are
supplied independently and not covered by this guide.
Hardware
12 x
C
3 x
e
6 x
G
12 x
X
3
1 x
Z
3 x
Ae
3
3 x
AF
3 x
AG
3
3 x
AH
soft Close
12 x
C
3 x
AP
3 x
AR
6 x
As
Please use scissors to open the
bag of fittings and then empty
the contents into a bowl so
that they do not get lost!
minimum Tools required
Cross Head Screwdriver
12 x
d
10mm
4 x
H
Flat Head Screwdriver
6 x
O
4 x
P
Bradawl
Hammer
Drill
Scissors
18 x
d
12mm
Tape Measure
Level
2.5mm
5mm
Drill Bit
Drill Bit
Advertisement

Related Manuals for B&Q CSS1354


Summary of Contents for B&Q CSS1354
- Page 1 Fitted COmbi PACk bedroom SINGLE Range WARdRObe Assembly Guide Handles, Handle screws, drawers & doors are supplied independently and not covered by this guide. Panels Hardware minimum Tools required Please build your single Cross Head Screwdriver 12 x Wardrobe before following 12 x 10mm this guide...
- Page 2 Gently ‘push’ down until the panel ‘clicks’ into place. Fitting of Door Stops Now fit the doorstops , as shown. 1371mm Using 2 people, turn the unit around. 1371mm Now fix the back to the fixed shelf as shown. CSS1354 02/10*...
- Page 3 Construction of Drawers Before fitting the Cam Legs to your Drawer Fronts you will have to drill the holes required for the Handles you have purchased separately. Drill through the appropriate pilot hole(s) for the Handles you have purchased. HANDLE FIXING INSTRUCTIONS IMPORTANT NOTE: From the REAR FACE of the Drawers drill through the holes using a 2.5mm diameter drill.
- Page 4 B&Q plc, Chandlers Ford, Hampshire, SO53 3YX. product may be recycled through your local recycling centre. When you want to dispose of CSS1354 02/10* Visit us at www.diy.com the product itself, please consider donating it to a local charitable organisation, otherwise...
Need help?
Do you have a question about the CSS1354 and is the answer not in the manual?
Questions and answers