Table of Contents
Advertisement
Quick Links
Advertisement
Table of Contents
Troubleshooting

Related Manuals for ThinkPad E470


Summary of Contents for ThinkPad E470
- Page 1 E470, E470c, and E475 User Guide...
- Page 2 Note: Before using this information and the product it supports, be sure to read and understand the following: • Safety, Warranty, and Setup Guide • “Important safety information” on page v The latest Safety, Warranty, and Setup Guide and the Regulatory Notice are available on the Lenovo Support Web site at: http://www.lenovo.com/support Second Edition (November 2016)
-
Page 3: Table Of Contents
Using an external display ..Chapter 1. Product overview ..1 Finding ThinkPad options ..Computer controls, connectors, and indicators . . . - Page 4 Bluetooth problem ... Export classification notice ..ThinkPad pointing device problems..Electronic emission notices..
- Page 5 Appendix D. ENERGY STAR model Appendix F. Trademarks..information ... . . Appendix E. Notices ..©...
- Page 6 E470, E470c, and E475 User Guide...
-
Page 7: Important Safety Information
Important safety information Note: Read the important safety information first. Read this first This information can help you safely use your notebook computer. Follow and retain all information included with your computer. The information in this document does not alter the terms of your purchase agreement or the Limited Warranty. - Page 8 • Before putting your computer in a carrying case, make sure that it is off, in sleep mode, or in hibernation mode. Do not put a computer in a carrying case while it is turned on. E470, E470c, and E475 User Guide...
-
Page 9: Conditions That Require Immediate Action
Conditions that require immediate action Products can become damaged due to misuse or neglect. Some product damage is serious enough that the product should not be used again until it has been inspected and, if necessary, repaired by an authorized servicer. As with any electronic device, pay close attention to the product when it is turned on. -
Page 10: Power Cords And Power Adapters
(such as deformed plastic) at the ac input pins or anywhere on the power adapter. Do not use any power cords where the electrical contacts on either end show signs of corrosion or overheating or where the power cord appears to have been damaged in any way. viii E470, E470c, and E475 User Guide... -
Page 11: Extension Cords And Related Devices
To prevent possible overheating, do not cover the power adapter with clothing or other objects when the power adapter is plugged into an electrical outlet. Extension cords and related devices Ensure that extension cords, surge protectors, uninterruptible power supplies, and power strips that you use are rated to handle the electrical requirements of the product. -
Page 12: External Devices
30 to 50% of capacity. We recommend that the batteries be charged about once per year to prevent overdischarge. Do not put the battery in trash that is disposed of in landfills. When disposing of the battery, comply with local ordinances or regulations. E470, E470c, and E475 User Guide... -
Page 13: Notice For Built-In Rechargeable Battery
Notice for built-in rechargeable battery DANGER Do not attempt to replace the built-in rechargeable battery. Replacement of the battery must be done by a Lenovo-authorized repair facility or technician. Only recharge the battery strictly according to instructions included in the product documentation. The Lenovo-authorized repair facilities or technicians recycle Lenovo batteries according to local laws and regulations. -
Page 14: Electrical Current Safety Information
1. Turn everything OFF. 1. Turn everything OFF. 2. First, attach all cables to devices. 2. First, remove power cords from outlets. 3. Attach signal cables to connectors. 3. Remove signal cables from connectors. E470, E470c, and E475 User Guide... -
Page 15: Liquid Crystal Display (Lcd) Notice
4. Attach power cords to outlets. 4. Remove all cables from devices. 5. Turn devices ON. The power cord must be disconnected from the wall outlet or receptacle before installing all other electrical cables connected to the computer. The power cord may be reconnected to the wall outlet or receptacle only after all other electrical cables have been connected to the computer. -
Page 16: Plastic Bag Notice
Some parts of your product may be made of glass. This glass could break if the product is dropped on a hard surface or receives a substantial impact. If glass breaks, do not touch or attempt to remove it. Stop using your product until the glass is replaced by trained service personnel. E470, E470c, and E475 User Guide... -
Page 17: Chapter 1. Product Overview
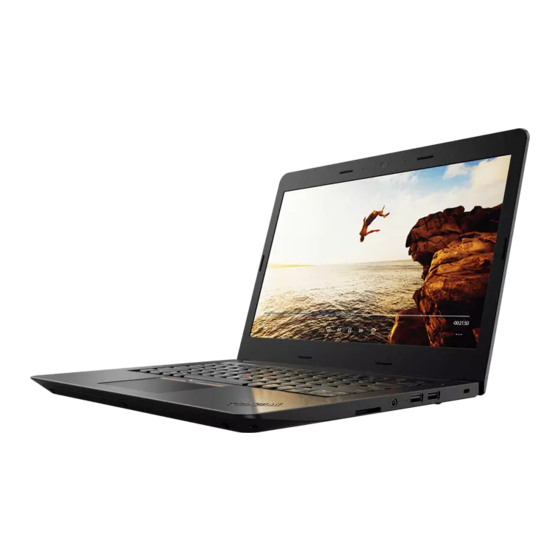
This section introduces hardware features of the computer. Front view Microphones Camera Power button Fingerprint reader (available on some models) ® ® ThinkPad trackpad TrackPoint buttons TrackPoint pointing stick Microphones The microphones capture sound and voice when used with a program capable of handling audio. Camera The camera enables you to take pictures or hold a video conference. -
Page 18: Left-Side View
® ThinkPad pointing device Trackpad TrackPoint buttons TrackPoint pointing stick Your computer is equipped with the Lenovo-unique ThinkPad pointing device. For more information, see “Using the ThinkPad pointing device” on page 16. Left-side view Power connector Ethernet connector HDMI connector Always On USB 3.0 connector... -
Page 19: Right-Side View
Always On USB 3.0 connector By default, the Always On USB 3.0 connector enables you to charge the USB-compatible devices in the following situations: • When your computer is on or in sleep mode • When your computer is off or in hibernation mode, but connected to ac power Attention: When you attach a USB cable to this connector, ensure that the USB mark is facing upward. -
Page 20: Rear View
Note: The hidden service partition is the reason why there is less free space than expected on your hard disk drive, hybrid drive, or solid-state drive. E470, E470c, and E475 User Guide... -
Page 21: Status Indicators
Wireless-LAN-card slot Your computer might have a wireless LAN card installed for you to establish wireless LAN connections. Built-in battery Use your computer with the battery power whenever ac power is unavailable. Memory slots You can increase the amount of memory in your computer by installing a memory module in the memory slot. -
Page 22: Important Product Information Labels
When this indicator is on, the camera is in use. System status indicators The indicator in the ThinkPad logo on the computer lid and the indicator in the power button show the system status of your computer. • Blinks for three times: The computer is initially connected to power. -
Page 23: Fcc Id And Ic Certification Number
The following illustration shows where to find the label that contains the machine type and model information of your computer. FCC ID and IC Certification number The FCC and IC Certification information is identified by a label on the computer as shown in the following illustration. -
Page 24: Labels For The Windows Operating Systems
• 2.5-inch form factor, 9.5-mm (0.37-inch) height hard disk drive • 2.5-inch form factor solid-state drive (available on some models) Display • Brightness control • Color display with Thin Film Transistor (TFT) technology • Display size: 355.6 mm (14 inches) E470, E470c, and E475 User Guide... -
Page 25: Computer Specifications
• Display resolution: 1366 x 768 pixels or 1920 x 1080 pixels Keyboard • Six-row keyboard • Function keys • ThinkPad pointing device (including the TrackPoint pointing device and trackpad) Connectors and slots • ac power connector • Audio connector •... -
Page 26: Operating Environment
2. If you do not find the program in the program list, search for the program in the search box. An introduction to Lenovo programs This topic provides a brief introduction to Lenovo programs. Depending on your computer model, some of the programs might not be available. E470, E470c, and E475 User Guide... - Page 27 The available programs are subject to change without notice. To learn more about the programs and other computing solutions offered by Lenovo, go to: http://www.lenovo.com/support Active Protection System™ This program protects your internal storage drive when the shock sensor inside your computer detects a condition that could damage the drive.
- Page 28 E470, E470c, and E475 User Guide...
-
Page 29: Chapter 2. Using Your Computer
Frequently asked questions This topic provides a few tips to help you optimize the use of your ThinkPad notebook computers. To ensure the best computer performance, go to the following Web site to find information such as aids for troubleshooting and answers to frequently asked questions: http://www.lenovo.com/support/faq... -
Page 30: Getting Help About The Windows Operating System
Start menu and click Get Started. Additionally, you can use the Cortana personal assistant to search for help, apps, files, settings, and so on. Using the special keys Your computer has several special keys to help you work more easily and effectively. E470, E470c, and E475 User Guide... - Page 31 Windows logo key Press the Windows logo key to open the Start menu. For information about using the Windows logo key with other keys, see the help information system of the Windows operating system. Fn key and function keys You can configure the Fn key and function keys in the Keyboard Properties window by doing the following: 1.
-
Page 32: Using The Thinkpad Pointing Device
This section provides information about using the ThinkPad pointing device. ThinkPad pointing device overview The ThinkPad pointing device enables you to perform all the functions of a traditional mouse, such as pointing, clicking, and scrolling. With the ThinkPad pointing device, you also can perform various touch gestures, such as rotating and zooming in or out. -
Page 33: Using The Trackpoint Pointing Device
Trackpad By default, both the TrackPoint pointing device and the trackpad are active with the touch gestures enabled. To change the settings, see “Customizing the ThinkPad pointing device” on page 20. Using the TrackPoint pointing device The TrackPoint pointing device enables you to perform all the functions of a traditional mouse, such as pointing, clicking, and scrolling. -
Page 34: Using The Trackpad
Then you can scroll through the document, Web site, or apps. Using the trackpad The entire trackpad surface is sensitive to finger touch and movement. You can use the trackpad to perform all the pointing, clicking, and scrolling functions of a traditional mouse. E470, E470c, and E475 User Guide... -
Page 35: Using The Trackpad Touch Gestures
The trackpad can be divided into two zones: Left-click zone (primary-click zone) Right-click zone (secondary-click zone) To use the trackpad, see the following instructions: • Point Slide one finger across the surface of the trackpad to move the pointer accordingly. •... -
Page 36: Customizing The Thinkpad Pointing Device
Customizing the ThinkPad pointing device You can customize the ThinkPad pointing device so you can use it more comfortably and efficiently. For example, you can choose to enable the TrackPoint pointing device, the trackpad, or both. You also can disable or enable the touch gestures. -
Page 37: Power Management
• Ensure that you use a cap with grooves as shown in the following illustration. • Depending on the model, your keyboard might look different from the illustration in this topic. Power management This section provides information about how to use ac power and battery power to achieve the best balance between performance and power management. -
Page 38: Managing The Battery Power
Spend more time unplugged with ThinkPad batteries. Mobility has revolutionized business by enabling you to take your work wherever you go. With ThinkPad batteries, you are able to work longer without being tied to an electrical outlet. Checking the battery status Move your pointer to the battery-status icon in the Windows notification area to check the battery status. -
Page 39: Power-Saving Modes
1. Go to Control Panel, and then change the view of Control Panel from Category to Large icons or Small icons. 2. Click Power Options. 3. Follow the instructions on the screen. For more information, see the Windows help information system. Power-saving modes There are several modes that you can use at any time to conserve power. -
Page 40: Wireless Connections
• Transferring data between hand-held devices and a personal computer • Remotely controlling and communicating with devices such as mobile phones Depending on the model, your computer might support the Bluetooth feature. To transfer data through the Bluetooth feature, do the following: E470, E470c, and E475 User Guide... -
Page 41: Using The Airplane Mode
3. Slide the control for Airplane mode to turn it on or off. Using the NVIDIA Optimus Graphics feature Some ThinkPad notebook computers support NVIDIA Optimus Graphics. The running program and power plan settings that you use on your computer have specific graphics quality demand. -
Page 42: Using The Camera
To install a media card, do the following: 1. Locate the appropriate type of slot for your card. See “Right-side view” on page 3. 2. Ensure that the metal contacts are facing down and toward the card slot. E470, E470c, and E475 User Guide... -
Page 43: Using An External Display
3. Press the card firmly into the card slot. If the plug-and-play feature is not enabled, do the following: 1. Go to Control Panel. 2. View Control Panel by Category. Click Hardware and Sound. 3. Click Device Manager. If you are prompted for an administrator password or confirmation, type the password or provide confirmation. - Page 44 3. Change display settings as you want. Note: If you set a higher resolution for the computer display than the external display, only part of the screen can be shown on the external display. E470, E470c, and E475 User Guide...
-
Page 45: Finding Thinkpad Options
Finding ThinkPad options If you want to expand the capabilities of your computer, Lenovo has a number of hardware accessories and upgrades to meet your needs. Options include memory modules, storage devices, network cards, port replicators or docking stations, batteries, power adapters, keyboards, mice, and more. - Page 46 E470, E470c, and E475 User Guide...
-
Page 47: Chapter 3. Accessibility, Ergonomic, And Maintenance Information
Chapter 3. Accessibility, ergonomic, and maintenance information This chapter provides information about accessibility, ergonomic, and cleaning and maintenance. Accessibility information Lenovo is committed to providing users who have hearing, vision, and mobility limitations with greater access to information and technology. This section provides information about the ways these users can get the most out of their computer experience. - Page 48 1. Right-click an empty area of the desktop and select Screen resolution. 2. Follow the instructions on the screen. Note: Setting a resolution too low might prevent some items from fitting on the screen. E470, E470c, and E475 User Guide...
-
Page 49: Ergonomic Information
Customizable item size You can make the items on your screen easier to read by changing the item size. • To change the item size temporarily, use the Magnifier tool in Ease of Access Center. • To change the item size permanently, do the following: –... -
Page 50: Cleaning And Maintenance
If your work area is not in an office setting, ensure to take special note of employing active sitting and taking work breaks. Many ThinkPad product solutions are available to help you modify and expand your computer to best suit your needs. You can find some of these options at http://www.lenovo.com/essentials. - Page 51 • When picking up your open computer, hold it by the bottom. Do not pick up or hold your computer by the display. • Only an authorized ThinkPad repair technician should disassemble and repair your computer. • Do not modify or tape the latches to keep the display open or closed.
- Page 52 E470, E470c, and E475 User Guide...
-
Page 53: Chapter 4. Security
It provides the following security features: • If only a supervisor password is set, a password prompt is displayed when you try to start the ThinkPad Setup program. Unauthorized users cannot access the ThinkPad Setup program without the password. -
Page 54: Setting, Changing, Or Removing A Password
Before you start, print these instructions. To set, change, or remove a password, do the following: 1. Restart the computer. When the logo screen is displayed, press F1 to start the ThinkPad Setup program. 2. Select Security ➙ Password by using the directional keys. -
Page 55: Setting The Security Chip
To set an item on the Security Chip submenu, do the following: 1. Restart the computer. When the logo screen is displayed, press F1 to start the ThinkPad Setup program. 2. Select Security ➙ Security Chip by using the directional keys. -
Page 56: Using The Fingerprint Reader
Notes: • Ensure that the supervisor password has been set in ThinkPad Setup. Otherwise anyone can change the settings for the security chip. • When you clear the security chip, turn off your computer and then turn it on again after you set the security chip to Active. -
Page 57: Deleting Data From Your Storage Drive
If you notice any of the following conditions, gently clean the surface of the reader with a dry, soft, lint-free cloth: • The surface of the reader is dirty or stained. • The surface of the reader is wet. • The reader often fails to enroll or authenticate your fingerprint. If your finger has any of the following conditions, you might not be able to register or authenticate it: •... -
Page 58: Using Firewalls
Lenovo provides a full version of antivirus software on your computer with a free 30-day subscription. After 30 days, you must renew the license to continue receiving the antivirus software updates. For more information about your antivirus software, see the help system of your antivirus software. E470, E470c, and E475 User Guide... -
Page 59: Chapter 5. Advanced Configuration
2. Connect the drive that contains the operating system installation program to the computer. 3. Start the ThinkPad Setup program. See “Using the ThinkPad Setup program” on page 45. 4. Select Startup ➙ Boot to display the Boot Priority Order submenu. -
Page 60: Installing Device Drivers
For more information about how to use Lenovo Companion, see the help system of the program. Using the ThinkPad Setup program The ThinkPad Setup program enables you to select the preferred settings for your computer through configuring the BIOS. E470, E470c, and E475 User Guide... -
Page 61: Configuring Thinkpad Setup
Note: If you are required to enter the supervisor password, enter the correct password. You also can press Enter to skip the password prompt and start the ThinkPad Setup program. If you do not enter the password, you cannot change the configurations that are protected by the supervisor password. -
Page 62: Updating The Uefi Bios
Note: Depending on the model and operating system, the menu items and the default value might change without notice. Main menu When you enter the ThinkPad Setup program, you first see the Main menu as follows: Note: The BIOS menu items might change without notice. Depending on the model, the default value might vary. -
Page 63: Config Menu
• Preinstalled operating system license • UEFI Secure Boot • OA3 ID • OA2 Config menu Note: The BIOS menu items might change without notice. Depending on the model, the default value might vary. Network • Wake On LAN Values: Disabled, AC only, AC and Battery Description: The network administrator can turn on a computer from a management console by using the Wake on LAN feature. - Page 64 Values: ThinkPad LCD, HDMI Description: Select the display device that you want to activate at boot time. This selection is effective for boot time, password prompt, and ThinkPad Setup. HDMI corresponds to the HDMI connector on your computer. • Total Graphics Memory Values: 256 MB, 512 MB Description: Allocate the total memory which Intel internal graphics shares.
- Page 65 Power ® • Intel SpeedStep technology Values: Disabled, Enabled Description: Select the mode of Intel SpeedStep technology at runtime. – Mode for AC Values: Maximum Performance, Battery Optimized Description: Maximum Performance: Always highest speed – Mode for Battery Values: Maximum Performance, Battery Optimized Description: Battery Optimized: Always lowest speed Note: This submenu is available on models with an Intel CPU.
- Page 66 37. • Lock UEFI BIOS Settings Values: Disabled, Enabled Descriptions: Enable this option to prevent unauthorized users from changing any settings in ThinkPad Setup. To use this function, a supervisor password is required. • Password at Unattended Boot...
- Page 67 Descriptions: Set a power-on password to protect the computer from unauthorized access. For more information, see “Passwords introduction” on page 37. • Hard Disk x Password Values: Disabled, Enabled Descriptions: Set a hard disk password to prevent unauthorized users from accessing data on the internal storage drive.
- Page 68 Absolute Software. If you select Permanently Disabled, you cannot enable this setting again. Secure Boot • Secure Boot Values: Disabled, Enabled Descriptions: Enable this option to prevent unauthorized operating systems from loading when you turn on the computer. E470, E470c, and E475 User Guide...
-
Page 69: Startup Menu
Disabled is the default value when OS Optimized is set to Disabled. Enabled is the default value when OS Optimized is set to Enabled. Note: To enable Secure Boot, you need to set the startup setting as UEFI Only and set CSM Support as No. - Page 70 When you change this setting, some other settings are changed automatically, such as CSM Support, UEFI/Legacy Boot, Secure Boot, and Secure RollBack Prevention. • Discard Changes Descriptions: Discard the changes. • Save Changes Descriptions: Save the changes. E470, E470c, and E475 User Guide...
-
Page 71: Using System Management
It also includes a number of blank fields where you can record information about the end users in your network. To enable a network administrator to remotely control your computer, set the following system-management features in the ThinkPad Setup program: • Wake on LAN • Network Boot sequence Note: If a supervisor password has been set, you are required to enter the supervisor password when you start the ThinkPad Setup program. - Page 72 To enable or disable the Wake on LAN feature, do the following: 1. Restart the computer. When the logo screen is displayed, press F1 to start the ThinkPad Setup program. 2. Select Config ➙ Network. The Network submenu is displayed.
-
Page 73: Chapter 6. Troubleshooting Computer Problems
1. Remove all external devices such as the printer and keyboard. 2. Ensure that your battery is charged and your computer has the ac power connected. 3. Access ThinkPad Setup and load the default settings. 4. Restart the computer and start the recovery operation. -
Page 74: Troubleshooting
Computer stops responding Print these instructions now and keep them with your computer for reference later. Problem: My computer is unresponsive (I cannot use the ThinkPad pointing device or the keyboard). Solution: Do the following: 1. Press and hold the power button until the computer turns off. If you cannot turn off the computer by pressing the power button, remove the ac power adapter and the removable battery. -
Page 75: Error Messages
• Message: 0251: System CMOS checksum bad. Solution: The system CMOS might have been corrupted by a program. The computer uses the default settings. Run ThinkPad Setup to reconfigure the settings. If you still see the same error code, have the computer serviced. -
Page 76: Beep Errors
Problem: Video problem. • Beeps: Three short beeps, pause, one short beep, pause, one short beep, pause, and three much shorter beeps (3-1-1-3 beeps) Problem: PCI resource problem. • Beeps: Four cycles of four short beeps E470, E470c, and E475 User Guide... -
Page 77: Memory Module Problems
Problem: TCG-compliant functionality-related problem (might be the TPM initialization failure). TCG is the abbreviation for Trusted Computing Group. • Beeps: Five short beeps Problem: System board problem. • Beeps: Five short beeps, pause, five much shorter beeps, and pause Problem: TCG-compliant functionality-related problem (might be the BIOS code validation failure). Memory module problems Print these instructions now and keep them with your computer for reference later. -
Page 78: Wireless-Lan Problem
– Connect to a 1000 BASE-T hub/switch (not 1000 BASE-X). • Problem: The Wake on LAN feature is not working. Solution: Ensure that Wake on LAN is enabled in ThinkPad Setup. If it is, check with your LAN administrator for the necessary settings. -
Page 79: Thinkpad Pointing Device Problems
• Problem: The TrackPoint pointing device or trackpad does not work. Solution: Ensure that the TrackPoint pointing device or trackpad is enabled in the Mouse Properties window. For more information, see “Customizing the ThinkPad pointing device” on page 20. Keyboard problems •... - Page 80 3. Click Display adapter properties. 4. Click the Monitor tab. Check the monitor information to make sure that the monitor type is correct. If it is, click OK to close the window; otherwise proceed with the following steps. E470, E470c, and E475 User Guide...
-
Page 81: External Monitor Problems
5. If more than two monitor types are displayed, select Generic PnP Monitor or Generic Non-PnP Monitor. 6. Click Properties. If you are prompted for an administrator password or confirmation, type the password or provide confirmation. 7. Click the Driver tab. 8. -
Page 82: Audio Problems
5. Ensure that the device following Sound, video and game controllers is enabled and configured correctly. • Problem: Recordings made by using the microphone input are not loud enough. Solution: Ensure that the Microphone Boost function is turned on and set by doing the following: E470, E470c, and E475 User Guide... - Page 83 1. Go to Control Panel, and ensure that you view Control Panel by Category. 2. Click Hardware and Sound. 3. Click Sound. 4. Click the Recording tab in the Sound window. 5. Select Microphone, and click the Properties button. 6. Click the Levels tab, and move the Microphone Boost slider upwards. 7.
-
Page 84: Fingerprint Reader Problems
Problem: The ac power adapter is connected to the computer and the working electrical outlet, but the power adapter (power plug) icon is not displayed in the Windows notification area. The ac power indicator also does not light up. Solution: Do the following: E470, E470c, and E475 User Guide... -
Page 85: Power Problems
1. Ensure that the connection of the ac power adapter is correct. For instructions on how to connect the ac power adapter, see “Using the ac power adapter” on page 21. 2. If the connection of the ac power adapter is correct, turn off the computer, and then disconnect the ac power adapter and remove the removable battery. -
Page 86: Sleep And Hibernation Problems
Hard disk drive problems • Problem: The hard disk drive makes a rattling noise intermittently. Solution: The rattling noise might be heard: – When the hard disk drive begins or finishes getting access to data E470, E470c, and E475 User Guide... -
Page 87: Solid-State Drive Problem
• Problem: The hard disk drive does not work. Solution: On the Startup menu of ThinkPad Setup, ensure that the hard disk drive is on the Boot priority order list. If it is on the Excluded from boot order list, it is disabled. Select the entry for it on the list and press Shift+1 to move it back to the Boot priority order list. - Page 88 E470, E470c, and E475 User Guide...
-
Page 89: Chapter 7. Recovery Information
Chapter 7. Recovery information This chapter provides information about the Windows recovery solutions on the Windows 10 operating system. Resetting your computer If your computer does not perform well, you might consider resetting your computer. In the resetting process, you can choose to keep your files or remove them, and then reinstall the Windows operating system. To reset your computer, do the following: Note: The items in the graphical user interface (GUI) might change without notice. - Page 90 4. Select a preferred keyboard layout. 5. Click Troubleshoot to display optional recovery solutions. 6. Select a corresponding recovery solution according to your situation. Then follow the instructions on the screen to complete the process. E470, E470c, and E475 User Guide...
-
Page 91: Chapter 8. Replacing Devices
To disable the built-in battery, do the following: 1. Turn off your computer and disconnect the ac power adapter and all cables from the computer. 2. Turn on your computer. When the logo screen is displayed, immediately press F1 to enter ThinkPad Setup. -
Page 92: Replacing The Bottom Cover
6. Turn the computer over. Connect the ac power adapter and all cables to the computer. Replacing the memory module Before you start, read “Important safety information” on page v and print the following instructions. E470, E470c, and E475 User Guide... - Page 93 Attention: • Before you start the replacement, touch a grounded metal object. This action reduces any static electricity from your body. Static electricity might damage the memory module. • Do not touch the contact edge of the memory module. Otherwise the memory module might get damaged. To replace the memory module, do the following: 1.
- Page 94 . Ensure that the memory module is firmly installed in the memory slot and cannot be moved easily. Note: If your computer has only one memory module installed, ensure that it is installed in the memory slot close to the thermal fan. E470, E470c, and E475 User Guide...
-
Page 95: Replacing The Internal Storage Drive
8. Connect the main battery connector. 9. Reinstall the bottom cover. See “Replacing the bottom cover” on page 76. 10. Turn the computer over. Connect the ac power adapter and all cables to the computer. Replacing the internal storage drive Before you start, read “Important safety information”... - Page 96 5. Disconnect the main battery connector and the internal storage drive cable. 6. Remove the screw that secures the storage drive. 7. Remove the storage drive together with its bracket by the cable as shown. E470, E470c, and E475 User Guide...
- Page 97 8. Remove the storage drive from the bracket. 9. Install the bracket to the new internal storage drive. 10. Install the new storage drive and pivot it downward. Ensure that the new storage drive is seated in place. Chapter 8 Replacing devices...
-
Page 98: Replacing The Coin-Cell Battery
• Replace only with a battery of the type recommended by Lenovo. • Keep the battery away from fire. • Do not expose it to excessive heat. • Do not expose it to water or rain. • Do not short-circuit it. E470, E470c, and E475 User Guide... - Page 99 • Do not drop, crush, puncture the battery, or make it subject to strong forces. Battery abuse or mishandling can cause the battery to overheat, which can cause gasses or flame to "vent" from the battery or coin-cell battery. To replace the coin-cell battery, do the following: 1.
- Page 100 6. Detach the connector and remove the coin-cell battery 7. Install the new coin-cell battery and attach the connector E470, E470c, and E475 User Guide...
- Page 101 10. Turn the computer over. Connect the ac power adapter and all cables to the computer. Attention: After you replace the coin-cell battery, reset the system date and time in the ThinkPad Setup program. See “Date/Time menu” on page 50.
- Page 102 E470, E470c, and E475 User Guide...
-
Page 103: Chapter 9. Getting Support
Chapter 9. Getting support This chapter provides information about getting help and support from Lenovo. Before you contact Lenovo Often, you can solve your computer problems by referring to the information in the explanations of error codes, running diagnostic programs, or by consulting the Lenovo Support Web site. Registering your computer Register your computer with Lenovo. -
Page 104: Using Diagnostic Programs
ThinkPad notebook computers come with a set of diagnostic programs that you can use to help you identify hardware problems. See “Diagnosing problems with Lenovo Companion” on page 57 for instructions on how to use the diagnostic programs. -
Page 105: Purchasing Additional Services
• Changes, modifications, or upgrades to device drivers • Installation and maintenance of network operating systems (NOS) • Installation and maintenance of programs For the terms and conditions of the Lenovo Limited Warranty that apply to your Lenovo hardware product, see “Warranty information”... - Page 106 E470, E470c, and E475 User Guide...
-
Page 107: Appendix A. Regulatory Information
Appendix A. Regulatory information This chapter provides regulatory and compliance information about Lenovo products. Certification-related information Product name: ThinkPad E470, ThinkPad E470c, and ThinkPad E475 Compliance ID: TP00083A and TP00083B (for India only) Machine types: 20H1, 20H2, 20H3, and 20H4 The latest compliance information is available at: http://www.lenovo.com/compliance... -
Page 108: Locating The Ultraconnect Wireless Antennas
Locating the UltraConnect wireless antennas ThinkPad notebook computers feature an integrated UltraConnect™ wireless antenna system built into the display for optimal reception, enabling wireless communication wherever you are. The following illustration shows the antennas locations of your computer: Wireless-LAN antenna (main) -
Page 109: Export Classification Notice
Electronic emission notices Federal Communications Commission Declaration of Conformity The following information refers to ThinkPad E470, E470c, and E475, machine types: 20H1, 20H2, 20H3, and 20H4. This equipment has been tested and found to comply with the limits for a Class B digital device, pursuant to Part 15 of the FCC Rules. -
Page 110: European Union - Compliance To The Electromagnetic Compatibility (Emc) Directive Or Radio Equipment Directive
Dieses Gerät ist berechtigt, in Übereinstimmung mit dem Deutschen EMVG das EG-Konformitätszeichen - CE - zu führen. Verantwortlich für die Konformitätserklärung nach Paragraf 5 des EMVG ist die Lenovo (Deutschland) GmbH, Meitnerstr. 9, D-70563 Stuttgart. E470, E470c, and E475 User Guide... -
Page 111: Korea Class B Compliance Statement
Informationen in Hinsicht EMVG Paragraf 4 Abs. (1) 4: Das Gerät erfüllt die Schutzanforderungen nach EN 55024 und EN 55022 Klasse B. Korea Class B compliance statement Japan VCCI Class B compliance statement Japan compliance statement for products which connect to the power mains with rated current less than or equal to 20 A per phase Japan notice for ac power cord The ac power cord shipped with your product can be used only for this specific product. - Page 112 E470, E470c, and E475 User Guide...
-
Page 113: Appendix B. Weee And Recycling Statements
Appendix B. WEEE and recycling statements This chapter provides environmental information about Lenovo products. General recycling information Lenovo encourages owners of information technology (IT) equipment to responsibly recycle their equipment when it is no longer needed. Lenovo offers a variety of programs and services to assist equipment owners in recycling their IT products. -
Page 114: Japan Recycling Statements
If you use a Lenovo notebook computer at home and need to dispose of a battery, you must comply with local ordinances and regulations. You also can refer to the instructions at: https://www.lenovo.com/jp/ja/environment/recycle/battery/ Recycling information for Brazil Declarações de Reciclagem no Brasil Descarte de um Produto Lenovo Fora de Uso E470, E470c, and E475 User Guide... -
Page 115: Battery Recycling Information For The European Union
Equipamentos elétricos e eletrônicos não devem ser descartados em lixo comum, mas enviados à pontos de coleta, autorizados pelo fabricante do produto para que sejam encaminhados e processados por empresas especializadas no manuseio de resíduos industriais, devidamente certificadas pelos orgãos ambientais, de acordo com a legislação local. -
Page 116: Battery Recycling Information For Taiwan
You also can refer to the instructions provided in the user guide for your product. For proper collection and treatment, go to: http://www.lenovo.com/lenovo/environment Battery recycling information for Taiwan Battery recycling information for the United States and Canada Recycling information for China E470, E470c, and E475 User Guide... -
Page 117: Appendix C. Restriction Of Hazardous Substances (Rohs) Directive
Appendix C. Restriction of Hazardous Substances (RoHS) Directive The latest environmental information about Lenovo products is available at: http://www.lenovo.com/ecodeclaration European Union RoHS This Lenovo product, with included parts (cables, cords, and so on) meets the requirements of Directive 2011/65/EU on the restriction of the use of certain hazardous substances in electrical and electronic equipment ("RoHS recast"... - Page 118 China RoHS E470, E470c, and E475 User Guide...
- Page 119 Taiwan RoHS Appendix C. Restriction of Hazardous Substances (RoHS) Directive...
- Page 120 E470, E470c, and E475 User Guide...
- Page 121 Appendix D. ENERGY STAR model information ® ENERGY STAR is a joint program of the U.S. Environmental Protection Agency and the U.S. Department of Energy aimed at saving money and protecting the environment through energy efficient products and practices. Lenovo is proud to offer our customers products with the ENERGY STAR qualified designation. You might find an ENERGY STAR mark affixed on the computer or displayed on the power settings interface.
- Page 122 5. Clear the Allow this device to wake the computer check box. 6. Click OK. E470, E470c, and E475 User Guide...
-
Page 123: Appendix E. Notices
Appendix E. Notices Lenovo may not offer the products, services, or features discussed in this document in all countries. Consult your local Lenovo representative for information on the products and services currently available in your area. Any reference to a Lenovo product, program, or service is not intended to state or imply that only that Lenovo product, program, or service may be used. - Page 124 This document is copyrighted by Lenovo and is not covered by any open source license, including any Linux agreement(s) which may accompany software included with this product. Lenovo may update this document at any time without notice. To obtain the most up-to-date documentation for your computer, go to: http://www.lenovo.com/support E470, E470c, and E475 User Guide...
-
Page 125: Appendix F. Trademarks
The following terms are trademarks of Lenovo in the United States, other countries, or both: Active Protection System Lenovo Lenovo logo ThinkPad ThinkPad logo TrackPoint UltraConnect Intel, Intel SpeedStep, and Thunderbolt are trademarks of Intel Corporation or its subsidiaries in the U.S. and/or other countries. - Page 126 E470, E470c, and E475 User Guide...
Need help?
Do you have a question about the E470 and is the answer not in the manual?
Questions and answers