Table of Contents
Advertisement
Sun Ray Wifi
Operating and Installation Instructions
(Read these instructions carefully and retain for future reference)
A qualified electrician must carry out the electrical installation of this radiator. The Electrical
installation must comply with the current UK and Irish regulations. Any claim on the warranty
could be invalid if these requirements have not been met.
Electric Radiator
Models:
WF500 Sun Ray Wifi 500w
WF750 Sun Ray Wifi 750w
WF1000 Sun Ray Wifi 1000w
WF1500 Sun Ray Wifi 1500w
WF1800 Sun Ray Wifi 1800w
NOTE:
1
Advertisement
Table of Contents

Related Manuals for ATC WF500 Sun Ray Wifi 500w


Summary of Contents for ATC WF500 Sun Ray Wifi 500w
- Page 1 Electric Radiator Operating and Installation Instructions (Read these instructions carefully and retain for future reference) Models: WF500 Sun Ray Wifi 500w WF750 Sun Ray Wifi 750w WF1000 Sun Ray Wifi 1000w WF1500 Sun Ray Wifi 1500w WF1800 Sun Ray Wifi 1800w NOTE: A qualified electrician must carry out the electrical installation of this radiator.
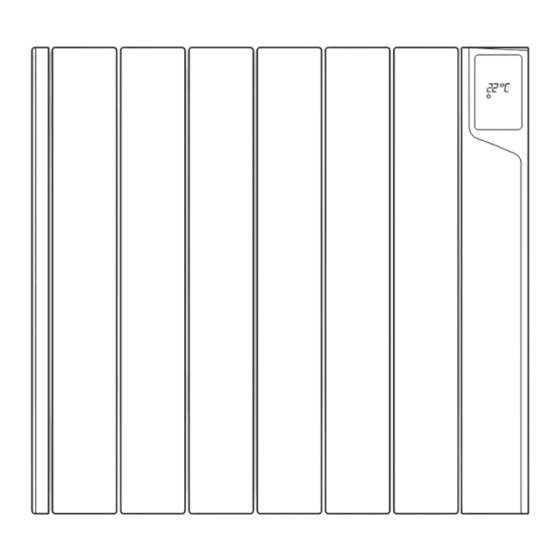
- Page 2 CONTENTS General / Important Information Page 2 Installation Instructions Page 4 Electrical Power Supply Location of Radiator Mounting of Radiator Operating Instructions Page 7 Controls Switching On Setting the temperature Selection of Mode Programming Keypad Locking (Anti-Tamper) Maintenance and Guarantee Page 12 GENERAL INFORMATION The Sun Ray Wifi has a special cast aluminium body specifically designed to assure the maximum rate of heat radiation;...
-
Page 3: Fuse Rating
Technical Data Number Of Power Size (mm) Net Weight MODEL Fuse Rating Fins Rating (W) HxWxD (Kg.) Sun Ray Wifi 500 580 x 420 x 100 5 Amp. Sun Ray Wifi 750 580 x 580 x 100 5 Amp. Sun Ray Wifi 1000 1000 580 x 740 x 100 10 Amp. -
Page 4: Electrical Connection
INSTALLATION INSTRUCTIONS Electrical Connection A qualified electrician must carry out the electrical installation of this radiator. The electrical installation must comply with the current UK and Irish regulations. Any claim on the warranty could be invalid if these requirements have not been met. The radiator requires a 230/240V 50/60Hz power supply. -
Page 5: Mounting The Radiator
Mounting The Radiator Place the radiator on the floor, as shown in Figure 1. For radiators with 4, 6, 8 or 10 elements position the supports supplied with the radiator as shown in Figure 1. For radiators with 12 elements the supports should be positioned between the second and third elements from each end. - Page 6 Once the heater is hanging as shown in figure 3b, attach locking bracket shown in figure 4 to the bottom right hand side of the heater using screw 1. Mark the location of screw 2 on the wall and then remove the bracket. Drill the hole for the fixing and insert the supplied wall plug, re-attach the locking bracket to the heater and then fix the heater to the wall with screw 2, then push on the left side of the locking plates on the top brackets until a click is heard.
- Page 7 Switching ON (Master): OPERATING INSTRUCTIONS Once the radiator has been mounted on the wall The control is based on four buttons and an LCD display. and correctly connected to the main electricity power supply, press the main On-Off switch on the right hand side of the radiator.
-
Page 8: Manual Programming
When the temperature setup icon starts Manual Programming flashing, press OK to scroll through each mode. To assist with programming the LCD screen is backlit and will stay illuminated for approximately 10 seconds after the last button is pressed. When the radiator is operational and the room temperature is lower than the set temperature the heating symbol will be shown indicating that... -
Page 9: Keypad Locking (Anti-Tamper)
Programming with APP To select one of the three advanced settings (C1 To programme your Sun Ray Wifi with a Sun to C3) use the +/- keys and choose the required Ray Gateway you must pair the radiator to the mode by pressing OK. -
Page 10: Default Values
Radiator Reset Resetting the radiator will return all settings to the factory defaults and will also delete any ‘pairing’ with a Sun Ray Gateway. To activate the RESET feature press the OK button and the CONFIG button for 10 seconds. The following screen will appear: To confirm the reset, press OK again, to cancel the RESET press any other key. -
Page 12: Maintenance And Care
Radiators clean may result in dust becoming burnt and depositing on the wall above the heater in the form of dark streaks or patches. This type of marking is expressly due to failure to keep the heater and surrounding area clean. ATC...
Need help?
Do you have a question about the WF500 Sun Ray Wifi 500w and is the answer not in the manual?
Questions and answers