Flashforge FINDER User Manual
Hide thumbs
Also See for FINDER:
- User manual (88 pages) ,
- Quick start manual (28 pages) ,
- Start up and instruction manual (25 pages)
Table of Contents
Advertisement
Advertisement
Table of Contents

Related Manuals for Flashforge FINDER


Summary of Contents for Flashforge FINDER
- Page 1 User Guide Finder Desktop 3D Printer V1.0 17.6.2015...
- Page 3 Contents Welcome to Flashforge Finder Overview Acknowledgment and Commitments About 3D Printing Chapter 1. Set up Your Finder Unpacking Your Finder About Finder Hardware Assembly Installing Filament Connecting Power Cable and USB Cable Loading and Unloading Filament Loading Filament Unloading Filament Leveling Build Plate Chapter 2.
- Page 4 WELCOME TO FLASHFORGE FINDER A. Introduction B. Acknowledgment and Commitments C. About 3D Printing Finder User Guide| www.ff3dp.com Finder User Guide | www.sz3dp.com...
- Page 5 This User Guide includes four chapters. In the first chapter, you will learn how to get set-up the Finder for the first print. In the second chapter, you will learn the ins and outs of FlashPrint software.
- Page 6 Our aim is to educate and guide you through the entire process of 3D printing. With 3D printing, there are no limits — you can go as far as your imagination takes you. With the Finder, dreams are no longer simply just imaginations. They can become physical realities that you can hold, touch, and feel.
- Page 7 The Technique Fused Deposition Modeling(FDM) is the most common method of 3D printing. It is also the method that the Finder uses. It works by melting plastic material called filament onto a print surface using high temperature. The filament solidifies after it cools down, which happens instantaneously after it is extruded from the print head.
- Page 8 FlashPrint will slice the 3D model into numerous layers and output it as a .g file, which is the format read by the Finder. The file is then transferred to the Finder by USB cable, USB Flash Disk or Wi-Fi.
- Page 9 CHAPTER 1. Set up Your Finder A. Unpacking Your Finder B. About Finder C. Hardware Assembly D. Loading and Unloading Filament E. Leveling Build Plate Finder User Guide| www.ff3dp.com...
- Page 10 Unpacking Your Finder Congratulations on your purchase of the Flashforge Finder 3D printer! In about 15 minutes, you will be ready to start making your first 3D object. This section lays out the procedure for correctly removing the Finder from its shipping box. The Finder contains delicate components, please remember to handle with extra care and attention.
- Page 11 3. Remove the side protective foam sheets, you will see the Finder in a transparent bag. Then remove the bag to unveil the Finder. 4. On the top foam sheet we can see the accessories from the kit contents: one plate tape, one Quick Start Guide, one 4GB USB, two Allen wrenches (M1.5 and M2) and one screwdriver.
- Page 12 Discard the tape holding the flat cable in place . 6. Take the filament spool protective foam out of the Finder. You will see a roll of blue PLA filament inside.
- Page 13 8. Move the build plate up. Remove the protective foam for build plate and take the power cable and USB cable out. 9. You have unpacked your Finder. Next, let’s go to the overview and accessories of Finder. Finder User Guide| www.ff3dp.com...
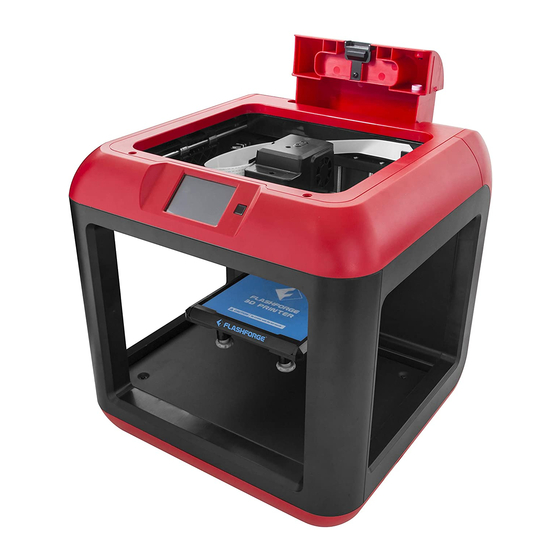
- Page 14 3. Nozzle 4. Z-axis guide rod 5.Build plate 6. Leveling thumb screw 7. Filament cartridge 9. Filament intake 10. X-axis guide rod 11. Spring presser 12. USB cable input 13. USB flash disk input 14. Power input Finder User Guide| www.ff3dp.com...
- Page 15 Accessory Box PLA Filament Power Cable USB Cable Plate Tape Quick Start Guide USB Flash Disk Allen Wrench(M1.5、M2.0) Screwdriver Finder User Guide| www.ff3dp.com...
- Page 16 Accessory Introduction Polylactic acid filament. PLA is a renewable bilplastic. PLA Filament Finder PLA is the source material from which you make objects on the Finder. Power Cable A cable that allows the Finder to connect with power USB Cable A cable that allows the Finder to communicate with a computer using the USB interface on the computer.
- Page 17 Hardware Assembly Your Finder has been installed before leaving factory, you can start up the Finder for printing after mounting the filament spool. Installing the Filament 1. Remove the filament cartridge in the rear of Finder, where you will place the filament spool.
- Page 18 Finder and plug the power cord into an electrical outlet. 2. Locate the USB cable and plug one end into the Finder and the other into your personal computer. The Finder supports USB 2.0. Finder User Guide| www.ff3dp.com...
- Page 19 Refer to the troubleshooting section filament is extruding at an angle. (Note: The Finder will sound a warning when the filament is running out, please change the filament in time) Finder User Guide| www.ff3dp.com...
- Page 20 Note: Do not pull out the filament with force as it will damage the gears. If the melted filament has cooled down in the extruder, please repeat the steps above. Finder User Guide| www.ff3dp.com...
- Page 21 Leveling Build Plate Finder creatively adopts three-point intelligent leveling system, which will give clear and comprehensive feedback to users. There are three spring-loaded screws under the build platform. The distance between the plate and the nozzle increases while tightening the nuts. On the contrary, the distance reduces.
- Page 22 Chapter2. About FlashPrint A. About the Software Finder User Guide| www.ff3dp.com Finder User Guide | www.sz3dp.com...
- Page 23 1. Decompress the downloaded RAR, and complete installation according to the instruction. 2.Start the software with the start menu shortcut or by clicking the software icon. 2. Software Operating Instructions You can use Flashprint software to control Finder and perform printing tasks. Finder User Guide| www.ff3dp.com...
- Page 24 Finder User Guide| www.ff3dp.com...
- Page 25 Scale the size of your object Select right or left extruder you want to print with Print it directly with your Finder or export to your SD card. 2.1 Load File You can load a model file or Gcode file into the software by the following six methods: Finder User Guide| www.ff3dp.com...
- Page 26 Section 2.6 if you want to slice the model file , generate Gcode file and print it. 2.2 Mouse Operations 2.2.1 Left-click Select a model by moving the cursor onto it and left-click it. Finder User Guide| www.ff3dp.com...
- Page 27 2.2.4 Scroll the mouse wheel Same effects in any operations when scrolling the mouse wheel. Please refer to the Section 2.3.3. 2.3 Change Views Change your views of the model by moving, rotating, scaling the view and so on. Finder User Guide| www.ff3dp.com...
- Page 28 (Top/ Bottom/Front/ Back/ Left/ Right View) . Method 1: Click the the [View] button, and then select the view you need to observe the model. Finder User Guide| www.ff3dp.com...
- Page 29 Overhang threshold value could be set as needed. The default value is 45 degree. 2.4 Edit models You can edit the models by moving, rotating, scaling the model and so Finder User Guide| www.ff3dp.com...
- Page 30 Method 1: Click the [Rotate] button on the left of the software interface and you can find three mutually perpendicular rings whose color is red, green and blue. Click one ring and rotate on the present axis, you will see Finder User Guide| www.ff3dp.com...
- Page 31 Otherwise it will only change the value of the corresponding positioning. 2.4.5 Others 2.4.5.1 Undo Undo the most recent edit you made to your model file by the following Finder User Guide| www.ff3dp.com...
- Page 32 There will be two ways to create copy of relevant model after pitching on Method 1: Click [Edit]--[Duplicate] Method 2: Press the shortcut Ctrl+D 2.4.5.5 Delete There will be two ways to delete relevant model after pitching on it. Method 1: Click [Edit]--[Delete] Method 2: Press the shortcut Delete Finder User Guide| www.ff3dp.com...
- Page 33 Surface to Platform 2.4.5.7 Auto Layout All Click [Edit]--[Auto Layout All] after loading one or more than one models, all models will be placed automatically as automatic placement Finder User Guide| www.ff3dp.com...
- Page 34 Click the [Auto Supports] button, the software will judge the position where supports are needed and generate corresponding treelike or linear supports. If the model already had support, the existing supports will be deleted and new supports will be generated. Finder User Guide| www.ff3dp.com...
- Page 35 Supports will be deleted once clicking the [Delete] button. Move the cursor to the supports needed deleting, current supports and its child node support will be highlighted, click the left mouse button to delete these highlighted support. Finder User Guide| www.ff3dp.com...
- Page 36 2.6 New Project Click [File]--[New Project] can build a blank project. If there is an unsaved modification on previous project, then will inform you whether Finder User Guide| www.ff3dp.com...
- Page 37 .obj. For .stl and .boj, models are integrated as one(include support part). If load it again, only the position of the model was saved, not included the printing parameters. 2.8 Printing Procedure 2.8.1 Select Machine Type Finder User Guide| www.ff3dp.com...
- Page 38 You need to slice the model before printing(printable file is generated by slicing the model). The following is operation process. (1)Pattern Step 1: Click [Print]--[]Print or click the Print icon on main interface, dialog of slicing parameters will show up. Finder User Guide| www.ff3dp.com...
- Page 39 You have three resolution solution(with default setting)to choose from, high resolution is corresponding with slow printing speed, opposite for the low resolution.For PLA printing, an extra solution “Hyper” is available. Click [More options] to set for layer, shell, infill, speed, temperature. Finder User Guide| www.ff3dp.com...
- Page 40 Bottom Solid Layer: Maximize is 10, minimum is 1. Infill a. Fill Density means fill rate. b. Fill Pattern is the pattern of filling shape which effects printing duration. Speed a. Print Speed is the moving speed of the extruder. Generally, the lower Finder User Guide| www.ff3dp.com...
- Page 41 Load Gcode file into FlashPrint software when it is generated. Step 1: The generated Gcode file will be loaded into software automatically if you select the [Preview] check-box when slicing, or you need manually load into it and then go to preview interface. Finder User Guide| www.ff3dp.com...
- Page 42 2.9.1 Connect / Disconnect 2.9.1.1 Connect You can connect the Finder to Flashprint software via USB cable or WIFI. The machine icon on the bottom right corner of the software interface shows a broken chain pattern means disconnected, while shows a unbroken one means connected.
- Page 43 [Tools]--[Set up]--[WIFI]-[WIFI ON]. 2. Open the wireless network connection in your computer, and choose . LPB wireless network. It is the default network of the printer, and no password is needed if you haven’t changed the settings. Finder User Guide| www.ff3dp.com...
- Page 44 3. Open your browser and enter the IP address 10.10.100.254 in the Address Bar. Then enter in admin as the account and password . (The above mentioned IP address /Account /Password are default when the setting haven’t been changed) Finder User Guide| www.ff3dp.com...
- Page 45 WIFI forever. 5. Click [STA Setting], and then click the [Scan] button and choose a commonly used network. Type in password, save it, and then click [Reboot] to the printer. Finder User Guide| www.ff3dp.com...
- Page 46 After this, you do not need to connect WIFI in the future if no WIFI setting is changed. If you want to change WIFI setting, please try the same way. e. Open STA setting, click search, choose an appropriate network, type in password and save it. Then reboot the printer. Finder User Guide| www.ff3dp.com...
- Page 47 FlashPrint. Click [Print]--[Connect Machine]. Choose WIFI as connect mode, and type in the IP address (showed on Touch Screen Panel), and click connect. Type 2: Set Finder as WIFI spot, and connect PC with Finder. a. Switch on Finder, go to WIFI ([Tools]—[Settings]—[WIFI]—[WIFI ON]) b.
- Page 48 XYZ coordinate frame on the right side: Show the current position of extruder/build platform. e. Make Current Position Zero button: Set the current position of the extruder/ build platform as (0, 0, 0). (NOTE: X, Y, and Z boxes are for Finder User Guide| www.ff3dp.com...
- Page 49 X/Y Speed and Z Speed: Set the move speed of extruder/ build platform. Limit Switch To protect Finder, it has 3 end-stop switches to control the maximum position, and the 3 limit switches corresponding to X/Y/Z axis limit switch. It has 2 status: a.
- Page 50 [Disable], and unlock the motor to be controlled manually. LED Color LED color of Finder can be changed via control this button. Extruder Controls You can set the value of “Motor Speed(RPM)”, which can control the rotation speed of filament feeding wheel.
- Page 51 2.9.4 On Board Preferences When the computer and printer are in connection state, click [Tools]--[On Board Preferences], you can check the printer name, extruder quantity etc. Finder User Guide| www.ff3dp.com...
- Page 52 64 - bit system, dpinst_x86.exe for 32- bit system, users can choose which they need) 2.10 Other 2.10.1 Preferences Click [File]--[Preferences], you can choose language and if needs detecting update when start Finder User Guide| www.ff3dp.com...
- Page 53 There are two ways to update the software. Online Automatic Update Choose [Detect update], the software will be updated automatically (Refer to 2.9.1) Manual Update Click [Help]--[Check for Update], it can detect online if there are Finder User Guide| www.ff3dp.com...
- Page 54 Note: The process of software download and installation, please refer to Section1.1~1.2 2.10.5 Check Flashprint information Click [Help]--[About Flashprint], the software information box will pop up. The contents include the current software version and copyright information. Finder User Guide| www.ff3dp.com...
-
Page 55: First Print
Chapter3. First Print A. Overview B. Start Printing C. Methods of Printing Finder User Guide| www.ff3dp.com... - Page 56 FlashPrint. There are three connection methods in order to print using the Finder. All methods, which include USB, USB flash disk, and Wi-Fi are covered in this chapter.
- Page 57 4. Adjust model print position and size according to your convenience, requirement and preference. Please refer to the Software part on Chapter 2 for adjustment. 5. Now the 3d model is ready to be printed. Part B will introduce how to choose connection methods. Finder User Guide| www.ff3dp.com...
- Page 58 7. Save the file at any location, and the object will start slicing.After the object is done slicing, it will automatically upload the gcode to Finder, then, the printer will go into a preheat phase. The Finder will begin printing once it has finished preheating.
- Page 59 3D model. 4. After finishing slicing, insert the USB flash disk into the USB interface on the Finder. Turn on the Finder. Make sure the build plate is leveled, and filament is loaded. 5. Tap [Print] and then select SD Card icon in the middle. A list of file(s) will show up, press the file that you would like to print, then press [Yes].
- Page 60 5. Click [Work Mode], select AP + STA mode, click [Save]. Don't click [Reboot].(Note: If you choose STA mode only, in the case of STA setting error, it will occur the risk of failure connect with the printer through wifi ) Finder User Guide| www.ff3dp.com...
- Page 61 9.Click the Print icon on the main interface, a printing selection dialog will show up. You should ensure that you choose “PLA” in the material options. Click [More Options] to implement advanced options. And you should check on [Print When Slice Done] and click [OK]. Finder User Guide| www.ff3dp.com...
- Page 62 10. Gcode files could be saved at any locations. After being saved, the model starts to be cut into slices and be uploaded to Finder. Then the printer will turn into preheat mode and start to print when the preheat finishes.
- Page 63 Chapter4. Supports and Service A. Supports B. Attachment Finder User Guide| www.ff3dp.com...
- Page 64 Our team of knowledgeable staff is on standby and ready to help you overcome any challenges you may have with your Finder. If your issue or question is not covered in the user manual, you can seek for solutions on our office website or contact us via telephone.
- Page 65 Z axis 0.0025mm; XY axis 0.011mm Filament Diameter 1.75mm Nozzle Diameter 0.4mm Current Speed 24CC/hr software FlashPrint Support Formats stl、obj Windows Mac OS Printer Size 420*420*420mm Weight 10.75Kg Input Voltage 100-240V, 50-60Hz, 100W Data Transmission USB cable、USB flash disk、wifi Finder User Guide| www.ff3dp.com...
Need help?
Do you have a question about the FINDER and is the answer not in the manual?
Questions and answers