Risco agility 3 Installation & Quick Start Manual
2-way wireless alarm system
Hide thumbs
Also See for agility 3:
- Installer manual (176 pages) ,
- User manual (60 pages) ,
- Quick installation manual (21 pages)

Related Manuals for Risco agility 3


Summary of Contents for Risco agility 3
- Page 1 Installation Quick Start Guide For detailed information please refer to the full Agility 3 Installer Manual provided on our website: www.riscogroup.com...
-
Page 2: Table Of Contents
SET SYSTEM PARAMETERS (CONTROLS) ......................... 9 CUSTOMIZE THE VOICE MENU ..........................9 SET UP USERS ............................... 10 CONNECTING THE AGILITY 3 TO THE CLOUD ......................10 PIR CAMERA ................................ 10 USER DEFINITIONS AND SYSTEM OPERATION ...................... 11 TEST THE SYSTEM..............................11... -
Page 3: Install The Main Unit
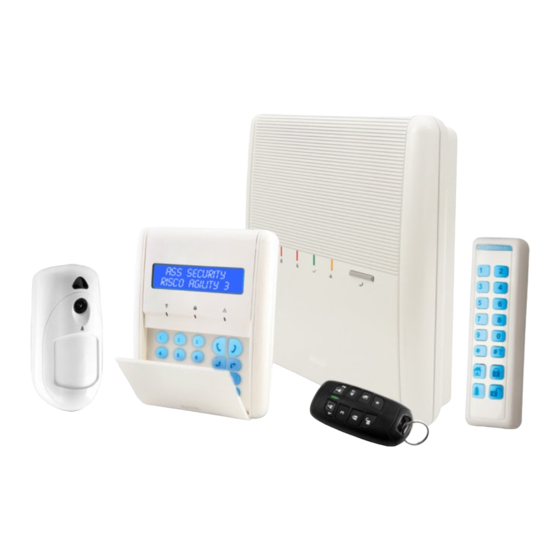
Agility 3 Installation Quick Start Guide Thank you for purchasing the Agility 3 Flexible Wireless Solution from RISCO Group. This quick start guide will describe the main steps for installing and programming the Agility 3 using the 2- way wireless keypad. -
Page 4: Keypad Programming
There are several options for programming the Agility: Configuration Software, wireless keypad, or memory card (PTM). The following sections explain how to program Agility from the LCD keypad. The following table describes the uses of the keypad keys during programming: Agility 3 Installation Quick Start Guide... -
Page 5: Accessing Installer Menu
1. From within the Installer menu select 1) Programming > 2) Radio Device > 2) Modification > 1) Zones > 2) Parameters. 2. Use the keys select the required zone and press 3. Set the basic parameters for each zone as follows: • Label – provide a meaningful name Agility 3 Installation Quick Start Guide... -
Page 6: Keyfobs
Keyfobs > 1) Parameters. 2. Select a keyfob and press to set its basic parameters. Use the keys to scroll between menus and the key to select menu options: a. 1-Way keyfob basic parameters: Agility 3 Installation Quick Start Guide... -
Page 7: Keypads
• Label – provide a meaningful name (see keypad's label table above for details) • Emergency keys: Defines whether the emergency keys will be activated or not. Agility 3 Installation Quick Start Guide... -
Page 8: Sirens
2. Select each method (PSTN, IP and/or GSM) and define its parameters. 13. Program MS Communication You can define up to three MS accounts and several associated parameters that define the nature of communication, event reporting and confirmation between the owner and the MS. Agility 3 Installation Quick Start Guide... -
Page 9: Set Up Follow-Me Destinations
3. Under Assign Message, create the phrases that will be used in place of the default messages (e.g., instead of Zone 1 define “Front Entrance and Hall”). Refer to the Descriptor Directory in the Installer Manual for the codes. Agility 3 Installation Quick Start Guide... -
Page 10: Set Up Users
The Agility 3 enables the use of advanced PIR-based detection cameras. This offers combined detection with image recording. Up to eight PIR cameras can be assigned to the Agility 3. To install the PIR camera detectors with the Agility 3: 1. -
Page 11: User Definitions And System Operation
RF signal strength from each device and an indication of battery trouble • GSM signal strength Perform a test to ensure Follow-me is working • Agility 3 Installation Quick Start Guide... -
Page 12: Fcc Warning
FCC ID: JE4AGILITY Valid for P/N RW132x4t0zzA IC: 6564A-AGILITY Valid for P/N RW132x4t0zzA Contacting RISCO Group RISCO Group is committed to customer service and product support. You can contact us through our website www.riscogroup.com or as follows: United Kingdom Brazil...
Need help?
Do you have a question about the agility 3 and is the answer not in the manual?
Questions and answers