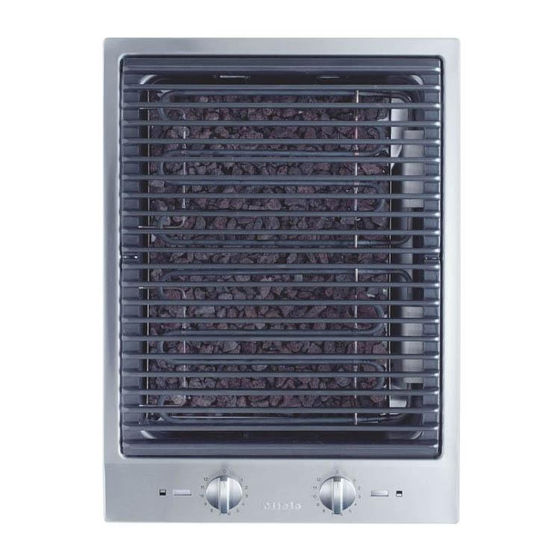
Miele CS 1322 Installation Instructions Manual
Hide thumbs
Also See for CS 1322:
- Operating and installation instructions (40 pages) ,
- Operating and installation instructions (40 pages) ,
- Operating and installation instructions (48 pages)
Table of Contents
Advertisement
Quick Links
Advertisement
Table of Contents

Related Manuals for Miele CS 1322


Summary of Contents for Miele CS 1322
- Page 1 Installation Instructions CS 1322 en - CA Installation, repair and maintenance work should be performed by a Miele authorized service technician in accordance with national and local safety regulations and the provided installation instructions.
-
Page 2: Important Installation Safety Instructions
IMPORTANT INSTALLATION SAFETY INSTRUCTIONS Note to the installer: You must ensure the power cable Please leave this instruction book for the appliance will not come under any mechanical strain once installed with the consumer for the local e.g., while the water is draining. electrical inspector’s use. - Page 3 IMPORTANT INSTALLATION SAFETY INSTRUCTIONS Safety distances above the appliance The minimum safety distance given by the hood manufacturer must be maintained between the electric barbecue and the hood above it. See the installation instructions of the hood for these safety measurements. If the hood manufacturers instructions are not available or if flammable objects are installed over the electric barbecue...
- Page 4 2" (50mm) 2" (50 mm) CS 1112 CS 1122 CS 1221 CS 1326 CS 1327 CS 1411 not recommended 8" (200 mm) CS 1312 CS 1322 10" (250 mm) for CS 1011 CS 1012 CS 1012-1 CS 1028 not permitted...
-
Page 5: Installation
Installation Safety distance from the wall covering If a wall covering is installed, a minimum safety distance must be maintained between the countertop cut-out and the covering, since high temperatures can damage these materials. If the covering is made of a combustible material (such as wood), the distance between the countertop cut-out and the wall covering must be a minimum of 2"... - Page 6 Installation Installation dimensions CS 1312 a Spring clips b Appliance front c Installation height d Power supply box with connection cable, L = 78 3/4" (2000 mm) e Drain valve f Rating label...
- Page 7 Installation Installation dimensions CS 1322 a Spring clips b Appliance front c Installation height d Power supply box with connection cable, L = 78 3/4" (2000 mm) e Drain valve f Rating label...
- Page 8 Installation Cut out If, during installation, the seal ^ Make the countertop cut-out for the around the frame does not sit flush desired number of appliances. with the countertop in the corners, Remember to maintain a minimum the corner radius, maximum "...
-
Page 9: Installation Of Multiple Appliances
Installation Installation of multiple appliances When installing more than one combiset appliance, a support bar b must be installed between the appliances. Countertop cut-out Countertop cut-out two appliances three appliances For the installation of two appliances For the installation of three appliances the width of the countertop cut-out D is the width of the countertop cut-out D is the sum of A and C. - Page 10 Installation Sample calculations for a countertop cut-out for three appliances appliance width appliance width appliance width Countertop minus 5/16" minus 5/16" cut-out (8 mm) (8 mm) 11" (280 mm) 11 5/16" (288 mm) 11" (280 mm) 33 3/8" (848 mm) 11"...
- Page 11 Installation a Spring clips b Support bars c Space between support bar and countertop d Cover The illustration represents the attachment of spring clips a and support bars b for 3 appliances. An additional support bar is required for each additional appliance. The position for attachment of an additional support bar depends on the width of appliance B.
- Page 12 Installation Attach the spring clips and support bars Wood or solid surface countertops ^ Place the supplied spring clips a and the support bars b at the marked positions as shown above, by laying them on the upper edge of the cut-out and then securing them with the "...
- Page 13 Installation Granite countertop The screws are not needed for granite countertops. ^ Coat the side and lower edges of the spring clips between a and b with silicone. ^ Fill the space e between the support bars b and the countertop with ^ Position and attach the spring clips silicone.
- Page 14 Installation ^ Place the front edge of the next Installing the appliance(s) appliance into the cut-out. ^ Feed the power cord down through ^ Connect the appliance(s) to the main the cut-out. power supply (see "Electrical ^ Place the front edge of the appliance connection").
- Page 15 Installation After the appliance has been built in, the splash guard and protection plate(s) should be fitted. The protection plate(s) is only required if the barbecue grill is installed on its own, i.e. detached from a multiple combiset configuration or another appliance.
-
Page 16: Tiled Surfaces
Installation Sealing Tiled surfaces The appliance must not be permanently The grouting a and shaded area under sealed into the countertop when the appliance frame must be flat and installed. The sealing strip under the even so that the frame will lie evenly edge of the appliance provides a and the sealing strip under the edge of sufficient seal for the countertop. -
Page 17: Electrical Connection
Electrical connection Power supply CAUTION: Before installation or ^ Be sure your electrical supply servicing, disconnect the power matches the rating label. supply by either removing the fuse, shutting off the main power or The rating label is located on the manually "tripping"... -
Page 18: Help Protect Our Environment
Help protect our environment Disposal of packing materials Disposal of an old appliance The cardboard box and packing Old appliances contain materials that materials are biodegradable and can be recycled. Please contact your recyclable. Please recycle. local recycling authority about the possibility of recycling these materials. - Page 20 Alteration rights reserved / 3911 M.-Nr. 07 346 950 / 05 INFORMATION IS SUBJECT TO CHANGE. PLEASE REFER TO OUR WEBSITE TO OBTAIN THE MOST CURRENT PRODUCT SPECIFICATIONS, TECHNICAL & WARRANTY INFORMATION.