Table of Contents
Advertisement
Quick Links
Advertisement
Table of Contents

Related Manuals for Siemens A31008-M1026-R101


Summary of Contents for Siemens A31008-M1026-R101
-
Page 2: Table Of Contents
Table of Contents Table of Contents For your Safety ......4 Safety Precautions . - Page 3 Table of Contents Network Settings ........... . . 36 WLAN Settings .
- Page 4 Table of Contents Garantie-Urkunde (Schweiz) ..........92 Service (Customer Care) .
-
Page 5: For Your Safety
Read the additional information contained in the file readme.txt carefully. ì Also note the product information on the Internet at http://www.siemens.com/gigasetwlancamera Trademarks Windows 2000, Windows XP, Windows Media Player and Windows Internet Explorer are registered trademarks of the Microsoft Corporation. -
Page 6: Introduction
Introduction Introduction The Gigaset WLAN Camera has an integrated microcomputer and a high-quality CMOS digital image sensor. Therefore it is able to display high-quality live streaming video over your wired LAN, the Internet and an 802.11g Wireless LAN. Using enhanced MPEG-4 technologies, the Gigaset WLAN Camera is able to stream high-quality video and audio directly to your PC. -
Page 7: Features
Introduction Features Standalone design – The Gigaset WLAN Camera is a standalone system with built- in CPU and video encoder. It requires only a power source and a connection to your LAN or Wireless LAN. Suitable for home, business or public facilities – Whether for home, business or public facility surveillance, or just for entertainment and fun, the Gigaset WLAN Camera has the features you need. -
Page 8: Security Features
Introduction Security Features User authentication – If desired, access to live video can be restricted to known users. Users have to enter their user name and password before being able to view the video stream. Up to 20 users can be entered. Password-protected configuration –... -
Page 9: Rear Panel
Introduction Ready LED On – Power on. Off – No power. Blinking – The Ready LED will blink during start up. This will take 15 to 20 seconds. Active LED Off – Idle. Blinking – Gigaset WLAN Camera is providing a live video stream to at least one viewer. -
Page 10: Package Contents
Introduction LAN port Use a standard LAN cable to connect your Gigaset WLAN Camera to a 10/100BaseT hub or switch. Note: On the Gigaset WLAN Camera, attaching the LAN cable will disable the wireless interface. Only 1 interface can be active at any time. Reset Button This button has two functions: Restore default IP address: When pressed and released, the Gigaset WLAN Camera... -
Page 11: Basic Setup
Basic Setup Basic Setup Safety instructions for connection Never use damaged or unapproved cables. Connect the unit to the sockets provided only using approved cables and plugs. Connect only approved accessories. Lay the cables in such a way that nobody can tread on or trip over them. Connect the unit only with the supplied mains cable. -
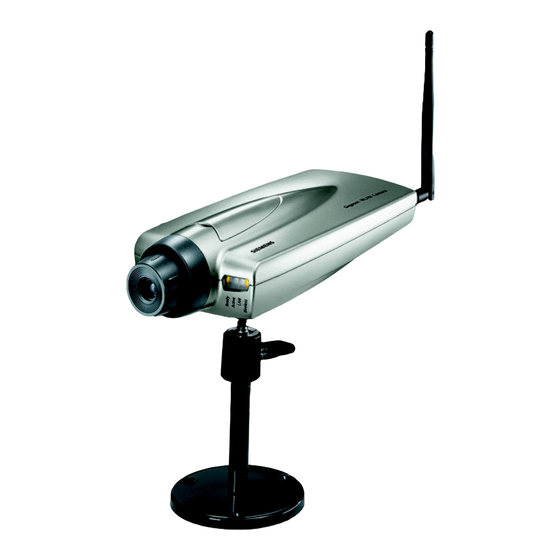
Page 12: Mounting And Connecting The Gigaset Wlan Camera
Basic Setup Mounting and connecting the Gigaset WLAN Camera Protect the Gigaset WLAN Camera against falling down. Even during installation, mount the stand and secure it against tilting. ì Mount the camera on the supplied base and stand. – Join the base, stand and swivel connector to the camera, as shown in the diagram above. -
Page 13: Uninstalling Software
Basic Setup ì Power up. – Connect the supplied power adapter to the Gigaset WLAN Camera and power up. Use only the power adapter provided. Using a different one may cause hardware damage. ì Check the LEDs. – The Ready LED will turn on briefly, then start blinking. It will blink during startup, which takes 15 to 20 seconds. -
Page 14: Setup Procedure
Basic Setup Setup Procedure ì Insert the supplied CD-ROM into your drive. If the setup program does not start auto- matically, run wlancamera_setup.exe in the root folder. You will see the Welcome screen shown below. ì Click the Setup button to start the setup wizard. The next screen, shown below, will list all the cameras on your LAN. - Page 15 Basic Setup ì Select the desired camera from the list on the left. The current settings for the selected camera will be displayed in the table on the right. ì Click Next to continue. Then you will be prompted to enter the administrator ID and password. ì...
- Page 16 Basic Setup – Fixed IP Address is recommended; a fixed IP address can be reserved in every LAN. – You choose Dynamic IP Address, if your LAN has a DHCP server. ì Click Next to continue. If you chose Dynamic IP Address, the server settings will be displayed. If you chose Fixed IP Address, the following TCP/IP settings screen will be displayed.
-
Page 17: Wlan Encryption
Basic Setup Wireless settings ì If required, you configure the Wireless Settings as follows: – Mode – If you have an Access Point, select Infrastructure. Otherwise, select Ad Hoc. – Authentication Type – Select the value used on your WLAN. –... - Page 18 Basic Setup WEP encryption ì Choose either 64 Bit Keys or 128 Bit Keys, depending on the settings of the other WLAN components. ì Enter the key, that is used by your other WLAN components. – Passphrase – Enter the string, with which you generated the key for the other WLAN components.
- Page 19 Basic Setup ì This screen allows you to enter a suitable Description and set the correct Time Zone, Date and Time. Make any desired changes, then click Next to continue. The next screen displays all details of the Gigaset WLAN Camera. ì...
- Page 20 Basic Setup ì If desired, you can click the Web UI button to connect to the camera using your web browser. ì Click WLAN Camera Utility for installing the Viewing & Recording tool, please refer to chapter "Installing the WLAN Camera Utility" on page 53. ì...
-
Page 21: Advanced Viewing Setup
Advanced Viewing Setup Advanced Viewing Setup After finishing setup via the Windows-based wizard, the Gigaset WLAN Camera can immediately be used by all users on your LAN. Refer to chapter "Viewing & Recording" on page 53 for details on viewing and recording live video. - Page 22 Advanced Viewing Setup ì Make the required adjustments: Video Settings Resolution Select the desired video resolution. The default resolution is set to 320 x 240. Image Quality Select the desired image quality. The default image quality is set to Normal. Note: Higher image quality requires more bandwidth.
- Page 23 Advanced Viewing Setup Adjustments Brightness Select Automatic or Manual. The default is set to Automatic in which case the camera will automatically adjust the brightness based on the current envi- ronment. Select Manual if you want to adjust the brightness manually. You can then enter the desired values.
-
Page 24: Controlling User Access To The Video Stream
Advanced Viewing Setup Controlling User Access to the Video Stream By default, all users can connect to the Gigaset WLAN Camera and view live video. If desired, you can limit access to known users, by requiring all users to log in to the Gigaset WLAN Camera with their individual user name and password. -
Page 25: Operation
Advanced Viewing Setup Operation When users connect, they will be prompted for their user name and password. They must enter the name and password defined on the User screen above. If using the Windows WLAN Camera Utility, the user name and password can be entered into the program, so that users do not need to provide the login data each time. -
Page 26: Router/Gateway Setup
Advanced Viewing Setup The Network – Options screen is part of the web-based administration interface. See chapter "Web-based Management" on page 32 for further details on using this inter- face. Viewers need to know this port number in order to connect and view live video, so you must inform viewers of the current port number. - Page 27 Advanced Viewing Setup Example: Internet configuration IP address of the camera (default): 192.168.2.252 Second port enabled (1024) IP address of the router: 217.229.39.104 (IP address varies) Second port (1024) forwarded to the IP address of the camera (192.168.2.252) Internet Camera access via Internet: http://217.229.39.104 (IP address varies) Camera access via DDNS:...
-
Page 28: Using Ddns (Dynamic Dns)
Advanced Viewing Setup Using DDNS (Dynamic DNS) Many Internet connections use a "Dynamic IP address", where the Internet IP address is allocated whenever the Internet connection is established. This means that other Internet users don't know the IP address, so can't establish a con- nection. -
Page 29: Viewing Via The Internet
Advanced Viewing Setup Viewing via the Internet Clients (viewers) will also need a broadband connection; dial-up connec- tions are NOT recommended. Using the Windows WLAN Camera Utility If using the WLAN Camera Utility (see chapter "Viewing & Recording" on page 53), the details of the Gigaset WLAN Camera must be entered there. -
Page 30: Motion Detection / E-Mail Alerts
Advanced Viewing Setup Example – domain name: HTTP://mycamera.dyndns.tv:1024 Where the router/gateway's Domain name is mycamera.dyndns.tv and the Second Port number on the Gigaset WLAN Camera is 1024. Motion Detection / E-Mail Alerts The Motion Detection feature will capture a short video and send it to your e-mail address when motion is detected. -
Page 31: Using Motion Detection / E-Mail Alert
Advanced Viewing Setup Using Motion Detection / E-Mail Alert ì Connect to the web-based interface of the Gigaset WLAN Camera. ì In the Administration menu, select E-Mail. If you don’t know the parameters of your e-mail account, please ask your Internet service provider. - Page 32 Advanced Viewing Setup ì In the Show “From” as field, enter the e-mail address you wish to display as the sender when you receive the mail. This should be a genuine e-mail address, other- wise spam filters may block your mail. ì...
-
Page 33: Web-Based Management
Web-based Management Web-based Management TThe Gigaset WLAN Camera can be configured using your web browser. The Gigaset WLAN Camera must have an IP address that is compatible with your PC. The recommended method to ensure this is to use the supplied Windows-based wizard, as described in chapter "Viewing via the Internet"... -
Page 34: Welcome Screen
Web-based Management Welcome Screen When you connect, the following screen will be displayed. The menu options available from this screen are: View Video – View live video using your web browser. Administration – Access the administration menu. These options are explained in the following sections. For viewing live video you must use Internet Explorer. -
Page 35: Viewing Video Screen
Web-based Management Viewing Video Screen ì Click on View Video. You may be prompted regarding a video applet like the example below. You must install this applet in order to view the Video. ì Click Yes. Video will start playing automatically. There may be a delay of a few seconds while the video stream is buffered. -
Page 36: Administration Menu
Web-based Management Administration Menu ì Click on Administration in the menu. The Administration menu contains all the settings for the Gigaset WLAN Camera: System – Description date / time, and NTP Network – All network and wireless settings Image – Adjust the video image Users –... -
Page 37: Network Settings
Web-based Management Time Enter the current time. Date Enter the current date. Timezone Choose the timezone for your location from the drop-down list. If your location is currently using daylight saving, enable the Adjust for daylight saving checkbox. You must UNTICK this checkbox when daylight saving finishes. -
Page 38: Wlan Settings
Web-based Management Obtain Address The Gigaset WLAN Camera will obtain its IP address and automatically related information from a DHCP server. Only select this (DHCP) option if your LAN has a DHCP server. Fixed IP Address You must assign the following data to the Gigaset WLAN Camera. -
Page 39: Security Features
Web-based Management ì Enter data into the fields: Mode The connection Mode determines the type of wireless com- munication used by the Gigaset WLAN Camera. If you have an Access Point, select Infrastructure. Otherwise, select Ad-hoc. Authentication Select the appropriate value – Open System or Shared Key, Type as used on your WLAN. - Page 40 Web-based Management WEP Encryption WEP Encryption Select the option used on your Wireless LAN. 64-Bit Keys (10 Hex chars) – If selected, data is encrypted using the default key before being transmitted. You must enter a default key. Other wireless stations must be set to use 64-bit encryption, and have the same key value in the same position in their key table.
- Page 41 Web-based Management Default Key Select a key to be used as the default key. Key Value If WEP encryption is used, you must enter at least one key value for the Default Key. All transmissions are encrypted using the Default Key.
-
Page 42: Ddns Settings
Web-based Management DDNS Settings The Domain Name Service (DNS) is using name servers that allocate the host names to the respective IP addresses. If your camera has a static IP address, you can enter this IP address into the address field of your web browser and you will get a connection to your camera. -
Page 43: Settings: Upnp Support And Port Forwarding
Web-based Management ì Enter data into the fields: DDNS Enable or disable the DDNS function, as required. Enable/Disable Only enable this feature if you have registered for the DDNS service with a DDNS service provider. Service Provider Choose a service provider from the list. Host Name Enter the host name (domain name) allocated to you by www.dyndns.org. -
Page 44: Image Settings
Web-based Management UPnP Enable UPnP support if required. If enabled, the Gigaset WLAN Camera will broadcast its availability using UPnP. UPnP compati- ble systems such as Windows XP will then be able to detect the presence of the Gigaset WLAN Camera. Second Port Enable this feature if required. - Page 45 Web-based Management ì Change the settings: Video Settings Resolution Select the desired video resolution format. The default resolution is set to 320 x 240. Image Quality Select the desired image quality. The default image quality is set to Normal. Note: Higher image quality requires more bandwidth. Power line Select the power line frequency (50 Hz or 60 Hz) used in your frequency...
-
Page 46: User Settings
Web-based Management User Settings With the user settings you may change the login data and you can restrict the access on the camera. ì Click on User in the Administration menu. ì Change the settings: Admin Login Administrator ID Enter the name for the administrator here. Spaces, punctuation, and special characters must NOT be used in the name. -
Page 47: Adding/Modifying User
Web-based Management User Database User List This displays all users you have entered into the user database. If you have not entered any users, this list will be empty. Buttons Use the Add, Delete, and Modify buttons to manage the user database. -
Page 48: E-Mail Settings
Web-based Management E-Mail Settings If desired, you can use the e-mail feature to have an e-mail sent to you whenever motion is detected. Note that because of the sensitivity of the CMOS digitizer, the motion detec- tion feature is not usable in situations where the level of illumination may change rap- idly. - Page 49 Web-based Management E-Mail Alerts Motion Detection Choose one of the options: Alerts Enable: An e-mail will be sent always when motion is detected. Disable: No e-mail will be sent. Enable during scheduled periods: An e-mail will be sent only dur- ing the periods, which are defined in the Schedule screen.
-
Page 50: E-Mail Alert Schedule
Web-based Management E-Mail Video Include Video Set to Yes to include a short video in your e-mail alert. Video Length Select the desired length. The size of the file depends on this setting, and also the video size and degree of compression. If you get no e-mails, even though you enabled the e-mail alerts, please contact your Internet service provider. -
Page 51: Status Informations
Web-based Management Status Informations In the status informations you find the actual settings of the camera. You could upgrade the firmware and reset the camera. ì Click on Status in the Administration menu. - Page 52 Web-based Management You find the following informations: System Device Name This shows the name of the Gigaset WLAN Camera. Description This shows the description of the Gigaset WLAN Camera, such as location. F/W version The version of the current firmware installed. You can upgrade the firmware by clicking the Upgrade Firmware button.
-
Page 53: Upgrading Firmware
Upgrading the firmware (software) of your Gigaset WLAN Camera may be useful, if your camera doesn’t work well anymore. Before updating the firmware, your have to down- load the upgrade file to your PC. ì Download the firmware update from: http://www.siemens.com/gigasetwlancamera ì Click on Status in the Administration menu. ì... -
Page 54: Viewing & Recording
Viewing & Recording Viewing & Recording The recommended method to view video is to use the supplied Windows WLAN Camera Utility. Installing the WLAN Camera Utility ì Insert the supplied CD-ROM into your drive. If the setup program does not start auto- matically, run wlancamera_setup.exe in the root folder. -
Page 55: System Tray Icon
Viewing & Recording ì Double click on this icon on your desktop: System Tray Icon When started, the program will create an icon in the Windows system tray on the task- bar, as shown below. WLAN Camera Utility icon This icon has the following functions: Animation –... -
Page 56: Main Screen
Viewing & Recording Main Screen When started, a screen like the example below will be displayed. The main screen is splitted into two areas: The left area shows the camera list and the right area shows the recordings list. Camera List The Camera List displays all Gigaset WLAN Camera you have defined. -
Page 57: Current Recordings
Viewing & Recording Current Recordings This panel lists all scheduled recordings currently in progress. Any recording currently in progress can be terminated by selecting it and clicking the Stop button. Please refer to chapter "Viewing & Recording" on page 53 for more information. Adding Cameras to the Camera List ì... -
Page 58: Adding Cameras On The Internet
Viewing & Recording Port Number This will normally display 80. Only change this if requested to do so by the Gigaset WLAN Camera administrator. Login The camera administrator can require that users provide a user name and password before being allowed to view the live video. If the administrator has not enabled this option, the Login fields can be left blank. - Page 59 Viewing & Recording Device Name This is the default name for the Gigaset WLAN Camera and cannot be changed. This field will be displayed automatically once a connection to the Gigaset WLAN Camera has been established. Description This displays the description entered by the Gigaset WLAN Camera administrator.
-
Page 60: Modifying An Existing Camera
Viewing & Recording Modifying an Existing Camera ì Open the WLAN Camera Utility. ì Click on one of the cameras in the Camera List on the left side. ì Click the Modify Camera button on the left side of the main screen. ì... -
Page 61: Viewing And Recording Live Video
Viewing & Recording Viewing and Recording Live Video ì Open the WLAN Camera Utility. ì Click on one of the cameras in the Camera List on the left side. ì Click the View button to view live video. The viewing window will be opened. If required, you could view live video of all cameras in the Camera List simultaneously. -
Page 62: Recording Preferences
Viewing & Recording Audio – This can be used to select the audio stream that can be heard. (Only one audio stream can be selected at any time.) If audio is disabled on the cam- era, this option is unavailable and a red “X” will cover this icon. For enabling audio tick the checkbox in the Image settings, see chapter "Image Settings"... -
Page 63: Files
Viewing & Recording Recorded File This is the drive and folder on your PC where recorded files will be Location stored. You need a drive that has large amounts of free space (approx. 2.5 MB / minute, resolution 320 x 240). ì... -
Page 64: Scheduled Recordings
Viewing & Recording This list shows all of the recorded files. The following operations are supported: Play – Play the selected file using Microsoft Media Player. Delete – Delete the selected file. Explore – Open the folder containing these files using Windows Explorer. Scheduled Recordings Recordings can be scheduled at any time, for any known Gigaset WLAN Camera. - Page 65 Viewing & Recording Type – Indicates if the recording is One Time, Everyday, or on a particular day each week. If a scheduled recording is selected, the Modify and Delete buttons can be used to edit or delete the selected entry. Schedule Definition Screen ì...
-
Page 66: Viewing With Your Web Browser
Viewing & Recording Viewing with your Web Browser The recommended method to view live video from the Gigaset WLAN Camera is to use the Windows utility. However, you can also use your web browser if necessary. Viewing over your LAN To establish a connection from your PC to the Gigaset WLAN Camera: ì... -
Page 67: Viewing Via The Internet
Viewing & Recording ì Click View Video to see a screen like the example below. If you get a message, that there has to be installed the Gigaset WLAN Camera video applet, click on Yes for installing it. The applet is required for viewing live video via the Internet Explorer. - Page 68 Viewing & Recording Example using a domain name: HTTP://mycamera.dyndns.tv:1024 Where the router/gateway's Internet domain name (using DDNS in this example) is mycamera.dyndns.tv and the "Second Port" number on the Gigaset WLAN Camera is 1024. ì If the administrator has enabled the user validation feature, you will then be prompted for a user name and password.
- Page 69 Viewing & Recording If you get a message, that there has to be installed the Gigaset WLAN Camera video applet, click on Yes for installing it. The applet is required for viewing live video via the Internet Explorer. Video will start playing automatically. There may be a delay of a few seconds while the video stream is buffered.
-
Page 70: Appendix
Appendix Appendix Troubleshooting This chapter covers some common problems that may be encountered while using the Gigaset WLAN Camera and some possible solutions to them. If you follow the suggested steps and the Gigaset WLAN Camera still does not function properly, contact your dealer for further advice. - Page 71 Appendix Problem Solution When I try to connect to You SHOULD be prompted for a user name and password if the Gigaset WLAN Camera, trying to access the Administration menu. I get prompted for a user Enter the Administrator ID and Password set on the User name and password.
-
Page 72: Specifications
Country-specific requirements have been taken into consideration. We, Siemens AG, declare that this device meets the essential requirements and other relevant regulations laid down in Directive 1999/5/EC. A copy of the Declaration of Conformity is available at: www.siemens.com/gigasetdocs. -
Page 73: Open Source Software And Gnu General Public License
Use of the open source software is without any liability of or any warranty from the licensor. Siemens will not provide any technical support for the open source software. No Warranty THIS SOFTWARE IS PROVIDED BY THE AUTHOR AND CONTRIBUTORS "AS IS" AND ANY... -
Page 74: Thttpd License
Appendix Upnpsdk-1.0.4 ez-ipupdate-3.0.11b7 thttpd License Copyright 1995,1998,1999,2000 by Jef Poskanzer (jef@acme.com). All rights reserved. Redistribution and use in source and binary forms, with or without modification, are permitted provided that the following conditions are met: 1. Redistributions of source code must retain the above copyright notice, this list of conditions and the following disclaimer. -
Page 75: Gnu General Public License
Appendix Disclaimer THE INFORMATION, CODE AND EXECUTABLE PROVIDED ARE PROVIDED "AS IS" WITHOUT WARRANTY OF ANY KIND, EITHER EXPRESS OR IMPLIED, INCLUDING BUT NOT LIMITED TO THE IMPLIED WARRANTIES OF MERCHANTABILITY AND FITNESS FOR A PARTICULAR PURPOSE. IN NO EVENT SHALL NOEL V AGUILAR BE LIABLE FOR ANY DAMAGES WHAT- SOEVER INCLUDING DIRECT, INDIRECT, INCIDENTAL, CONSEQUENTIAL, LOSS OF BUSI- NESS PROFITS OR SPECIAL DAMAGES. - Page 76 Appendix Also, for each author's protection and ours, we want to make certain that everyone understands that there is no warranty for this free software. If the software is modified by someone else and passed on, we want its recipients to know that what they have is not the original, so that any problems introduced by others will not reflect on the origi- nal authors' reputations.
- Page 77 Appendix c) If the modified program normally reads commands interactively when run, you must cause it, when started running for such interactive use in the most ordinary way, to print or display an announcement including an appropriate copyright notice and a notice that there is no warranty (or else, saying that you provide a warranty) and that users may redistribute the program under these conditions, and telling the user how to view a copy of this License.
- Page 78 Appendix and so on) of the operating system on which the executable runs, unless that compo- nent itself accompanies the executable. If distribution of executable or object code is made by offering access to copy from a designated place, then offering equivalent access to copy the source code from the same place counts as distribution of the source code, even though third parties are not compelled to copy the source along with the object code.
- Page 79 Appendix It is not the purpose of this section to induce you to infringe any patents or other prop- erty right claims or to contest validity of any such claims; this section has the sole pur- pose of protecting the integrity of the free software distribution system, which is imple- mented by public license practices.
-
Page 80: Lesser Gnu General Public License
Appendix DEFECTIVE, YOU ASSUME THE COST OF ALL NECESSARY SERVICING, REPAIR OR CORREC- TION. 12. IN NO EVENT UNLESS REQUIRED BY APPLICABLE LAW OR AGREED TO IN WRITING WILL ANY COPYRIGHT HOLDER, OR ANY OTHER PARTY WHO MAY MODIFY AND/OR REDISTRIBUTE THE PROGRAM AS PERMITTED ABOVE, BE LIABLE TO YOU FOR DAMAGES, INCLUDING ANY GENERAL, SPECIAL, INCIDENTAL OR CONSEQUENTIAL DAMAGES ARIS- ING OUT OF THE USE OR INABILITY TO USE THE PROGRAM (INCLUDING BUT NOT LIM-... - Page 81 Appendix code or can getit if you want it; that you can change the software and use pieces of it in new free programs; and that you are informed that you can do these things. To protect your rights, we need to make restrictions that forbid distributors to deny you these rights or to ask you to surrender these rights.
- Page 82 Appendix to gain by limiting the free library to free software only, so we use the Lesser General Public License. In other cases, permission to use a particular library in non-free programs enables a greater number of people to use a large body of free software. For example, permission to use the GNU C Library in non-free programs enables many more people to use the whole GNU operating system, as well as its variant, the GNU/Linux operating system.
- Page 83 Appendix 1. You may copy and distribute verbatim copies of the Library's complete source code as you receive it, in any medium, provided that you conspicuously and appropriately pub- lish on each copy an appropriate copyright notice and disclaimer of warranty; keep intact all the notices that refer to this License and to the absence of any warranty;...
- Page 84 Appendix 3. You may opt to apply the terms of the ordinary GNU General Public License instead of this License to a given copy of the Library. To do this, you must alter all the notices that refer to this License, so that they refer to the ordinary GNU General Public License, version 2, instead of to this License.
- Page 85 Appendix 6. As an exception to the Sections above, you may also combine or link a "work that uses the Library" with the Library to produce a work containing portions of the Library, and distribute that work under terms of your choice, provided that the terms permit modifi- cation of the work for the customer's own use and reverse engineering for debugging such modifications.
- Page 86 Appendix 7. You may place library facilities that are a work based on the Library side-by-side in a single library together with other library facilities not covered by this License, and dis- tribute such a combined library, provided that the separate distribution of the work based on the Library and of the other library facilities is otherwise permitted, and pro- vided that you do these two things: a) Accompany the combined library with a copy of the same work based on the Library,...
- Page 87 Appendix to induce you to infringe any patents or other property right claims or to contest validity of any such claims; this section has the sole purpose of protecting the integrity of the free software distribution system which is implemented by public license practices. Many people have made generous contributions to the wide range of software distrib- uted through that system in reliance on consistent application of that system;...
-
Page 88: Disposing
Appendix 16. IN NO EVENT UNLESS REQUIRED BY APPLICABLE LAW OR AGREED TO IN WRITING WILL ANY COPYRIGHT HOLDER, OR ANY OTHER PARTY WHO MAY MODIFY AND/OR REDISTRIBUTE THE LIBRARY AS PERMITTED ABOVE, BE LIABLE TO YOU FOR DAMAGES, INCLUDING ANY GENERAL, SPECIAL, INCIDENTAL OR CONSEQUENTIAL DAMAGES ARIS- ING OUT OF THE USE OR INABILITY TO USE THE LIBRARY (INCLUDING BUT NOT LIMITED TO LOSS OF DATA OR DATA BEING RENDERED INACCURATE OR LOSSES SUSTAINED BY YOU OR THIRD PARTIES OR A FAILURE OF THE LIBRARY TO OPERATE WITH ANY OTHER... -
Page 89: Kundenservice (Customer Care)
Österreich 09 00 30 08 08 (1,35 Euro/Min.) Es erwarten Sie qualifizierte Siemens-Mitarbeiter, die Ihnen bezüglich Produktinfor- mation und Installation kompetent zur Seite stehen. Im Falle einer notwendigen Reparatur, evtl. Garantie- oder Gewährleistungsansprü- che erhalten Sie schnelle und zuverlässige Hilfe bei unseren Service-Centern in: Deutschland 0 18 05 33 32 20 (0,12 Euro/Min.) -
Page 90: Garantie-Urkunde (Deutschland)
Durch eine erbrachte Garantieleistung verlängert sich der Garantiezeitraum nicht. Soweit kein Garantiefall vorliegt, behält sich Siemens vor, dem Kunden den Aus- tausch oder die Reparatur in Rechnung zu stellen. Siemens wird den Kunden hierü- ber vorab informieren. Eine Änderung der Beweislastregeln zum Nachteil des Kunden ist mit den vorste- henden Regelungen nicht verbunden. -
Page 91: Garantie-Urkunde (Österreich)
Neugeräte und deren Komponenten, die aufgrund von Fabrikations- und/oder Mate- rialfehlern innerhalb von 24 Monaten ab Kauf einen Defekt aufweisen, werden von Siemens nach eigener Wahl gegen ein dem Stand der Technik entsprechendes Gerät kostenlos ausgetauscht oder repariert. Für Verschleißteile (z. B. Akkus, Tastaturen, Gehäuse) gilt diese Haltbarkeitsgarantie für sechs Monate ab Kauf. -
Page 92: Garantie-Urkunde (Belgien)
Regelung zur Produkthaftung. Durch eine erbrachte Garantieleistung verlängert sich der Garantiezeitraum nicht. Soweit kein Garantiefall vorliegt, behält sich Siemens vor, dem Kunden den Aus- tausch oder die Reparatur in Rechnung zu stellen. Eine Änderung der Beweislastregeln zum Nachteil des Kunden ist mit den vorste- henden Regelungen nicht verbunden. -
Page 93: Garantie-Urkunde (Schweiz)
Soweit kein Garantiefall vorliegt, behält sich Siemens vor, dem Kunden den Aus- tausch oder die Reparatur in Rechnung zu stellen. Siemens wird den Kunden hierüber vorab informieren. Die Siemens Schweiz AG behält sich das Recht vor seine Servicearbeiten durch ein Subunternehmen ausführen zu lassen. Anschrift siehe www.siemens.ch/gigasetservice. -
Page 94: Service (Customer Care)
Premium Hotline: United Kingdom 0906 9597555 (0.75 £/minute) You can talk to qualified Siemens technicians who will guide you expertly through product information and installation. For fast and dependable assistance with any repairs or guarantee/warranty claims, contact our Service Centres:... -
Page 95: Guarantee Certificate (United Kingdom)
The duration of the Guarantee shall not be extended by services rendered under the terms of the Guarantee. Insofar as no Guarantee default exists, Siemens reserves the right to charge the cus- tomer for replacement or repair. The above provisions do not imply a change in the burden of proof to the detriment of the customer. -
Page 96: Guarantee Certificate (Ireland)
Siemens. This Guarantee shall apply to new devices purchased in the European Union. For Products sold in the Republic of Ireland, the Guarantee is issued by Siemens Ireland Limited, Ballymoss Road, Sandyford Industrial Estate, Dublin 18 – The Republic of Ireland. - Page 97 The above provisions do not imply a change in the burden of proof to the detriment of the customer. To make a claim under this Guarantee, please contact the Siemens helpdesk on 1850 777 277. This number is also to be found in the accompanying user guide.
-
Page 98: Service Clientèle (Customer Care)
Des collaborateurs de Siemens qualifiés vous y fourniront des informations produits et des conseils d'installation éclairés. Pour vos besoins de réparation ou vos questions liées à la garantie, vous obtiendrez une assistance rapide et fiable auprès de nos Service Clients Siemens, aux numé- ros suivants : France... -
Page 99: Certificat De Garantie (France)
La présente garantie bénéficie, dans les conditions ci-après, à l'utilisateur final ayant procédé à l'acquisition de ce Produit Siemens (ci-après le Client). Pour la France, la pré- sente garantie ne limite en rien, ni ne supprime, les droits du Client issus des articles 1641 et suivants du Code Civil Français relatifs à... - Page 100 Produit Siemens, sauf disposition impérative contraire. De même, la responsabilité de Siemens ne peut être mise en cause pour les domma- ges survenus aux logiciels intégrés dans le Produit Siemens par le Client ou tout tiers à...
-
Page 101: Certificat De Garantie (Belgique)
La durée de garantie ne se prolonge pas par la prestation de services fournis dans le cadre de la garantie pendant la période de garantie. Pour autant qu'il ne s'agisse pas d'un cas de garantie, Siemens se réserve le droit de facturer au client les frais de réparation ou de remplacement. -
Page 102: Certificat De Garantie (Suisse)
Une mise en jeu de la présente garantie ne prolonge pas la durée de garantie. Siemens se réserve le droit de facturer au Client les frais découlant du remplacement ou de la réparation lorsque le défaut n'est pas couvert par la garantie. Siemens en informera le Client au préalable. -
Page 103: Servizio Clienti (Customer Care)
Centro di servizio 0848 212 000 Il servizio Siemens è a disposizione in caso di anomalie del dispositivo. In caso di domande sul suo uso, rivolgersi al proprio rivenditore. Le domande relative alla linea DSL e via cavo vanno rivolte al gestore della rete. -
Page 104: Certificato Di Garanzia (Italia)
Siemens. La presente garanzia è valida per tutti i dispositivi acquistati all'interno dell'Unione Europea. Garante per i prodotti acquistati in Italia è la Siemens S.p.A., Viale Piero e Alberto Pirelli 10, 20126 Milano. Si escludono ulteriori responsabilità di Siemens, salvo il caso di comportamento doloso o gravemente colposo di quest'ultima. -
Page 105: Certificato Di Garanzia (Svizzera)
In questo caso, Siemens provve- derà ad avvertire anticipatamente il cliente. Siemens Schweiz AG si riserva il diritto di far eseguire i lavori di manutenzione da un subappaltatore. Per l'indirizzo, vedere www.siemens.ch/gigasetservice. Il presente regolamento non modifica in alcun caso le regole probatorie a svantaggio del cliente. -
Page 106: Klantenservice (Customer Care)
Wij geven u snel en individueel advies! U heeft drie mogelijkheden om met ons in con- tact te komen: Onze on-linesupport op internet: www.siemens.com/customercare Altijd en overal bereikbaar. U krijgt 24-uurs-ondersteuning rondom onze producten. U vindt daar een verzameling van de meest gestelde vragen en antwoorden alsmede bedieningshandleidingen en actuele software-updates om te downloaden. -
Page 107: Garantie (België)
De duur van de garantie wordt niet verlengd door diensten die in het kader van de garantie tijdens de duur van de garantie worden verleend. Voor zover het niet om een garantiegeval gaat, behoudt Siemens zich het recht voor, de klant voor het vervangen of repareren kosten in rekening te brengen. -
Page 108: Garantie (Nederland)
Garantie (Nederland) Siemens verleent de consument een garantie van 24 maanden voor dit toestel, te reke- nen vanaf de datum van aankoop. Als bewijs hiervoor geldt de aankoopfactuur. Binnen de garantietermijn zal Siemens alle gebreken die het gevolg zijn van materiaal- en/of productiefouten kosteloos repareren of het defecte toestel vervangen. -
Page 109: Servicio Técnico (Servicio De Atención Al Cliente)
Servicio Técnico (Servicio de Atención al Cliente) Nuestro Servicio de Asistencia Online en Internet: www.siemens.com/customercare En caso de averías del equipo o consultas acerca de la garantía, diríjase a nuestro Servicio de Asistencia 902 115061 Por favor tenga a mano el resguardo de compra. -
Page 110: Certificado De Garantía
La duración de la garantía no se extenderá en virtud de los servicios prestados según las condiciones de garantía. Siemens se reserva el derecho de cobrarle al cliente el reemplazo o la reparación en caso de que el defecto no sea cubierto por la garantía, siempre que dicho cliente... - Page 111 Las normas antes mencionadas no suponen ninguna exigencia de inversión de la carga de la prueba en detrimento del cliente. Para solicitar el cumplimiento de esta garantía, contacte con el servicio telefónico de Siemens. El número correspondiente figura en la guía de usuario adjunta.
-
Page 112: Index
Index Index ..Adding cameras on the Internet E-Mail Alert ......Adding cameras to the camera list Using . - Page 113 Index ........Image Safety precautions .
- Page 114 Index ......Viewing via the Internet Image settings ....Viewing with your web browser Network settings .
- Page 115 Issued by Siemens Communications Haidenauplatz 1 D-81667 Munich © Siemens AG 2005 All rights reserved. Subject to availability. Rights of modification reserved. Siemens Aktiengesellschaft www.siemens.com/gigaset No. A31008-M1026-R101-2-7619...