DeLonghi ECAM23.460 Instructions For Use Manual
Hide thumbs
Also See for ECAM23.460:
- Instructions for use manual (22 pages) ,
- Manual (2 pages) ,
- Instructions for use manual (22 pages)
Table of Contents
Advertisement
Quick Links
Advertisement
Table of Contents
Troubleshooting

Related Manuals for DeLonghi ECAM23.460


Summary of Contents for DeLonghi ECAM23.460
- Page 1 De’Longhi Appliances via Seitz, 47 31100 Treviso Italy www.delonghi.com...
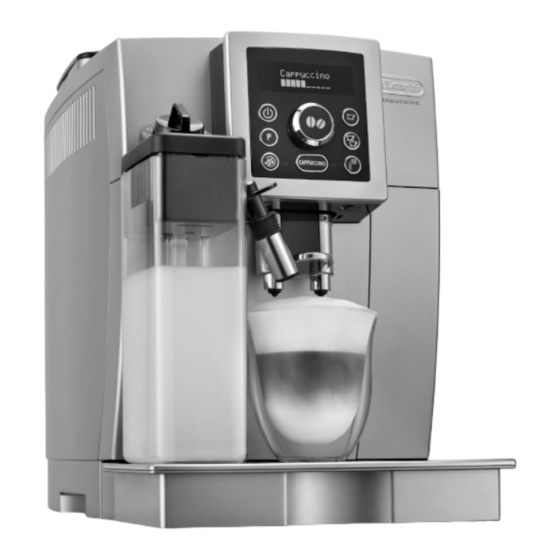
- Page 2 ECAM23.460 COFFEE MAKER Instructions for use. Keep these instructions Visit www.delonghiregistration.com to register your product Visit www.delonghi.com for a list of service centers near you. ELECTRIC CHARACTERISTICS 120 V~ 60 Hz 1250 W MACHINE À CAFÉ Mode d’ e mploi . Conservez cette notice Visitez www.delonghiregistration.com pour...
- Page 3 page 6 page 24 pàg. 43...
-
Page 7: Table Of Contents
CONTENTS 10. MAKING CAPPUCCINOS AND MILK-BASED COFFEES ..........14 1. IMPORTANT SAFEGUARDS ......7 10.1 Filling and attaching the milk container ..14 1.1 Short cord instructions .........7 10.2 Adjusting the amount of froth .....14 2. INTRODUCTION ..........8 10.3 Making cappuccino or latte macchiato ..14 2.1 Symbols used in these instructions ....8 10.4 Making frothed milk (without coffee) ..14 2.2 Letters in brackets .........8... -
Page 8: Important Safeguards
1. IMPORTANT SAFEGUARDS When using electrical appliances, basic safety precautions should always be followed, including the following. • Read all instructions carefully. • Make sure the voltage of your electrical system corresponds to the voltage shown on the bottom of the machine. -
Page 9: Introduction
2 cups of coffee with the settings displayed 2.4 Video instruction manual available on: button to deliver hot water ( When in the MENU, it http://ecam23460.delonghi.com acts as the "OK" button to confirm the selection made) B10. CAPPUCCINO button: to prepare cappuccino or frothed milk... -
Page 10: Description Of The Accessories
3.3 Description of the accessories 4.3 Connecting the appliance (page 2 - C ) Important! C1. Indicator paper Check that the mains power supply voltage corresponds to that C2. Pre-ground coffee measure indicated on the rating plate on the bottom of the appliance. C3. -
Page 11: Turning The Appliance On
• To enjoy your coffee even more and improve the perfor- Important! mance of your appliance, we recommend installing a Never press the main switch while the appliance is on. water softener filter (C4) as described in section “15. Water softener filter”. -
Page 12: Auto-Off
7.8 Setting the temperature Once the time has been confirmed, activation of auto-start is indicated by the symbol displayed alongside the time and To modify the temperature of the water used to make the coffee, under "Auto-start" in the menu. proceed as follows: To disable the function: 1. -
Page 13: Default Values (Reset)
1. Press the P button (B4) to enter the menu; 1) To enable this function, press the button (B5). 2. Turn the selection dial (B2) (fig. 7) until "Cup lighting" ap- "RINSING, Please wait" appears on the display (B1); pears on the display (B1); 2) After a few seconds, hot water is delivered first from the 3. -
Page 14: Customising The "My Coffee" Quantity
9.3 Customising the "my coffee" quantity 1. Fill the container (A7) (fig. 12) with coffee beans; 2. Place under the coffee spouts (A13): The appliance is set by default to automatically deliver 1,01 - 1 cup, if you want to make 1 coffee (fig. 9); fl.oz. -
Page 15: Making Cappuccinos And Milk-Based Coffees
10.2 Adjusting the amount of froth 4. Press the 1 cup coffee button (B7)(fig. 10). 5. Preparation begins. The amount of coffee selected appears Turn the froth adjustment dial (D1) to adjust the amount of froth on the display together with a progress bar which gradual- on the milk delivered while making cappuccinos and milk-based ly fills as preparation progresses. -
Page 16: Cleaning The Milk Container After Use
10.6 Cleaning the milk container after use 11. HOT WATER Important! Danger of burns Important! Danger of burns. When cleaning the internal tubes of the milk container (D), a Never leave the machine unattended while delivering hot water. little hot water and steam leak out of the milk spout (D5). Avoid The hot water spout (C6) becomes hot during delivery. -
Page 17: Cleaning The Machine's Internal Circuit
machines, you need not use chemical products to clean the dicator protrudes from the cup tray (A16), the drip tray must machine. be emptied and cleaned otherwise the water may overflow the • None of the components of the appliance can be washed in edge and damage the appliance, the surface it rests on or the a dishwasher with the exception of the milk container (D). -
Page 18: Cleaning The Infuser
If necessary, remove coffee deposits with the brush (C5) Turn the froth adjust- supplied. ment dial (D1) anti- clockwise to the "IN- 12.9 Cleaning the infuser SERT" position (fig. 33) and pull off upwards; The infuser (A11) must be cleaned at least once a month. Wash all the compo- Important! nents thoroughly with... -
Page 19: Setting Water Hardness
• You should use De’Longhi descaler only. Using unsuitable 10. The appliance is now ready for rinsing through with clean descaler and/or performing descaling incorrectly may re- water. Empty the container used to collect the descal- sult in faults not covered by the manufacturer's guarantee. er solution. -
Page 20: Setting Water Hardness
2. Immerse the paper completely in a glass of water for one Please note second; The filter lasts about two months if the appliance is used nor- 3. Remove the paper from the water and shake lightly. After mally. If the coffee machine is left unused with the filter in- about a minute, 1, 2, 3, or 4 red squares form, depending stalled, it will last a maximum of three weeks. -
Page 21: Replacing The Filter
16. TECHNICAL DATA 15. After the flow of hot water stops, the appliance automati- cally resets to "Ready for coffee" status. Voltage: 120 V~ 60 Hz max. 10A The new filter is active and indicated by an asterisk displayed Power: 1250W under "Install filter"... -
Page 22: Displayed Messages
17. DISPLAYED MESSAGES DISPLAYED MESSAGE POSSIBLE CAUSE REMEDY FILL TANK Insufficient water in the tank (A9). Fill the tank with water and/or insert it correct- ly, pushing it as far as it will go until it clicks into place (fig. 3). EMPTY GROUNDS CONTAINER The grounds container (A14) is full. -
Page 23: Troubleshooting
GENERAL ALARM The inside of the appliance is very dirty. Clean the inside of the appliance thoroughly, as described in section “12. Cleaning”. If the message is still displayed after cleaning, con- tact a service centre. REPLACE FILTER The water softener filter (C4) is exhausted. Replace the filter or remove it as described in the "Water softener filter"... - Page 24 Coffee does not come out of The coffee spouts (A13) are blocked. Clean the spouts with a toothpick (fig. 28B). one or both of the spouts. The milk does not come out of The lid (D2) of the milk container lid is dirty Clean the milk container lid as described in sec- the milk spout (D5) tion “12.10 Cleaning the milk container”.
Need help?
Do you have a question about the ECAM23.460 and is the answer not in the manual?
Questions and answers