
Related Manuals for Toro 38079


Summary of Contents for Toro 38079
- Page 1 Form No. 3327-986 924, 1028, and 1332 Power Shift Snowthrower Model No. 38079—230000001 and Up Model No. 38559—230000001 and Up Model No. 38087—230000001 and Up Operator’s Manual International English (GB)
-
Page 2: Table Of Contents
Installing the Auger/Impeller Housing ..Dealer or Toro Customer Service and have the model and Installing the Shift Rod ..... -
Page 3: Safety
The following instructions have been adapted from the ANSI/OPEI B71.3–1995 standard and the ISO 8437:1989 Operation standard. Information or terminology specific to Toro snowthrowers is enclosed in parenthesis. Do not put hands or feet near or under rotating parts. Keep clear of the discharge opening at all times. -
Page 4: Toro Snowthrower Safety
The following list contains safety information specific to accidentally starting the engine. Toro products or other safety information that you must Do not run the engine indoors, except when starting it know. -
Page 5: Sound Pressure
This unit does not exceed a hand/arm vibration level of Sound Pressure 13.8 m/s (model 38079) or 16.2 m/s (models 38559 and 38087), based on measurements of identical machines per This unit has a maximum sound pressure level at the Directive 98/37/EC. -
Page 6: Safety And Instruction Decals
Safety and Instruction Decals Safety decals and instructions are easily visible to the operator and are located near any area of potential danger. Replace any decal that is damaged or lost. 94-2568 1. Cutting/dismemberment in impeller and auger hazard—keep bystanders away 94-2558 1. - Page 7 Tecumseh Part No. 36501 1. Primer Tecumseh Part No. 37119 1. Warning—hot surface; do not touch Tecumseh Part No. 37226 1. Key ignition 4. Fast 2. Engage to start the 5. Increasing scale engine 6. Slow 3. Disengage to stop the 7.
-
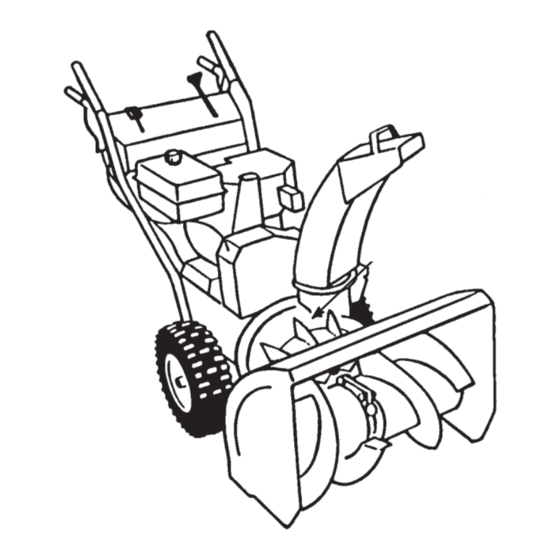
Page 8: Assembly
Assembly Note: Determine the left and right sides of the machine from the normal operating position. Loose Parts DESCRIPTION QTY. Flange-head bolts—3/4 in. (1.9 cm) Lower belt cover Installing the auger/impeller housing Installing the auger/impeller housing Flange-head bolts—1/2 in. (1.3 cm) Cable cover Shift rod Installing the shift rod... - Page 9 2. Align the holes in the auger/impeller housing with the 12. Lower the snowthrower onto its wheels. holes in the engine frame (Fig. 2). 13. Check the adjustment of the impeller cable; refer to 3. Route the auger/impeller drive belt around the impeller steps 4 through 8 of Adjusting the Auger/Impeller Drive pulley (Fig.
-
Page 10: Installing The Shift Rod
Installing the Shift Rod Installing the Discharge Chute 1. Insert the upper ball joint stud through the front of the 1. Apply a light coat of low-temperature grease to the shift bracket and secure it with a locknut (Fig. 6). chute ring (Fig. -
Page 11: Installing The Chute Control Gear
Installing the Chute Control Gear 1. Insert the 1-inch (2.5 centimeter) carriage bolt into the mounting hole of the gear bracket (Fig. 8). Figure 9 1. Scraper 3. Remove the 2 flange bolts and flat washers that secure the ends of the scraper to the side plates (Fig. 10). Figure 8 1. -
Page 12: Before Starting
Before starting the engine, add oil. The crankcase in models 38079 and 38559 holds 26 ounces (0.77 liters) of oil, and the crankcase in model 38087 holds Filling the Fuel Tank with 28 ounces (0.83 liters) of oil. -
Page 13: Checking The Tire Pressure
Important Important Do not use gasoline that is more than 30 Do not use fuel additives other than a fuel days old. stabilizer/conditioner. Do not use fuel stabilizers with an alcohol base such as ethanol, methanol, or isopropanol. Danger 1. Clean around the fuel tank cap (Fig. 12). 2. -
Page 14: Operation
Operation Note: Determine the left and right sides of the machine from the normal operating position. Operating Controls Auger/Impeller Drive Control Lever (Fig. 13)—To engage both the auger and impeller, press the lever m-4034 against the right handgrip. To disengage, release the Figure 14 lever. -
Page 15: Removing The Carburetor Heater Box
Recoil Starter (Fig. 17)—The recoil starter is on the back side of the engine. Pull the recoil starter to start the engine. Figure 19 Figure 17 1. Green ground wire clip 1. Recoil starter 7. Install the choke knob. Removing the Carburetor 8. -
Page 16: Stopping The Engine
7. Cover the hole in the center of the primer (Fig. 14) with 4. Shift the traction drive into the N (Neutral) position. your thumb and slowly push in the primer 3 times, 5. Stop the engine by doing one of the following: pausing a moment between pushes. -
Page 17: Freewheeling Or Self-Propel Drive
Note: To shift the wheels manually when the engine is not 3. Tighten the pivot bolt on the rear of the headlight running, follow steps 1 and 2 and then lift up on the assembly when the light is in the desired position. handles to unlock the wheels. - Page 18 Do not overload the snowthrower by clearing snow at too fast a rate. If the engine slows down, shift the snowthrower into a lower gear to reduce the forward speed. In wet or slushy conditions, maintain maximum engine speed, and do not overload the engine to prevent clogging the discharge chute.
-
Page 19: Maintenance
Maintenance Note: Determine the left and right sides of the machine from the normal operating position. Recommended Maintenance Schedule Maintenance Service Maintenance Procedure Interval Check the engine oil level. Refer to Checking the Engine Oil Level on page 20. Check the auger gearbox oil level and add oil if necessary. Refer to Checking the Initially Auger Gearbox Oil Level on page 20. -
Page 20: Checking The Engine Oil Level
Caution If you leave the wire on the spark plug, someone could accidently start the engine and seriously injure you or other bystanders. Disconnect the wire from the spark plug before you do any maintenance. Set the wire aside so that it does not accidentally contact the spark plug. -
Page 21: Adjusting The Skids And The Scraper
Adjusting the Skids and the For Gravel Surfaces: Scraper Support the auger blades a few inches (centimeters) above the ground, and adjust the skids to prevent the snowthrower from picking up rocks. Adjust the skids and the scraper initially and then as needed to ensure that the auger does not contact the paved or gravel 8. -
Page 22: Adjusting The Auger/Impeller Drive Belt
Note: With the lever released, there should be at least Important Do not adjust the belt too tightly; a tight 1/8 in. (3 mm) clearance between the tab on the belt can cause the snowthrower to creep even after you impeller idler arm and the brake arm (Fig. -
Page 23: Replacing The Drive Belts
Replacing the Drive Belts Note: The cable must slide freely in the bracket when you change the belts. If the auger/impeller drive belt or the traction drive belt 10. If you replace the traction drive belt, install it around (Fig. 31) becomes worn, oil-soaked, or otherwise damaged, the traction drive and the middle pulley section, and replace the belt. -
Page 24: Lubricating The Drive Chain
5. Drain the oil. 7. Check the deflection of the chain by lifting up on it with moderate pressure at the mid span. There should be a 6. Install the oil drain plug. 1/8 to 3/8 in. (3 to 10 mm) deflection (Fig. 34). 7. -
Page 25: Replacing The Spark Plug
Emptying the Fuel Tank Important Excessive chain tension may cause transmission damage. 1. Stop the engine and wait for all moving parts to stop. 13. Check the speed shift control alignment with the Power Shift slot. If the gear shift lever does not align with the 2. -
Page 26: Storage
Storage 2. Touch up chipped surfaces with paint available from an Authorized Service Dealer. Sand affected areas before painting, and use a rust preventative to prevent the metal parts from rusting. Warning 3. Tighten all screws and nuts. Repair or replace any damaged parts. -
Page 27: Troubleshooting
Troubleshooting Toro designed and built your snowthrower for trouble-free operation. Check the following components and items carefully, and refer to Maintenance on page 19 for more information. If a problem continues, see an Authorized Service Dealer. Problem Possible Causes Corrective Action Electric starter does not turn 1. - Page 28 Problem Possible Causes Corrective Action 3. The fuel tank is nearly empty or 3. Drain and fill the fuel tank with contains stale fuel. fresh gasoline (not more than 30 days old). If the problem persists, contact an Authorized Service Dealer. 4.