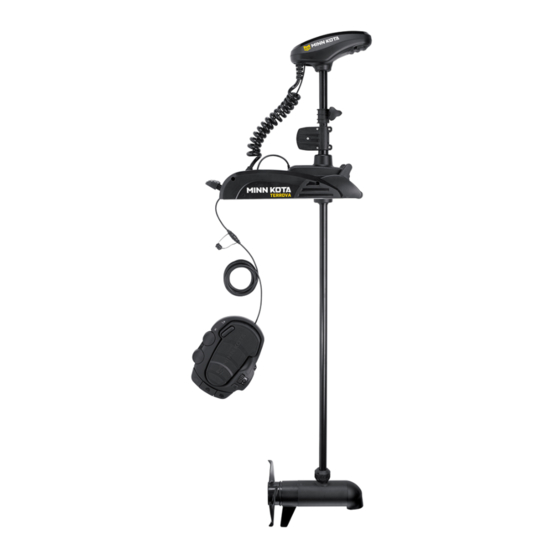
MINN KOTA TERROVA User Manual
Bow-mount trolling motor
Hide thumbs
Also See for TERROVA:
- Owner's manual (62 pages) ,
- Installation instructions manual (49 pages) ,
- User manual (23 pages)
Table of Contents
Advertisement
Advertisement
Table of Contents

Related Manuals for MINN KOTA TERROVA


Summary of Contents for MINN KOTA TERROVA
- Page 1 TERROVA BOW-MOUNT TROLLING MOTOR USER MANUAL...
- Page 2 FEATURES Push-to-Test Battery Meter AutoPilot Indicator (functional on equipped motors only) Adjustable Depth Collar System Ready Indicator Fall Away Ramps Stow/Deploy Lever Lifetime Warranty Flexible Composite Shaft Low Profile Foot Pedal Weedless Wedge 2 Propeller Cool Quiet Power Motor Specifications subject to change without notice. *This diagram is for reference only and may differ from your actual motor.
-
Page 3: Mount Installation
MOUNT INSTALLATION TOOLS AND RESOURCES REQUIRED: • #3 Phillips Screw Driver • Drill • 9/32” Drill Bit • 7/16” Box End Wrench • A second person to help with the installation 1. Remove the four sideplate screws. Remove the right sideplate and swing the left sideplate out and away from the base extrusion. -
Page 4: Battery Wiring & Installation
CAUTION: These guidelines apply to general rigging to support your Minn Kota motor. Powering multiple motors or additional electrical devices from the same power circuit may impact the recommended conductor gauge and circuit breaker size. If you are using wire longer than that provided with your unit, follow the conductor gauge and circuit breaker sizing table below. -
Page 5: Selecting The Correct Batteries
• It is highly recommended that a circuit breaker or fuse be used with this trolling motor. Refer to “Conductor Gauge and Circuit Breaker Sizing Table” in the previous section to fi nd the appropriate circuit breaker or fuse for your motor. For motors requiring a 60-amp breaker, the Minn Kota MKR-19 60-amp circuit breaker is recommended. CONNECTING THE BATTERIES 12 VOLT SYSTEMS: 1. -
Page 6: Push-To-Test Battery Meter
BATTERY WIRING & INSTALLATION 36 VOLT SYSTEMS: +36 Volts to trolling motor positive (or circuit breaker) To trolling motor negative 1. Make sure that the motor is switched off (speed selector on “0”). 24 Volt Series Connection 36 Volt Series Connection 2. -
Page 7: Motor Wiring Diagram
MOTOR WIRING DIAGRAM NOTE: This is a universal, multi-voltage diagram. Double check your motor's voltage for proper connections. Over-Current Protection Devices not shown in this illustration. BATTERY GAUGE CONTROL BOARD STEERING MOTOR WHITE BLACK BLACK COMPASS ACCESSORY PLUG BROWN BLACK M- RED M+ AUTOPILOT INDICATOR, RED SYSTEM READY, INDICATOR, GREEN... -
Page 8: Using & Adjusting The Motor
USING & ADJUSTING THE MOTOR STOWING AND DEPLOYING THE MOTOR WARNING: When raising or lowering the motor, keep fi ngers clear of all hinge and pivot points and all moving parts. STOW/DEPLOY LEVER OPERATION: 1. Push in Depth Collar Steering Housing 2. -
Page 9: Autopilot™ Controls
USING & ADJUSTING THE MOTOR AUTOPILOT™ CONTROLS (ON AUTOPILOT EQUIPPED MOTORS ONLY) The Minn Kota AutoPilot uses a magnetic compass and a microprocessor chip to keep the trolling motor pointed in the direction ™ you want to go. Each time the wind or water current moves the boat off course, the AutoPilot senses the change and steers itself back to the original heading. -
Page 10: Installing An External Transducer
Note: An external transducer is not included with your trolling motor. Your trolling motor may be pre-installed with a Universal Sonar 2 transducer system. In this case, the transducer is integrated into the motor unit. Leave slack ACCESSORY RECOMMENDATIONS: • Minn Kota Transducer Mounting Kit (MKR-15) Tie wrap cable Transducer... -
Page 11: Using The Foot Pedal
USING THE FOOT PEDAL All the controls in the foot pedal are easy to operate by either foot or hand. A light touch is all that is necessary. MOMENTARY A toe touch on either of the two momentary buttons Heel/toe turns the propeller on. -
Page 12: Service And Maintenance
SERVICE & MAINTENANCE PROPELLER REPLACEMENT TOOLS AND RESOURCES REQUIRED: Propeller • Box End Wrench Slot End - 1/2” for motors with 70 lbs thrust or lower. - 9/16” for motors with 80 lbs thrust or higher. Prop Nut Washer • Screwdriver (optional) CAUTION: Disconnect the motor from the battery before beginning any prop work or... -
Page 13: Troubleshooting And Repair
TROUBLESHOOTING & REPAIR 1. Motor fails to run or lacks power: • Check battery connections for proper polarity. • Make sure terminals are clean and corrosion free. Use fi ne sandpaper or emery cloth to clean terminals. • Check battery water level. Add water if needed. 2. -
Page 14: Parts Diagram
TERROVA 80 80 LBS THRUST - 24 VOLT - 45”/54”/60”/72” SHAFT This page provides Minn Kota® WEEE compliance disassembly instructions. For more information about where you should dispose of your waste equipment for recycling and recovery and/or your European Union member state require- ments, please contact your dealer or distributor from which your product was purchased. -
Page 15: Parts List
PARTS LIST TERROVA 80 PART ITEM DESCRIPTION NUMBER 80 LBS THRUST - 24 VOLT - 45”/54”/60”/72” SHAFT 2325665 DECAL — COVER PART 2325674 DECAL — CTRL BOX 80 ITEM DESCRIPTION NUMBER 2325675 DECAL — CTRL BOX 80 US2 2777000 24V MOTOR 45” FW 2325676 DECAL —... - Page 16 PARTS LIST TERROVA 80 PART ITEM DESCRIPTION NUMBER 80 LBS THRUST - 24 VOLT - 45”/54”/60”/72” SHAFT 2263011 E-RING .375 PART ITEM DESCRIPTION 2322702 SPRING — LATCH PIN NUMBER 2323410 SCREW, 8-32 X .75 2323000 E-CLIP, 3/16, SS 2323408 SCREW, 8-32 X 2...
-
Page 17: Environmental Compliance Statement
COMPLIANCE STATEMENTS ENVIRONMENTAL COMPLIANCE STATEMENT: It is the intention of JOME to be a responsible corporate citizen, operating in compliance with known and applicable environmental regulations, and a good neighbor in the communities where we make or sell our products. WEEE DIRECTIVE: EU Directive 2002/96/EC “Waste of Electrical and Electronic Equipment Directive (WEEE)”... -
Page 18: Recommended Accessories
Stop buying new batteries and start taking care of the ones you’ve got. Many chargers can actually damage your battery over time – creating shorter run times and shorter overall life. Digitally controlled Minn Kota chargers are designed to provide the fastest charge that protect and extend battery life.
Need help?
Do you have a question about the TERROVA and is the answer not in the manual?
Questions and answers